About
With Kaltura's Theming design system, you can customize the look and feel of your Kaltura application and unlock exciting new features like bulk upload and custom pages. This guide will walk you through everything you need to know about enabling Theming and how it can take your site to the next level.
What is Theming?
The Theming module is used to customize the look and feel of KMS and provides a customized set of pages for your application. With Theming, you can refresh the look and feel of your KMS as well as enable new capabilities such as bulk upload. This feature and module is currently available for KMS only.
Should I enable Theming?
Yes! Theming enables streamlining your KMS branding and design, making it easier to make the video portal your own. But that's not all! Theming also opens up new capabilities, like custom pages and bulk upload. These features are only available when Theming is enabled on your KMS instance. The new Theming capabilities and features will help you take your video portal experience to the next level!
When to get started with Theming
You can get started with Theming already and start enjoying the new capabilities!
If you have basic branding and updates to your KMS, we recommend already enabling the Theming modules so you can enjoy the new capabilities. If you have complex design and CSS customization for your KMS, we recommend starting to test the new theming capabilities on a staging environment, and planning your move to the new theming capabilities and design.
New features for Theming will be rolled out over the coming months. As additional features are made available, this guide will be updated accordingly. You can rely on the main Theming module article for additional information on enabling additional capabilities.
About this guide
This guide will walk you through enabling Theming module capabilities on your KMS instance, step by step. Since Theming impacts your KMS design and functionality, we recommend first enabling the modules on a staging environment to familiarize yourself with the different features and only after validation, enabling the modules and configuration on production environment.
Note: While the Theming module may be started on a sandbox, the process may be implemented on any production environment and is fully reversible.
Step by step guide
Step 1: Enable Theming
- Navigate to the Theming module at https://{your_site_url}/admin/config/tab/theming#enabled
- Set the enable field to "Yes".
- Scroll to the bottom of the page and click Save.
This action opens the Theming feature capabilities, and also transforms the site's navigation bar/header to the new design.
Before:

After:

Note: All previous navbar's elements - such as the logo, menus, and links - are kept, only the display is changed.
Step 2: Customize your site's header
The site header includes the logo, main site navigation, button and links (CTAs) to other sites, and the Create menu with all your video creation tools. In this step, we provided some suggestions for designing a simple and elegant header.
Set site logo
If you already setup a logo, you may skip this section.
- Navigate to the Header Module at https://{your_site_url}/admin/config/tab/theming#enabled
- Locate the logoImageUpload field, and upload your logo.
- Scroll to the bottom of the page and click Save.

Select horizontal or vertical navigation
This is a good opportunity to choose your navigation bar design. If your site has many navigation items, we recommend using vertical navigation bar. For a smaller number of items in the navigation bar, we recommend horizontal navigation. On small screens like mobile devices, the navigation will show as vertical for better usability.
- Navigate to the Navigation module at https://{your_site_url}/admin/config/tab/navigation
- Locate the navigationStyle field, and set it to either Horizontal or Vertical Navbar.
- Scroll to the bottom of the page and click Save.
Horizontal:

Vertical:

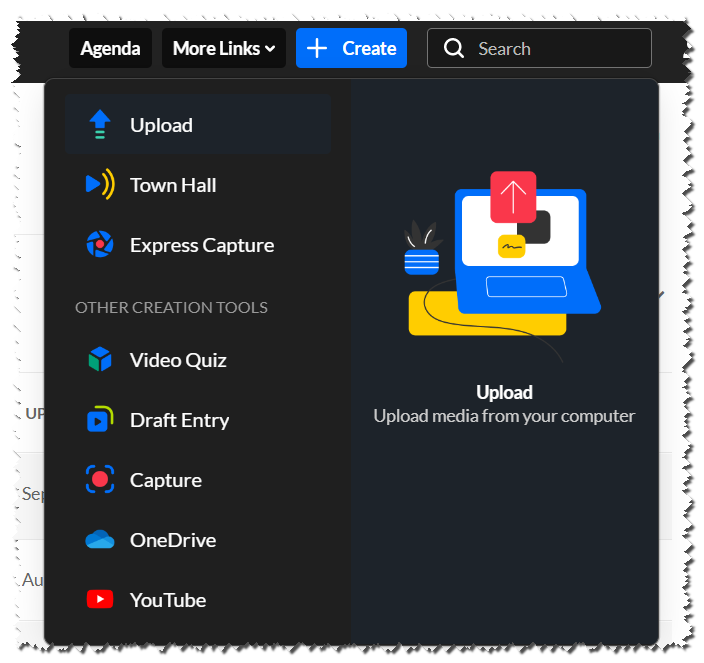
Manage the +Create menu order
- Navigate to the addNew module at https://{your_site_url}/admin/config/tab/addNew.
- Locate the sections and select the sequence on how you want to display the sections, whether on the top or below.
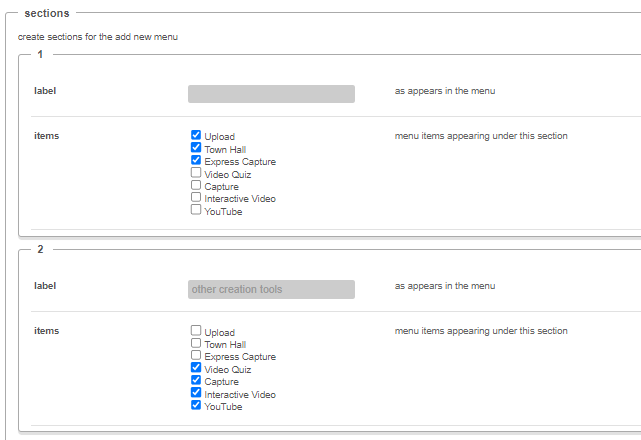
- Scroll to the bottom of the page and click Save.


Add Call to Actions Buttons
Want to add some special buttons or call to actions? These Call To Actions (CTA) buttons take users to a specific page in the site, or to external sites, such as the main university site or Corp site.
- Navigate to the HeaderMenu module at https://{your_site_url}/admin/config/tab/navigation
- Click the "+Add Menu" button.

- Fill in details for the new CTA. Use the example below as a guide:
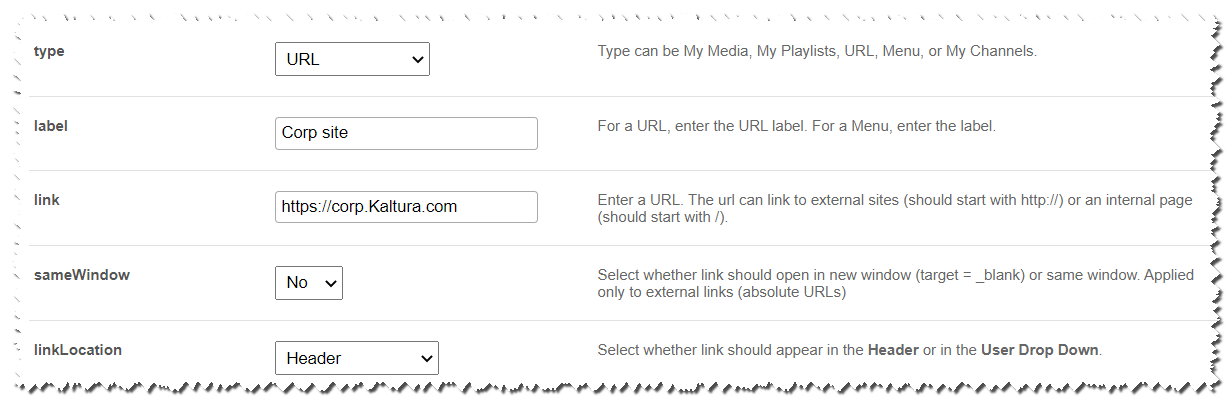 In this example, the link will display a button called "Corp site", and will take the users to the Kaltura corporate site:
- Scroll to the bottom of the page and click Save.

 In this example, the link will display a button called "Corp site", and will take the users to the Kaltura corporate site:
Step 3: Set up the site footer
To setup a footer to the site, navigate to the Footer module and configure it. Here are the steps:
Disable the Legacy (Previous) Footer
Note: The updated Application module configuration does not contain the Footer setup for the new Theming Design System.
- Navigate to the legacy Application module at https://{your_site_url}/admin/config/tab/application#footer.
- Locate the Footer field, and clear all the text.
You can copy and save the text in the field for safe keep if needed. - Scroll to the bottom of the page and click Save.

Enable the New Footer
- Navigate to the Footer module at https://{your_site_url}/admin/config/tab/footer#enabled
- Set the enable field to "Yes".
- Scroll to the bottom of the page and click Save.
This action enables the Theming footer on your site.

Configure the Footer
In the Footer module, the following may be configured:
- Logo
- Texts and Links
- Social links.

Learn more and setup the footer using the Footer Module.
Step 4: Change the primary color of your site (optional)
Use these instructions to change the primary color of the header and footer from the Kaltura blue to your company's main colors or the colors of your choice.
- Navigate to the Theming module at https://{your_site_url}/admin/config/tab/theming#enabled
- Click +Add Themes.
- In the new theme box that was created, click the Edit button.

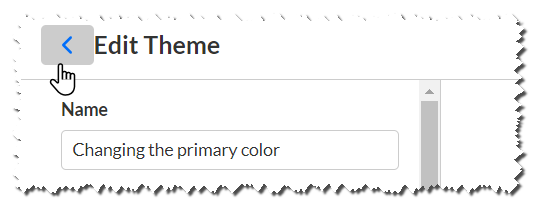
- The Edit Theme window, also referred to as the Theme Builder, is displayed.
- Set the Name of the Theme, and change the primary (and if you want, the secondary) colors
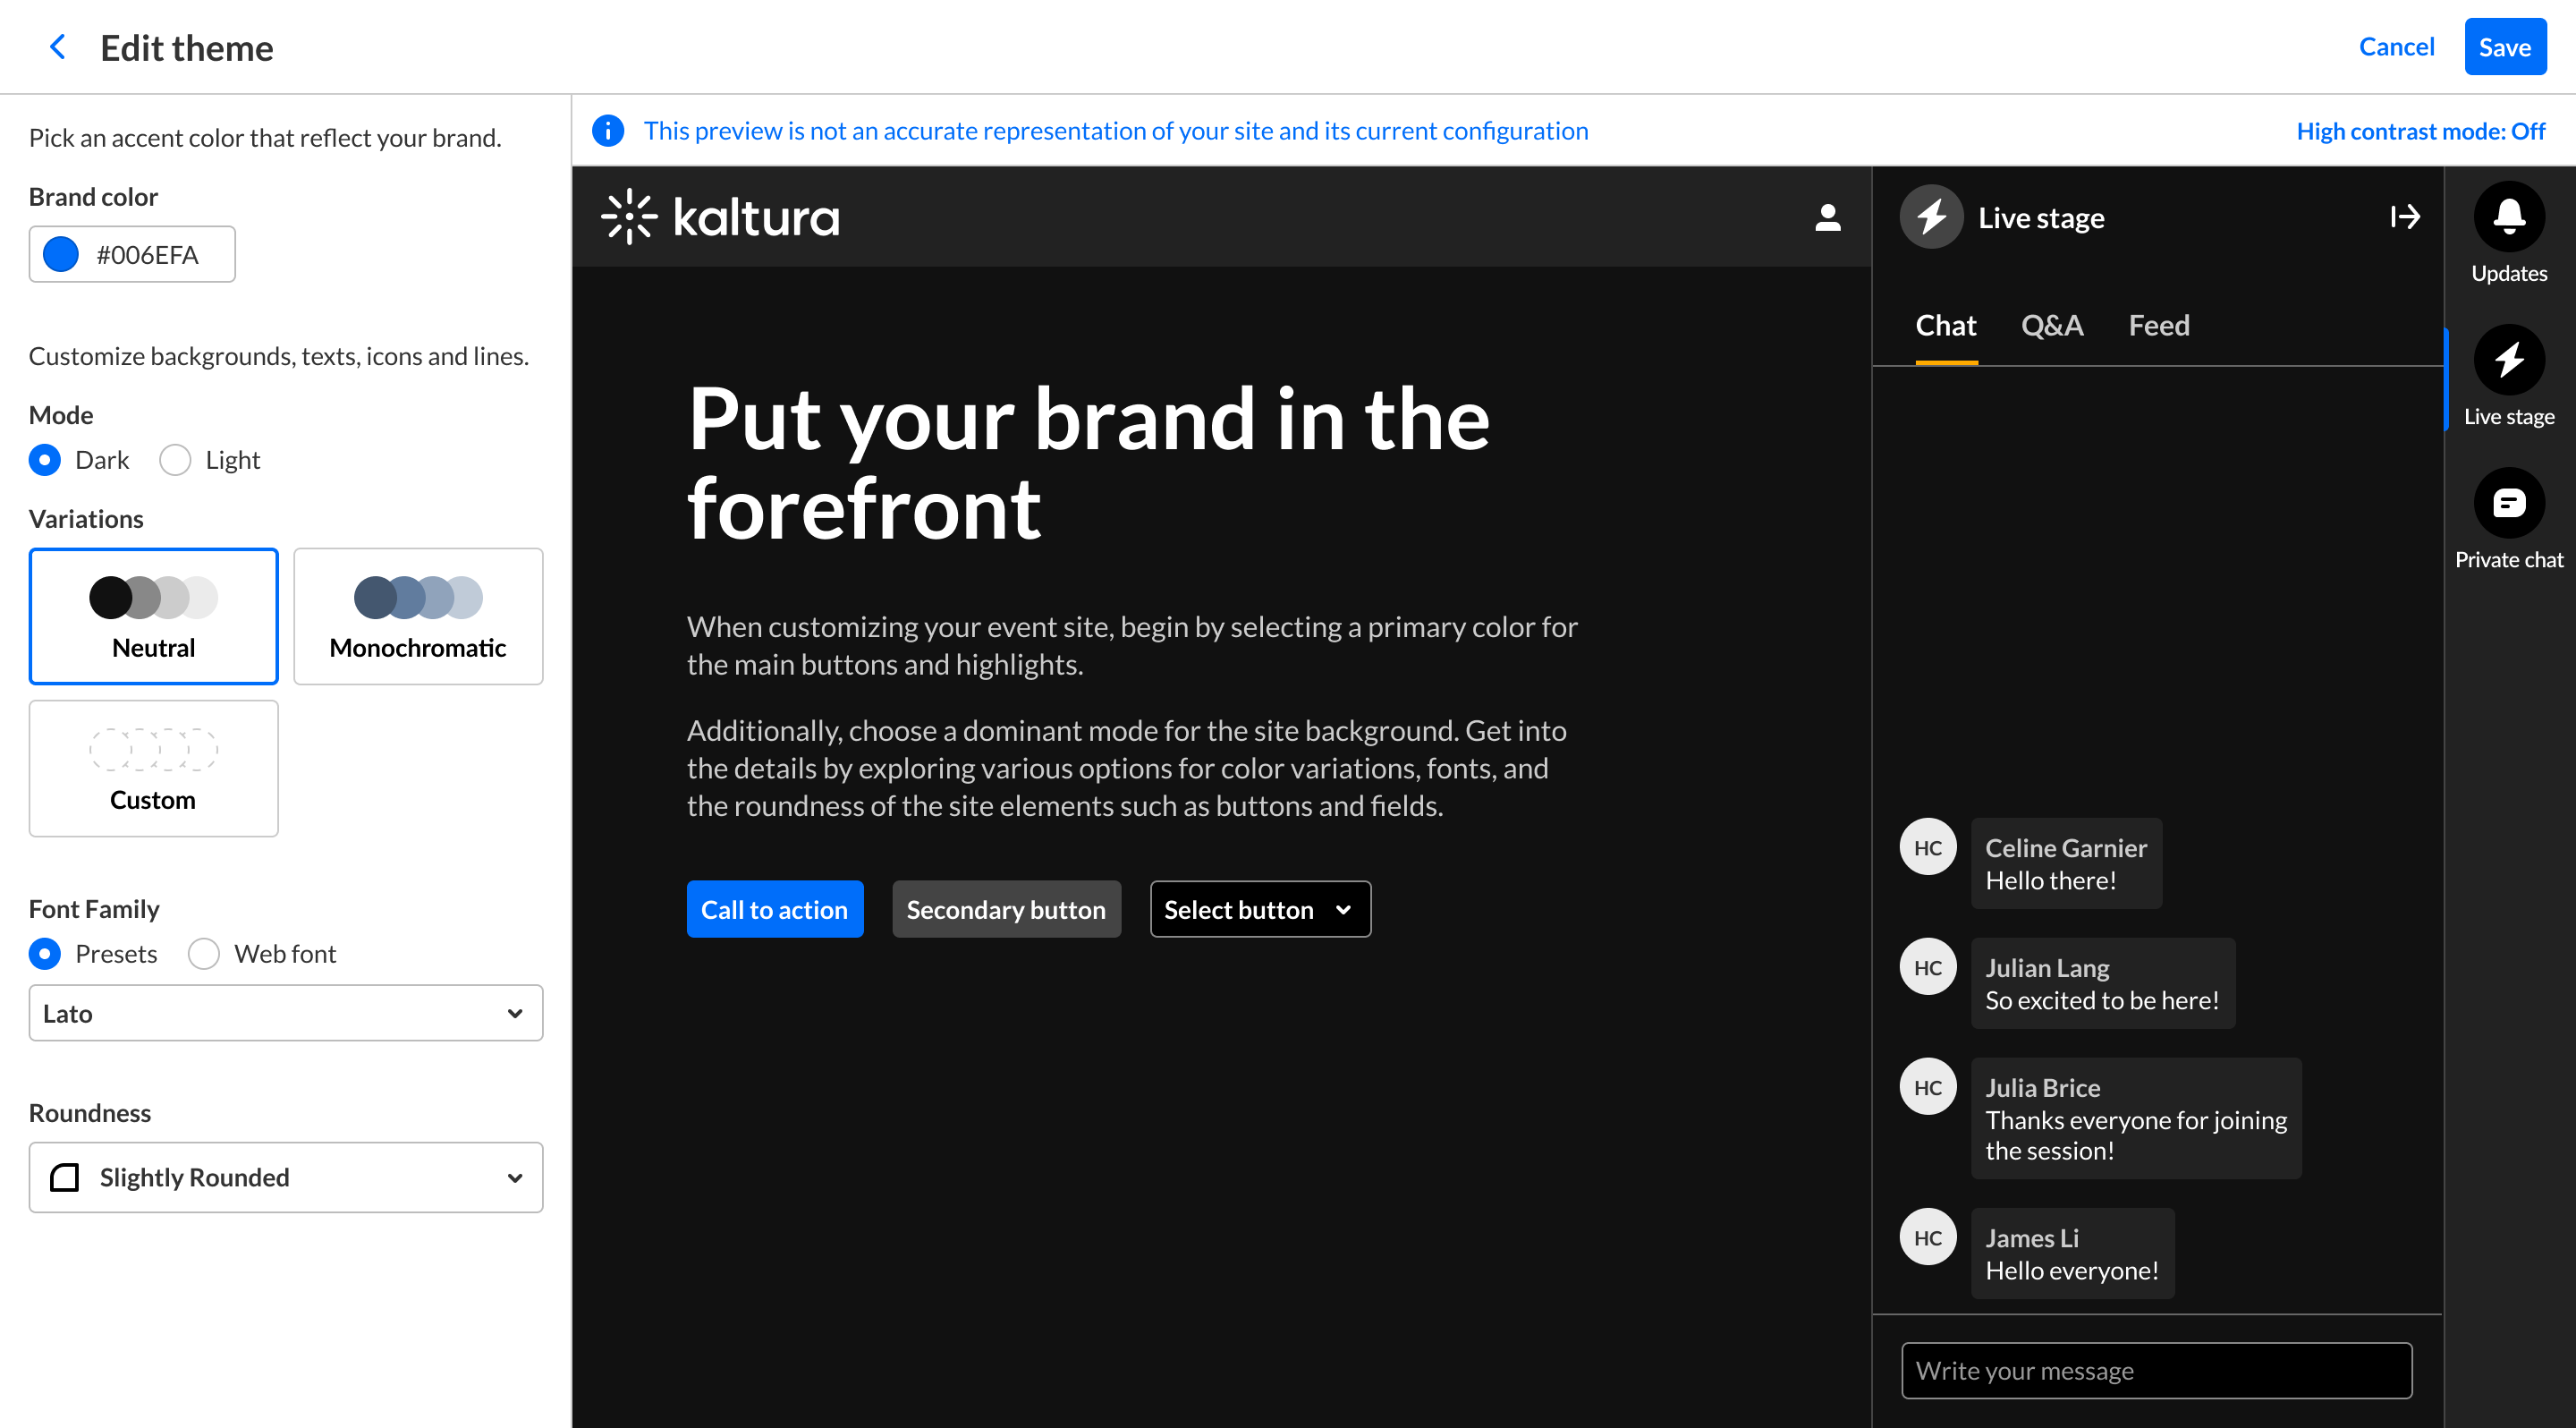
- After modifying the theme attributes, save the theme, and click "Back" to return to the Theming module:
- Set the Name of the Theme, and change the primary (and if you want, the secondary) colors
- Locate the CurrentTheme field, and select the new theme you created.

- Scroll to the bottom of the page and click Save.


Basic Theme

Custom Theme

Explore our Theme Builder article for additional ways to personalize your site's colors and fonts.
Related modules
Enabling the Theming module provides additional features and capabilities that can be seen the following modules:
- TemplatePages
- CustomPages
- AddNew
- Login
- Footer
- HelpPage
- ListPage
- PersonalProfile
- ChannelThemingUI
- ChannelCollections
- UploadMedia
- Header
- Playlistpage
- GroupPage
