About
Site navigation is the way visitors move through your site's pages and content. The navigation bar generally displays the pages and sections on your site that your visitors can click on and be redirected to.
Applies exclusively to the legacy Video Portal.
The images in this article show the legacy Video Portal with the Theming design system enabled.
Configure
- Go to your Configuration Management console, and click the Navigation module. You can also navigate directly using a link: https://{your_KMS_URL}/admin/config/tab/navigation.
The module page displays.
- Configure the following:


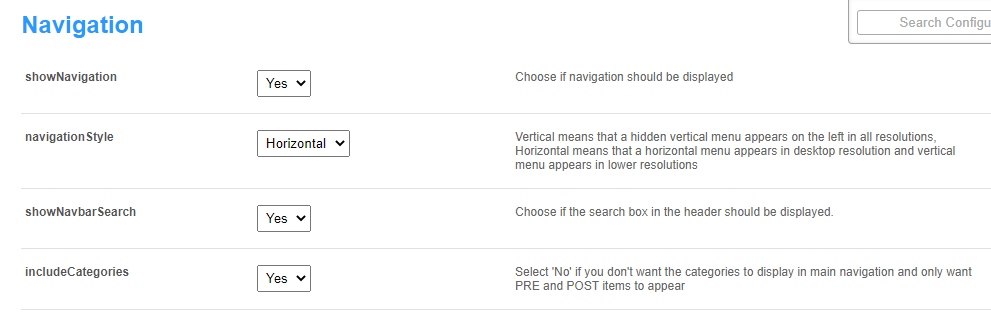
Navigation style
showNavigation - Show or hide the navigation bar (the default is 'Yes').
The image below shows showNavigation set to 'No'.
The image below shows showNavigation set to 'Yes'.

navigationStyle - Choose Horizontal (top menu on desktop, collapses to side on mobile) or Vertical (side menu on all screens).
 Navigation set to vertical
showNavbarSearch - Show or hide the search box in the header (default is 'Yes').

includeCategories - Set to 'No' if you don’t want categories in your main navigation.
For more information about adding a category, check out our article Categories.
Set a guest landing page
Set a special landing page for guests either by creating a custom page in the templatepages module or using an existing page like Global search. Add your page to the custompages module, then link it to the site navigation using the landingPage field (as shown below). Ensure the page is accessible to guests by setting it to Guest override or using a public channel page.

Configure:
- enabled - Set to 'Yes' to enable the landing page.
If set to 'No' and allowanonymous is also set to 'No', guests will be redirected to your login page.
- type - Select the type of page from the drop-down menu:
- Playlist - Enter a playlist ID. This will redirect users to that playlist's page.
- Link - Enter any link to redirect users to (for static pages).
- Category - Choose a gallery from a drop-down list. This will redirect users to that gallery.
- Entry ID - Enter an entry ID. Will redirect users to that entry's media page.
- Channels page - This will redirect users to the Channels page (https://{Your mediaspace}.kaltura.com/channels).
- Channel - Choose a channel from the drop-down list. This will redirect users to that channel's main page.
- Custom page - Choose a custom page from the drop-down menu (added from the custompages module). This will redirect guests to the template page.
- value - Enter the relevant value for the selected type: URL for links, ID for Playlist. To add the homepage you created above, simply enter a slash (/) in the field instead of the entire slug.
- category - Click the blue Select Gallery button and enter the gallery name or ID.
- entryID - Enter an entry ID to redirect users to that entry's media page.
- channel - Click the blue Select Channel button and enter the channel name or ID.
- page - Select a custom page from the drop-down list (as shown in the example below). A custom page in status 'disabled' won't be shown on the menu.
Page types other than 'link' must be in a Video Portal that has been set to allow anonymous users.
Depending on what you choose from the type drop-down list, other options will display as follows:

Set homepages for logged-in users
Add one or more pages to your site's base URL for logged-in users. You can design a new page in the templatepages module, or reuse an existing page, such as the Global search. Just add your page to the custompages module, then link it to the site navigation here.
Click +Add "homePages".
In the section that displays, configure the following:
- enabled - Set to 'Yes' to enable the landing page.
- type - Select where to send users:
- Playlist - Enter a playlist ID. This will redirect users to that playlist's page.
- Link - Enter any link to redirect users to (for static pages).
- Category - Choose a gallery from a drop-down list. This will redirect users to that gallery.
- Entry ID - Enter an entry ID. Will redirect users to that entry's media page.
- Channels page - This will redirect users to the Channels page (https://{Your mediaspace}.kaltura.com/channels).
- Channel - Choose a channel from the drop-down list. This will redirect users to that channel's main page.
- My Media - This will redirect users to the My Media Page, and will only show for permitted roles.
- My Playlists - This will redirect users to the My Playlists page.
- My Channels - This will redirect users to the My Channels page.
- My content analytics - This will redirect users to the My content analytics page.
- Custom page - Choose a custom page from the drop-down menu (added from the Custompages module). This will redirect users to the custom page, and will only show if the page is enabled.
- value - Enter the relevant value for the selected type: URL for links, ID for playlist.
- allowedGroups - You can choose a group to display this homepage to. Leave it empty to show it to all users or users not in any homepage group. For users in multiple groups, the first homepage will appear. If no groups or alternative homepages exist, the first item from the Pre/Post navigation list they have access to will be shown.
- Click +Add "allowedGroups".
- In the new section that displays, click Select Groups.
- Type in a group name or ID.
- Click Submit.

Repeat these steps to add more groups.

'Pre' menu
The Pre section adds menu items before your channels. Items appear in the order you add them.
Click +Add "pre" and configure the following:
name - Enter the label shown in the nav bar.
type - Select one of the options:
- Playlist - Enter a playlist ID. This will redirect users to that playlist's page.
- My Media - This will redirect users to the My Media page, and will only show for permitted roles.
- My Playlists - This will redirect users to the My Playlists page.
- Link - Enter any link to redirect users to. This is also used for channel collections (add the slug from the channelcollections module)
- Category - Choose a gallery from a drop-down list. This will redirect users to the gallery page.
- Entry ID - Enter an entry ID. Will redirect users to that entry's media page.
- Channels page - This will redirect users to the All Channels page.
- My Channels - This will redirect users to the My Channels page.
- Channel - Choose a channel from the drop-down list. This will redirect users to that channel's main page.
- Label - Only input text for a label. You can use this to organize content beneath the label in a hierarchy.
- Partner KMS URL - Enter a link to another legacy Video Portal in the same partner. This enables logged-in users to access that legacy Video Portal without needing to log in again.
- My Content Analytics - This will redirect users to the My Content analytics page.
- Custom page - Choose a custom page from the drop-down menu (added from the Custompages module). This will redirect users to the custom page, and will only show if the page is enabled.
Depending on what you choose from the type drop-down list, other options will display:
- value - Enter the relevant value for the selected type: URL for links, ID for Playlist. To add the homepage you created above, simply enter a slash (/) in the field instead of the entire slug.
- sameWindow - The default is 'No'. Select 'Yes' if you want the page to open in the same window.
- category - Click the blue Select Gallery button and enter the gallery name or ID.
- entryID - Enter an entry ID to redirect users to that entry's media page.
- channel - Click the blue Select Channel button and enter the channel name or ID.
- url - Enter the base URL of another Video Portal in the same partner. This enables logged-in users to access that Video Portal without needing to log in again.
- page - Select a custom page from the drop-down list. (A custom page in status 'disabled' won't be shown on the menu.)
allowedGroups - Choose the group that should see this item. A user who's not in that group won't see this page in their navigation menu.

If you choose a type which has a drop-down menu, you can add items to the dropdown by clicking +Add items.

The items section expands. Configure the following:
- name - Enter the name of the menu item. The name is displayed in the main navigation bar.
- type - Select one of the options from the drop-down list (see above). Depending on what you choose from the drop-down list, other options will display (see above).
To create the next 'pre' element, click +Add "pre" and repeat the steps.
If you would like your first item on the header to be a homepage, you can follow the steps in Setup a Homepage.
To learn more about setting up pages for your site, you can read Create and use a template page.
Below is an example of 'Home' positioned as the first item in the navigation bar, using the homepage that was configured in the homepages section above.

'Post' menu
Next is the Post menu section. This is where you'll add items that come after the galleries (also known as 'categories'). Your legacy Video Portal displays the items in the order you define here.
Click +Add "post", and follow the same steps as in the Pre menu section above.
Below is an example of configuration to add Genie to the navigation bar.

This is how it looks to end-users on the navigation bar:

Finally, when you have finished your configurations, scroll down and click Save.
If you'd like to learn more about adding a channel to your navigation menu, you can follow the steps in Create a new channel.
