About
This article describes how to edit a DIY live webcast session.
DIY live webcasts give you the ability to broadcast/webcast a Kaltura live session directly from a Kaltura Studio room. Simply create a DIY live webcast session, then navigate to the Studio room and begin broadcasting.
This article pertains only to multi-session events.
Some behavior described here applies to a non-default configuration. Customer-specific variations are highlighted where applicable.
Access session editing capabilities
There are two ways to reach session editing capabilities:
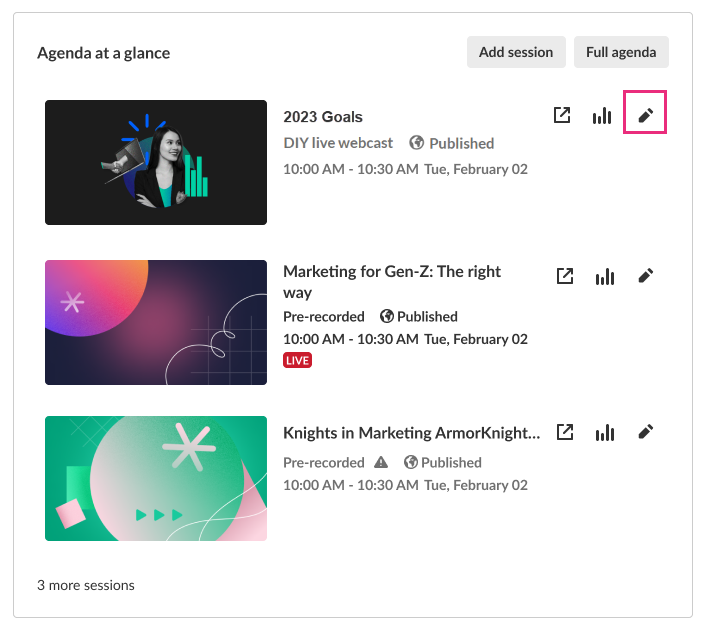
- On the Event Overview page, in the Agenda at a glance section, hover over the session you would like to edit, then click the blue pencil (edit) icon.

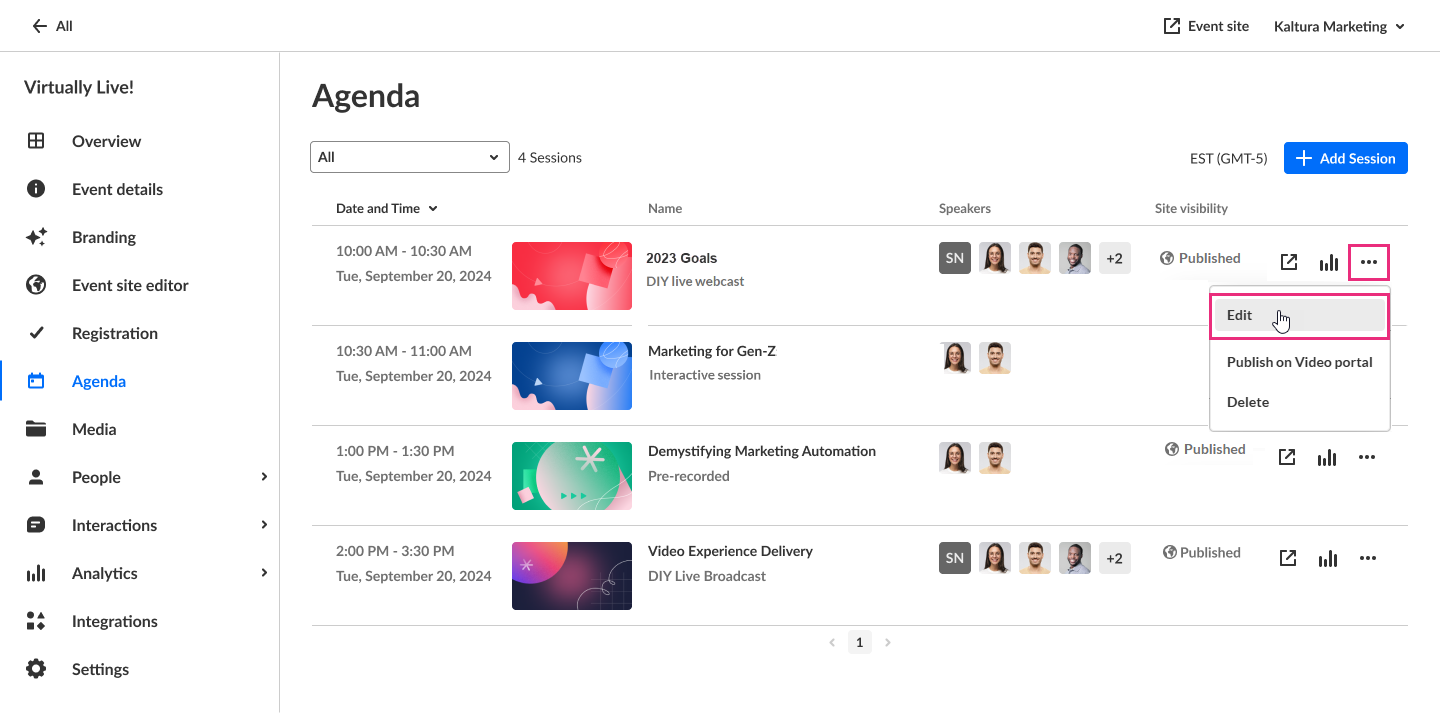
- On the Event Agenda page, click the name of the session, or the three blue dots to the right of the session and choose Edit.

The Edit session page displays with the Basics tab open by default.

Create with AI
Enrich and repurpose your content into engaging, snackable experiences with Kaltura's AI-powered post-production assistant. Click to access Content Lab functionality. This button will be active and enabled only on sessions with applicable media uploaded. See Create highlight clips with AI and Create a summary and chapters with AI for more information.
View analytics
Click the three-dot action menu then select View analytics.

See Session analytics for details.
Publish on Video portal
Click the three-dot action menu then select Publish on Video portal.

See Session publishing capabilities for details.
Duplicate session
Click the three-dot action menu then select Duplicate.

See Duplicate session for more details.
Delete session
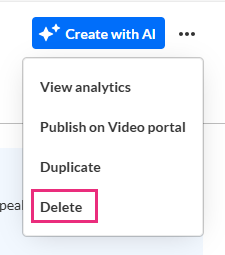
- Click the three-dot action menu then select Delete.
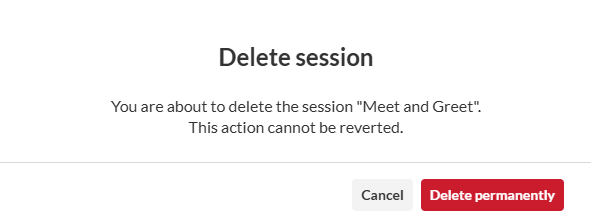
 A warning message displays.

- Click Delete permanently or click Cancel to cancel the action.
Basics tab
Configure the core details of your event, like title, description, and tags. Launch the studio, access a direct link to the session page, manage recordings, and much more.
- Launch Kaltura Studio room and copy studio link to share
- Visit session page and copy session page link to share
- Edit session details
- Activate AI assistant
- Control screen sharing and stage access during the sessionDepending on your account settings, the ability to control screen sharing and stage access may not be enabled.
- Manage recordings
Captions tab
Manage captions and translations for your session. Order, upload, edit, download, delete, and set default captions, and much more.
The ability to order captions and translation must be enabled and configured on your account. If they are not, please contact your Kaltura representative to enquire about adding them. If captions and translation are enabled and configured on your account, you may order them only after creating your session and accessing the Captions tab of the Edit session page.
- Order live captions
- Order live translation
- Order captions for session recording or video source
- Upload captions for session recording or video source
- Set as default, edit, download, and delete captions for a session recording
Attachments tab
Provide your audience a greater immersive experience and more value by enriching your session with downloadable content. Manage content like documents, spreadsheets, presentations, audio/video files, and images on the Attachments tab.
Supported file types consist of the following:
Media files - *.mts;*.MTS;*.qt;*.QT;*.mov;*.MOV;*.mpeg;*.MPEG; *.avi;*.AVI;*.mp4; *.MP4; *.vob;*.VOB;*.flv; *.FLV; *.f4v; *.F4V; *.asf;*.ASF; *.wmv;*.WMV;*.m4v;*.M4V;*.3gp;*.3GP; *.mkv;*.MKV;*.arf;*.ARF; *.webm;*.WEBM; *.mxf;*.MXF
Document files - 'doc', 'docx', 'docm', 'dotx', 'dotm', 'xls', 'xlsx', 'xlsm', 'xltx', 'xltm', 'xlsb', 'xlam', 'ppt', 'pptx', 'pptm', 'potx', 'potm', 'ppam', 'ppsm', 'odb', 'odc', 'odf', 'odg', 'odi', 'odm', 'odp', 'ods', 'odt', 'otc', 'otf', 'otg', 'oth', 'oti', 'otp', 'ots', 'ott', 'oxt','swf','pdf'
Image files - 'jpg', 'jpeg', 'bmp', 'png', 'gif', 'tif', 'tiff'
- Upload attachments
- Edit attachments
- Download attachments
- Get information on attachments
- Delete attachments
Share & Embed tab
Looking for more information about this feature? Feel free to contact your Kaltura representative.
When using Kaltura's Live Broadcasting services, you can choose to share (re-stream) your scheduled live event to any RTMP based live broadcasting service. When re-stream is set, Kaltura will take care of replicating your live stream and concurrently stream it to additional live broadcasting services such as social media live streaming.
You may share (restream) and embed only after creating your session and accessing the Share & Embed tab of the Edit session page.
You may share (restream) and embed future sessions only.


 A warning message displays.

