Upload media


About

This article outlines the various content uploading options available through the Kaltura Management Console. You have the flexibility to upload files directly from your computer, import content from a range of online repositories, or initiate a bulk upload request using Kaltura-formatted CSV or XML files - all conveniently accessible within the Kaltura Management Console.

The supported media types to upload are video/audio/image. For the full list of supported ingestion file formats and codec, please refer to What are the Supported Transcoding Formats for the Kaltura SaaS Edition?

The supported minimum upload speed should be higher than 3-4 Mbps. Lower upload speeds might result in an error such as "Oops! Failed to match expected file size error on upload of large files".

Upload from desktop

Use this option to upload files from your desktop. You can continue working on other tasks while files are uploading and resume the file upload in case of connection failure.

1. In the KMC, click +Create in the navigation bar.

 The upload window displays. 

2. Click Upload from Desktop.

The high-speed upload option is particularly useful for content administrators uploading large source files or time sensitive content on a regular basis. If you would like to use high-speed upload, see our article Kaltura High-speed upload user guide.

3. Select one or more media files. Use the ctrl key to select multiple files. 

4. Click Open.

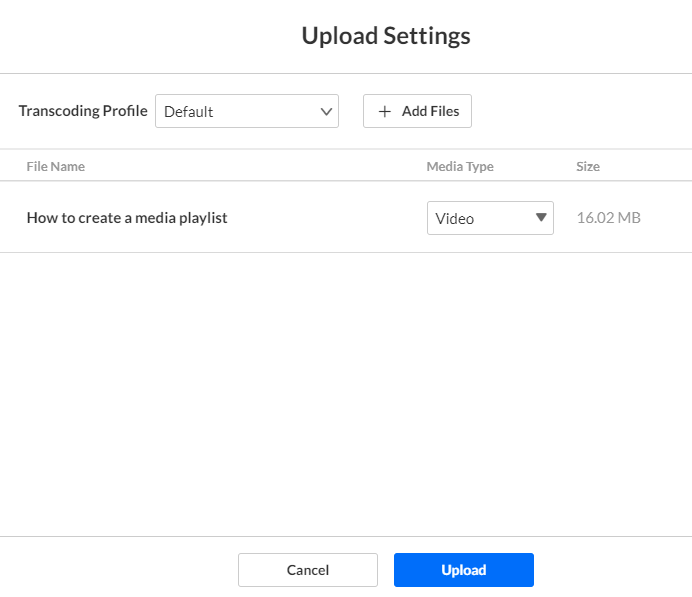
The Upload Settings window displays.

5. Configure the following:

  • Transcoding Profile - Use the default or select another one from the drop-down menu. For more information, see our article Transcoding Settings and Processing.
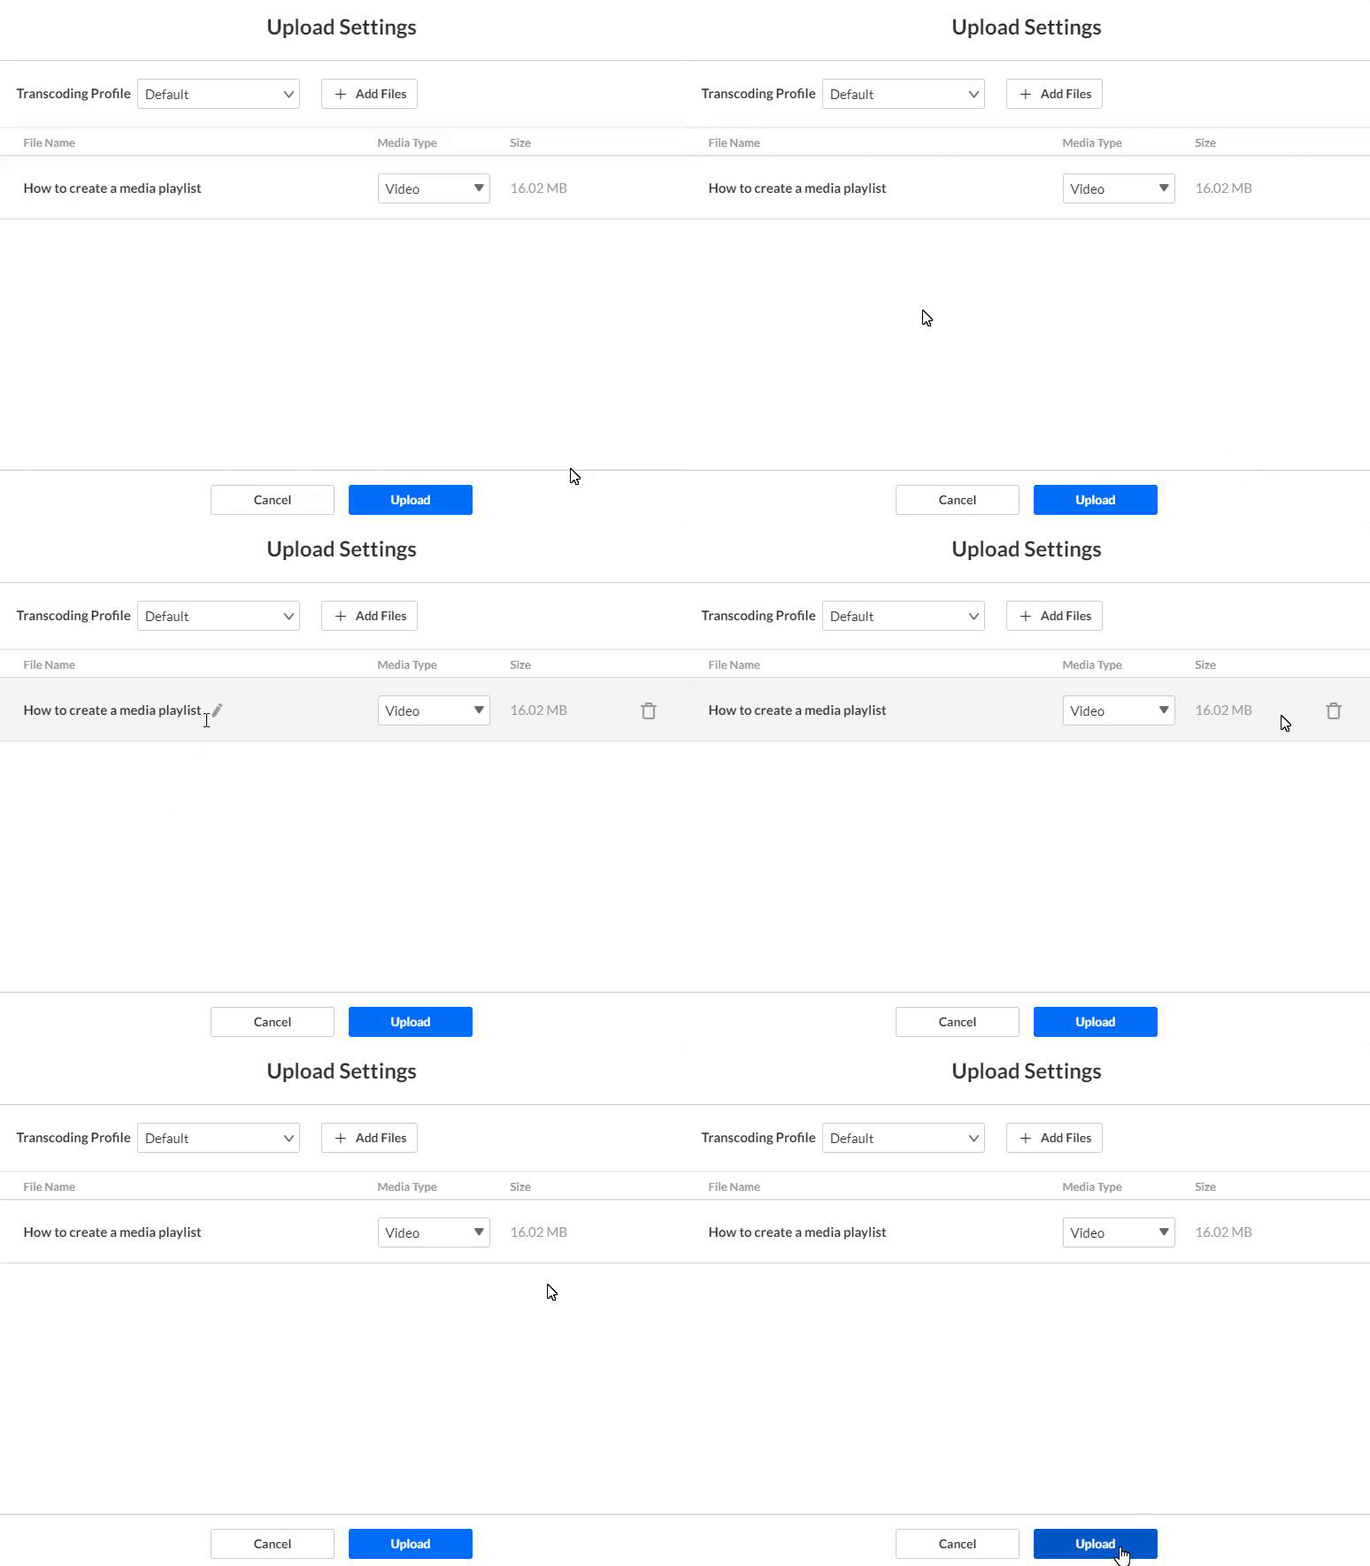
  • (Optional) Modify the file name by hovering over the name and clicking on the pencil icon.
  • You can also click on the trash can icon to cancel your upload.
  • The media type is automatically detected by the file extension, but you can modify it if needed by choosing an option from the drop-down menu. 
  • (Optional) Click + Add Files to add more files. 

6. Click Upload.

The media appears under the Entries tab.

Upload control tab

The Upload Control screen displays all queued tasks and the number of files in progress.

It can be reached from 2 places:

  • Clicking the Upload Control tab under the Content menu (see above).
  • Clicking the View Details link in the Upload Monitor screen (see below).

The Upload Control table shows the following information or each file: 

  • Type - The file type video / audio / image as an icon
  • File Name - the file name is entered by the user in the "Upload Settings" screen
  • Entry ID - the id of the entry that was created for this file
  • File Size - The file size
  • Uploaded on - The date and time this file was selected for upload
  • Status - The status of each upload task
  • Progress - A progress bar showing the upload progress visually

Upload status

Tasks are sorted according to status:

  • Completed - File upload was completed successfully and the progress bar color is green. Completed tasks are removed from the upload row automatically after 5 seconds.
  • Uploading - File is currently uploading.
  • Queued - File is waiting in queue to start upload.
  • Failed - File upload failed. This could be a failure in the upload process itself or a failure in any of the related processes for this file such as creating the entry for it or updating the entry with the uploaded file resource.

Cancel

You cancel a single upload by clicking the trash can icon to the right of the entry. This removes the selected file from the queue.


You can cancel several uploads by clicking the checkboxes next to the entries. This prompts the bulk delete icon to display. Click the red trash can icon to cancel the uploads.

Retry

If a file upload fails, the file status is changed to 'Fail' and a link for retrying the upload appears. Clicking the retry link restarts the upload process for the selected file.

Bulk upload

Bulk upload simplifies and speeds up the process of adding multiple entries and files to the Kaltura server in one go. The key advantages are:

  • It automates the ingestion process by importing many files at once.
  • Metadata fields are filled in automatically, reducing the need for manual input in the KMC.
  • It bypasses browser and client upload restrictions, allowing larger files to be ingested.

There are 4 ways to perform bulk content uploads:

With these options, you can also ingest files from your own FTP server, or any publicly accessible file’s host. Metadata fields can be populated from CSV/XML. For more information see What is bulk upload and FTP content ingestion?

For any bulk actions that will create more than 5,000 entries (e.g., users), including categories bulk uploads, please contact your Kaltura representative to coordinate the upload.

This section will explore the bulk upload choices in the +Create menu in the KMC.

Retrieve CSV/XML samples

1. Click +Create in the navigation bar. 

The download page displays.

2. Click Download CSV/XML Samples.

3. Open the downloaded folder. (kaltura_batch_upload_sample)

The samples include specific format descriptions and guidelines. See our articles What is XML bulk upload? and How to submit a CSV or XML file for more information.

Upload in bulk

1. Click +Create in the navigation bar, then click Bulk Upload from the menu.

2. Select the entity type from the following:

  • Entries
  • Categories
  • End Users
  • End Users Entitlement

3. Select the file and click Open.

A window displays with a confirmation that your request has been submitted. You can track the upload by clicking the link Bulk upload log page .

Bulk upload tab

The bulk upload log page contains the following information for each uploaded file:

  • File name
  • Item type
  • Uploaded by
  • Upload date
  • Number of items
  • Status
  • 3 dots menu - You can perform the following actions for each file:
    • Download log file
    • Download original file
    • Delete

You can also use the Refine filter to filter your files.

You can filter by the following parameters:

  • Date - enter the desired dates
  • Uploaded items - Entries, Categories, End-user Entitlements, End Users
  • Statuses - Finished Successfully, Finished with Errors, Failed, All other Statuses

Upload from URL

Use this option to add media from a URL.

1. Click +Create in the navigation bar.

2. Click Upload from URL.

The Upload from URL window displays.

3. Select the Transcoding Profile from the drop-down list.

4. Enter the File URL (for example, a Google Drive file URL may resemble the following: 'https://drive.google.com/uc?id=ABCDEFG&auathuser=0&export=download')

5. Click Upload.

6. Click Add Files to add more files.

Create Live Stream Entry

See our article Create a live stream entry.

Prepare Entry

See our article Create a draft entry.

Upload monitor

The upload monitor in the navigation bar displays uploads according to the way the entries were uploaded and monitors the following types of uploads:

  • upload from desktop
  • bulk upload (pending permissions)
  • drop folders (pending permissions)

1. To track your uploads, click the folder icon.
The upload monitor table displays.

2. Click View details for more information.

Was this article helpful?
Thank you for your feedback!
In This Article
Related Articles
Back to top

Never miss a thing!

Subscribe to our customer newsletter and our release notes updates, so you always get the best out of Kaltura.
Newsletter