About
You can upload, manage, and display caption files for your media in the KMC.
You can automate caption creation using Kaltura Reach services. Learn more in our article Introduction to Reach.
Add a captions file to an entry
You can upload multiple caption files per entry, for example captions in different languages, and label each file accordingly.
- Log into your KMC account. The Entries page displays by default.
- Click on the desired video.
- In the left panel, click the Captions tab.
- Click +Add Caption.
- Complete the following:


The edit details displays.


The 'Add Caption' box displays.
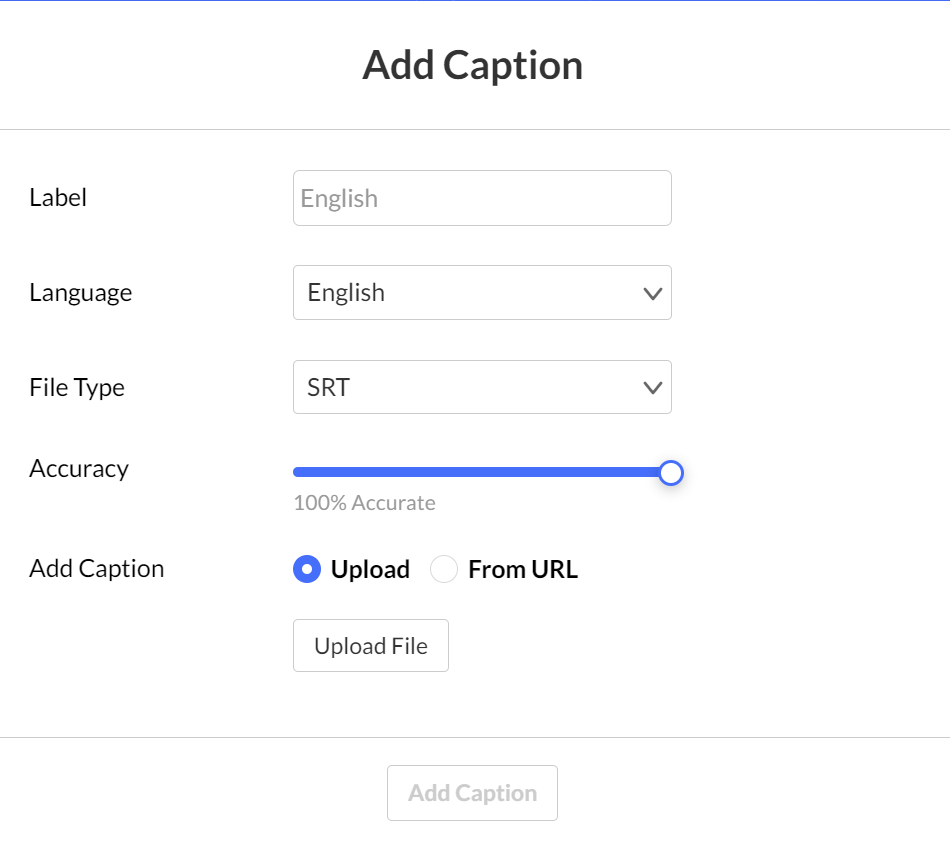
- Label - Enter a Label that will appear in the player’s captions drop-down menu (for example, Japanese). If configured on your account you can also add a suffix to the label for easier identification. See Captioning & enrichment profiles & services in KMC for more information.
- Language - Select the language.
- File type - Select SRT, DFXP or VTT or SCC.
- Accuracy - The default value is 100%. If the entry has multiple captions for the same language, the player displays the file with the highest accuracy.
- Add caption - Choose Upload or From URL:
- Upload File - Upload an SRT, DXFP, VTT or SCC file from your computer.
- From URL - Paste an external URL in the Enter Caption URL location.
6. Click Add Caption.
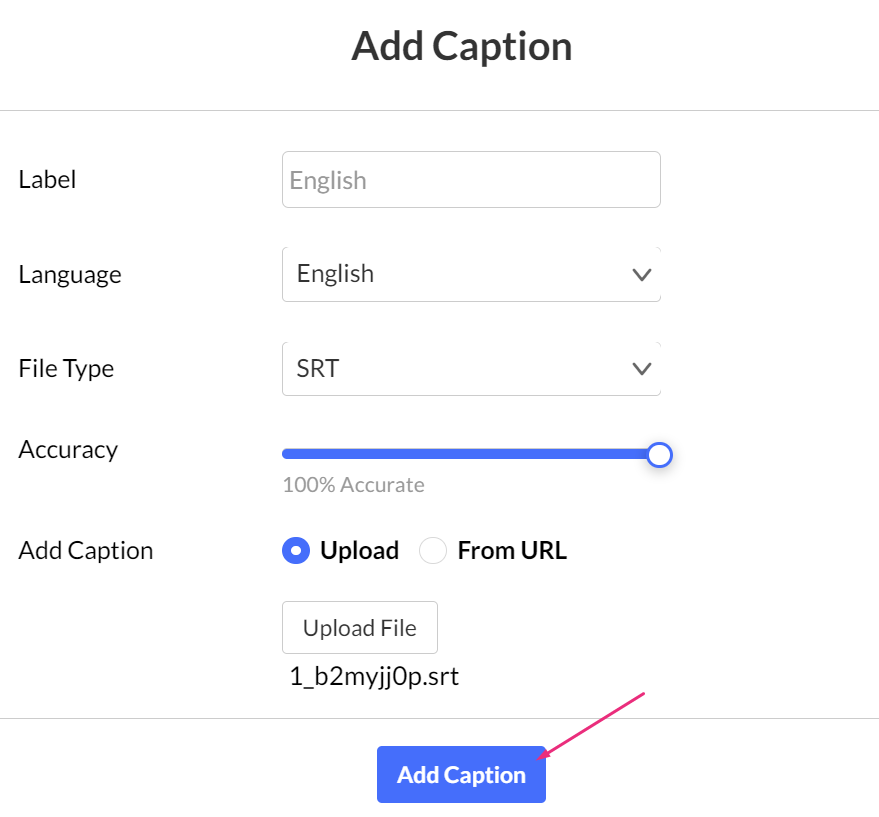
The caption file(s) display in the captions table.

To add additional captions files repeat these steps.
Set captions as default
To make captions the default display, simply click Set as Default. When enabled, this caption file automatically displays when the video plays.

Display captions on player
To show captions on the player, toggle the switch under Display on Player. Once enabled, the caption file is available through the CC button in the player.

Editing actions
After you upload a caption file, you can manage it using the three-dot menu.
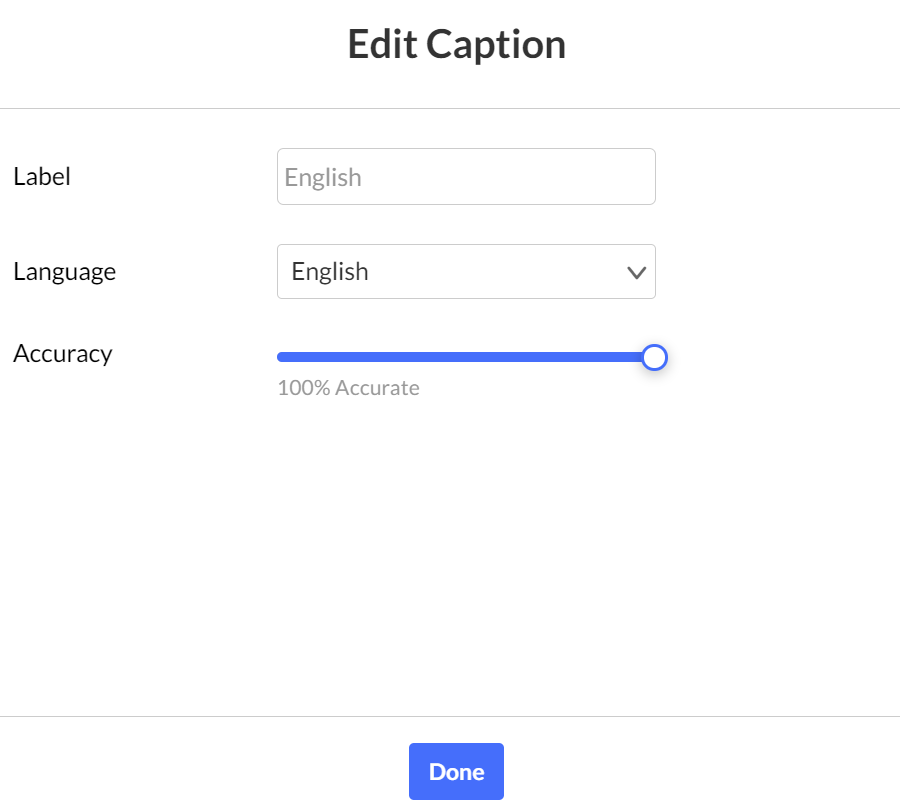
Edit label or language
- Click the three-dot menu at the far right of the desired entry, and select Edit.
- Edit the file label or language and click Done.

Edit captions
Click the three-dot menu at the far right of the desired entry, and select Closed Captions Editor.
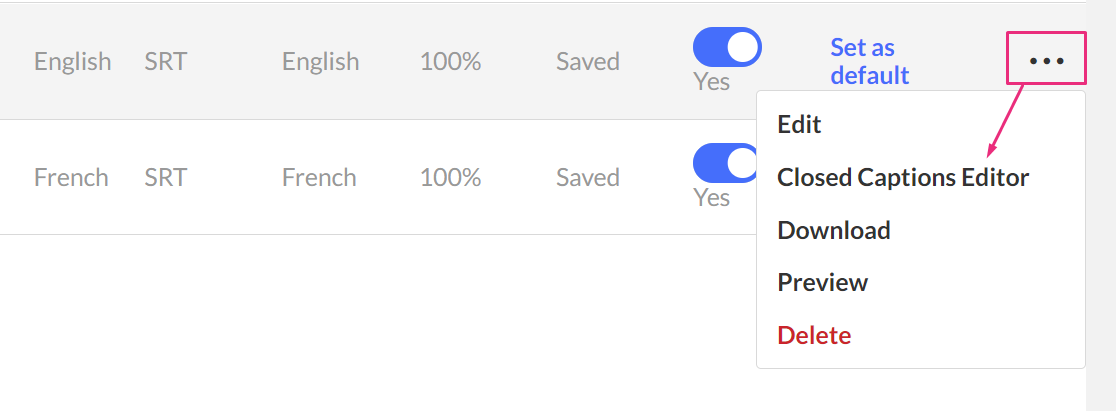
See Edit captions in KMC for more information.
Download and edit captions file
- Click the three-dot menu at the far right of the desired entry, and select Download.
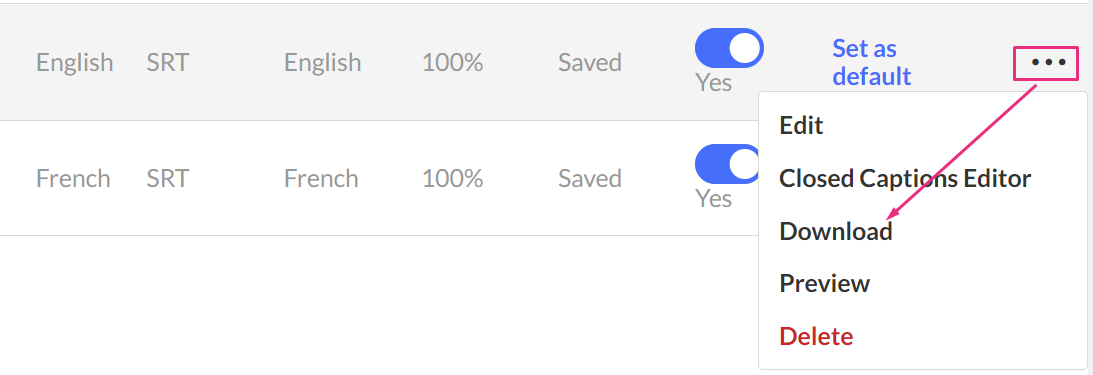 The file downloads.
 - Edit the file.
- Upload the file again as described in Add a captions file above.
Preview file
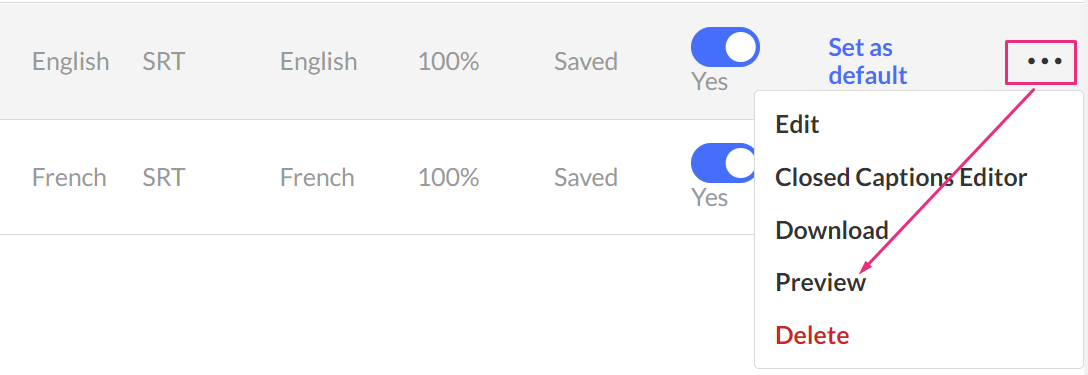
Click the three-dot menu at the far right of the desired entry, and select Preview.
Delete captions
Click the three-dot menu at the far right of the desired entry, and select Delete.
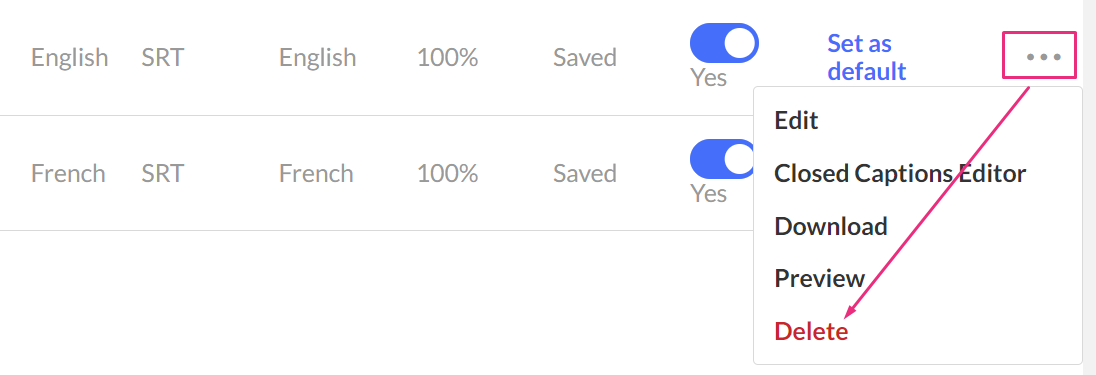
The caption file is removed from the entry.
To display captions during playback, captions must be enabled in your player or you must use a player configuration that already supports captions. For setup instructions, see Set captions to display by default in the player.

 The file downloads.