About
The siteRegistration module makes it easy to set up registration, customize the registration page, set email templates for post registration and registration confirmation, set calendar invites, manage email domains, and close registration.
The module also supports optional post-event emails that are sent after an event ends.
This module requires the Theming module to be enabled.
Configure
1. Go to your Configuration Management console, and click the Siteregistration module. You can also navigate directly: https://{your_site_URL}/admin/config/tab/siteregistration.

The 'Siteregistration' page opens.

2. Configure the following:
Embed registration - This gives you the ability to grab an embed code for the registration form and easily embed it anywhere you'd like, for example, your corporate site. For instructions, see Embed Registration at the end of this article.

enabled - Set to 'Yes' to enable the module.
requireRegistration - Select which (if not all) of the registration user types are required to register:
- SSO Only - Post Login - Select this option if you want to present the registration form to any user after login through SSO authentication to the site. The "{site_URL}/register" URL will not be available for guests.
- Form Users Only - Pre Login - Select this option to present the registration form for guests, using the "{site_URL}/register" URL. SSO users login to the site will not be asked to register.
registrationCompleteTitle - Title of the page presented after the registration form has been submitted. If you don't type anything, the default text will be used.
registrationCompleteText - Text for the page presented after the registration form is entered. If you don't type anything, the default text will be used. Please note that <br> indicates the following text will start on a new line.
ssoRegistrationCompleteButtonLabel - Type the text you want for the button that will be presented for SSO users after the registration form has been submitted. If you don't type anything the default text will be used.
ssoRegistrationCompleteButtonUrl - Add the URL of the button that will be presented for SSO users after the registration form has been submitted.
ssoRegistrationCompleteTitle - Type the title of the page that will be presented for SSO users after the registration form has been submitted. If you don't type anything the default text will be used.
ssoRegistrationCompleteText - Type the text for the page that will be presented for SSO users after the registration form has been submitted. If you don't type anything the default text will be used.
emailVerification - Choose an option:
- Enforce Verification - Choose this option if you require users to verify their emails as part of the registration flow.
- Skip Verification - Choose this option if you don't require users to verify their emails as part of the registration flow.
When using magic link, it's recommended to select the Skip Verification option because the magic link itself serves as the confirmation. Users can log in directly with the magic link, making the verification step unnecessary.
verifyOnLogin - Choose an option:
- Show - This will show the “Verify My Email” link on the login page below the sign in button.
- Hide - This will hide the “Verify My Email” link on the login page below the sign in button. Users will be able to manually navigate to the link destination “{baseURL}/registration/activate”.
confirmationTitle - Type a title to show in the confirmation screen. If you don't type anything the default text will be used.
confirmationText - Type the text to show in the confirmation screen. If you don't type anything the default text will be used.
confirmationButtonLabel - Type text you want for the confirmation screen button. If you don't type anything the default text will be used.
postConfirmationTitle - Type a title you want to show on the post confirmation screen.
postConfirmationText - Type text you want to show on the post confirmation screen. If you don't type anything the default text will be used.
postConfirmationButtonLabel - Type text you want for the post confirmation screen button. If you don't type anything the default text will be used.
postConfirmationButtonUrl - Add the URL for the button that will be presented on the post confirmation screen.
noInviteCodeGroupId - Enter the group ID to assign users who DO NOT have an invite code
preSubmitScript - Enter javascript code (without script tags) that will be executed upon registration page or modal load.
postSubmitScript - Enter javascript code (without script tags) that will be executed upon successful registration.
marketoFieldsMapping - Fields mapping of registration form to Marketo fields.
- Click +Add "marketoFieldsMapping".
A new window opens.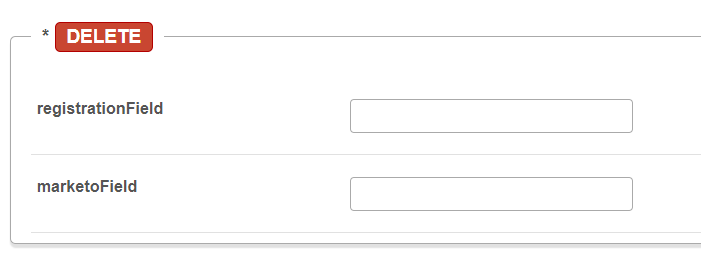
- Complete the fields for mapping:
- registrationField
- marketoField - Repeat the process to map as many fields as desired.

registrationClosed - Selecting 'Yes' will render the registration closed view instead of the registration form.
registrationClosedTitleText - Type the title you want to show in the registration closed view. If you don't type anything the default text will be used: Registration is now closed.
registrationClosedDescriptionText - Type the description you want to show in the registration closed view. If you don't type anything the default text will be used: Thanks for joining!
The following fields require you to choose an email template. Email templates are configured in the emailtemplates module. Click the Configure email templates links provided to navigate directly to the EmailTemplates module in the admin console if you need to create a template.
- Send email only
- Send both email and calendar invite
- Send calendar invite only
To use the calendar invitation function, the loginLogFrom field in the basesiteregistration module must be populated.
When a user registers for an event, they’ll automatically receive a confirmation email and a calendar invite (iCS file). The invite blocks time in their calendar, making it easy to remember and attend the event.
If you selected Send both email and calendar invite or Send calendar invite only, the following additional configuration options display:

iCalEmailTemplate - Choose an email template to use in the calendar invitation. The time and date will be taken automatically from the basesiteregistration module loginLogFrom field.
ssoiCalEmailTemplate - Choose an email template to use in the calendar invitation for SSO users. Time and date will be taken automatically from the basesiteregistration module loginLogFrom field.
confirmationiCalEmailTemplate - Choose an email template to use in the calendar invitation for auto-confirmed users. Time and date will be taken automatically from the basesiteregistration module loginLogFrom field.
returnUseriCalEmailTemplate - Choose an email template to use in the calendar invitation for returning users who already have password form previous event to use their previous password in this event. Time and date will be taken automatically from the basesiteregistration module loginLogFrom field.
registrationEmailTemplate - Choose an email template to send registrants once they completed the registration form.
ssoRegistrationEmailTemplate - Choose an email template to send SSO users once they completed the registration form. Click the Set SSO Domains link to navigate directly to the Application module.
confirmationEmailTemplate - Choose an email template to send registrants once they have confirmed their email address.
returnUserEmailTemplate - Choose an email template to inform returning users who already have a password from a previous event to use their password in this event - post-registration page.
blockedEmailTemplate - Choose an email template to inform blocked users that they are blocked on this event - post-registration page.
unregisteredEmailTemplate - Choose an email template to inform unregistered users that they are blocked on this event - post-registration page.
restrictDomains - You can choose to restrict email domains that are allowed to register. Blocked domains will not allow users to register with emails from these domains. Allowed domains will only permit users with these domains to register. Choose from the options:
- None
- Allowed domains
- Blocked domains
If you select Allowed or Blocked Domains, a window displays.

Upload a CSV or a XLS file, placing each restricted domain on a new line. To block all users from a specific domain, enter the domain name, for example, "youtube.com". To block a user name from all domains, enter "username@*".
invalidEmailMessage - Type a message to show users if their email domain is not approved. Your email address is not in the approved domains. If you don't type anything the default text will be used: Please use an approved email domain to log in.
Cookies - If you want to enable the registration page to look for a cookie on the page, and save the value in it on the user’s registration info, click the +Add "cookies" button. A window displays.

- cookieName - Enter the name of the cookie containing the value.
- cookieRegid - Enter the matching ID to be stored in the user’s registration data.
registrationEmailTypePostEvent - Choose an email template to send registrants once they completed the registration form - post event (Configure email templates). This email is sent only after the event end time. It’s sent to all user types (new, returning, and SSO), even if Send calendar invite only is selected. If left empty, the standard registration email behavior is used.
confirmationEmailTypePostEvent - Choose an email template to send registrants once they completed the registration form - post event (Configure email templates). This email replaces the standard confirmation email after the event ends. If left empty, the standard confirmation email is sent.

Please note the post-event email fields registrationEmailTypePostEvent and confirmationEmailTypePostEvent appear only after an event end time is defined in the loginLogTo field in the BaseSiteRegistration module.
4. Click Save.
Embed registration
1. Go back to the top of the Siteregistration window and click Embed registration.

The embed registration page displays.

2. Complete the following fields:
Theme - Select a theme from the dropdown menu, which includes the themes you've customized using the Theming module. Watch it instantly transform the preview on the right as you switch themes. See our article Theme Editor for more information.
Title - Type a title for your registration form. Leave empty to use the default text: Registration.
Description - Type a description or leave empty to use the default text: We're excited to have you with us! Complete this to register for our event.
Additional parameters
This section shows registration fields that were pre-filled when setting up your registration form, for example, a utmsource field:

The additional parameter values are configured in the Registration Form Editor in the basesiteregistration module. These fields will only appear if you check Allow inserting values for this field via URL parameters in the form settings, as shown in the image below.

A success message displays: Embed code copied to clipboard.
You can repeat the process to create as many embeds as you want.
