If you're setting up a new event, we recommend using Live Studio, our modernized live event experience. See Introduction to Live Studio for more information. If your organization is still using the legacy webcasting product, this article still applies.
This article describes how to schedule an event.
Scheduling an event is accessed from the user drop down menu in KMS and from the My Media menu in KAF.
Only users with permission set by the KMS/KAF admin in the Recscheduling module are able to create events.
Use the Calendar View (My Schedule Page) to create events.
- For KMS - Select My Calendar from the user drop down menu.
For KAF - Select My Calendar from the My Media menu. - On the Calendar Page click Create Event, then select Lecture Capture Event or Webcasting Event.
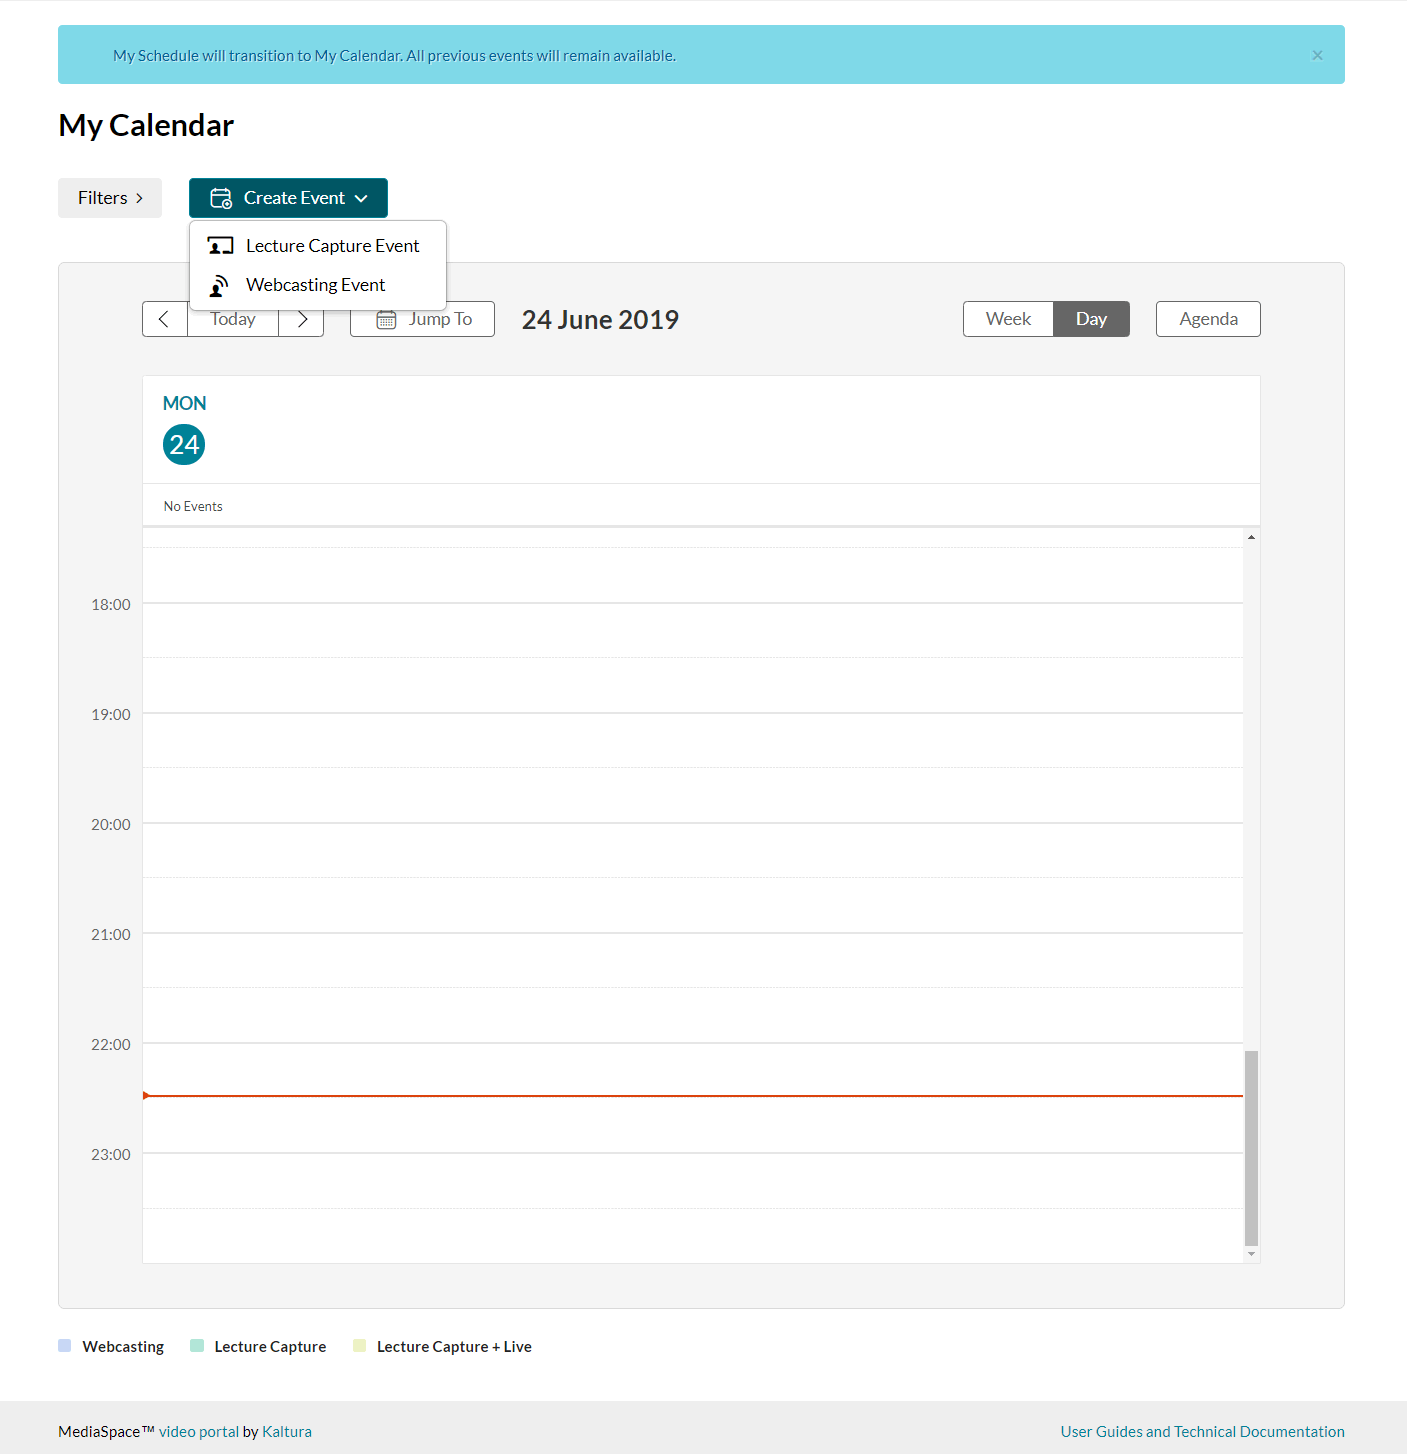
The Create Event page is displayed.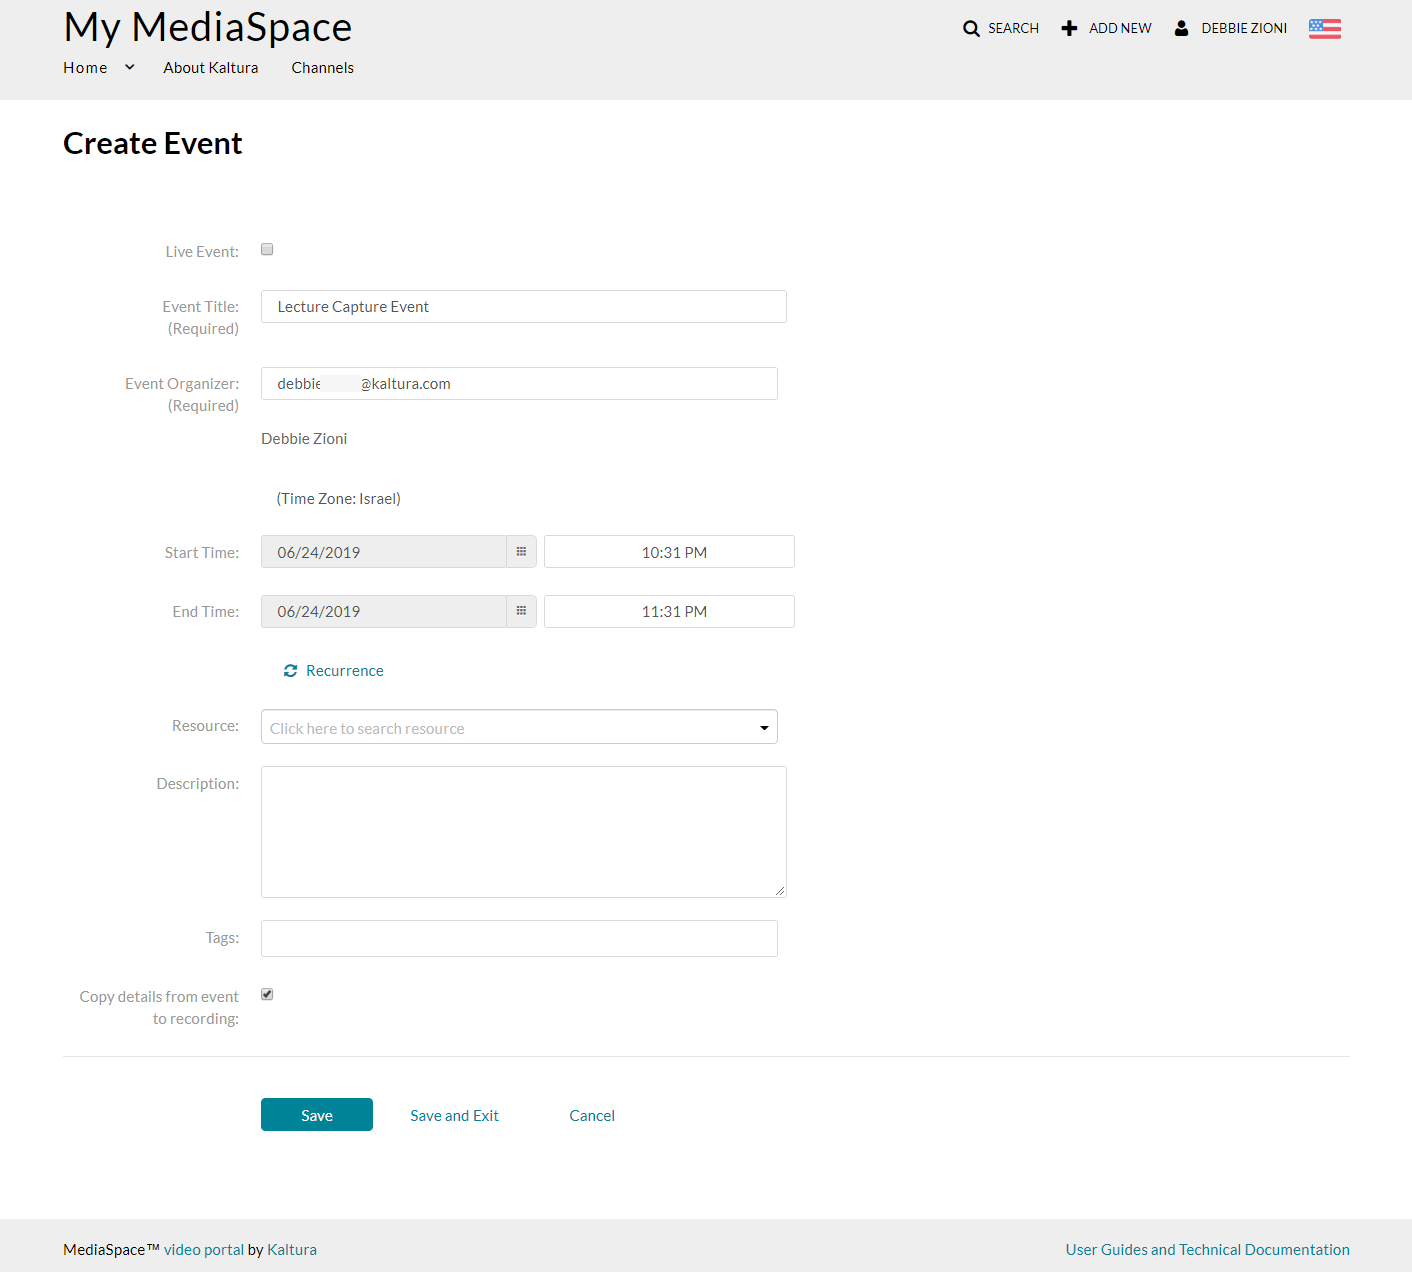
- Enter the following information:


Field Name | Description | Comment | Mandatory Field? |
Live | Defined if the event will also be live streamed | This field is only be available if configured by your admin. Please make sure the capture device you are scheduling supports live events. This field is enabled in the Recscheduling module. | No |
Event Title | The Title of the event |
| Yes |
Event Organizer | The organizer of the event | Default value is the current user. This field can be used by capture devices to set the owner of the recording. | Yes |
Start Time | The start date and time | The default uses the current date and the current time is rounded up to closest full hour. | Yes |
End Time | The end date and time | The default uses the current date, start time + 1 hour. The minimum recording time is 15 minutes. | Yes |
The resources for the date/time selected | Enter text for one of the pre-defined resources, autocomplete is available, or, click on the drop down menu to display the list of pre-defined resources that can be selected. You can select multiple resources. | No | |
Recurrence | A button indicating if this event is recurring. | The default is No. Clicking on Recurrence opens the recurrence screen. See Scheduling Management - Adding Recurring Events. | No |
Description | Event Description |
| No |
Tags | Event Tags | Add event tags to describe the event and make it easier to find when browsing or searching. Tags are a non-hierarchical keyword or term assigned to an entry to help describe the entry and allow it to be found again through a search. | No |
Copy details from event to recording |
| By default, the resulting recording will have the same Title, Description and Tags as the event. If you would like to edit the metadata for the recording or access advanced settings, uncheck the checkbox to open the recording setting fields. See Defining Metadata for a Scheduled Recording for details. | No |
Defining Metadata for a Scheduled Recording
The default checkbox for Copy details from event to recording is checked.
The recording result from the event has the same metadata as the event. All metadata for the specific KMS/KAF instance is copied into the event recording details. See sample screens for KMS and KAF.
The following fields are displayed when the "Copy details from event to recording" checkbox is not checked.
Field Name | Description | Comment | Mandatory |
Name (required) | The title of the entry | The default is the event title. | Yes |
Description | The entry description | The default is the event description. | No |
Tags | The entry tags | The default is/are the event tag(s). | No |
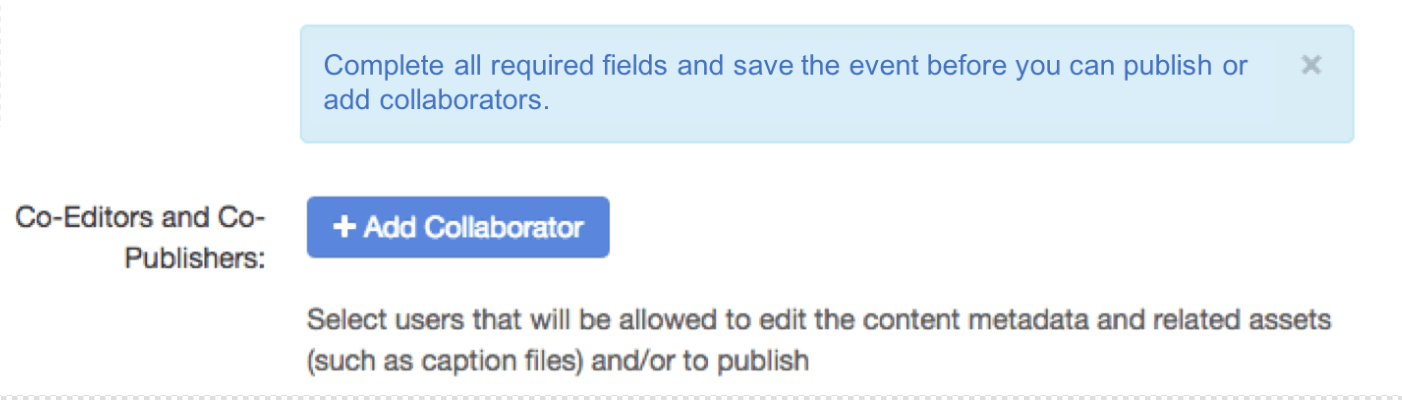
CoEditors and Co-Publishers | Click + Add Collaborator to add collaborrators (co-editors and co-publishers) to the resulting recording. | Configure the user/s who will be granted collaboration permissions. This button only appears if the MediaCollaboration module is enabled. The collaboration window is displayed to add collaborators. | No |
A table showing current collaborators of the entry. | This table only appears if the MediaCollaboration module is enabled and if a collaborator was added. Only event organizers may add collaborators. | No | |
Private/ Published/ Unlisted (not for KAF instances) | Allows users to define where the entry will be published. | The default is Private. Media will be visible to the content owner only. Published - media will be visible to individuals according to entitlements on published destinations. If selected, choose the Categories and Channels where you want to publish the media to. Unlisted - media will be visible to anyone with a link to the page. Note: Entries may be published to additional root categories that were configured by the KMS/KAF admin. | No |
To modify the metadata
- If you want to change the metadata for the recording, uncheck the box and enter different details. Click Save to save the details on the Create/Edit Event page.
- Click Save and Exit to save the changes and return back to the calendar view to see that the event has been added or updated.
- Click Cancel to return back to the calendar view.
KMS Sample Screen
The following is a sample screen illustrating the metadata fields for an event created through a KMS instance.

KAF Sample Screen
The following is a sample screen illustrating the metadata fields for an event created through a KAF instance.

Adding Collaborators
Media owners/event organizers can change the media ownership and add co-editors and co-publishers to their media.
Co-editors can edit the entry's details and metadata, Co-editors cannot delete media or add new co-editors and co-publishers. Co-editors can see analytics page for the media they co-edit.
Co-Publishers can publish media to their entitled Categories or Channels.
The MediaCollaboration module must be enabled by your KMS/KAF administrator for this option to display. Group support may be enabled for the Media Collaboration’s features. When enabled, you can select groups that may be assigned as co-editors/publishers for an entry.
- Click Add Collaborator.
The Add Collaborator Page is displayed.|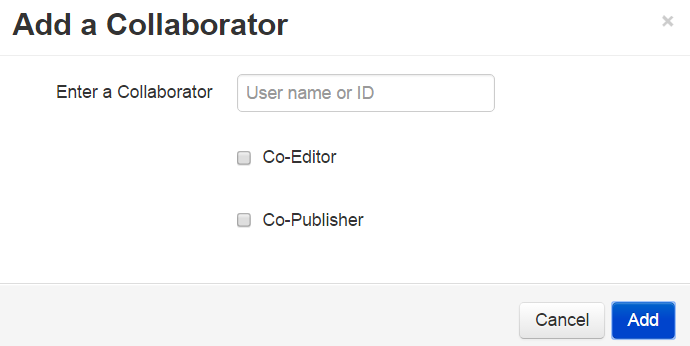
- Enter the collaborator’s user name or ID .
Only users that are available on your KMS/KAF instance may be added. You can use the auto-complete function (from 3rd letter and on). - Check the type(s) of permissions for the collaborator you are adding to the media entry,
- Click Add.
The User and their privilege is listed on the Collaboration Table.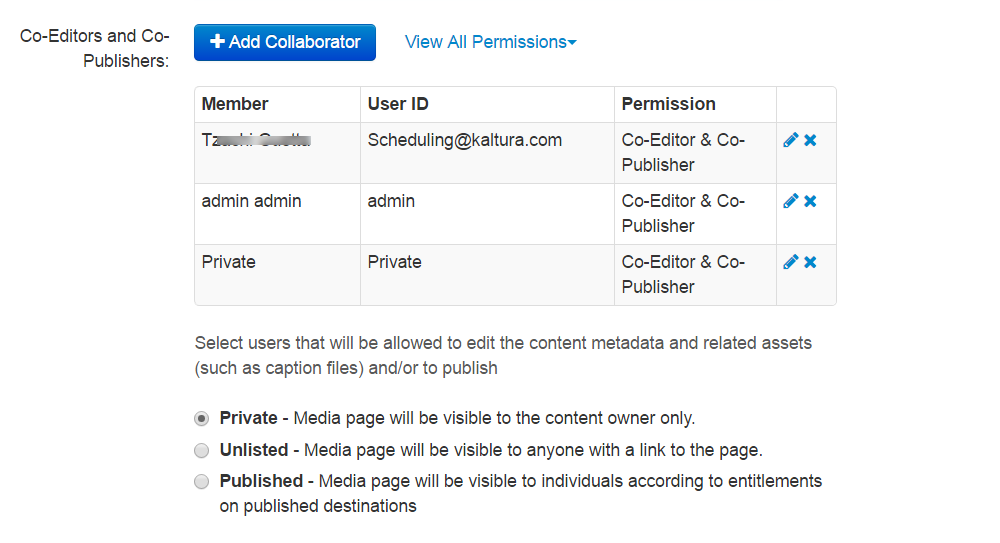
- To view the collaborators’ permissions click View all Permissions and select the type of collaborator.
- Use the editing options/icons in the Actions column to edit/delete the collaboration settings.


