About
This article explains how to upgrade an existing Kaltura LMS Extensions integration in Blackboard Ultra from LTI 1.1 to LTI 1.3 using Blackboard’s migration tool. It is intended for Kaltura and Blackboard administrators.
The upgrade migrates the following Kaltura tools to LTI 1.3:
- My Media
- Media Gallery
- Browse Search and Embed
- Interactive Video Quiz
Existing content embedded through the LTI 1.1 Kaltura Browse Search and Embed tool can continue to launch after the upgrade, provided you use the same KAF Configuration Management instance and it is running version 5.108.10x or later.
This procedure migrates only LTI 1.1 tools, placements, and embeds. It does not migrate content embedded using the legacy Kaltura Video Building Block for Blackboard Learn.
- This article applies to institutions currently using a Kaltura LMS Extensions LTI 1.1 integration in Blackboard Ultra. For a new deployment, see Set up the Kaltura LMS Extensions LTI 1.3 integration in Blackboard Ultra.
- Blackboard’s migration tool requires the Kaltura domain registered for LTI 1.3 to match the provider domain used by the existing LTI 1.1 tool provider. If you are creating a new KAF Configuration Management instance or changing the domain, for example, by introducing an alias or vanity URL, perform a new LTI 1.3 installation instead.
Prerequisites
Make sure you have administrator access to:
- The Blackboard Developer Portal
- Blackboard Ultra (SaaS)
- The Kaltura Management Console (KMC)
- A KAF Configuration Management instance of type Bbultra, running version 5.108.10x or later
Make sure the following modules are enabled in the KAF Configuration Management console:
Step 1 - Confirm the KAF type
This upgrade procedure requires a KAF Configuration Management instance of type Bbultra.
- Sign in to the Configuration Management console at
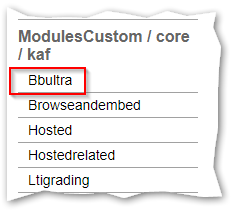
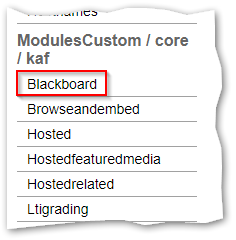
https://{your_KAF_URL}/admin. - In the left panel, scroll down to the ModulesCustom / core / kaf section.
- Check the first module in the section:
- If the first module is Bbultra, continue with the upgrade.
- If the first module is Blackboard, stop and contact your Kaltura representative before proceeding.
Step 2 - Back up the configuration
- Sign in to the Configuration Management console at
https://{your_KAF_base_URL}/admin. - Under Server Tools, click Backup Configuration.
- On the Backup Configuration page, click Save Backup.
- In the confirmation window, click Yes, and then click Save.
- Click OK.


After the backup is complete, the message Configuration file was saved successfully displays.
The Last configuration save date on the backup page indicates when the configuration settings were last modified, not when the backup was created.
Step 3 - Register the application in the Blackboard Developer Portal
Register the Kaltura application in the Blackboard Developer Portal. The registration provides the application information and URLs required for the LTI 1.3 integration.
You need a separate registration for each KAF integration that uses LTI 1.3.
You must have a Blackboard Developer Portal account and a production group to which you can assign the application. For more information, see Production groups in the Blackboard documentation.
- Sign in to the Blackboard Developer Portal.
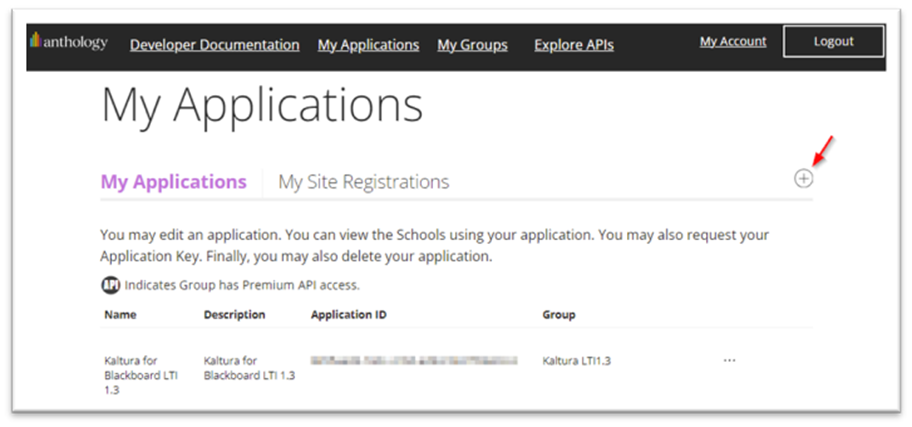
- On the My Applications page, click + to create an application.
- On the Register a New Application page, configure the following settings:
- Application Name - Enter a name that uniquely identifies the KAF integration.
- Description - Enter a description of the application.
- Domain(s) - Enter your KAF domain, for example,
bb-lti13-2964661-test1.kaf.kaltura.com. Do not includehttps://or a trailing slash. - Group - Select the production group to which you want to assign the application.
To use Blackboard’s migration tool, the value entered in Domain(s) must match the Provider Domain used by the existing LTI 1.1 Kaltura tool provider.
- Enable My Integration supports LTI 1.3.
- Configure the LTI 1.3 settings as follows:
- Login Initiation URL -
https://{your_KAF_URL}/hosted/index/oidc-init - Tool Redirect URL -
https://{your_KAF_URL}/hosted/index/oauth2-launch - Tool JWKS URL -
https://{your_KAF_URL}/hosted/index/lti-advantage-key-set - Signing Algorithm - Select RS256.
- Login Initiation URL -
- Click Register Application.
- Copy the settings and store them securely.
The registered application settings display.
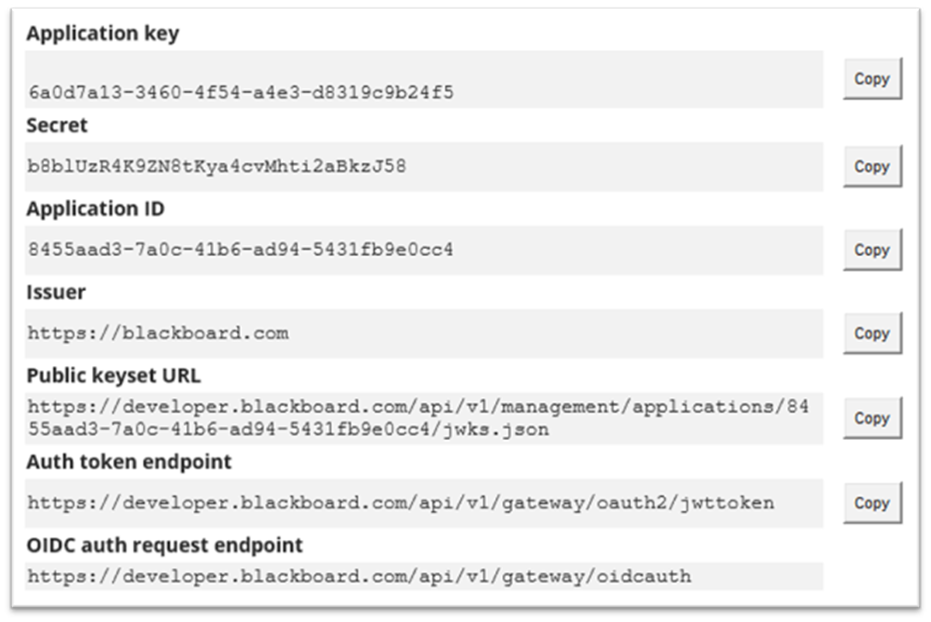
Keep this page open. You will use these settings in the next step.
Step 4 - Enable LTI 1.3 in the Configuration Management console
Configure the KAF Configuration Management instance to support LTI 1.3 and connect to Blackboard.
- Sign in to the Configuration Management console at
https://{your_KAF_URL}/admin. - Open the Hosted module.
- Set
authMethodto lti1.3. - Complete the following fields using the application settings from Step 3:
lti13PlatformOidcAuthUrl- Enter the OIDC auth request endpoint.lti13AuthTokenUrl- Enter the Auth token endpoint.lti13KeysUrl- Enter the Public keyset URL.lti13ClientId- Enter the Application ID.
- For
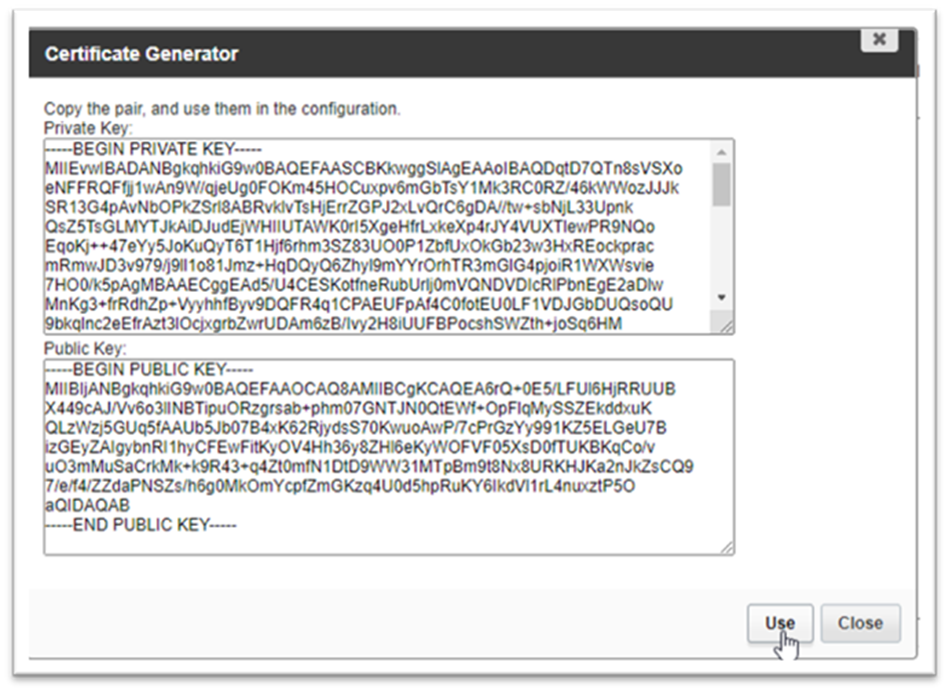
lti13ServicePrivateKey, click generate key pair here. - In the Certificate Generator, click Use.
- In the
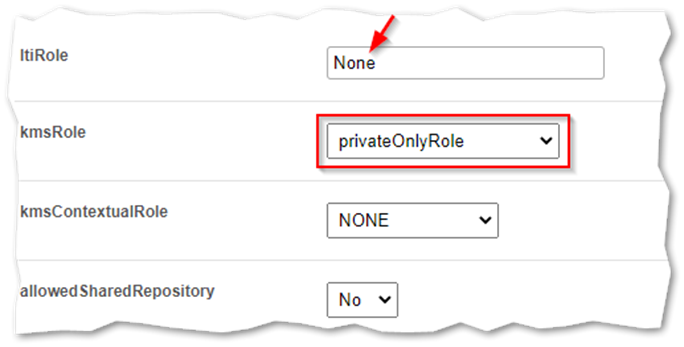
ltiRolesMappingsection, locateltiRole = None. - Set
kmsRoleto privateOnlyRole. - Scroll to the bottom of the Hosted module and click Save.
The LTI 1.3 configuration fields display.

The keys are saved in the lti13ServicePrivateKey and lti13ServicePublicKey fields.
Step 5 - Add the LTI 1.3 tool provider in Blackboard
Add the LTI 1.3 tool provider and use Blackboard’s migration tool to migrate the existing Kaltura LTI 1.1 tools.
- Sign in to Blackboard as an account administrator.
- Navigate to Administrator Tools > Integrations > LTI Tool Providers.
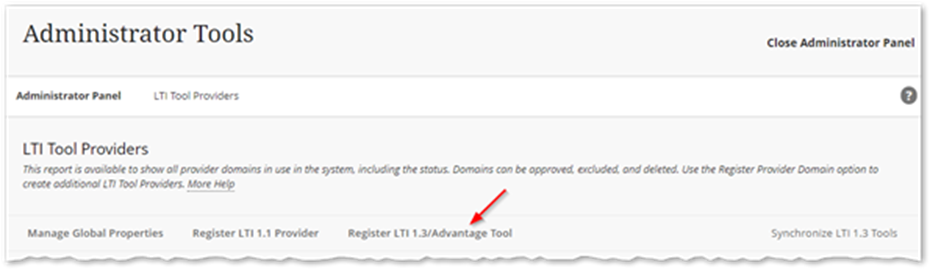
- On the LTI Tool Providers page, click Register LTI 1.3/Advantage Tool.
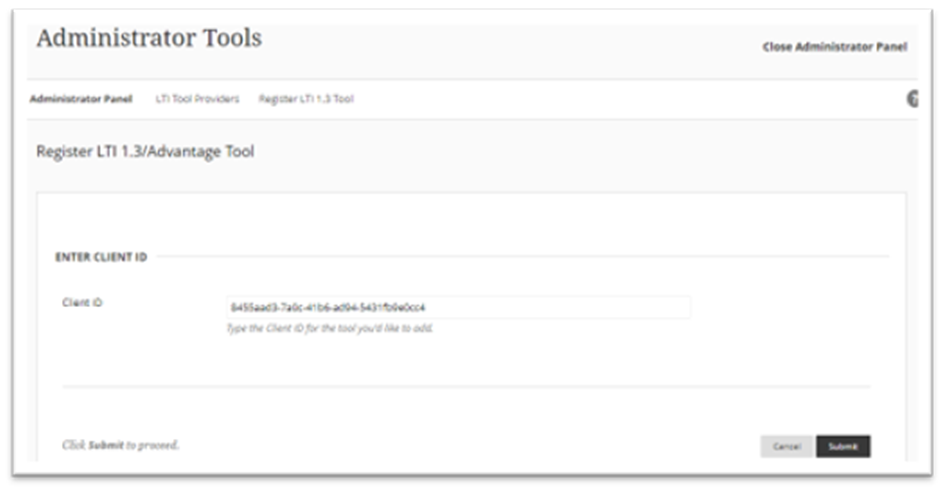
- In the Client ID field, enter the application ID copied in Step 3. This value must match the value entered in
lti13ClientIdin Step 4. - Click Submit.
- Click OK.
- Review and configure the following settings:
- Client ID - Confirm the application ID for the registered application.
- Name - Enter the application name.
- Description - Enter the application description.
- Deployment ID - Confirm the deployment ID for the LTI 1.3 tool.
- Initiate Login URL - Confirm the login initiation URL.
- Tool Redirect - Confirm the tool redirect URL.
- Domains - Enter your KAF domain without
https://or a trailing slash. - Tool Status - Select Approved.
- Tool Provider Custom Parameters - Add the following parameters:
lis_user_username=@X@user.id@X@lis_course_id=@X@course.id@X@
- User Fields to Send - Select:
- Role in Course
- Name
- Email Address
- Allow grade service access - Select Yes.
- Allow Membership Service Access - Select Yes.
- Click Submit.
A confirmation window displays.
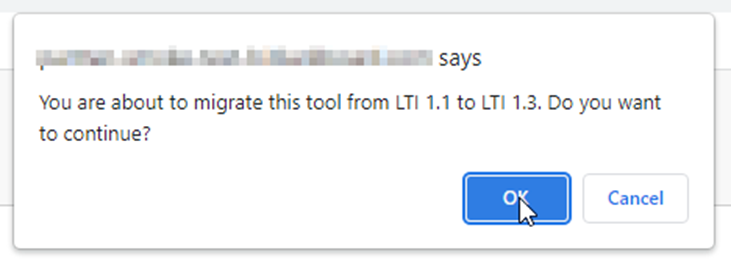
The Tool Status page displays the settings from the existing LTI 1.1 Kaltura tool provider.
A success message displays. The LTI 1.1 tool provider and its Kaltura tool placements are migrated to LTI 1.3.
Step 6 - Confirm the Kaltura tool placements
Confirm the configuration of each Kaltura tool placement you use:
- My Media
- Media Gallery
- Browse Search and Embed
- Interactive Video Quiz
Each placement is independent. You can use any combination of the available placements.
- Sign in to Blackboard as an account administrator.
- Navigate to Administrator Tools > Integrations > LTI Tool Providers.
- On the LTI Tool Providers page, locate the tool provider migrated to LTI 1.3.
- Open the tool provider’s options menu, and then click Manage Placements.
- Open the options menu for the placement you want to review, and then select the edit option.
- Review the applicable placement settings described below.
My Media placement
- Label - Enter the name displayed to users, for example, My Media.
- Description - Enter a description of the tool.
- Handle - Enter the internal ID, for example,
KalturaMyMedia. - Availability - Select Yes to make the tool available.
- Type - Select System Tool.
- Save the Kaltura icon to your computer.
- Click Browse and select the saved icon.
- For Target Link URI, add
/bbultra/index/launch/target/my-mediato your KAF URL. - Click Submit to save your changes, or click Cancel if you did not make any changes.

Example: https://123456.kaf.kaltura.com/bbultra/index/launch/target/my-media
Media Gallery placement
- Label - Enter the name displayed to users, for example, Media Gallery.
- Description - Enter a description of the tool.
- Handle - Enter the internal ID, for example,
KalturaMediaGallery. - Availability - Select Yes to make the tool available.
- Type - Select Course Tool, and then select Allow student access.
- Save the Kaltura icon to your computer.
- Click Browse and select the saved icon.
- For Target Link URI, add
/hosted/index/course-galleryto your KAF URL. - Click Submit to save your changes, or click Cancel if you did not make any changes.

Example: https://123456.kaf.kaltura.com/hosted/index/course-gallery
Browse Search and Embed placement
- Label - Enter the name displayed to users, for example, Kaltura Embed Media.
- Description - Enter a description of the tool.
- Handle - Enter the internal ID, for example,
KalturaBSE. - Availability - Select Yes to make the tool available.
- Type - Select Deep Linking content tool, and then select Allow student access.
- Save the Kaltura icon to your computer.
- Click Browse and select the saved icon.
- For Target Link URI, add
/browseandembed/index/browseandembedto your KAF URL. - Click Submit to save your changes, or click Cancel if you did not make any changes.

Example: https://123456.kaf.kaltura.com/browseandembed/index/browseandembed
Interactive Video Quiz placement
- Label - Enter the name displayed to users, for example, Kaltura Video Quiz.
- Description - Enter a description of the tool.
- Handle - Enter the internal ID, for example,
KalturaVideoQuiz. - Availability - Select Yes to make the tool available.
- Type - Select Deep Linking content tool, and then select Allow student access.
- Save the Kaltura icon to your computer.
- Click Browse and select the saved icon.
- For Target Link URI, add
/browseandembed/index/browseandembed?type=quizto your KAF URL. - Click Submit to save your changes, or click Cancel if you did not make any changes.

Example: https://123456.kaf.kaltura.com/browseandembed/index/browseandembed?type=quiz
Step 7 - Confirm the REST API integration
The REST API integration allows users to publish content from My Media to Media Galleries and import content from one Media Gallery to another.
For instructions on implementing the REST API integration with a user account that has a custom system role, see Set up the Kaltura LMS Extensions LTI 1.3 integration in Blackboard Ultra.
- Sign in to Blackboard as an account administrator.
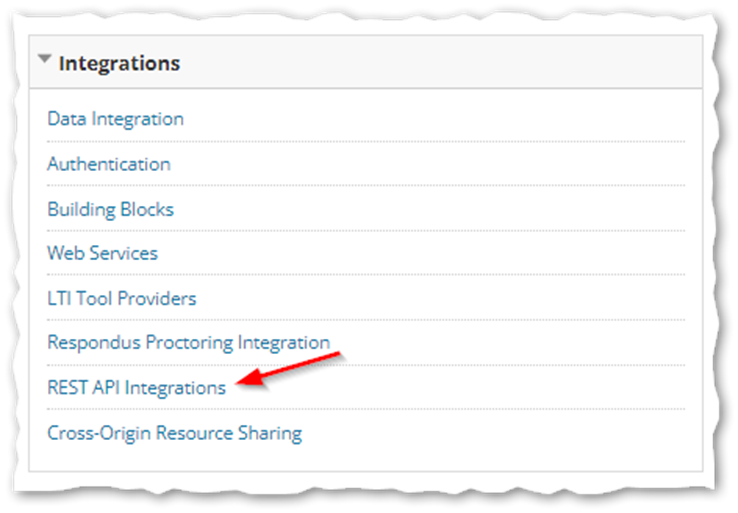
- Navigate to Administrator Tools > Integrations > REST API Integrations.
- Locate the Kaltura for Blackboard integration.
- Open the integration’s options menu, and then select the edit option.
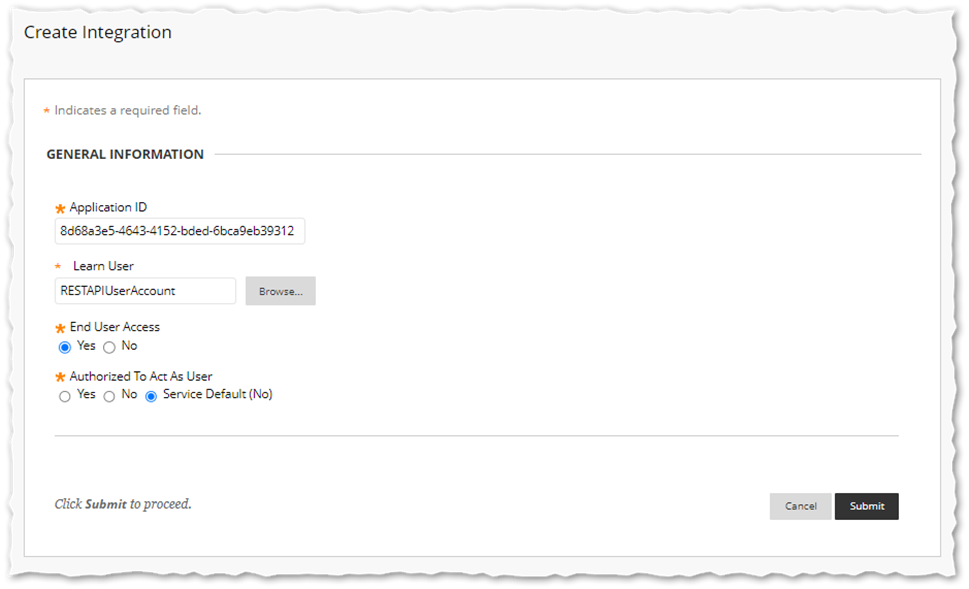
- Confirm the following settings:
- Application ID - Enter
8d68a3e5-4643-4152-bded-6bca9eb39312. - Learn User - Select the Blackboard user assigned to the integration.
- End User Access - Select Yes.
- Authorize To Act As User - Select Service Default (No).
- Application ID - Enter
- Click Submit to save your changes, or click Cancel if you did not make any changes.
Step 8 - Configure the Kaltura user ID
By default, the Kaltura user ID is based on the Blackboard user ID.
During an LTI launch, Blackboard passes user information to Kaltura. The ltiUserIdAttribute setting in the Hosted module determines which LTI attribute Kaltura uses as the user ID.
For an LTI 1.1 integration, where authMethod is set to lti, the default value of ltiUserIdAttribute is lis_person_sourcedid.
If ltiUserIdAttribute is not currently set to lis_person_sourcedid, stop and review Configure the Kaltura user ID used with an LMS integration before continuing.
For an LTI 1.3 integration, the custom parameter added in Step 5 passes the Blackboard user ID to Kaltura. Configure ltiUserIdAttribute as follows to preserve the user IDs used by the LTI 1.1 integration:
- Sign in to the Configuration Management console at
https://{your_KAF_base_URL}/admin. - Open the Hosted module at
https://{your_KAF_base_URL}/admin/config/tab/hosted. - Locate
ltiUserIdAttribute. - Set
ltiUserIdAttributetocustom_lis_user_username. - Scroll to the bottom of the module and click Save.
