About
Translations convert the spoken language in a video into another language and appear as subtitles. Viewers can read the translated subtitles in their preferred language while the original audio remains unchanged.
You can also create rules to automatically request captions, OCR, chaptering, or dubbing for new entries that meet specific criteria. For more information, see Create captioning & enrichment rules in Rich Media CMS.
If Content Lab is enabled on your account, you can also order translations using the Captions & translations workflow. This article describes the legacy REACH workflow. For the Content Lab workflow, see Order VOD translations in Rich Media CMS with Content Lab.
How translations work
VOD translations require a captions file with approximately 99% accuracy. To meet this requirement, first order professional captions for the media. After the captions are complete, submit a translation request using those captions as the source.
If you already have a captions file with approximately 99% accuracy, you can skip the first step and upload your captions file when ordering translations.
Media must be at least 10 seconds long for translation processing.
Step 1: Order professional captions
Single video
- Log into your Rich Media CMS. The Entries page displays by default.
- Locate the desired entry, click the three dots, and select Captions & Enrich (legacy).

Multiple videos
- Click the boxes next to the desired videos. The More Actions menu at the top of the page is activated.
- Select Captions & Enrich.
- Complete the following fields:

The Captions & Enrich page displays.
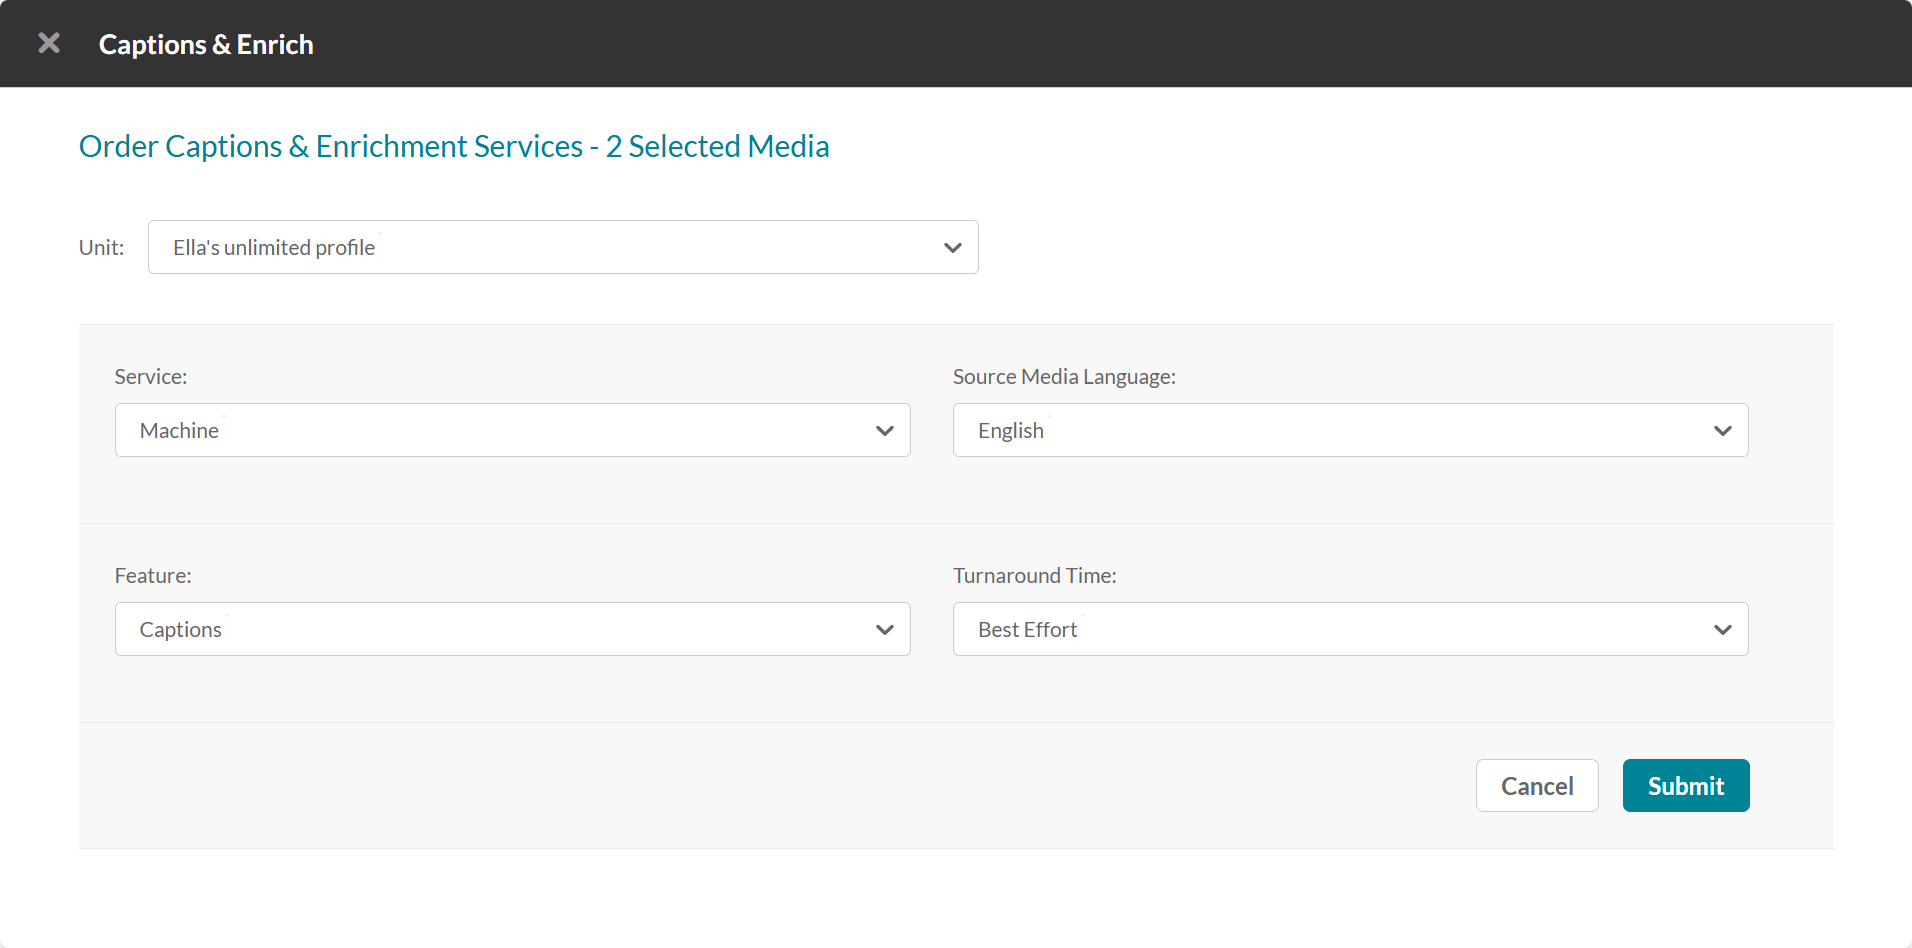
- Unit – This option only appears if different REACH profiles (budgets) are configured for units in your account. The selected unit is charged for the request.
- Service - Select Professional.
- Source Media Language - Select the language spoken in the media. Available languages depend on your REACH plan.
- Feature - Select Captions.
- Turnaround time - Select a turnaround option. Available options depend on your REACH plan.
4. Click Submit.
A confirmation message displays.
When the captions are ready, they are automatically added to the video.
You can set up an automatic email notification to be alerted when the captions are ready. This is configured by your administrator in the Reach module's notifiedUsers field.
Step 2: Request translations
1. Once the professional captions are ready, complete the following fields:
- Service - Select Machine.
- Source Media Language - Select the language spoken in the media. Available languages depend on your REACH plan.
- Feature - Select Translation.
- Target Translation Language - Select the language to translate the captions into. Available languages depend on your REACH plan.

2. Click Submit.
When the translations are ready, they are automatically added to the media.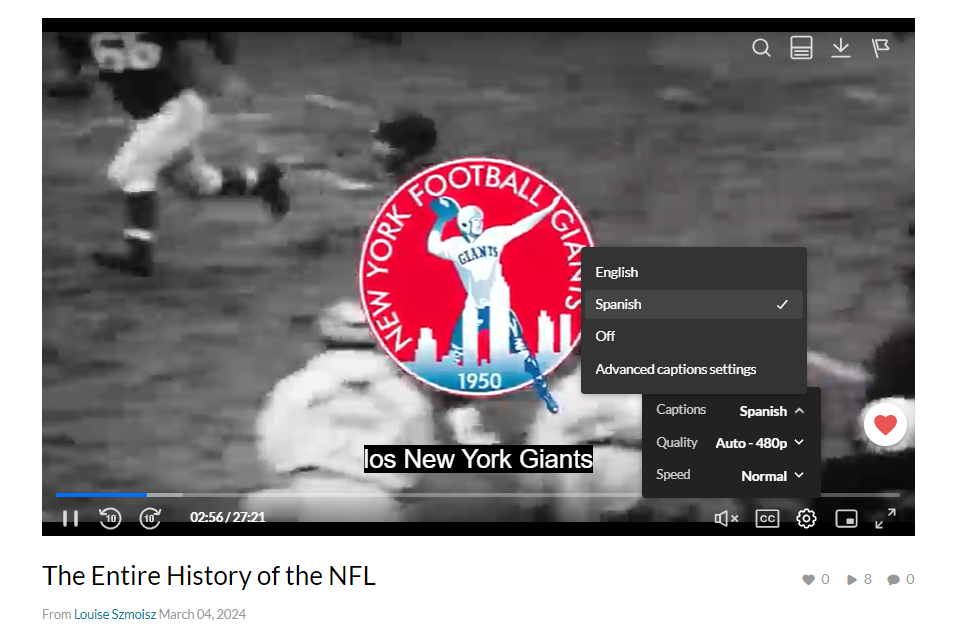
If you already have a captions file
If you already have a captions file with approximately 99% accuracy, you can skip Step 1 and upload it when ordering translations.
After completing the translation request fields, click Upload captions file.
1. Click Upload Captions File.
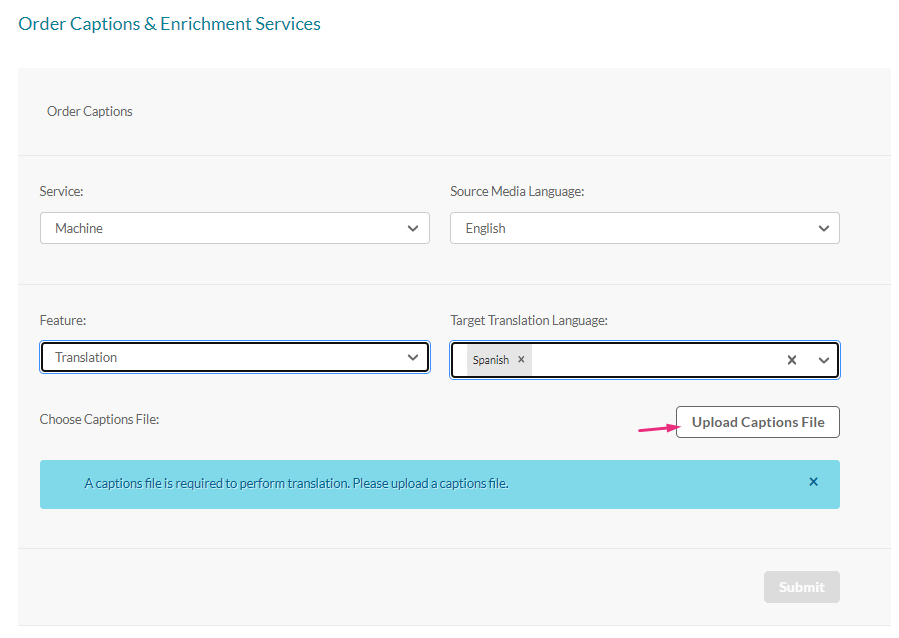
The Upload Captions File window displays.
2. Click Browse.
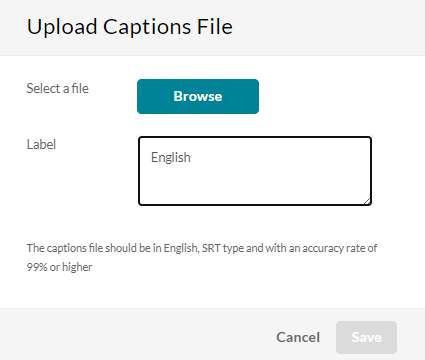
3. Select an SRT, DFXP, or XML file from your computer.
The file uploads automatically.
The system can't verify the accuracy of the uploaded file and assumes it meets the 99% accuracy requirement. If the file is less accurate, the upload succeeds, but the translated captions won't appear in the player.
4.(Optional) In the Label field, enter a label for the source language. This label displays in the player's captions menu.
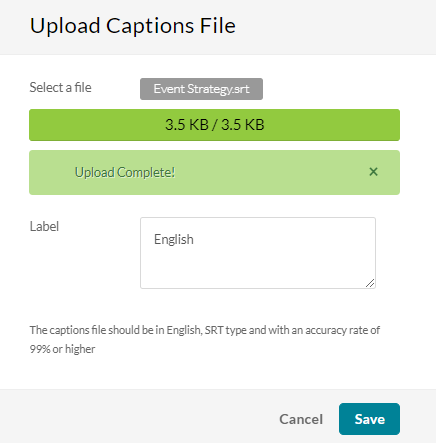
5. Click Save.
A confirmation message displays indicating that the captions file was uploaded successfully.
6. Click Submit.
The Submit button is available only after the captions file has finished uploading.
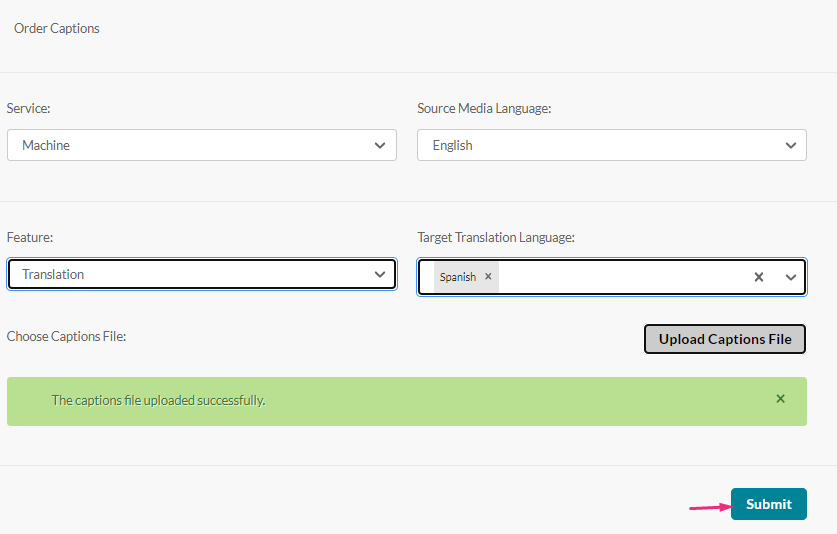
A confirmation message displays.
When the translations are ready, they are automatically added to the video.
- To learn more about how captions display in the Kaltura player, see Captions and audio tracks, and Accessibility.
- You can resubmit REACH orders in certain cases, such as after updating media content or changing profile settings. For more information, see Resubmissions for REACH services.
