About
Kaltura Lecture Capture is a powerful yet easy-to-use solution for recording lectures and presentations in classrooms, lecture halls, and other educational spaces. Designed for simplicity, the application lets users start recording with a single click, offering seamless integration with existing hardware and systems. With support for Full HD (1080p) recording and intuitive tools, it makes capturing high-quality content accessible to institutions of all sizes.
The Delcom USB busy light enhances the experience by delivering clear, visible status updates and intuitive controls, allowing students and lecturers to easily monitor and manage recording activity.
Launch the application
- Click on the Kaltura Classroom Application icon on your Desktop.

The Lecture Capture homepage displays.
Using the Delcom USB busy light
- Plug the Delcom USB light into your computer.
- Confirm that the light reflects the correct status:
- Red for active recording.
- Yellow for paused recording.
- Gray no recording taking place
- Press the switch to toggle between pause and resume during a recording session.
Lecture Capture homepage
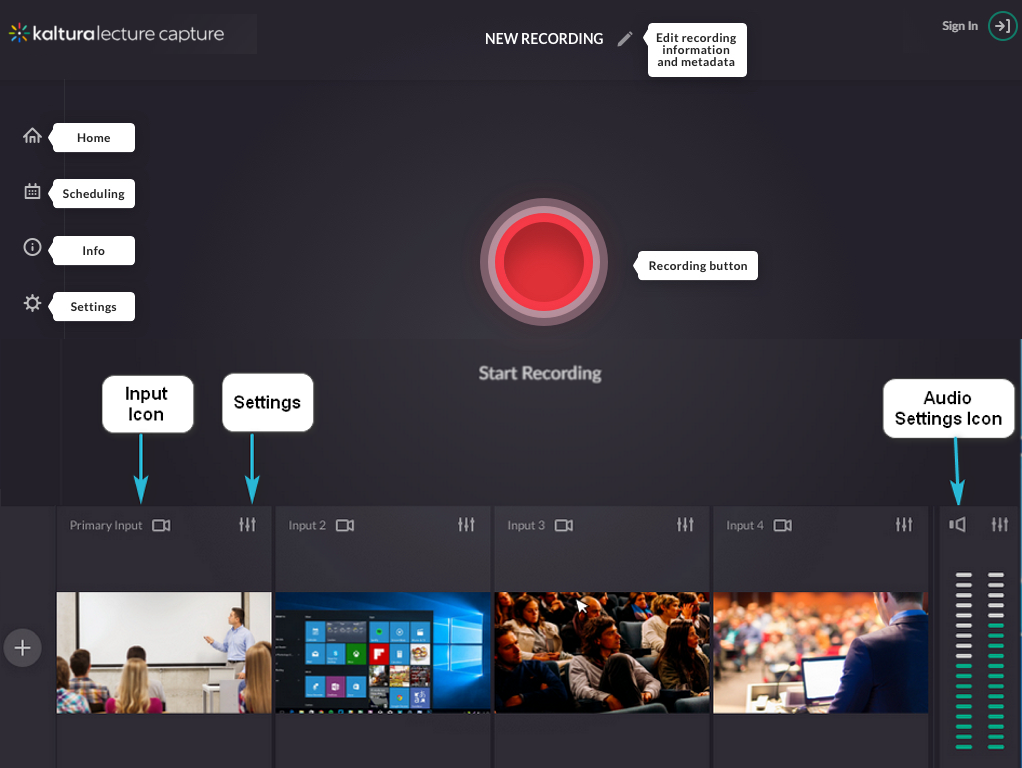
The application includes the following:
- Home tab – Opens the homepage.
- Scheduling tab – Opens the agenda for scheduled events.
- Info tab – Lists the Kaltura Classroom Application information and version.
- Settings tab – Displays the Client Name selected for the recording. You can save your default configuration and upload application logs in the Settings tab. For additional information see Setting the Resource Name for a Specific Install.
- Plus sign - use to add and configure additional input.
- Pencil icon – Use to Edit Recording Information.
- Recording button – Press to record.
- Configuration Settings.
- Sign in - Use to authenticate. (This feature is configured by your system administrator and is optional.)

That’s it. You can start recording.
Exit the application
If the Kaltura Classroom Application is not running in the background, scheduled recordings will not initiate.
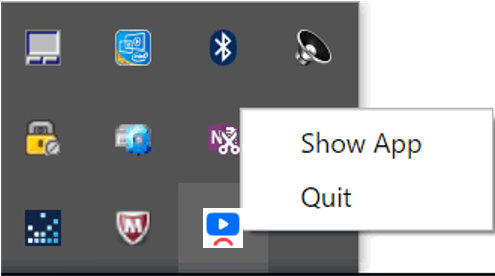
- In your taskbar and navigation Properties box, right-click on the Lecture Capture icon.
- Select Quit to exit the application.

Hide or show the application
- Right-click on the Lecture Capture icon and select Show or Hide.
Hiding the application does not exit the application.


