Input Settings for Recordings
There are multiple options and choices for selecting recording inputs. The number of input settings you may be able to use is determined by your system administrator and is limited to four devices. You may configure up to four devices, screen or camera, as inputs. In the Kaltura Lecture Capture Home Page, the default selection is a camera as the Primary Video and the screen as the Secondary Video. You can use the settings to configure the quality of recording, or choose a different recording input. You can either remove inputs completely or disable them for a specific recording by clicking on the input icon.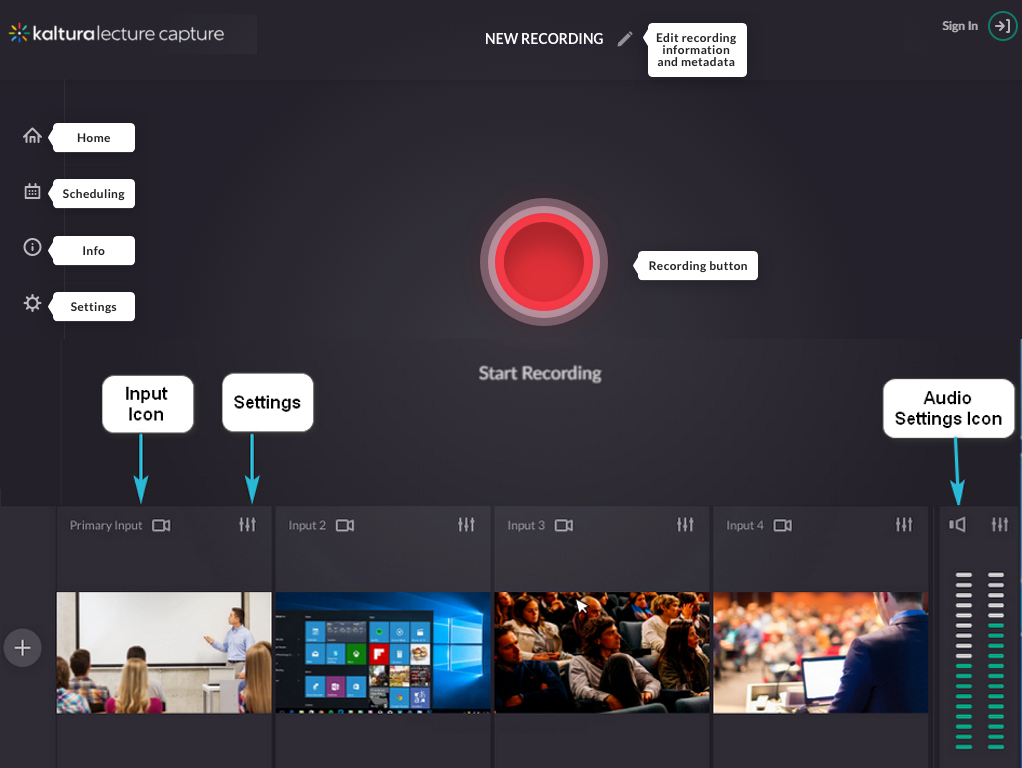
All input settings are saved for future recordings.
By default, all inputs are configured to the highest quality available, so you can just start recording. If you would like to change any of the settings for the camera, screen or audio, please use the following information to modify the configuration settings.
Input Settings for Live Broadcasting
The live broadcast will include the streaming of the primary input along with a slide stream if one is available. Even if Kaltura Classroom is recording multiple streams, only the primary stream will be broadcast.
Configuring Your Camera Settings
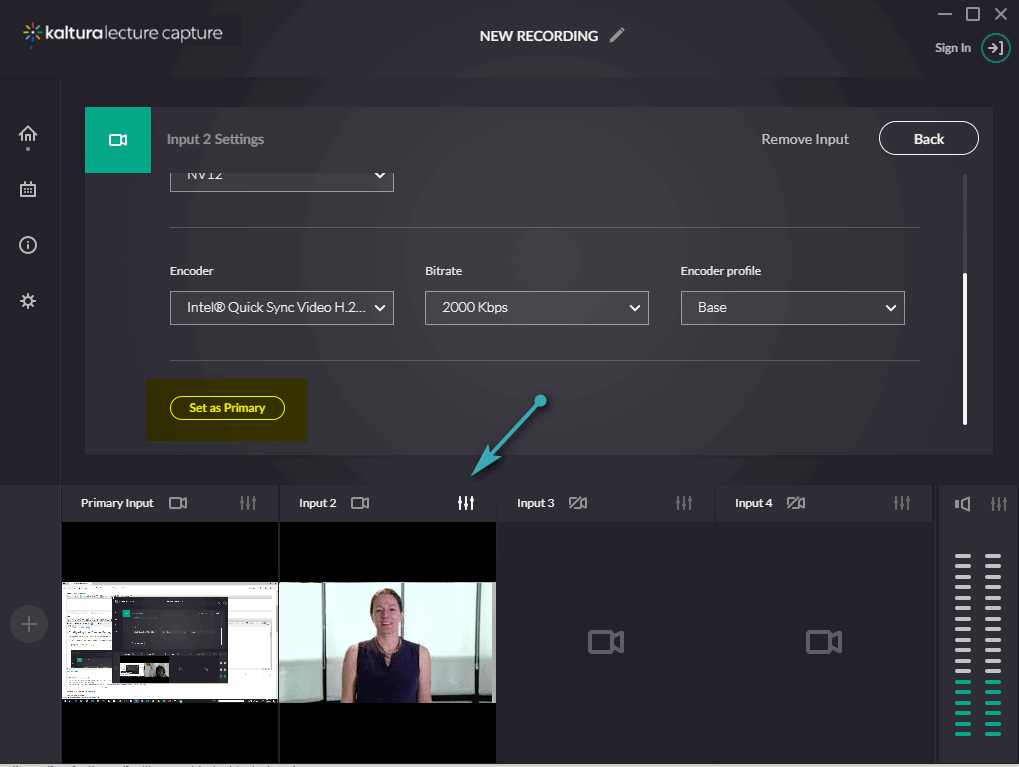
Camera settings are set to the highest quality available by default, so you can just start recording. If you would like to change the camera input or other camera settings perform the following steps:
- Click on the Settings icon.
- Scroll down and select Set as Primary.

- Select the Input source (camera) you are going to record from, from the drop-down menu. If there is more than one camera connected to your PC, select the Input source you want to record from.
- The optimal camera settings are defined for you automatically, however, you can change the following settings:
- a. Resolution: Recording of the highest quality is produced when the resolution is maximal. Selecting a lower resolution reduces the recording quality and the size of the resulting file.
b. FPS (Frames per Second). We recommend using 30 frames per second. Using less frames might result in blurring of fast movements.
c. Color Space – Represents the image in colors.
d. Encoder – Select the encoder from the dropdown menu.
e. Bitrate – Select the bitrate.
f. Encoder Profile - Select High, Main or Baseline - You can preview all changes in the Preview Window. After completing your Camera Settings, click Back to go back to the main recording window.

The camera settings cannot be altered in the middle of the recording. It is important to make sure all your settings are complete before you start recording.
Configuring Your Screen Settings
Screen settings are set to the highest quality available by default, so you can just start recording. If you would like to change the screen or other screen settings, perform the following steps:
- If you want the screen to be the primary input, click on the Settings icon.
- Scroll down and select Set as Primary.
- Select the screen you are going to record from the Input Source drop-down menu. If there is more than one screen connected to your PC, select the screen you would like to record. If you are recording from multiple screens, you can click on Identify to indicate which screen is the active screen.
- The optimal screen settings are defined for you automatically however, if you want to change the settings, you can change the following:
- a. Resolution: Recording of the highest quality is produced when the resolution is maximal. Selecting a lower resolution reduces the recording quality and the size of the resulting file.
b. FPS (Frames per Second). We recommend using 30 frames per second. Using less frames might result in blurring of fast movements.
c. Color Space – Represents the image in colors.
d. Encoder – Select the encoder from the dropdown menu.
e. Bitrate – Select the bitrate.
f. Encoder Profile - Select High, Main or Baseline - After completing your Screen Settings, click Back to go back to the main recording window.

The Screen settings cannot be altered in the middle of the recording.It is important to make sure all your settings are complete before you start recording.
- Click Remove Input.
The input source (camera or screen) will not be able to be used to record media. The device is not deleted and may be used as a source for another input.
Configuring Your Audio Settings
Audio settings are set to the highest quality available by default, so you can just start recording. If you would like to change the audio input or other audio settings, perform the following steps:
- Click on the Audio Settings icon in the Audio section of your screen located at the right of the screen..
- Select the Input source (microphone) and Input type you are going to record from. If there is more than one microphone connected to your PC, select the microphone you want to record.
The optimal sound settings are defined for you automatically, however, if you want to change the settings, you can change the Input Type. - Select On to capture the system audio. Select Off to disable the audio input.
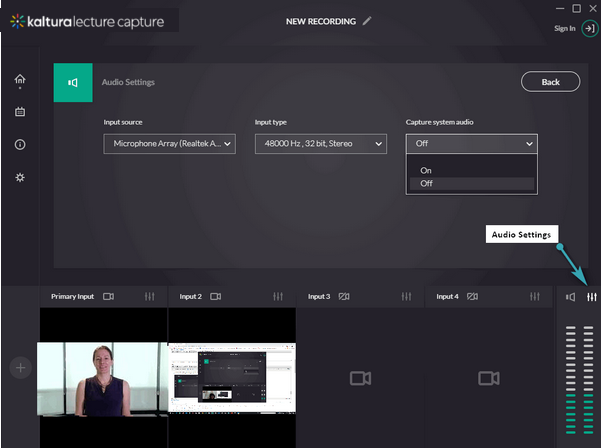
- Click Back to go back to the main recording window.

