Prerequisite Reading
The Kaltura Webcasting Self-serve feature simplifies the work required to setup a Kaltura Webcasting event. Kaltura Self-serve Webcasting removes the needs for expensive equipment (cameras, encoders, switchers, etc) and production teams, making Webcasting available and simple for every employee.
Kaltura Self-serve Webcasting Capabilities
- Allows broadcasting video directly from the Kaltura Webcasting application, using integrated/USB PC/Mac webcams/cameras and microphones (without the need to use an external HW/SW encoder).
- Allows broadcasting audio-only directly from the Kaltura Webcasting application, using integrated/USB PC/Mac microphones (without the need to use an external HW/SW encoder).
- Allows screencasting (instead of webcam), allowing sharing of desktop/application screen to support more use-cases and create even more engaging live experiences.
- Provides the ability for the producer/presenter that is not broadcasting to have a real time preview of the event that is currently broadcasting. For more information, see the article Presenter Real Time Preview.
Kaltura Self-Serve Webcasting Hardware Requirements
| Hardware | Requirement |
| Audio | Must have at least 1 audio-input device (i.e. Microphone) |
| Bandwidth | Upload speed of 200Kbps |
| Hard Drive | At least 1GB free |
| Memory | 2GB Ram |
| OS | Win 7 or higher, Mac OSx |
| Processor | Minimum 2 Cores with 1.6Ghz (32 or 64 bit) |
| Video Camera | Must have some camera (can use built in camera) |
Kaltura Self-serve Webcasting Global Settings
Kaltura Self-serve Webcasting must be enabled by your administrator. See the Kaltura Webcasting Administrator's Guide for configuration information.
The following capabilities are available:
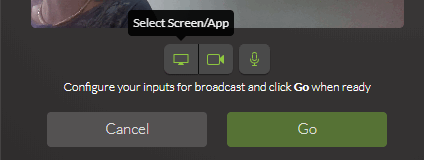
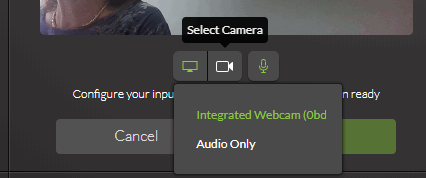
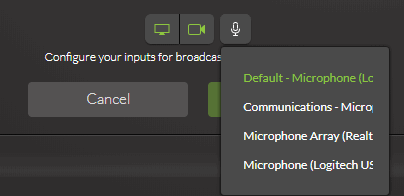
- Configuration tab -a user may select the video source (list of local webcams and screens) and audio source (with Volume Unit meter indication).
Screen Selection
Camera Selection
Audio Selection (microphone) - Real-time preview of the video/audio - Kaltura Self-serve Webcasting typically uses a webcam, with a display of what is being broadcasted, The preview window may be minimized and expanded using the Self-Serve icon.
There are two types of previews:
- Local Preview – allows you to see the output from the camera locally on your computer
- Kaltura Broadcasting Preview – shows you the preview after it’s been tunneled through the Kaltura platform giving you the real output. For this to work properly, the live entry must have an Access Control Profile configured to allow traffic to the Kaltura.com domain.
- Allows screencast (sharing your screen) - when enabling this option, a user may choose what they want to share - you can share your entire desktop or a specific application (e.g. browser/powerpoint/etc)
- When the screencast is on, the webcam is automatically off (both cannot be streamed simultaneously) and the layout is automatically changed to focus on the screen only.
Workflow
Administrators/Producers
- Enable and configure the Kwebcast Module. See the Kaltura Webcasting Administrator's Guide.
- Enable and Configure Kaltura Webcasting Self-serve.
- Create a Webcasting Event.
- Edit the Webcasting Event.
- Install/Launch the Kaltura Webcasting Application.
- Manage Slide Broadcast.
- Setup for Broadcast.


