About
Interactive Video Paths let you create branching video experiences where viewers choose how they move through the content. Instead of following a single video from beginning to end, viewers can select different options that take them to other videos or content.
This guide introduces the main parts of an interactive video path and explains how they work together.
How interactive video paths work
An interactive video path is made up of individual videos called nodes. You arrange these nodes on a visual node map and connect them to create different paths through your content.
During playback, viewers interact with hotspots that can take them from one node to another. Hotspots can also open a web page or perform other configured actions.
For example, you could start with an introductory video that gives viewers three choices. Each choice can lead to a different video, and those videos can offer additional choices or return viewers to an earlier point.

Understand the main components
Interactive Video Paths use three main components:
- Nodes - Individual videos in the interactive experience. Nodes appear on the node map and can be arranged to represent the structure of your experience.
- Paths - Connections between nodes. Paths determine which nodes viewers can move between.
- Hotspots - Clickable areas that appear during a video. Hotspots can take viewers to another node, open a web page, or trigger another configured action.
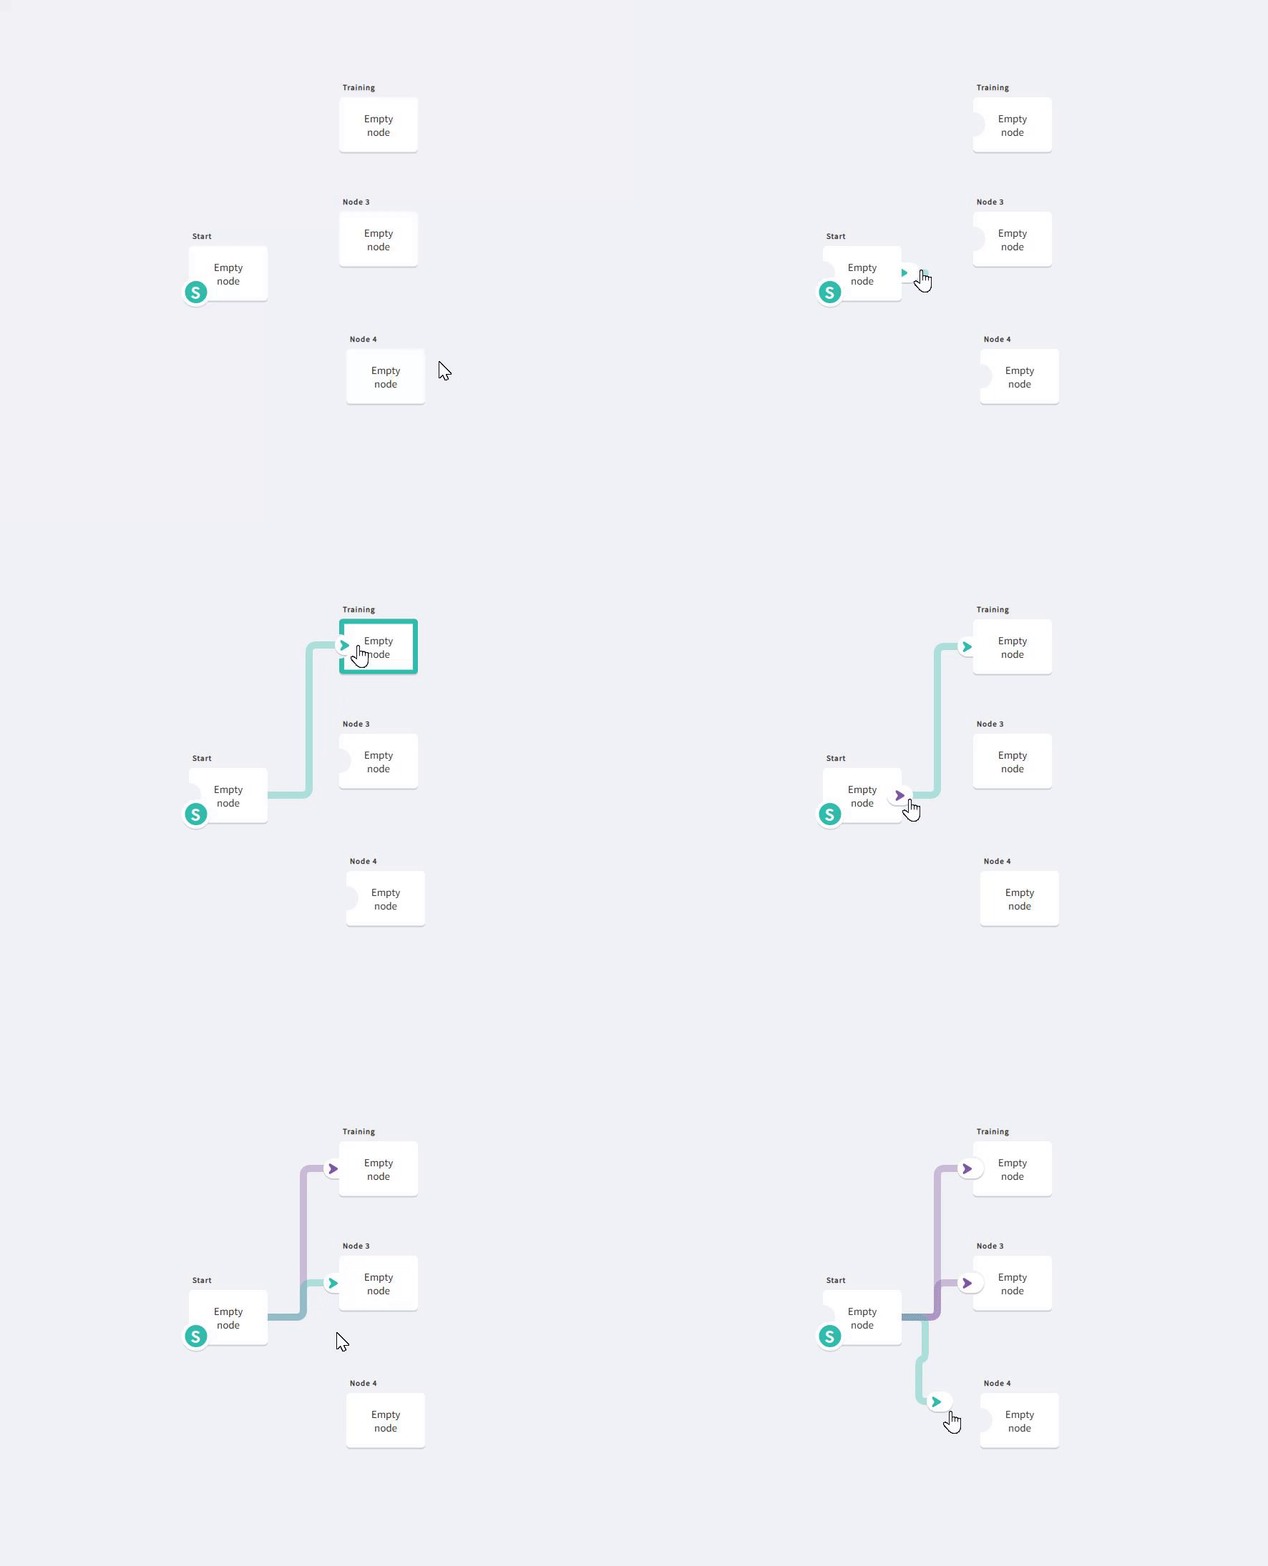
When you connect nodes, hotspots are automatically created for those connections. You can then position, style, and time the hotspots in the node editor.
Create an interactive video path
You build an interactive video path in the video composer.
The basic workflow is:
- Select Interactive Video from the +Create menu.
- Enter a name and optional description.
- Add the videos you want to use.
- Add and arrange nodes on the node map.
- Connect the nodes to create paths.
- Assign videos to the nodes.
- Add and customize hotspots.
- Preview the experience using Click-through mode.
For detailed instructions, see Create an interactive video in Content Hubs.
Preview the viewer experience
Use Click-through mode in the video composer to experience the interactive video as a viewer.
In this mode, you can play the videos and select the hotspots you've created to move through the different paths. Editing is disabled while Click-through mode is on.
Previewing your project can help you identify paths that don't lead where expected or places where viewers might need a clearer way to navigate.
Edit an interactive video path
After creating an interactive video, you can reopen it from My Media and continue working in the video composer.
You can:
- Add or remove media.
- Add, rename, or remove nodes.
- Change the connections between nodes.
- Add or edit hotspots.
- Preview the experience using Click-through mode.
For instructions, see Edit an interactive video in Content Hubs.
Publish your interactive video
Interactive videos are available from My Media and can be published like other media.
Viewers must have permission to view the media included in the interactive video.
For instructions, see Publish media.
View analytics
Interactive video analytics can help you understand how viewers move through your experience.
You can track overall viewing activity as well as performance for individual video nodes and hotspots. This can help you see which paths viewers take and how they interact with the choices you've provided.
For more information, see the Interactive Video Paths analytics article.
Where to go next
Once you're familiar with how Interactive Video Paths work, use these articles to continue:
- Create an interactive video in Content Hubs - Build your interactive video and connect its nodes.
- Add hotspots to interactive videos - Add, position, style, and configure interactive hotspots.
- Plan and design an interactive video path - Learn best practices for planning your structure and creating a smooth viewer experience.
- Edit an interactive video in Content Hubs - Reopen an existing interactive video and continue editing it.
- Interactive Video Paths analytics - Review viewer activity and interaction with your video paths.
