About
The Browse, Search, and Embed (BSE) tool lets you search My Media, Media Gallery, Shared Repository, and playlists, then embed media directly in rich-text areas like Assignments, Forums, and course pages in Canvas.
While BSE-embedded content is viewable in the Canvas mobile app, the BSE (Browse and Embed) tool itself might not be supported the same way as other LTI tools. We recommend opening Canvas in a web browser on desktop or mobile to use BSE.
This feature requires the following to be enabled:
- Browseandembed module
- Theming module with the 'browseandembed' feature set to 'Yes
Access Kaltura media
- Navigate to the area where you want to embed media, such as Announcements, Discussions, or Assignments.
- Click the button to create a new post. The rich-text editor opens.
- Enter your text and then click the Embed Kaltura Media icon.

The Kaltura media window opens.
About the Kaltura media window
Your window may look different depending on how many columns your admin has configured.
Available columns include ID, Type, Tags, Plays, Views, Created At, and Updated At. The columns are configured in the Browseandembed module.

On smaller screens, the Upload, Express Capture and YouTube tools are grouped under the +Create button.
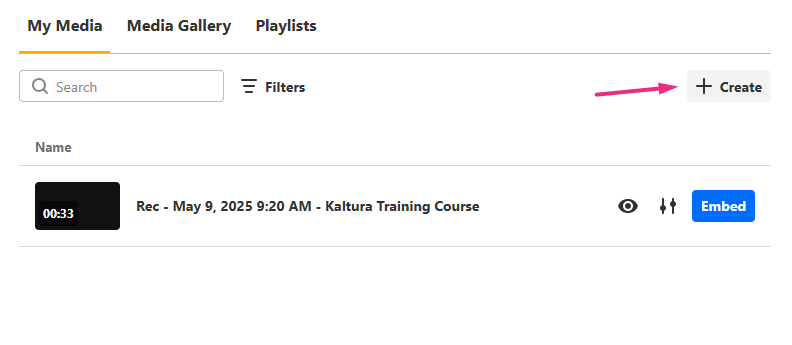 Smaller embed windows show the +Create button
If you're new to Theming, you might notice that the + Create menu has fewer options than the non-Theming version (Add New menu) - this is by design. Theming keeps things quick and simple for uploading or capturing content and embedding it right away!
Browse, search and embed media
Browse and search
In the embed window, you can browse and search existing media across different repositories. You can also create or upload new media. See Add new media below.
- My Media - Your personal uploaded media.
- Media Gallery - By default, shows media from the current course’s Media Gallery. If enabled by your administrator, you can also search and embed media from any Media Gallery you own.
- Shared Repository - Institution-wide shared media (if enabled by your administrator).
- Playlists - Media Gallery playlists available in the current course (if enabled by your administrator).
You can embed audio files using Kaltura’s audio player. The player is available in the list of player options in the customize embed settings (see below).
Mandatory captions before embedding - If your admin has enabled the 'Captions Required' setting, certain media types (like video, audio, or quizzes) must have captions in order to be embedded. Items without captions will appear with grayed-out buttons, and a message at the top of the embed window will explain why the items are unavailable.
You can use the search bar and filters to locate content. Searching playlists is limited to text-based fields such as name, description, and tags.

If Folders are enabled on your account, a My folders option appears in the filters. You can use it to view only the media stored in a specific folder. Folder selections apply only to your current session.

To preview more details, click the eye icon next to a media item. The sidebar will display:
- a playable preview (if available)
- media details (title, tags, duration, etc.)
- publishing locations

Add new media
Need to upload or record a new video? Use one of the options at the far right:
- Upload - Upload one or more files. Wait for uploads to finish before clicking Save and Select. Visit our article Upload media for guidance.
- Express Capture - Record directly from your webcam. Visit our article Create a recording with Express Capture for guidance.
- YouTube - Link to a YouTube video. Visit our article Add a YouTube video for guidance.

Once the upload is complete, click the settings icon to adjust embed options (see Customize embed settings).
If your administrator has required metadata fields (such as tags or descriptions), you must complete them before embedding.
Embed
1. In the Embed Kaltura Media window, locate the media you want to insert and click Embed.

The Customize Embed window opens.

2. To proceed without changes, click Embed in the lower right. To customize the settings first, refer to the instructions below.

If you're embedding a playlist, it will appear as a single embedded block containing all items in the order they were arranged in the Media Gallery playlist.
Customize embed settings
The Customize Embed option may not be available in all environments. This feature must be enabled by your administrator in the Browseandembed module.
When embedding media, you can configure the following:
Select a player - Choose from pre-configured players set by your administrator.
When you change the selected player, the preview updates automatically to reflect your choice.
Select video embed size - Set the maximum display size of the embedded media. Your administrator defines the available embed sizes.
Thumbnail embed - Display a static preview image instead of loading the full video player immediately. This helps improve page load speed and gives users control over when to play the video.
Enabling or disabling this option will also update the preview in real time.
Video time selection - You can share the video from a specific time. Choose 'Start video at' and enter the time according to the format given (00.00). For example, if you want a video to start at 1 minute and 30 seconds into the video, enter 01.30
Save these settings as default - Enable this option to apply the same settings automatically to future embeds of this media type.
When you change a setting, the preview updates automatically.
Once you’re ready, click Embed. Your media will appear in the editor.
Note about embedding YouTube videos
If you add a YouTube video and see an error, the video owner may have disabled embedding on other websites. You can confirm this by checking the video’s Share → Embed option on YouTube.
If you see a message such as, Video unavailable: Playback on other websites has been disabled by the video owner, this means the video can’t be embedded or played in Kaltura.
If a video previously worked, the video owner may have recently changed its privacy or embed settings.

