About
Easily customize your channel’s layout, appearance, and functionality in Video Portal using Kaltura’s editing features. You can update details, manage playlists and users, adjust layout, and add CTAs - everything you need to create a polished, engaging channel page.
The following instructions are for Theming users.
Access the edit page
- From the user menu, select My Channels.
- Find the channel you want to edit and either click 'Go to channel' button or the media thumbnail.
- At the far right, click the Actions menu and select Configure.

The My Channels page displays.


The channel page opens.


The edit page opens on the Details tab by default.

You can configure your gallery under the following tabs:
Details tab
- Name – dppears on the navigation bar; you can rename it here
- Description – add a summary of the channel content to display on the channel page
- Tags – enter descriptive tags to help with searchability
- Reference ID - (Optional) used for integrations with external systems
- Privacy
- Open - anyone can view content (including anonymous users) but only administrators and channel members can contribute
- Restricted - all logged-in users can view content but only channel members can contribute
- Private - only channel members can view and contribute content
- Shared Repository - Only channel members can view and contribute content; Content may be published to other channels, according to publishing entitlements.
- Public, Restricted - Anyone can view content (including anonymous not logged-in users). Only channel members can contribute content according to their publishing entitlements.
- Public, Open - Anyone can view content (including anonymous not logged-in users) and all logged in users can contribute content.
- Options (optional)
- Moderate content - media will not appear in gallery until approved by manager
- Enable comments in channel
- Keep comments private to channel
- Force media published only to this channel to always be played in the context of the channel
- Enable subscription to channel
- Enable embed grab - allows users to grab an embed of an entry in the context of a channel
- Enable the channel TV for sessions on this channel
- Enable Newrow Live Room
- Categories
- You can assign the channel to one or more categories (galleries)


Click Save when done.
Theme tab
The Theme tab features are not currently available in the new Theming design.
Use the Theme tab to set how the channel looks and behaves.

- Enable channel carousel - Select to enable the channel carousel. When selected, the channel carousel playlist is displayed.
- Channel carousel playlist - Choose a playlist from My Playlists or Channel Playlists (Note that if you choose My Playlist, only content in the channel is displayed on the carousel.)
- First tab - Select which tab should be displayed first in the channel. (The image below shows the Media tab as the first in the channel.)
- Channel Player Set - This setting controls how media in the channel is played back. A player set includes a list of players, each assigned to a different media type (video, audio, image, etc.). If a media type doesn’t have a specific player assigned, the default is used.
- Theme Preference - Choose which theme should take precedence if a themed entry is published to this channel. To learn more about a themed entry, please see Entrydesign.
Playlists tab
Manage and customize your channel playlists.

There are a few options for managing your playlists:
- Click +Create Channel Playlist at the far right to make a new playlist. See our article Create a channel playlist for more information.
- To change the order of your playlists, click the dots next to the playlist title and drag to the desired position.
- To edit your playlist, click the pencil icon in the Actions column. For information, read our article Edit playlist details.
- To delete a playlist, click the delete icon in the Actions column.
- To embed a playlist, click the embed icon in the Actions column. For information, read our article Embed a channel playlist.

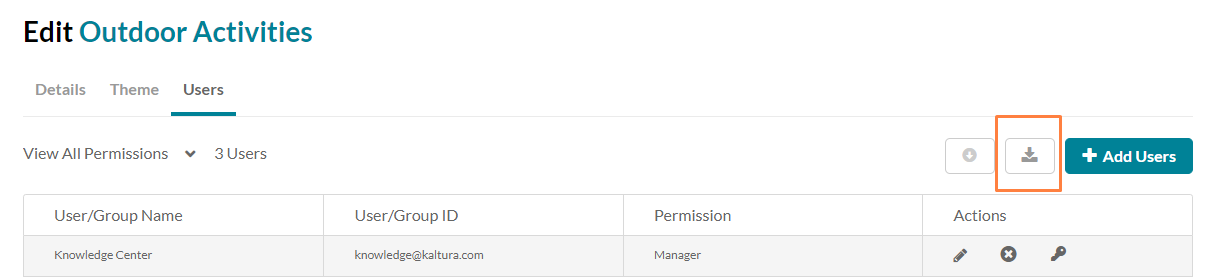
Users tab
If you are the channel manager or owner, you can add users to the channel as well as view and edit permissions.

Edit user permissions
- Click the pencil icon in the Actions column next to the user.
A drop-down list appears in the Permission column. - Choose the permission type from the drop-down list.
- Click the save icon to save your changes.
Add users
- Click the +Add Users button. The 'Add Users' window displays.
- Type in the user name.
- Select permission from the following options:
- Member
- Contributor
- Moderator
- Manager
- Click Add.

Some users may be listed as "Not a member". This means they are channel subscribers who have opted to receive email updates about the channel but do not hold an assigned role (Member, Contributor, Moderator, or Manager). Subscribers can still access content if the channel is open, but they do not have editing or management permissions.
Delete users
- In the list, locate the user you want to delete.
- In the same row, go to the Actions column and click the remove icon (X).
The user is removed.

Set a user as owner
- Locate the user you want to assign ownership to on the list.
- In the same row, go to the Actions column and click the key icon.
If there is already an owner assigned, a warning message will display: Only one owner can be assigned. This change will make the selected user/group the new owner and you will be set as a manager for this channel. Would you like to proceed?
- Click Yes to proceed.

Download a list of users
Click the download icon to export the user list as a CSV file.
Collections tab
Associate your channel with collections and filtering values for better organization and search. Read more about it in our article Add a channel to a channel collection.

Admins must configure the channelcollections module before you can use this feature.
Advanced Settings tab
Personalize your channel’s look and feel.

Watch the video below to learn more about customizing your channel's appearance.
There are a few options to choose from:
- Upload banner image - Upload a banner image for your channel's main page.
- Icon Entry ID - Enter an image entry ID to display as the channel's icon. You can find the image ID in the image's details in My Media or in KMC.
- Banner Video ID - Add a video as an intro to your channel to highlight special content or anything you like.
- View Mode - Choose Detailed or Grid.
Please note the action buttons (for example, edit and analytics) are not yet available in Theming.
- Tabs - displays the channel elements (Sessions, Content, Playlists, About) in tabs.
- Vertical - shows the channel elements one above the other, allowing navigation between the elements with a scroll.
- check the box next to 'Display a custom link' button.
- enter the name that will be displayed on the button.
- enter the HTML link you want users to be navigated to (links will open in a new tab)
Options include:
- Sessions
- Genie (if enabled on your site)
- Playlists
- Media
- About
Note for Genie users: If Genie is enabled for your site, select 'Genie' in the Sections settings to display the 'Ask anything' experience. The way it displays on the channel page depends on the channel layout you choose (Tabs or Vertical).
For more information, see Add Genie to specific channels.
Options include:
- Sessions
- Media
- Playlists
- About
- Genie (if enabled on your site)
Don’t forget to click Save when you’re done!
