Event Registration Overview
Event registration is the process by which an entry owner may add a registration page to the video thus making it only available for users that have filled in the registration form. Entry collaborators may configure a registration form that fits their needs and configure the form per entry basis.
Online registration not only improves efficiencies and adds security, it also eliminates unnecessary paperwork. Registration maximizes participation and improves marketing capabilities while allowing participants to sign up when and where it is most convenient for them.
Event Registration Roles
When creating an event, or editing media, there are several people involved that have different roles and objectives.
- Admin - Rich Media Content Management System and Kaltura MediaSpace admins are responsible for enabling the Registration module and creating the schemas for the Registration Forms.
- Entry Owner - The entry owner is responsible for enabling the Registration Form ( Add Registration) and selecting the registration form from one of the configured options. The entry owner may also choose to enable or disable the registration form for the entry, as well as customize the Registration Page. The Entry Owner is also responsible for sending a link to view the content/the event.
- Viewer -The viewer's role is to register by filling out the Registration Form's fields.
Event Registration Workflow
- Create a Registration Form in the Rich Media Content Management System.
- Enable and Configure the Registration Module in the Kaltura MediaSpace Management Console.
- Create /Edit an Event - Add Registration and Select a Registration Form.
- Set up the Registration Page Display.
- Send a Link to Viewers
- Download the registration report
Kaltura Event Registration Documentation Guides
The information about Kaltura's Event Registration procedures, features and tips are written for specific roles. The following guides are available and written per user roles:
- Kaltura Event Registration Administrator's Guide
- Kaltura Event Registration Entry Owner Guide
- Kaltura Event Registration Viewer's Guide
This is a custom module that allows users to generate Rich Media CMS-like embed codes. Also supports embed code generation for Interactive Video entries.
Field | Description |
| enabled | Enable the Adminembed Module. |
| autoEmbed | Enable auto embed option. |
| dynamicEmbed | Enable auto dynamic option. |
| thumbnailEmbed | Enable thumbnail embed option. |
| iframeEmbed | Enable iframe embed option. |
| legacyFlashEmbed | Enable legacy Flash embed option. |
| httpsEmbeds | Enable https embed option. |
| seoOptimization | Enable SEO optimization. Adds entry SEO metadata. |
| kalturaSeoOptimization | Enable Kaltura SEO links in the embed co. |
| embedAllowed | |
| tabName | Name of tab to display on the media page and the checkbox val. |
| enableExternalAccessControl | Enables access control changing . |
| previewLabel | Name of the preview label. |
| embedSkins | Define skins that can be used for embedded players. Click + Add Embed Skins to add. |
| name | What is the name of the skin? The skin name is displayed when the user selects an embed skin. |
| imgFile | What is the relative path to the image file on the server? The image file represents how the skin looks. |
| uiConfId | What is the numerical value of the player ID to use in the embed code? |
| embedSizes | Define sizes that can be used for embedded players. Define the player size in the following format: {width}x{height} |
| large, medium, small | Enter values as relevant. |
About
This module adds Annoto's in-video collaboration assessment and insights solutions to Kaltura legacy Video Portal (aka KMS) and LMS integrations (Kaltura Application Framework aka KAF). To learn more, see Introduction to Annoto.
For KAF and LMS integrations, the Annotokaf module is required to be enabled as well.
If this module is not available, please get in touch with your Kaltura representative to enquire about adding it.
You can use Annoto with Kaltura videos embedded outside of LMS (KAF) and MediaSpace (KMS). Please contact support@annoto.net for more information.
Prerequisites
Send the following information to the Annoto team:
- Send the KAF/KMS domain and any alias domains if you have one.
- To activate the module, the Annoto team will send back the following information:
- API Key
- Secret
- Go to your KMS/KAF Management Console (<Your_Kaltura_site_Url>/admin) and navigate to the Annoto module.
- Enable the Annoto module
- Fill in the appropriate fields with the API Key and Secret
- Click Save.

Grading Support
If you are using Annoto in an LMS via the Kaltura KAF the following to enable grading support.
- Send the field called "endpoint" under the Webhook section in the Annoto Module.
- Make sure AnnotoKAF Module is existing and enabled.
- Annoto Team will send you the jwksUrl and integrationKey values.
If the field is empty, please enable/disable the Annoto Module.
Video as Comment
Integration parameters are required for them to enable video as a comment feature.
- Go to your KMS/KAF Management Console (<Your_Kaltura_site_Url>/admin) and navigate to the Annoto module.
- Copy the text of the following integration configuration:
- appTokenId
- appToken
- appTokenHash
- uiConfigId
If the field is empty, please enable/disable the Annoto Module
Annoto Module Settings Overview
General Settings
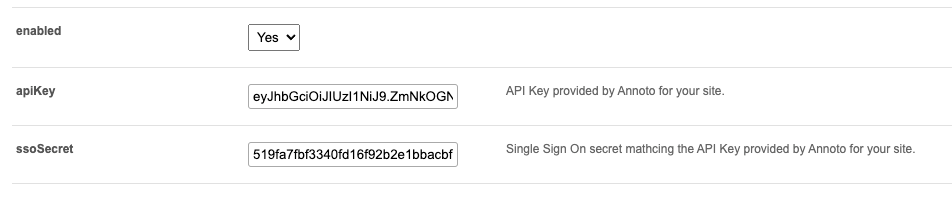
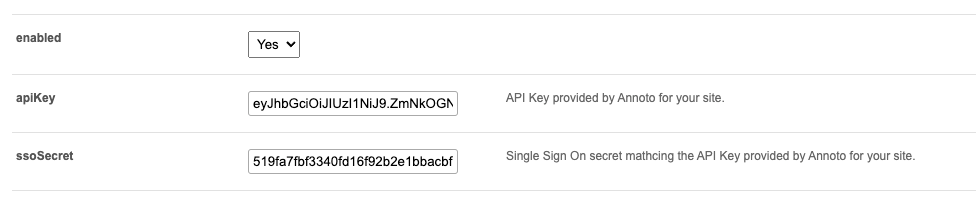
- enabled - Enable/Disable the Annoto module.
- apiKey - Provided by Annoto per Partner ID.
- ssoSecret – Provided by Annoto. Single Sign-On secret matching the API Key.
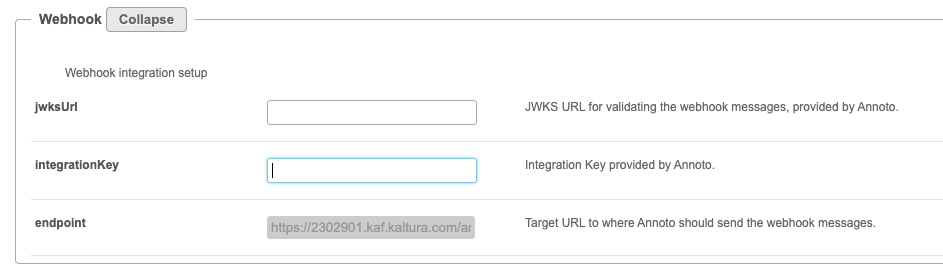
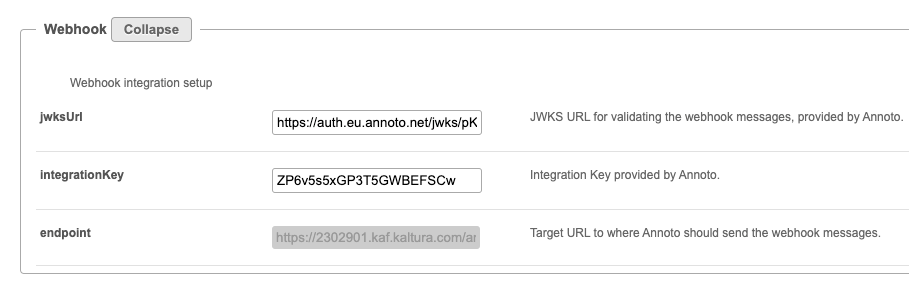
Webhook (Only KAF)
Configure webhook integration so that advanced features can be enabled, such as enabling Annoto's reporting grading to the LMS.
- jwksUrl - JWKS URL for validating the webhook messages, provided by Annoto.
- integrationKey - Integration Key provided by Annoto.
- Endpoint - Target URL to where Annoto should send the webhook messages. (The following field are auto-populated with the disable/enablement of the module. )
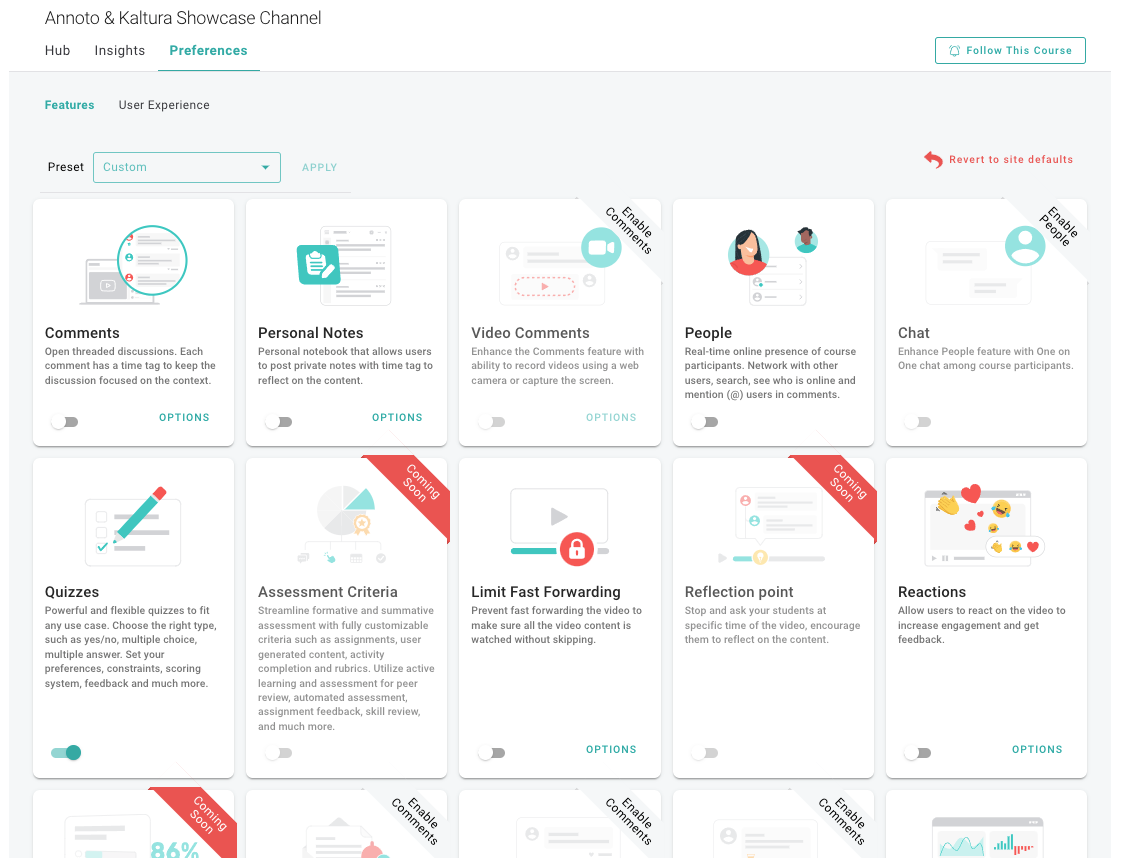
Annoto Preferences Permissions Settings
• activationEditAllowedRoles
-
Who can change the Annoto Preferences? if a role is selected, any role above it will also be able to change the Annoto Preferences.
- Specific Users
- privateOnlyRole
- adminRole
- unmoderatedAdminRole
If Specific Users or groups are selected, see the following video tutorial and steps:
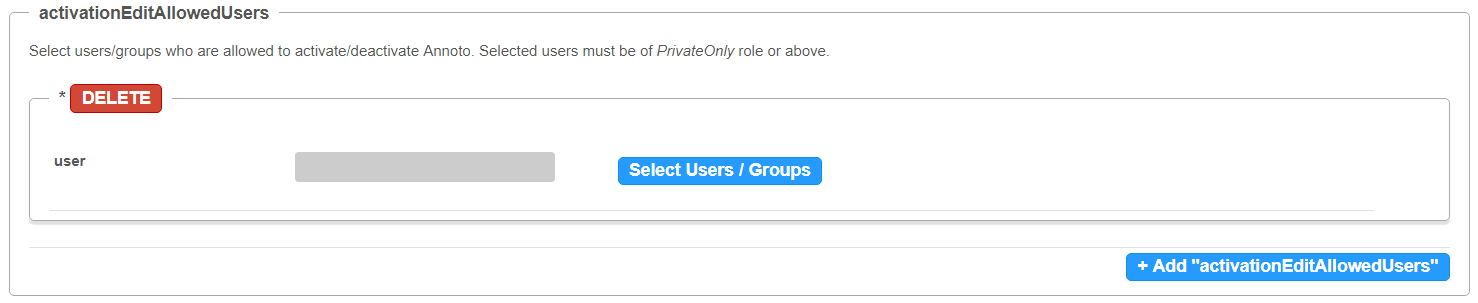
- Once “Specific Users” is chosen, a submenu will be available for adding authorized users and/or groups.
- Click on “activationEditAllowedUsers” to add Users/Groups

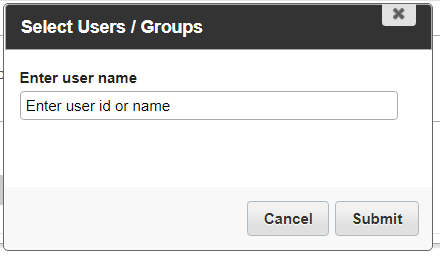
- Click on “Select Users/Groups” to add Users/Groups to the list
- Enter the user or group (once you start typing you will see suggestions related to what you entered)
For example, in the below image, we can see Hen@annoto.net is currently the only one that can set the Annoto Preferences. All other users will not have the option of changing the Annoto Preferences in Courses/Categories/Channels.


As a best practice, we suggest creating a Kaltura Users Group named for example “annoto_admins” and adding only this group to activationEditAllowedUsers list. For more information on Groups visit: Kaltura Groups.
Additional Activation settings
• guestUsersAllowed - If checked, not-logged-in Users will be able to see Annoto Widget. [KMS only]
• deployment - Select Annoto Deployment Regio EU/ US / Custom.
Player Embed Sizes
• playerEmbedSizesOverride - Enables overriding the BSE player sizes (for the optimal Annoto user experience).
• keepCustomBSEPlayerSizes - If enabled, override only the default sizes but keep any custom BSE player sizes. Note: when user embeds, the default size would be the custom and not the annoto-defined size.
• playerEmbedSizes - Defines sizes that can be used for embedded players. Defines the player size in the following format: {width}x{height}. Recommended sizes:
• Large: 1200*628
• Medium: 1024*576
• Small: 900*506
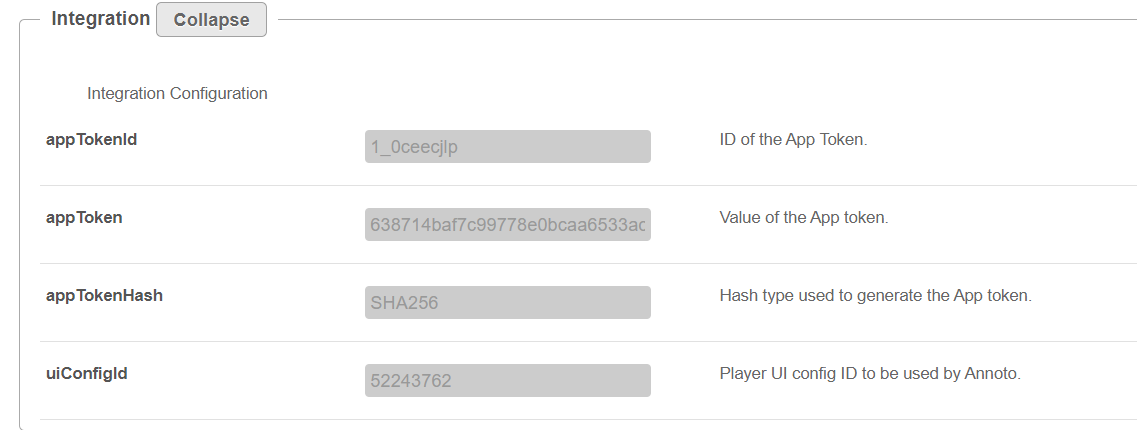
Integration
The following fields are auto-populated with the enablement of the module.
- appTokenId - ID of the App Token.
- appToken - Value of the App token.
- appTokenHash - Hash type used to generate the App token.
- uiConfigId - Player UI config ID to be used by Annoto.
Player Plugin Settings
The following fields are auto-populated with the enablement of the module. Do not change!
• enablePlayerPlugin - Enables the built-in Player Plugin. If disabled, the Annoto plugin would not be injected into the Kaltura player by the module. Allows using Kaltura player with custom (non-production) Annoto plugin.
• playerPluginUrl
- URL of the V2 player Annoto plugin. Must start with '//'.
• v7PlayerPluginUrl - URL of the V7 player Annoto plugin. Must start with '//'.
• analyticsCDN - CDN host of the Annoto analytics assets (read-only).
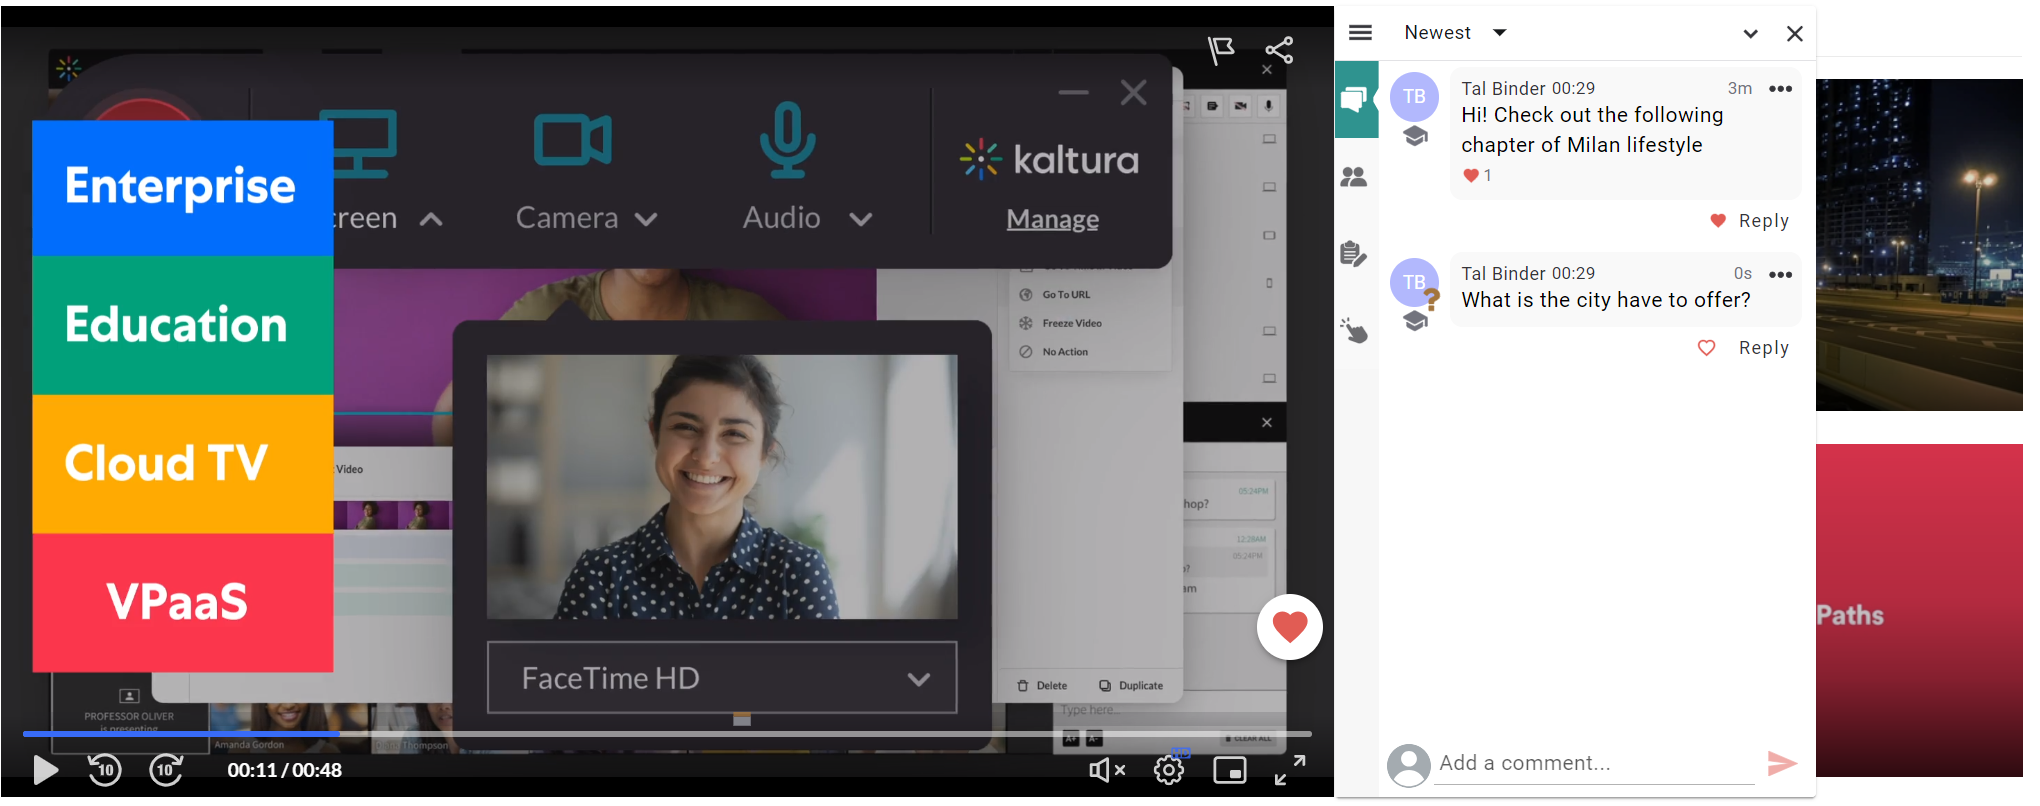
The following image demonstrates the Kaltura Player with Annoto Widget enabled.
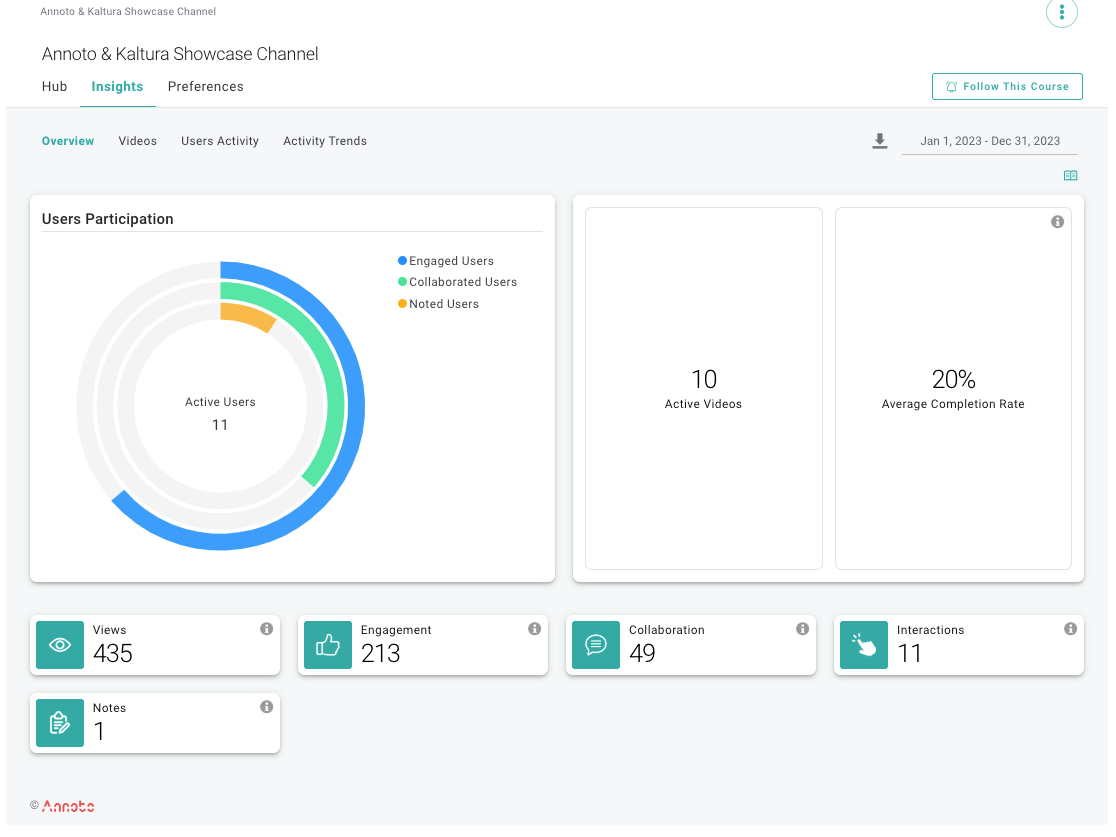
The following image demonstrates Annoto Dashboard within MediaGallery/Channel:
Troubleshooting
Symptom | Resolution |
After enabling the Module and entering the apiKey, the ssoSecret, and enabling Annoto on the media, Annoto is still not displaying. | We need to verify that the client does not have an alias domain, instead of the traditional partner_id.mediaspace.com domain, as the apiKey and ssoSecret that Annoto provides are generated based on the domain |
Verify that the apiKey and ssoSecret are not switched by mistake. |
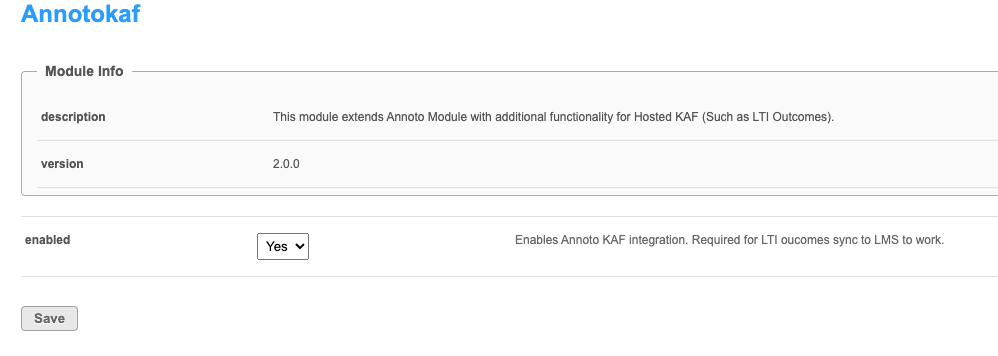
This module extends Annoto module with additional functionality for Hosted KAF (Such as LTI Outcomes).
- Go to your KMS/KAF Management Console (<Your_Kaltura_site_Url>/admin) and navigate to the Annotokaf module.
- Enable - set Yes to enable the module.
- Click Save.

About
The Newrow module lets users launch a real-time virtual room directly from channels and LMS media galleries. Channel owners can enable or disable the room for each channel, based on the site-level configuration.
In a live room, participants can:
- Play Kaltura content
- Record sessions and have recordings automatically uploaded to the channel or media gallery
- Upload and display documents
- Invite other users to participate
Integration
When the module is enabled, a Launch Live Room button appears at the top of media gallery / channels page. Administrators can choose whether this button is shown by default.
Inside the live room:
- Go to Settings > Kaltura to search for and play media with participants
- If the session is recorded, the recording is automatically uploaded to the associated Media Gallery or Channel
Learn more about Kaltura Rooms in our article Introduction to the Kaltura Room.
Single-entry rooms
The Newrow module provides the room functionality used by single-entry rooms. These rooms are created, published, and scheduled in the MeetingEntry module.
For configuration steps, see the MeetingEntry module article.
Configure
1. Go to your Configuration Management console and click on the Newrow module. You can also navigate to it directly using a link: https://{your_KMS_URL}/admin/config/tab/newrow.

The 'Newrow' page displays.

2. Configure the following:
enabled - Set to 'Yes' to enable the module.
moduleMode - Defines how the Newrow module operates on your site - whether Kaltura Rooms are available as a standalone feature, or whether Newrow is used only as a supporting service for other modules (such as Live Studio).
newrowOpenInNewTab - Set to' Yes' to open the meeting room in a new browser tab. Set to 'No' to open it in the same tab. (Not applicable to Kaltura Rooms.)
allowedUsersOrRoles - Select the minimum role or specific users/groups allowed to change the availability of Kaltura Channel rooms (or Media Gallery rooms in LMS) in channels they can manage.
Choose from the following:
- PrivateOnly role
- admin role
- unmoderatedAdmin role
- Specific users / groups
If you choose Specific users / groups, an additional field displays:

Click +Add "allowedUsers at the lower right to open a new field.
In the new field that opens, click Select users / groups.

In the popup, type in the user ID or name , then click Submit.

joinButtonType - Defines how the Join Room button behaves on the room's hero page:
- Static – The button is always visible. Room access is controlled by the room owner using the open/close doors feature.
- Dynamic – The button appears only after a moderator enters the room. For scheduled sessions, it remains hidden from end users until the start time.
When set to 'Static', additional settings appear:
safariSupport - Allows users to join Live Rooms from Safari using the Kaltura Desktop Application for Mac. (Not applicable to Kaltura Rooms.)
mobileSupport - Allows users to join Live Rooms using Kaltura’s video conferencing apps for iOS and Android. (Not applicable to Kaltura Rooms.)
promotionAllowedDomains - Enter a comma-separated list of domains (e.g., kaltura.com, kaltura.org) to restrict which users can be promoted within a room. When configured, only users with an email address matching the specified domains are eligible for promotion. If left empty (default), all users can be promoted regardless of their email domain.
- The domain list configured in the promotionAllowedDomains field is case-insensitive, ignores extra spaces, and supports specific subdomains (for example, x.y.com).
- This setting is configured once at the module level and applies globally, meaning the same domain restriction is enforced for all Kaltura Rooms launched via LTI across all Channels and Media Galleries on the site.
channelRoomTemplates
Set the default room template and define which templates are available for channel owners to choose from when creating rooms.

availableRoomTemplates - Choose which templates users can select when creating or editing a room:
- Interactive – All cameras on by default. Supports up to 25 visible and 100 total participants. Best for workshops, training, and group discussions.
- Webinar – Speakers appear on camera, audience participates in chat. Supports up to 10 cameras and 300 participants. Moderators can bring audience members on stage.
defaultRoomTemplate - Sets the template applied to all new rooms by default.
The 'default template' dropdown only becomes available after you select at least one option in availableRoomTemplates and click Save.
channelRooms - Determine if dedicated Kaltura Rooms are available across your application’s channels and media galleries. Use the dropdown menu to select the global availability:
- Available (On by default): Rooms are enabled for all channels automatically.
- Available (Off by default): Rooms are available as a feature, but are not turned on until a channel owner enables them.
- Disabled: Rooms are completely removed from all channels.
Once enabled at this level, individual channel or media gallery owners can still override the default setting within their specific channel settings.
3. When you have finished configuring everything, click Save.
About
Use Powtoon to create animated presentations and animated explainer videos.
This guide will walk you through how to activate Powtoon on your legacy Video Portal (aka MediaSpace/KMS) and KAF applications.
If the Powtoon Module is unavailable, please contact your Kaltura representative to add the module to your legacy Video Portal/KAF instance.
Setup
- Log in to the application Configuration Management <Base_URL>/admin (e.g. https://videos.mediaspace.kaltura.com/admin)
- Scroll down and select the Powtoon module in the modulesCustom-5.x.x-control section.
- In the Enabled field, select Yes to enable the Powtoon module.
- Click Save.
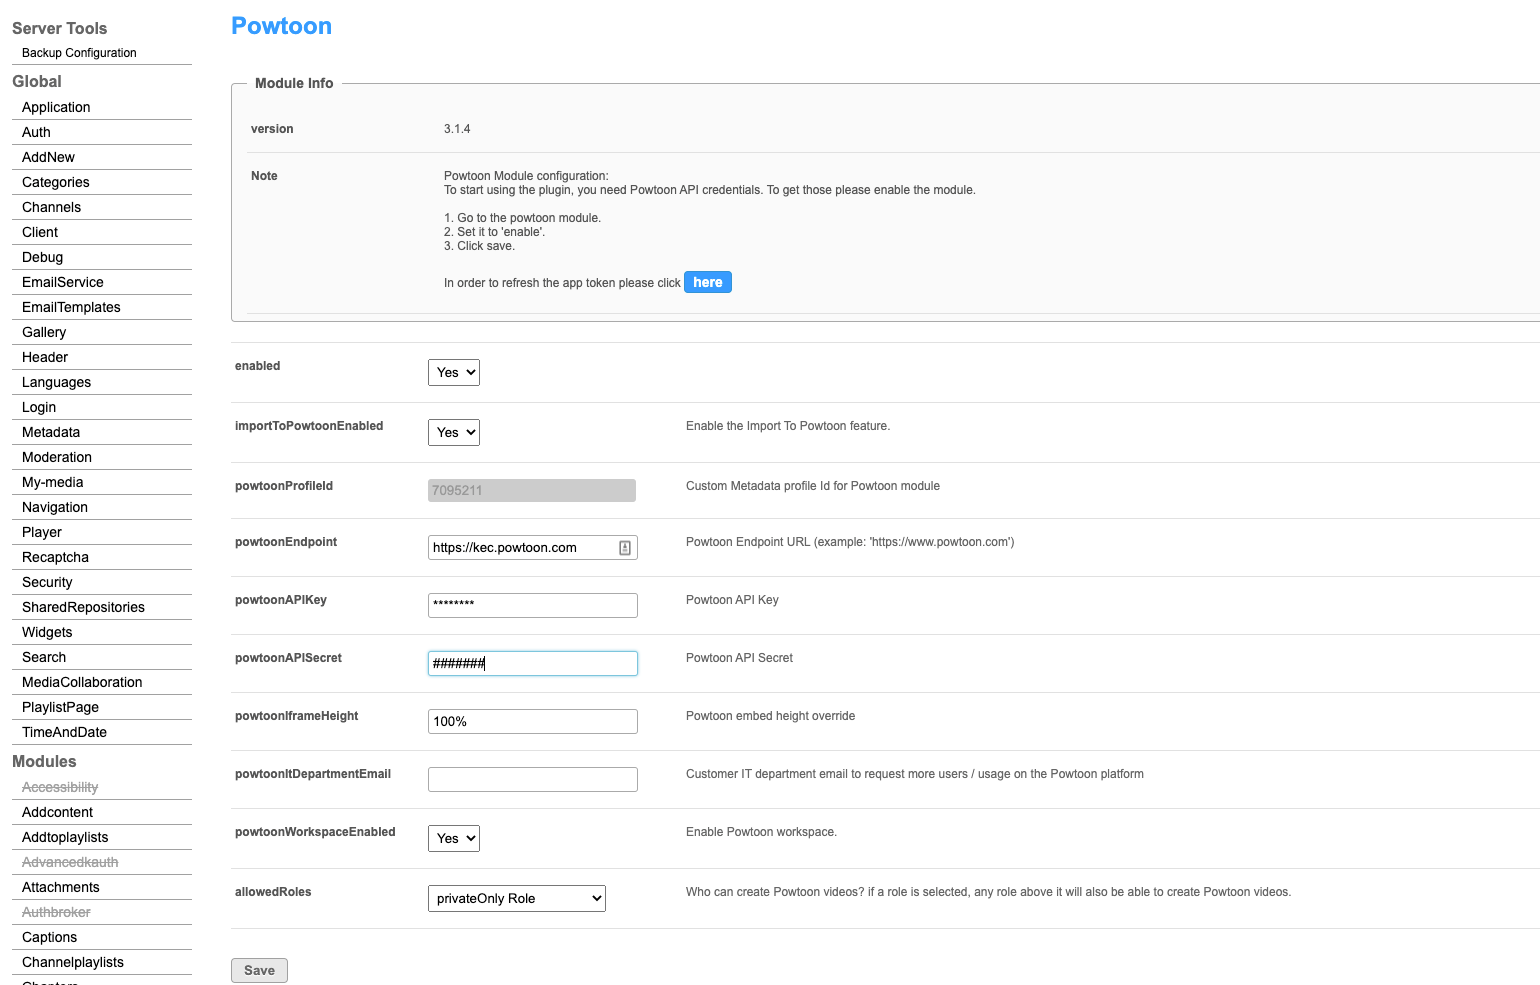
Upon enabling and saving the module, the account configuration fields as well as the Powtoon API credentials will be automatically populated on the page. The available fields include:
enabled - Set to Yes to enable the module.
importToPowtoonEnabled - [Auto enabled] Set to Yes to enable the Import To Powtoon feature.
powtoonProfileId - [Auto populated] Custom Metadata profile ID for the Powtoon module.
powtoonEndpoint - [Auto populated] Powtoon Endpoint URL (example: 'https://www.powtoon.com')
For Enterprise customers, please use https://kec.powtoon.com/api
For Education customers, please use https://www.powtoon.com/api
powtoonAPIKey - [Auto populated DO NOT REPLACE] Powtoon API Key
powtoonAPISecret - [Auto populated DO NOT REPLACE] Powtoon API Secret
powtoonIframeHeight - [Auto set to 100%] Powtoon embed height override
powtoonItDepartmentEmail - [Optional] Enter the email address of the account manager that users will contact if they encounter license issues.
powtoonWorkspaceEnabled - [Auto enabled] Enable Powtoon workspace.
allowedRoles -
Assign roles to users in your organization with the minimum permissions they need to create a new Powtoon video:- Specific Users: whitelisted users or groups created in the Kaltura user and group configuration
- privateOnlyRole: this role can add media and upload content to My Media but cannot publish to galleries.
- adminRole: this role can contribute content to all categories and upload content.
- unmoderatedAdminRole: this role can upload content and bypass moderation (when moderation is enabled for an account).

To learn more, see Powtoon User Guide for Kaltura.
This module adds the Rich Media CMS entry distribution capabilities to Kaltura's legacy Video Portal. To learn more about distribution, visit our article Content distribution.
Configure
1. Go to your Configuration Management console, and navigate to the Distribution module. Your link should look like this: https://{your_KMS_URL}/admin/config/tab/distribution.
The Distribution module page displays.
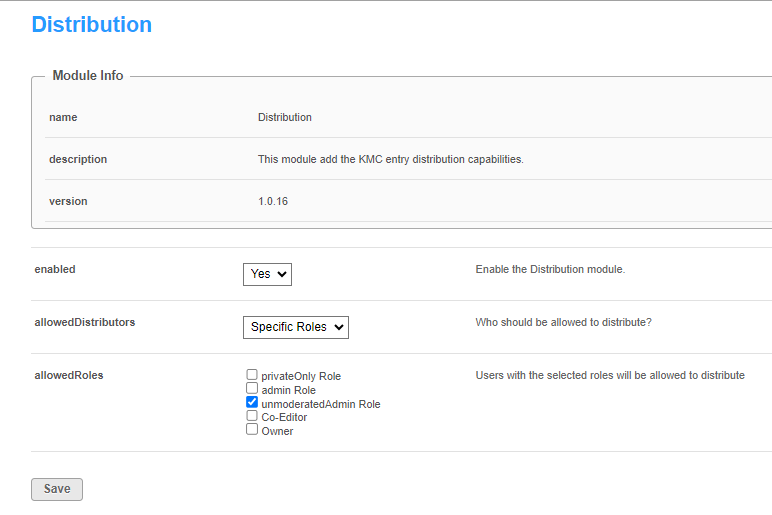
2. Configure the following:
enabled: Select 'Yes' to enable the module.
allowedDistributors: Choose the users who will be allowed to distribute, Specific Roles or Specific Users:
Specific Roles - Choose a role from allowedRoles below:
allowedRoles: Users with the selected roles will be allowed to distribute:
- privateOnly Role
- admin Role
- unmoderatedAdmin Role
- Co-Editor
- Owner
To learn more about roles, visit our article Administration Pages.
Specific Users - If you choose this option, you can add users as follows:
a. Click +Add "distributionUsers".
The distributionUsers window displays.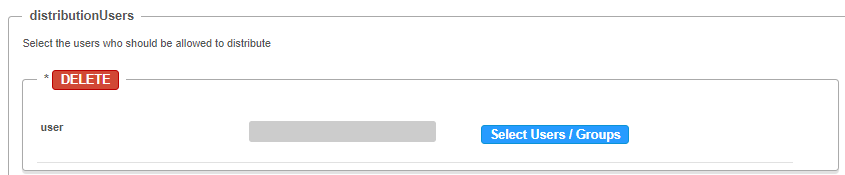
b. Click Select Users / Groups.
c. Select the ID or name of the user who should be allowed to distribute.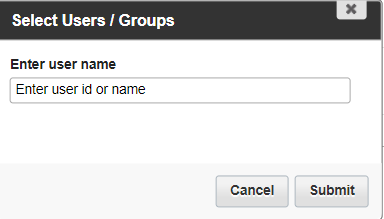
d. Click Submit.
The user appears in the grey field.
Repeat the process to add more users.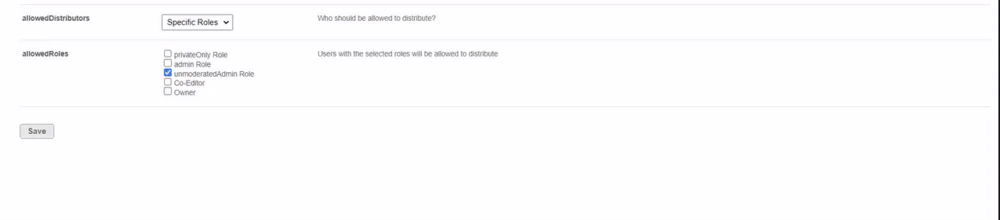
3. Click Save.
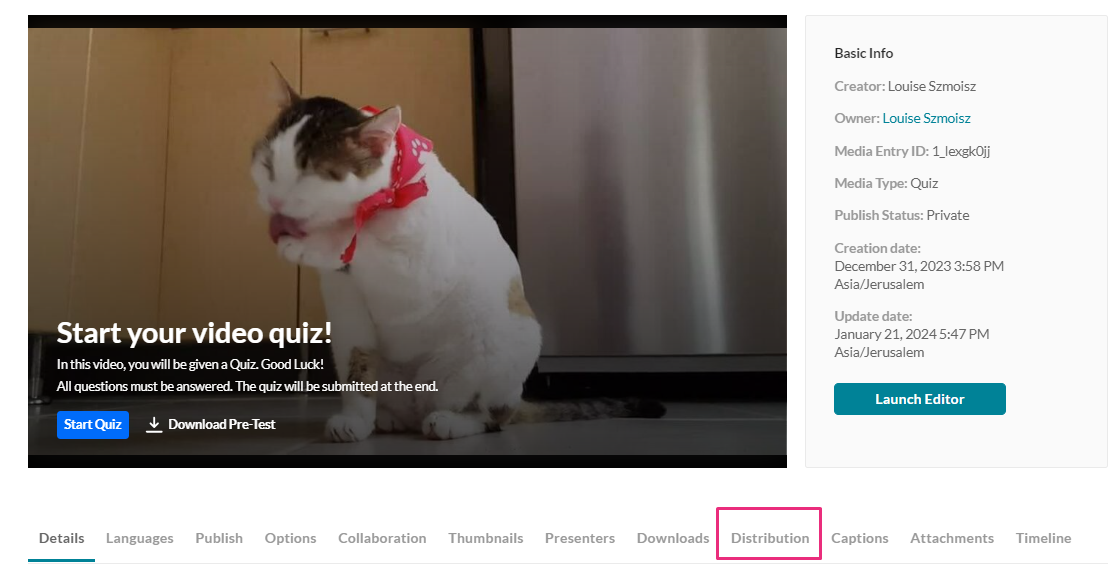
User experience
A Distribution tab displays on the Edit Media page in your legacy Video Portal as shown below:
About
During an event, Kaltura's gamification tools spark networking between participants and build real relationships with your audience.
Allowing participants to earn badges through actions, for example, motivates them to even further engage in the event.
Please contact your Kaltura representative about enabling and configuring this feature.
