If you're setting up a new event, we recommend using Live Studio, our modernized live event experience. See Introduction to Live Studio for more information. If your organization is still using the legacy webcasting product, this article still applies.
After the KMS admin has enabled the Registration module and has configured Registration Forms that are available, the entry owner may reconfigure the Registration Page's display as well as change the selected Registration Form to use. The entry owner may also disable the Registration Form.
Workflow
Create an Entry with Registration
Registration forms may be configured for Webcast, Live, VOD, and Quiz entries.
The Add Registration Field will be available only if the Registration Module has been enabled in the KMS Admin. When you are creating an event you can select to Add Registration or when you are editing an entry.
Add Registration When Creating an Event
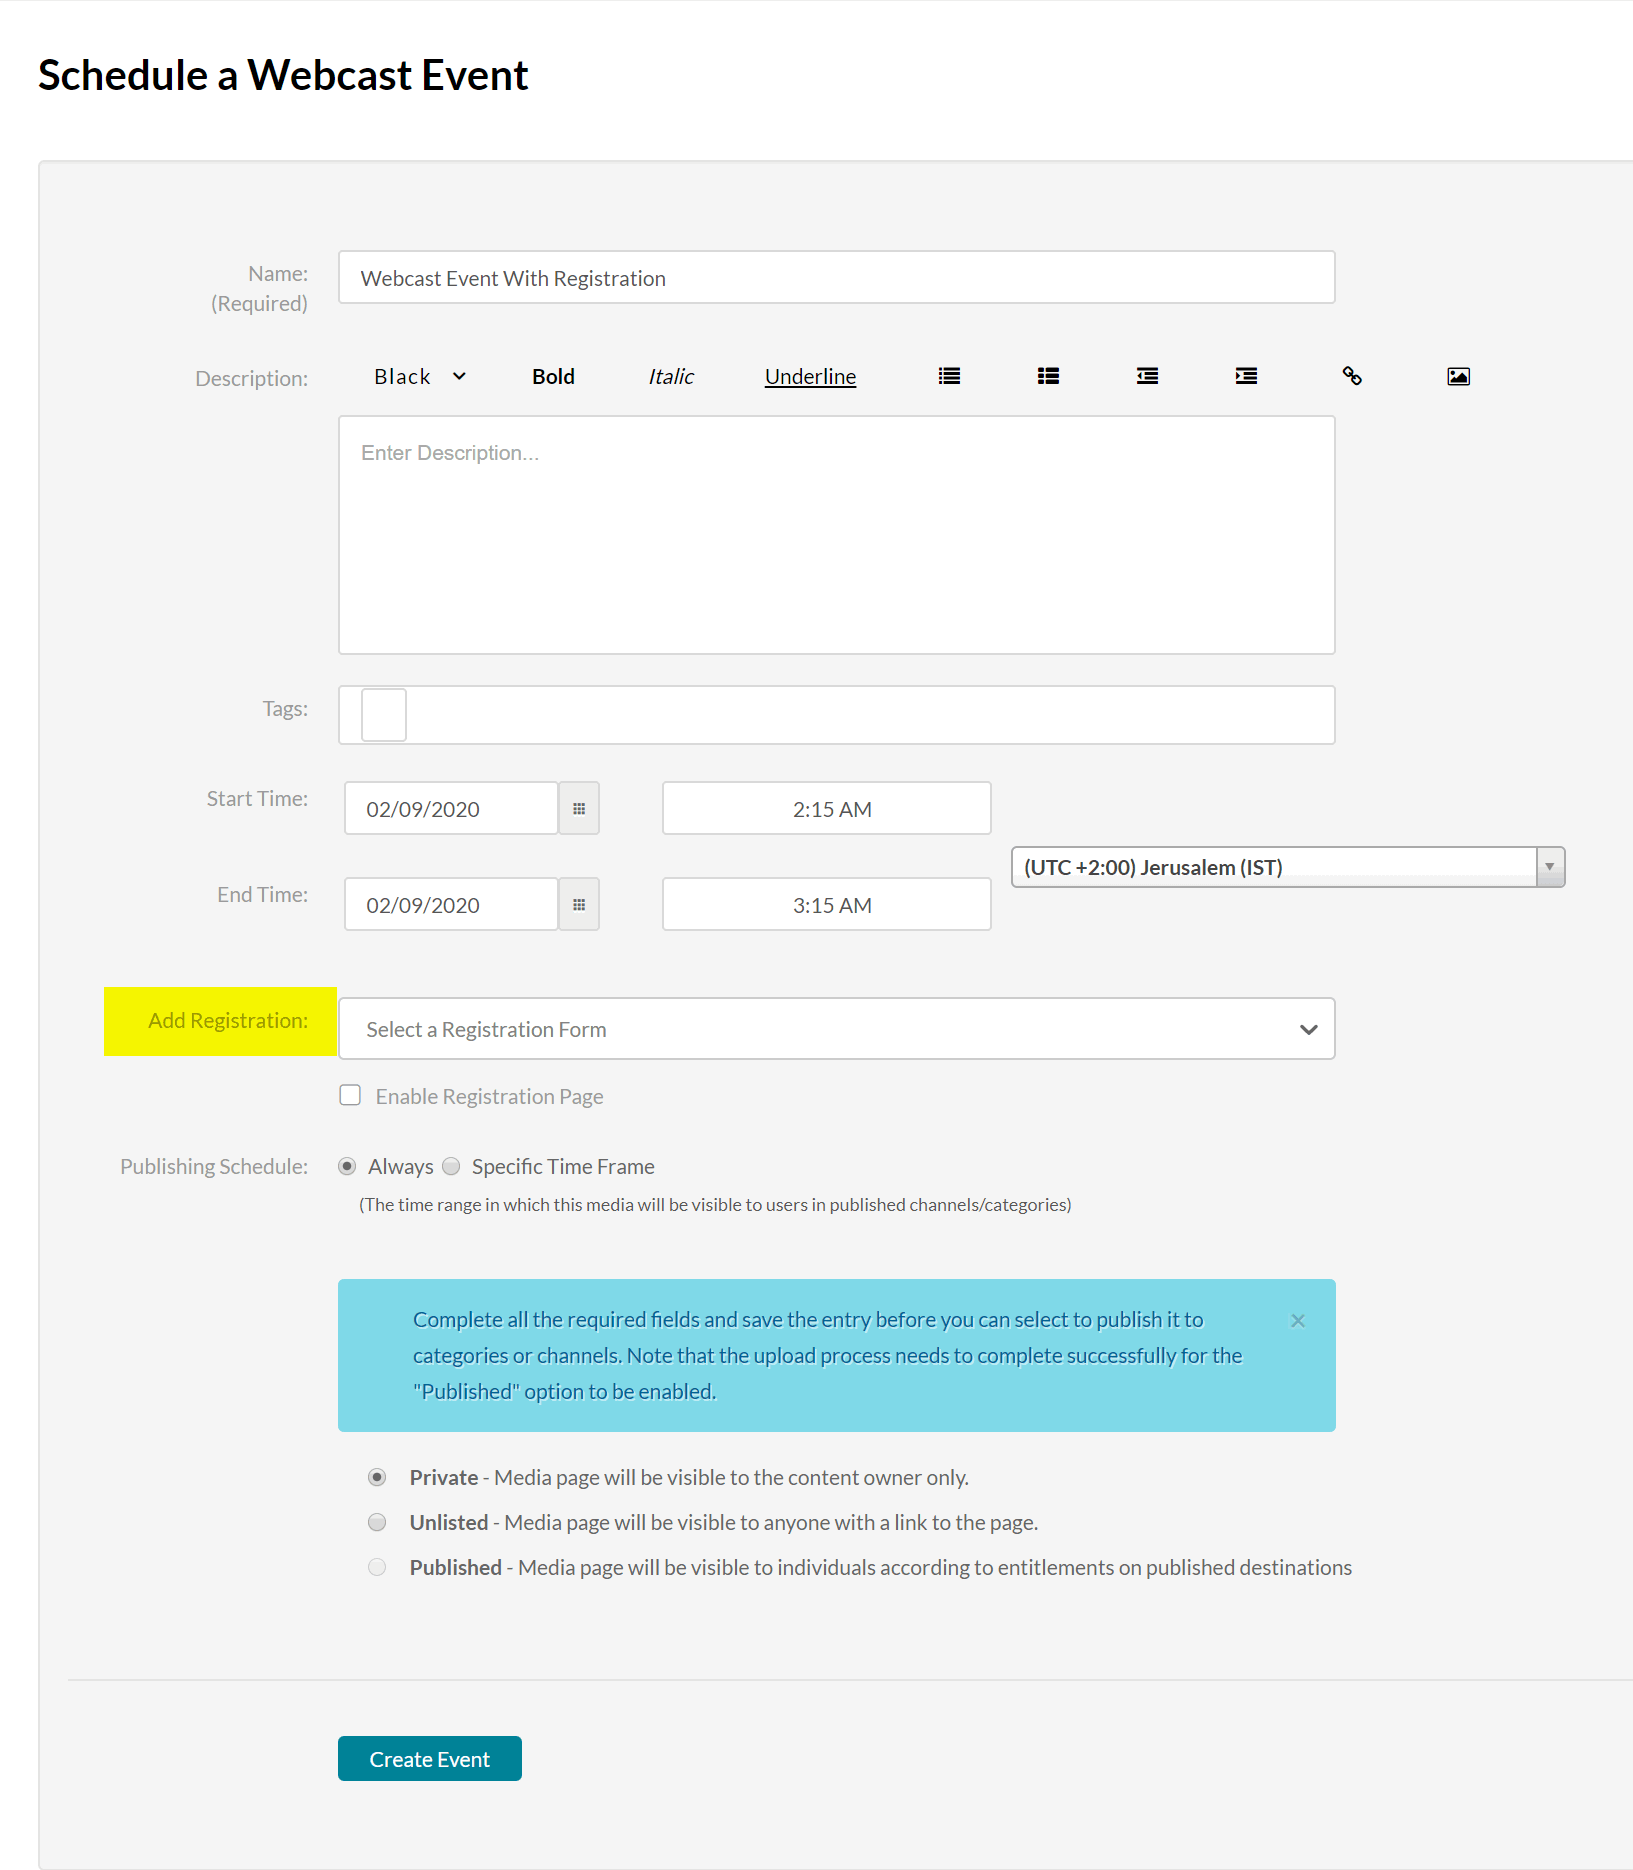
The following shows an example of the Schedule Webcast Event screen with the Add Registration Option.
Only registration forms that have been added to the KMS by the KMS Admin will be available.
- Check Enable Registration Page
- Select a Registration Form from the Add Registration drop down menu.
- Enter the relevant information and click Create Event.
A default Registration form is used if you do not make a selection.
After you have added the Registration option and selected a Registration Form, you may customize the Registration Page.
Add Registration When Editing an Event
The following shows an example of the Edit Webcast Event screen with the Enable Registration Option.

Follow the instructions To add the Registration Option.
Customize the Registration Page
To customize the Registration Page
- Edit the Entry. The Registration tab (with a yellow star to highlight it) is added for all users that have the Registration Module enabled.
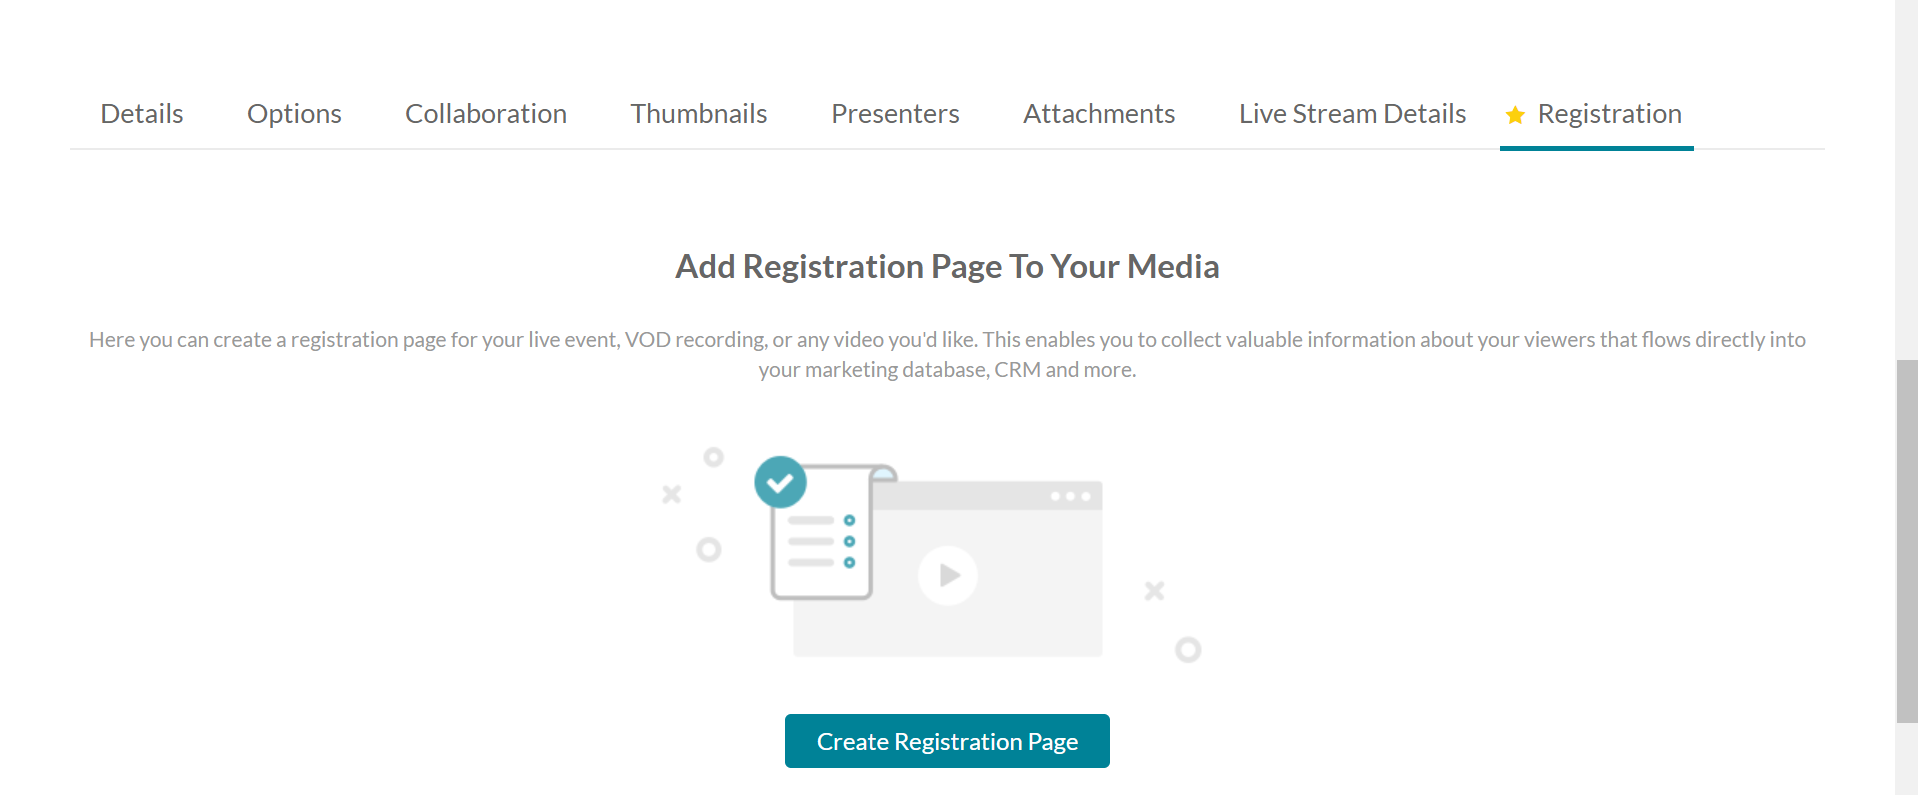
- Click Create Registration Page. The Customize Registration Page is displayed.
 Each section opens up configuration options to customize your Registration Page. Use the links to edit the options.
 - Select Disable Registration Page if you want to cancel the Registration Form display.
- Modify each section as you want and click Save and Preview or Save when you are satisfied with your settings.

 Each section opens up configuration options to customize your Registration Page. Use the links to edit the options.
Set Up the Registration Page
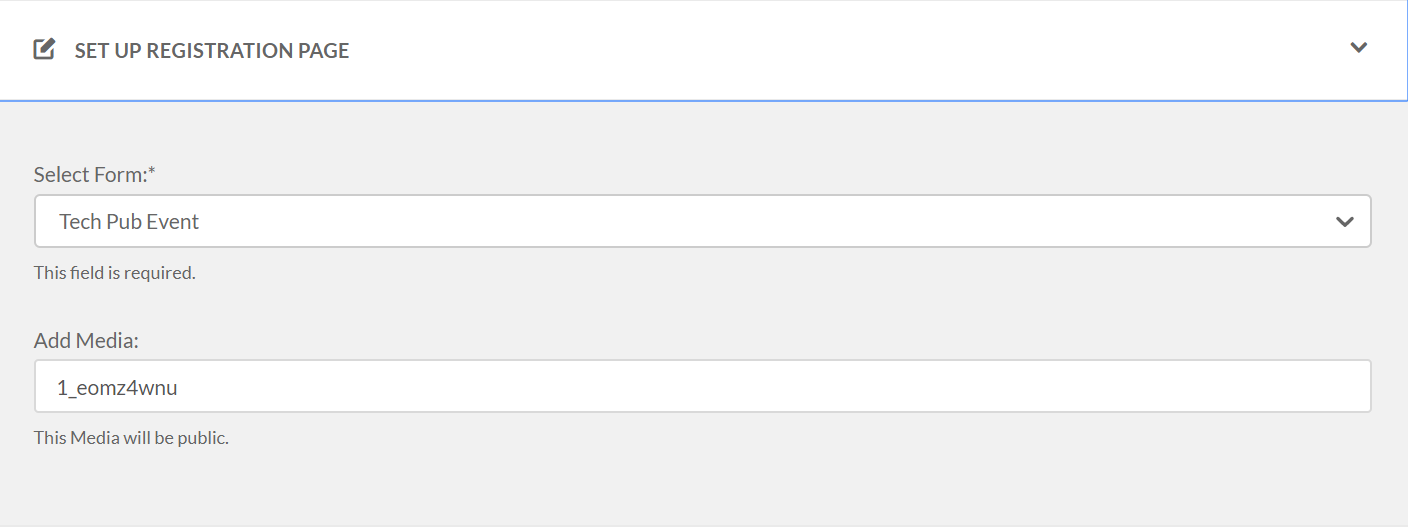
Use this section to select a different registration form. The Registration Form field is mandatory. The default form is used if you do not select a Registration Form.
You may add a media URL or Media ID in this section that will be shown on the event Registration Page. For example you may want to add a video as a teaser, or other relevant media to interest your viewers. Whatever media is selected here will be public to those viewing the registration page.
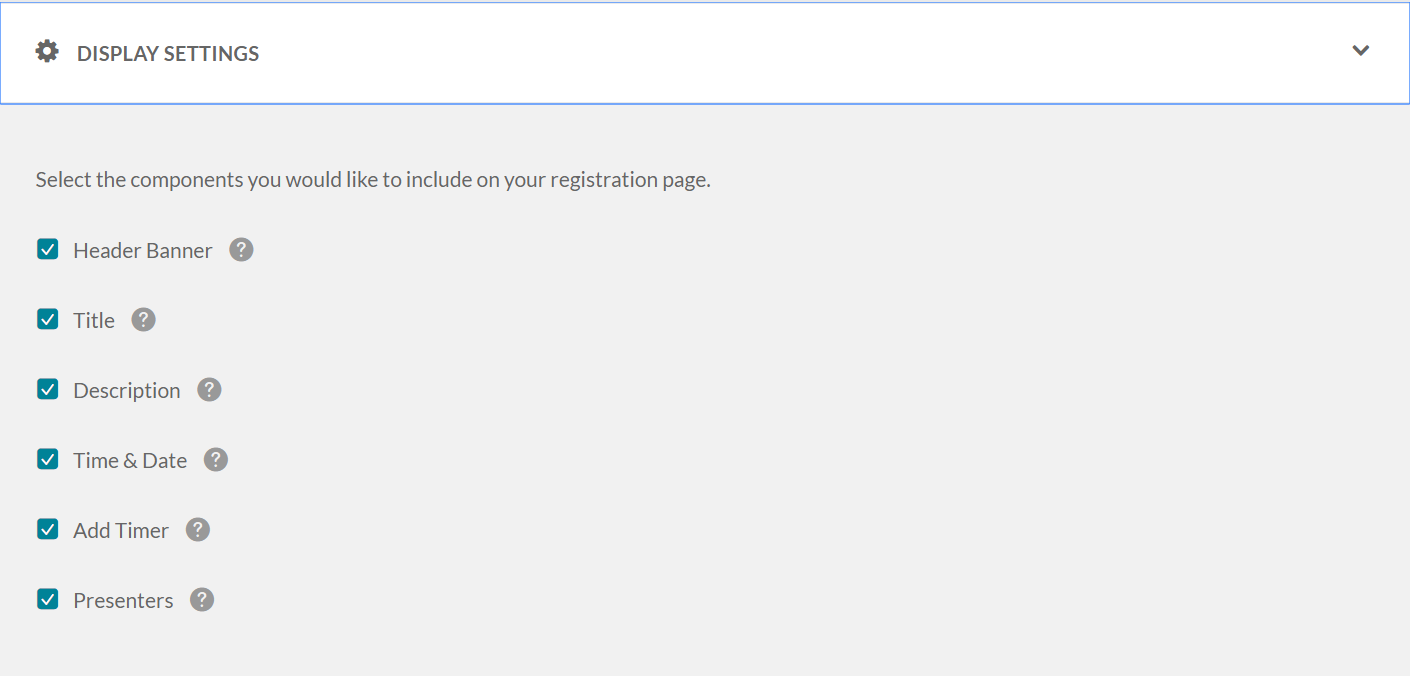
Display Settings
Use this section to configure the display on the event registration page. All of the information is taken from the tabs that are configured for this entry. Each of these are fields are configurable and you can decide whether to display the field or not.
- The Header Banner displays the thumbnail that is shown in the back of the Header section. Use the link to edit the thumbnail.
- The Title is the title of the event.
- The Description is the description of the event.
- The Presenters is taken from the configured presenters.
- The Time and Date is the scheduling for the event. When you click on Edit the event scheduling page is displayed. You can select to change the time, date and time zone for the event as well as display it on the event registration page..
- The Timer shows a countdown until the event starts

Email Validation
There is a chance that you may want a specific group of emails to register for the event, or perhaps you want to exclude certain viewers. There are two ways to configure registration parameters through email. You can upload an excel file, CSV with one column or enter manually up to 150 mails.
After you upload the CSV you can replace, remove or download the excel file. The file size is limited to a 10 MB.
- Include - include the emails that are eligible to register for the event.
- Exclude - exclude the emails that are not eligible. All others emails will be eligible.
Wildcards are allowed (asterisk). For example *@gmail.com to include or exclude gmail viewers.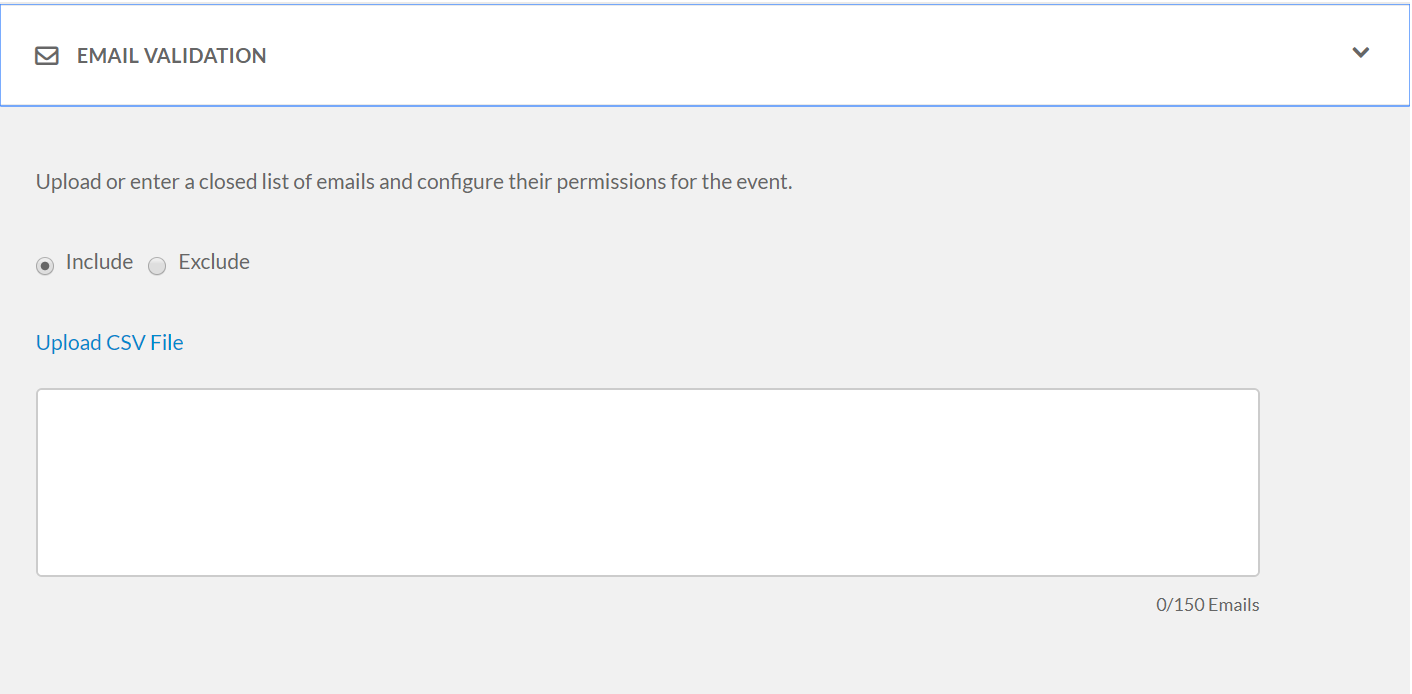

Share the Registration Page
The entry owner should distribute the link to the event within the organization via any preferred communication channel. KMS doesn't support sending out links via mail.

The following is an example of a registration page that is configured tor a Webcasting event.

View the Event Registration Analytics
