About
This guide is intended for Kaltura and Brightspace by D2L administrators. The information in this guide supersedes the information in the Kaltura Video Extension for Brightspace installation Guide.
Prerequisites
- Brightspace version 10.7 or above
- Kaltura Partner ID (PID), e.g., 12345678
- Kaltura Administrator Secret, e.g. f79359d3227f45be73c181489888afc5
- A Kaltura Application Framework (KAF) instance URL, e.g. https://12345678.kaf.kaltura.com. This will be used as the launch point when adding a new tool provider. The KAF instance should contain the following modules:
- KAF admin login page URL, e.g. https://12345678.kaf.kaltura.com/admin. Kaltura administrators configure various settings via this interface. These settings change how end users interact with Kaltura via your LMS.
If you are missing any of the above, contact your Kaltura representative for more information about adding LMS integration to your Kaltura account.
Update Brightspace settings
The Content-Item Message (CIM) service is required for some of the Kaltura features, such as:
- Being able to embed Kaltura media directly into Brightspace content using Insert Stuff. Kaltura calls this functionality Browse, Search, and Embed (BSE).
- Integrating the students score from Video Quizzes (VQ) with the Brightspace gradebook.
Additional information about CIM and Brightspace may be found here.
Enable the CIM service in your Brightspace environment
- Click the Admin Tools icon and click "Config Variable Browser".
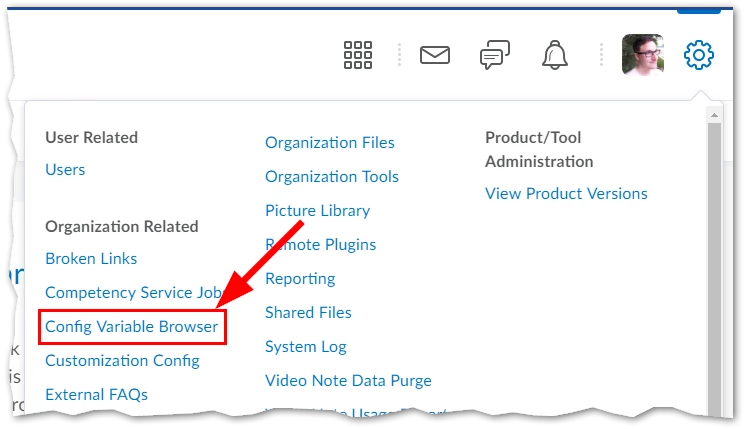
- In the Config Variable Browser, search for “contentitem” and then click "d2l.Tools.Lti.ContentItemMessaging.IsEnabled".
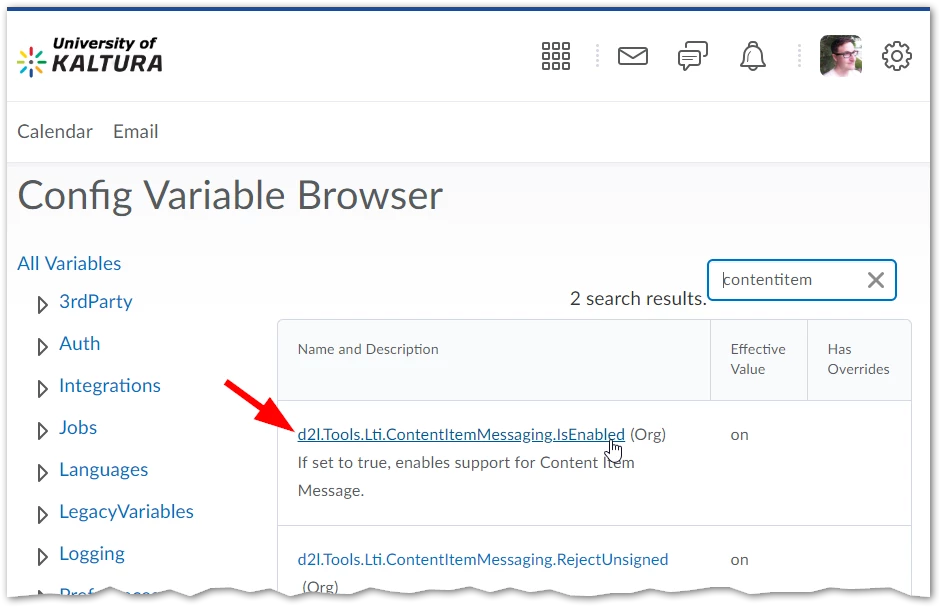
- Change the org value to “On”.

- Click Save.


Verify all security settings are checked under configure tool consumer information
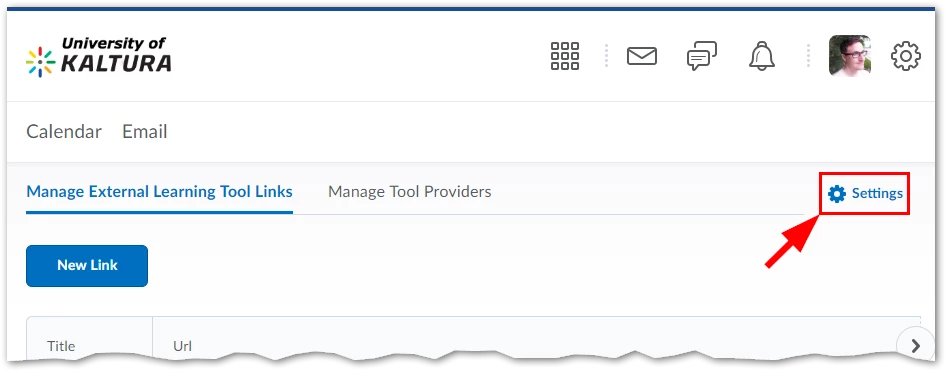
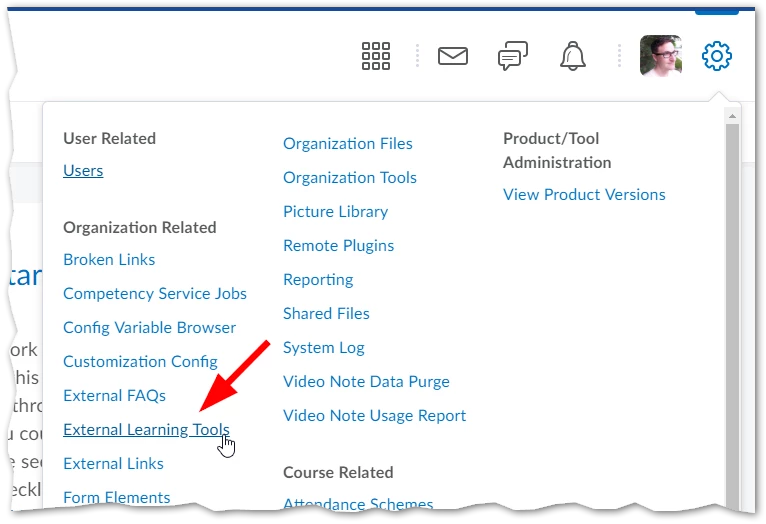
- Click the Admin Tools icon and click "External Learning Tools".

- With the "Manage External Learning Tool Links" tab selected, click "Settings".
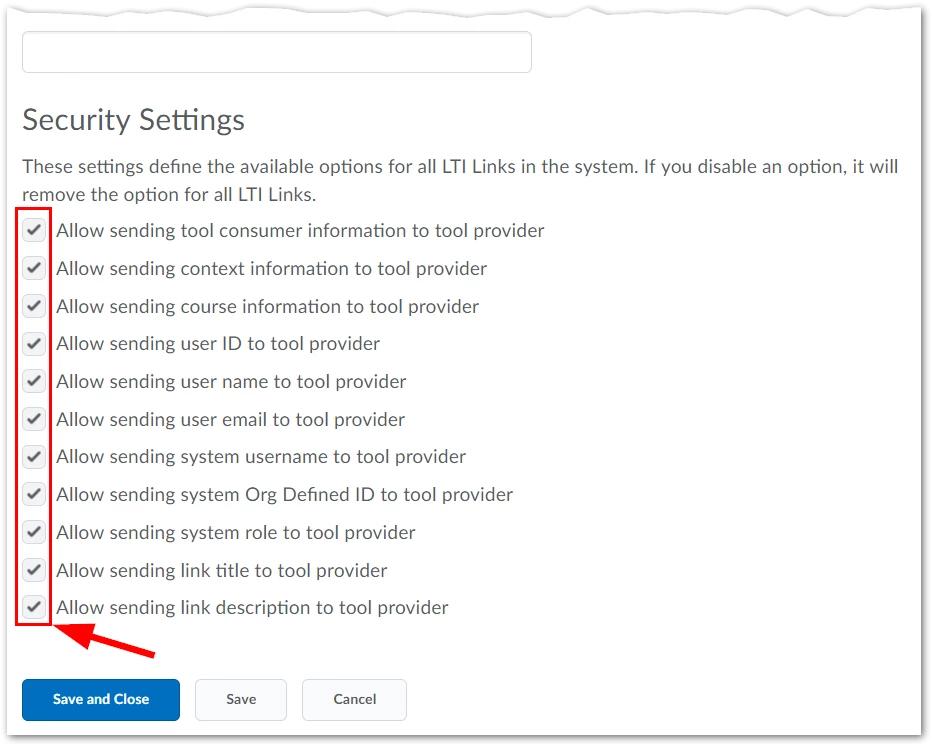
- Scroll to the bottom of the "Configure Tool Consumer Information" and check all security settings.


Deployment instructions
Add Kaltura as a tool provider
The Tool Provider allows you to enter the Kaltura key and secret one time for all the Kaltura tools.
- Click the Admin Tools icon and click "External Learning Tools".
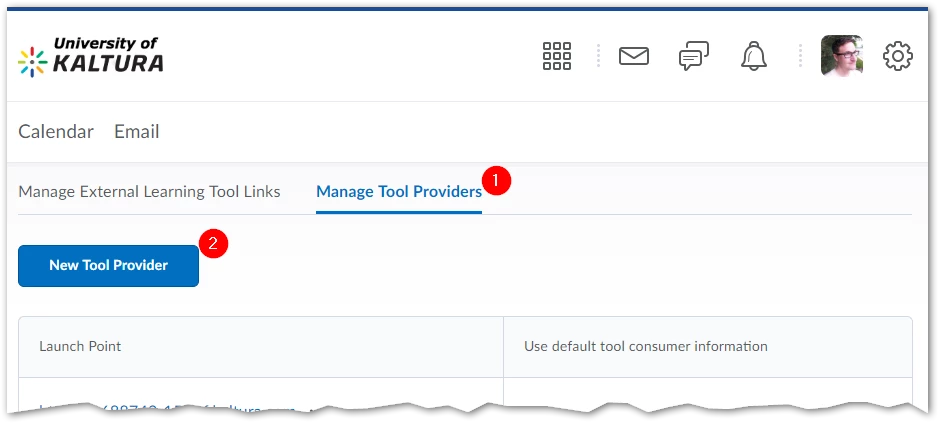
- Click on "Manage Tool Providers" tab (1) and then click "New Tool Provider" (2).
- Fill in the information as follows:
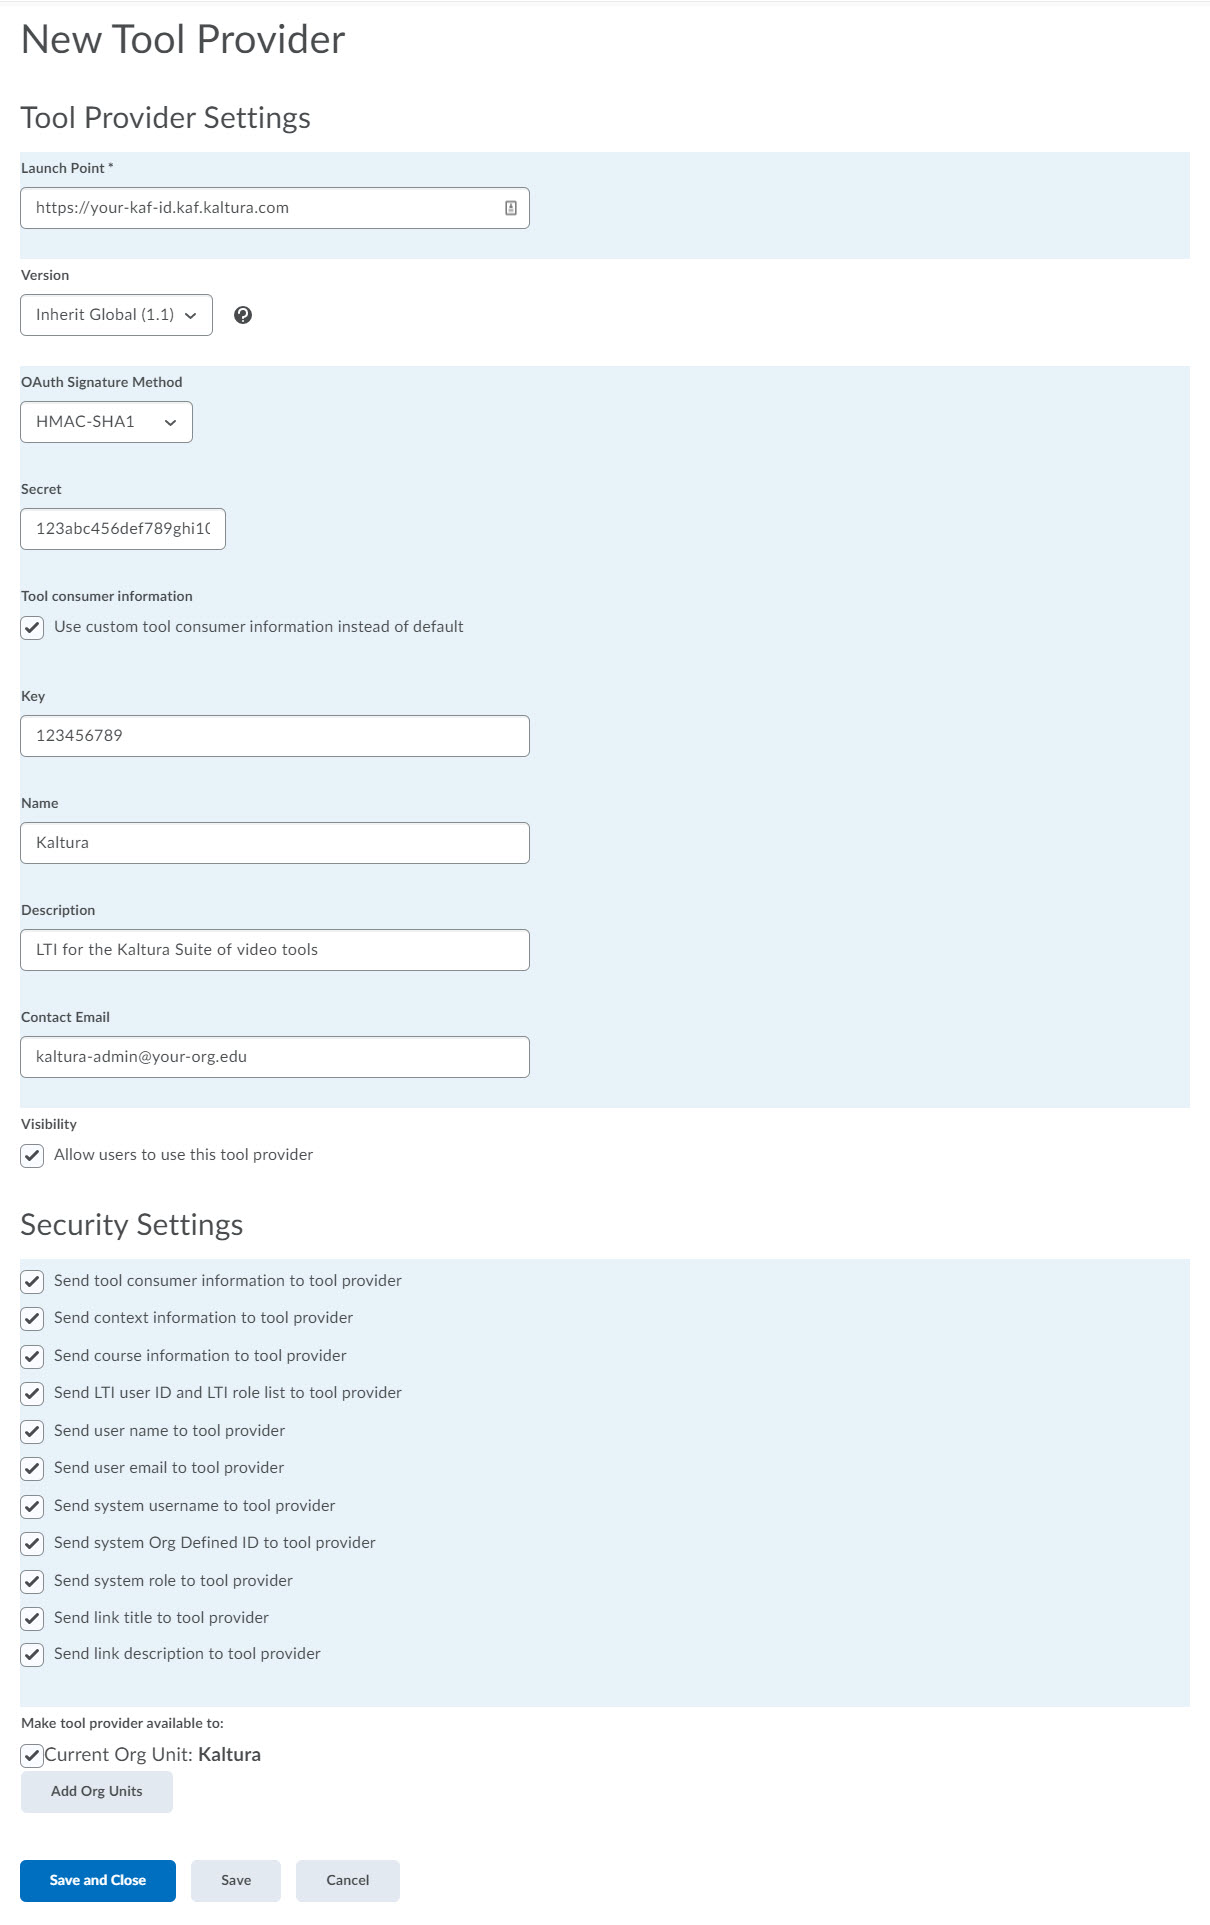


- Launch Point: use your KAF URL, e.g.:https://123456.kaf.kaltura.com
- Version: Choose the LTI version from the drop down
- OAuth Signature Method: Select HMAC-SHA1
- Secret: Use your Kaltura Admin Secret (from the "Integration Settings" tab of the Kaltura Management Console)
- Check "Use custom tool consumer information instead of default” under "Tool consumer information".
- Key: Use your Kaltura Partner ID
- Name: Choose a name for the Tool, e.g.: Kaltura Media Platform
- Description: Enter a description that users will understand, e.g. "Kaltura deeply integrates with D2L Brightspace to provide you with a centralized location for everything video, including creating, editing, curating, and publishing".
- Contact Email: Enter an email address for users who wish to contact support at your institution.
- Check "Allow users to use this tool provider" under "Visibility”.
- Check all boxes under “Security Settings”.
- Add the appropriate org units for where in your institution you would like to use Kaltura. We recommend choosing the main Org unit and all sub descendants, but you can also select otherwise.
Deploying the Kaltura tools
STEP 1 - Add the Remote Plugins
- Locate the Admin Tool and navigate to Remote Plugins.
- Create (three) New Remote Plugins.
- My Media
- Media Gallery
- Browse Search and Embed
Each plugin is independent of the others, so if you wish not want to use any one of them, there is no need to create the plugin.
For each plugin: set the following fields:
My Media
- Change the Plugin Type to “Navbar”.
- Name: Fill in the tool name – “Kaltura My Media”.
- Launch Point URL: Fill in your KAF URL concatenated with the following URL: “/d2l/index/launch/target/my-media”
For example: https://123456.kaf.kaltura.com/d2l/index/launch/target/my-media - Add the desired org units.
- Click Save.
Media Gallery
- Change the Plugin Type to “Navbar”.
- Name: Fill in the tool name - “KalturaMedia Gallery”.
- Launch Point URL: Fill in your KAF URL concatenated with the following URL: “/d2l/index/launch/target/course-gallery”
For example: https://123456.kaf.kaltura.com/d2l/index/launch/target/course-gallery - Add the desired org units.
- Click Save.
Browse Search and Embed
You can add the BSE Plugin in both the Insert Stuff and as a Quicklink. Each addition requires its own plugin.
To add the BSE Plugin in the Insert Stuff
- Create a Plugin Type - “Insert stuff (CIM)”.
- Name: Fill in the tool name - “Insert Kaltura” or “Add Kaltura Media”.
- Launch Point URL: Fill in your KAF URL concatenated with the following URL “/d2l/index/launch/target/browseandembed”
For example: https://123456.kaf.kaltura.com/d2l/index/launch/target/browseandembed - Icon URL: You can add the Kaltura logo: https://cdnsecakmi.kaltura.com/content/static/kalturalogo.png or leave empty if you are using the Brightspace default logo.
- Add the desired org units.
- Click Save.
To add the BSE plugin as a Quicklink
- Create a Plugin Type - “Quicklink (CIM)”
- Name: Fill in the tool name - “Insert Kaltura” or “Add Kaltura Media”.
- Launch Point URL: Fill in your KAF URL concatenated with the following URL: “/d2l/index/launch/target/browseandembed”
For example: https://123456.kaf.kaltura.com/d2l/index/launch/target/browseandembed - Icon URL: You can add the Kaltura logo: https://cdnsecakmi.kaltura.com/content/static/kalturalogo.png or leave empty if you are using the Brightspace default logo.\r\n
- Add the desired org units.
- Click Save.
Video Quiz (IVQ) Gradebook Integration
To enable the Kaltura Video Quiz (IVQ) Gradebook Integration, the following conditions must apply:
- The BSE Plugin should be available in the Insert Stuff or in a Quicklink.
- In the KAF instance URL, (e.g. 12345678.kaf.kaltura.com) the Ltigrading module must be turned on.
More information about Kaltura Video Quiz can be found here.
STEP 2 – Set the External Learning Tools
- Locate the Admin Tool and navigate to the External Learning Tools.
The three new tools should be displayed - one for each plugin you created. All tools will have the “eye” icon on them, noting that they are invisible to the users. - Click on each Kaltura tool and modify as follows:
- Check the “Visibility” check box.
- In the Key/Secret section, check Sign messages with key/secret with and enable Tool consumer key/secret to take the key/secret from the Tool Consumer.
- Under Security Settings, check “Use tool provider security settings”.
- Add the desired Org Units.
- Click Save and close.
Set Up My Media and Media Gallery as a Navigation Bar Link
Perform the following task first:
Add My Media to the Org Unit Navigation Bar
- As the administrator of the org go to the org unit home page.
- Hover over the navigation bar and click the pencil icon on the left. The Edit Navbar window is displayed.
- Click Create Custom Link.
- In the Create Custom Link window, enter My Media as the Name.
- Click Insert QuickLink.
- Select External Learning Tools.
- In the Insert a Quicklink window select My Media launch and click Insert.
The Create Custom Link window is displayed. - Click Save and Close.
Add Media Gallery to the Course Navigation Bar
Adding the Course Media Gallery Tool can be done either by the admin in the course template, or by the individual course admin
- As the administrator of the org go to the org unit home page.
- Hover over the navigation bar and click the pencil icon on the left.
The Edit Navbar window is displayed. - Click Create Custom Link.
- In the Create Custom Link window, enter My Media as the Name.
- Click Insert Quicklink.
- Select External Learning Tools.
- In the Insert a Quicklink window select Course Media Gallery launch and click Insert.
The Create Custom Link window is displayed. - Click Save and Close.
Verify Your Browse Search and Embed Deployment
This section describes how to verify the BSE deployment. According to the plugins you created you might have one or two locations where you can find the Kaltura BSE plugin.
BSE in the Brightspace Insert Stuff
To verify that the BSE is in the Brightspace Insert Stuff
- Navigate to a course, and create a new content item such as an Announcement or Assignment.
- Enter a Headline.
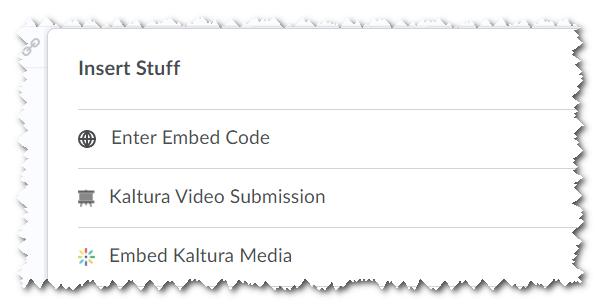
- Choose the new Insert Stuff icon.
The Kaltura button name depends on what you chose to write on the plugin name. In this example, it is Add Kaltura Media. - Select the new plugin name you created.
- Choose the video. See the Kaltura Video Extension for Brightspace by D2L User Guide for more information.
- Click Insert.
- Save the announcement you created.
After the announcement is in place, navigate to it, and play the video.
BSE in the Brightspace Quicklink
To verify that the BSE is in the Brightspace Quicklink
- Navigate to a course, and go to the course content.
- Click on the “Add Existing Activities”.
- Select the new plugin name you created.
The Kaltura button name depends on what you chose to write on the plugin name. In this example it is Add Kaltura Media. - Choose the video, and click select.
Navigate to the bottom of the content and click on the new item you created.
A Kaltura video should appear.
Kaltura video Submission in the Brightspace Insert Stuff
Create a new tool similar to the BSE, using the following link instead:
https://{your_KAF_URL}/browseandembed/index/browseandembed/assignment/yes
You can use this icon for the submission tool: https://cdnsecakmi.kaltura.com/content/static/submission.png
To learn more about the LMS Video Assignments, please visit Submission Workflow Admin Guide for the LMS Video Assignments.
Legacy D2L deployment
Working with Legacy D2L Kaltura Deployments and Widgets
This section is targeted to Kaltura and Brightspace by D2L existing clients who have been using the legacy Kaltura integration in the Insert Stuff.
Upgrading Legacy Kaltura Embeds to the New BSE Embeds
The legacy Kaltura button located in the Insert Stuff is part of the former integration that is maintained by D2L. Upgrading the content from the legacy Insert Stuff embeds to the new BSE is also maintained by D2L.
Using the Legacy and New Kaltura Embeds
Both new and legacy Kaltura versions of the Insert Stuff can work together side by side. You may want to gradually adapt to the new BSE. You can do so and when ready, you can disable the ability to add content with the legacy version.
Follow these steps is you choose to add new content only using the new Insert Stuff,
To continue working with legacy embeds
- Login to Brightspace, click the Admin Tools gear, and under Security, select the Roles and Permissions.
The Edit Role Permissions window is displayed. - Filter by Role and select the Role you want to modify.
- In the Filter by Tool, select Kaltura.
- Remove all the checkboxes, and Save.
- Repeat step #2 for all other roles.
By removing all the checkboxes, users with the role you chose, will no longer be able to see the legacy Kaltura button in the Insert Stuff panel.
Troubleshooting When Upgrading to the New BSE Feature
Clients that are upgrading the existing Insert Stuff Kaltura button with the new BSE feature may encounter the following known issues:
Getting "Access Denied" after installing the BSE tool.
Most likely reason: Since you installed Kaltura in the past, before Tool Consumers/Providers were introduced in D2L, you probably have many ‘Tool Providers’ with the same name (such as 123456.kaf.kaltura.com) in the ‘Tool Providers’ section.
Having multiple Tool Providers with the same name may cause issues when adding the BSE, as these legacy Tool Providers do not contain the secret and key. Since we recommend setting the tools to “Sign messages with key/secret with Tool Consumer key/secret”, that may be the cause of the ‘Access denied’ error to display, as the new tool uses a random ‘Tool Provider’ that does not contain the key/secret.
Solution: There are 2 options to resolve this issue.
- Remove all the legacy Tool Providers. Since the legacy tools were not set to get the key/secret from the Tool Consumer, deleting them should not interfere with My-Media and Media Gallery to continue working.
- Instead of setting the new external learning tool to ‘Sign messages with key/secret with Tool Consumer key/secret’, create a new plugin and set the plugin with the key/secret in advance. You will also need to fill in the secret/key in the new external tool that will be created.
Be certain to set the “Security Settings” in the external tool to “Use link security settings” and check ALL the boxes.
Another possible reason: The Browseandembed module is not available or enabled in your KAF instance. Verify that it is enabled by logging in to the KAF admin page.
Solution: contact Kaltura support and ask them to enable the "Browseandembed" module in your KAF instance.
Widgets in Brightspace
Using the Brightspace Widgets in a course is still possible, however, since the widgets are displayed smaller than they should be, we do not recommend using them. While the Kaltura media can function on a smaller screen, we found that adding the Kaltura My Media and Media Gallery in the Navigation Bar provides a better UI and User experience.
If you want to use the widgets, add the Kaltura plugin and in the plugin type choose “Widget”. Widgets are only relevant to My Media and Media Gallery.
