About
The Sessions component shows your scheduled sessions on a homepage as interactive cards, so visitors can add them to their calendar and join them when they start.
Here, homepages are the main page of your site and the main page of each event or campaign that you build in Content Hubs. Content Hubs calls the pages you design yourself custom pages.
To add a component to a homepage, and to set its order and who can see it, see Configure components for homepages in Content Hubs.
Applies only to Content Hubs. Requires Theming to be enabled on your site.
Configure the Sessions component
This component shows scheduled sessions as interactive session cards.
The Add to calendar button changes to Join now a set number of minutes before a session starts (15 minutes by default). To change this timing, use the SessionCardJoinNowIndication setting in the Widgets module.
To learn how visitors save a session to their calendar, see Add to Calendar feature in Content Hubs. If your site uses RSVP, see RSVP to a session in Content Hubs.
This component requires the Eventplatformcore module to be enabled.
- Content - Select the source of the content. When you select it, more fields appear.
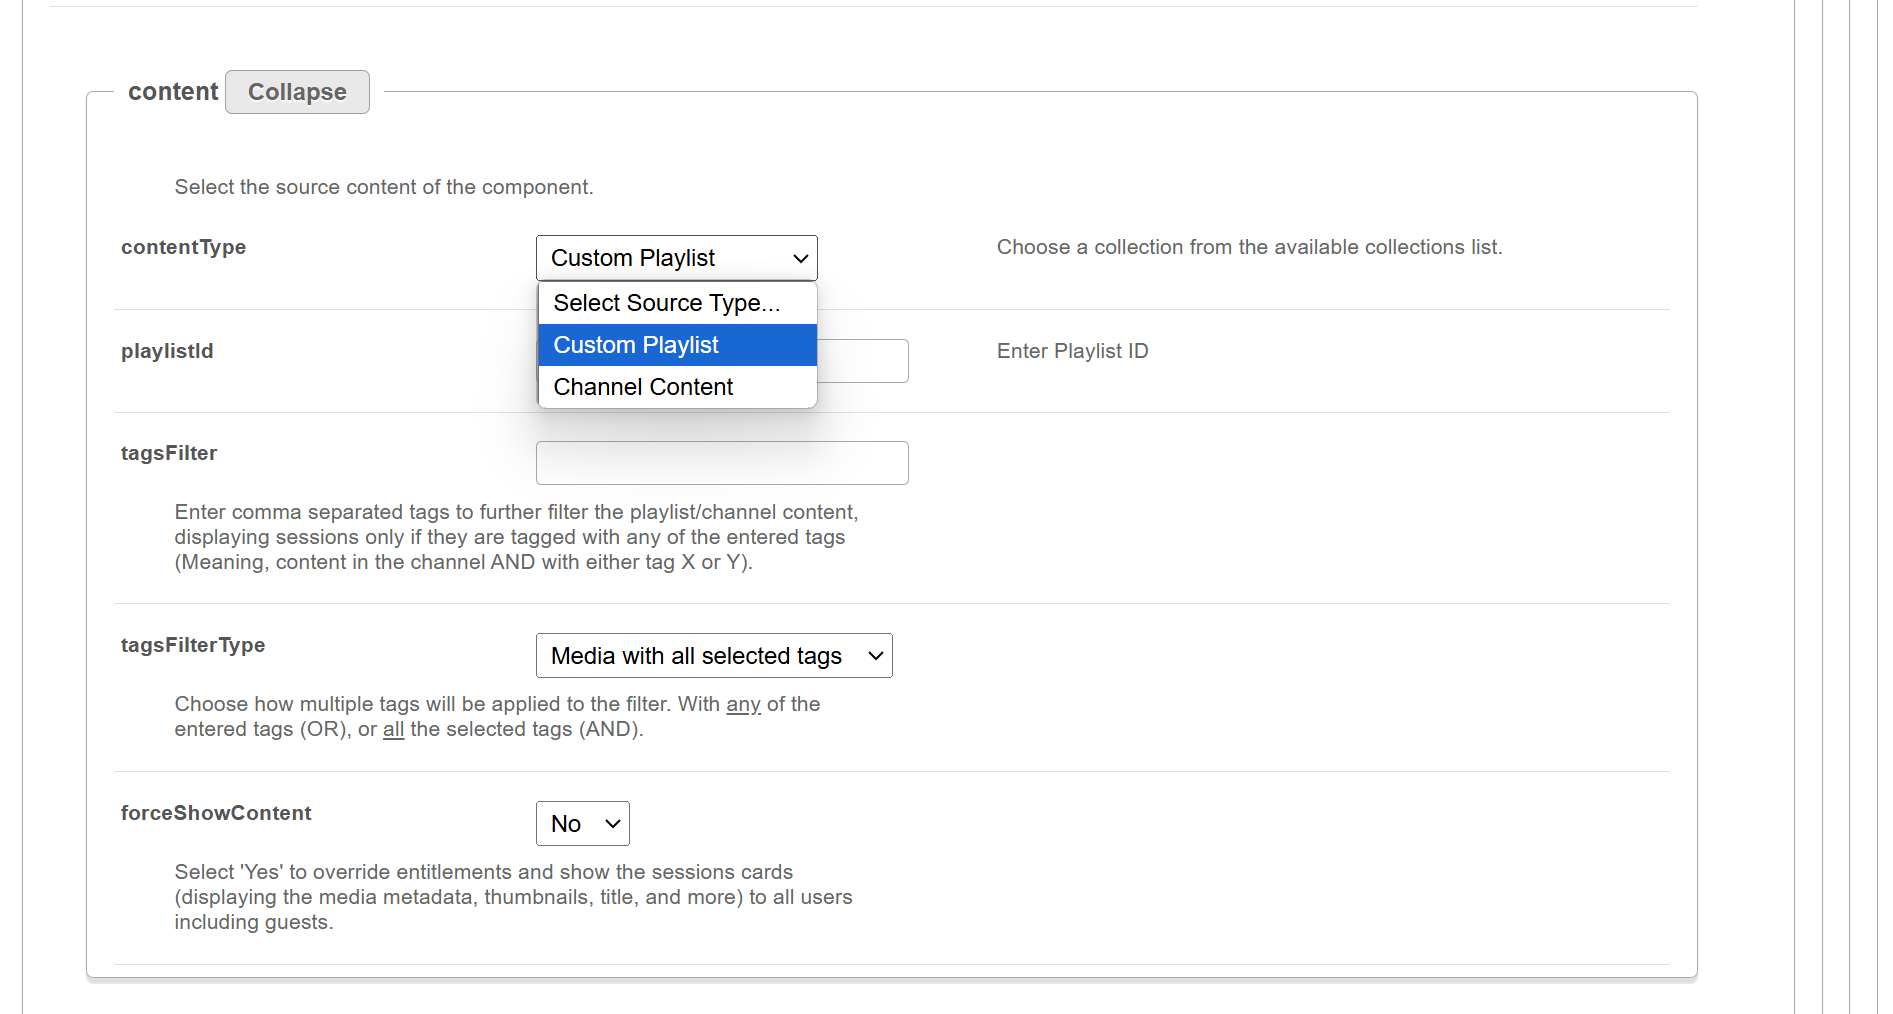
- contentType - Select Custom playlist or Channel content, and then enter the playlist ID or search for the channel.
- tagsFilter - Enter tags, separated by commas, to filter the playlist or channel content further. The component shows only sessions with the tags you enter.
- tagsFilterType - Select how multiple tags are applied:
- Media with all selected tags - Shows only media that has all the tags you entered.
- Media with any of the selected tags - Shows media that has at least one of the tags you entered.
- forceShowContent - Select Yes to ignore entitlements and show session cards, including media metadata, thumbnails, and titles, to all users, including guests. Select No to respect entitlements.
For guests, session links are disabled.
- headerText - Enter the title shown at the top left, for example, Agenda.
- headerType - In the topRightHeader section, select how the text at the top right of the component behaves:
- No link - Shows the text only.
- Enter URL - Lets you enter a direct link. The
rightHeaderURLfield appears. - Custom page - Lets you choose a page from the available pages in the CustomPages module. The
CustomPagefield appears.
- rightHeaderText - Enter the text to show at the top right of the component. To make it a link, select Enter URL or Custom page in the
headerTypefield. Leave empty to hide it. - rightHeaderURL - Enter the link to show at the top right of the component. It opens in a new tab. This field appears when you select Enter URL.
- CustomPage - Select the page to send users to. You create pages in the CustomPages module. This field appears when you select Custom page.
- scheduleOrder - Select how sessions are sorted: Earliest to latest or Latest to earliest.
The component shows up to 50 session cards.
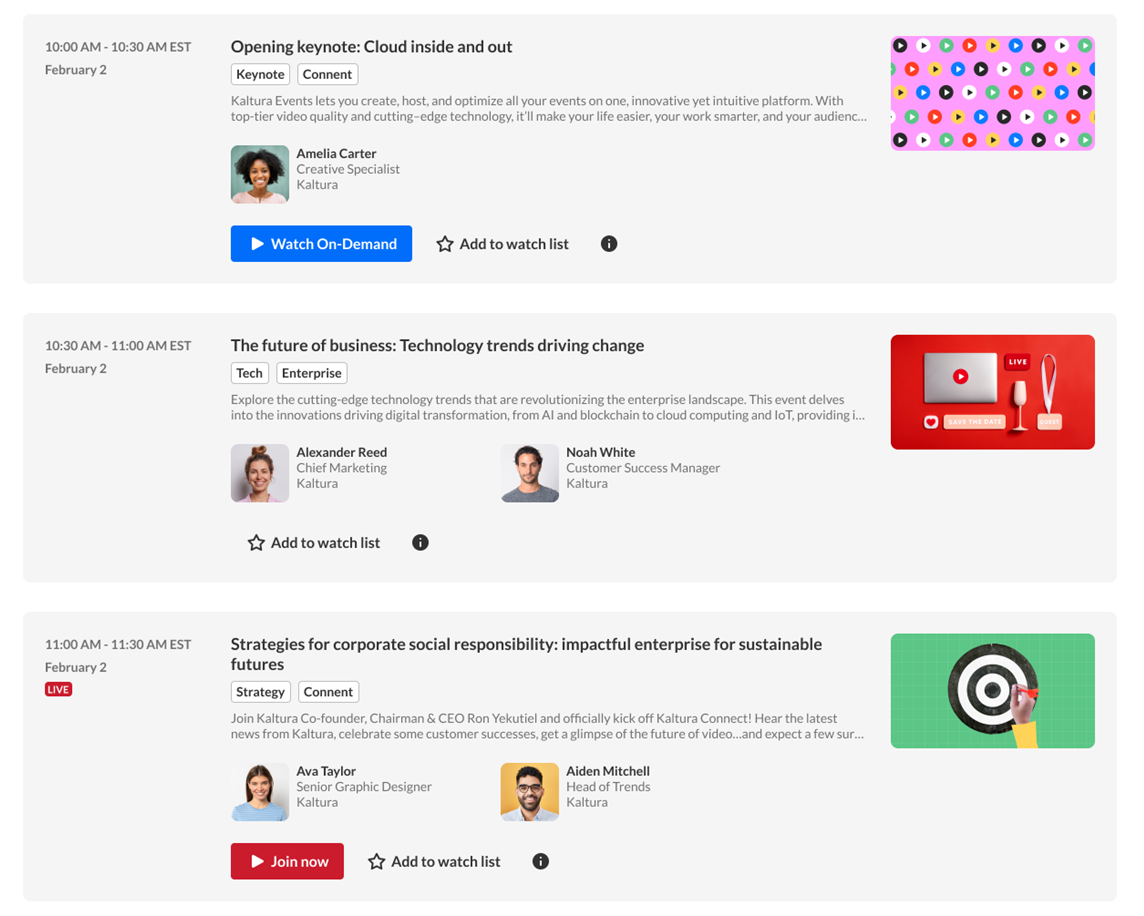 Example of interactive session cards
- displayType - Select which sessions to show:
- Show all (default) - Shows all sessions.
- Upcoming only - Shows only future sessions. If there are no upcoming sessions, the component doesn't appear.
- Toggle upcoming & past sessions - Shows upcoming sessions first. Users can switch between upcoming sessions and all sessions.
Save your changes
After you configure the component, select Save at the bottom of the page. This saves your page and clears the site and module cache.