Kaltura’s High-Speed Upload option is targeted at content administrators (KMC users) that upload media to their KMC account. The High-Speed Upload option is particularly useful for content administrators uploading large source files or time sensitive content on a regular basis.
Aspera’s patented FASP™ Transport Technology is a proven standard for the high-speed movement of large files over IP Networks. It achieves speeds that are significantly faster than FTP and HTTP. Please refer to Aspera’s FASP benchmark information to learn more.
The High-Speed Upload option is activated by Kaltura when the High-Speed Upload option is included or added to the service agreement.
How is Content Ingested to Kaltura When Using the High-Speed Upload option?
Kaltura’s High-Speed Upload is enabled by the Aspera Connect Server hosted and managed in Kaltura Data Centers. The High-Speed Upload option is integrated with Kaltura’s Drop Folders’ ingestion service in a similar way to the ingestion flow of uploading files to a Drop Folder hosted in Kaltura using an FTP client.
With the High-Speed Upload option, files are uploaded using Aspera’s FASP™ Transfer Technology to a Kaltura Drop Folder hosted in Kaltura. From the Kaltura Drop Folder, the ingestion process will automatically create Kaltura entries and will initiate the transcoding process and/or the setting of all media assets at their final location from which they are available for playback and content delivery.
The ingestion process from the drop folder supports the following types of workflows:
- Upload of stand-alone media files
- Upload of both media files and XML files where metadata setting is automated as well.
To read more about Kaltura’s Drop Folder service please refer to the article about Kaltura Drop Folders.
How to Enable the High-Speed Upload Option to Your KMC Account?
To activate the High-Speed Upload option for your KMC account, please contact your Kaltura account manager or any other Kaltura representative you are currently working with. The activation process includes the provisioning of an Aspera user account and the Kaltura hosted Drop Folder to which the Aspera account will be contented.
The created Aspera account is set to the maximum aggregated bandwidth defined for your account. Your concurrent uploads via this account may utilize the maximum aggregated bandwidth only. Subsequently, the more concurrent uploads you have, the slower each upload will be.
By default, all of the Aspera accounts in Kaltura are set to an Aspera Fair Transfer Policy. For more information about Aspera’s transfer policy settings, see the Aspera Connect Guide.
Aspera Upload Client Options
For uploading content to Kaltura via Aspera’s FASP™ Transfer Technology,you may choose different upload client options:
- Uploading Content via Kaltura’s Aspera Upload Web Page - provided as part of Kaltura’s High-Speed Upload service.
Uploads from this page are managed from Aspera’s Connect web browser plug-in. Step by step guidelines on how to install the Aspera connect web browser plugin and to upload content to Kaltura on an on-going basis are provided in the Uploading Content via Kaltura’s Aspera Upload Web Page section. - Your selected Aspera desktop transfer clients: Aspera Client. These clients provide extended features set that may be of use for high usage or automated transfers. The Aspera desktop transfer clients are offered and supported by Aspera.
Uploading Content via Kaltura’s Aspera Upload Web Page
After the Aspera account and its connected drop folder is activated, you can immediately upload content to your KMC account via the standard Aspera Connect Web Upload page.
To upload content via Kaltura’s Aspera Upload Web Page
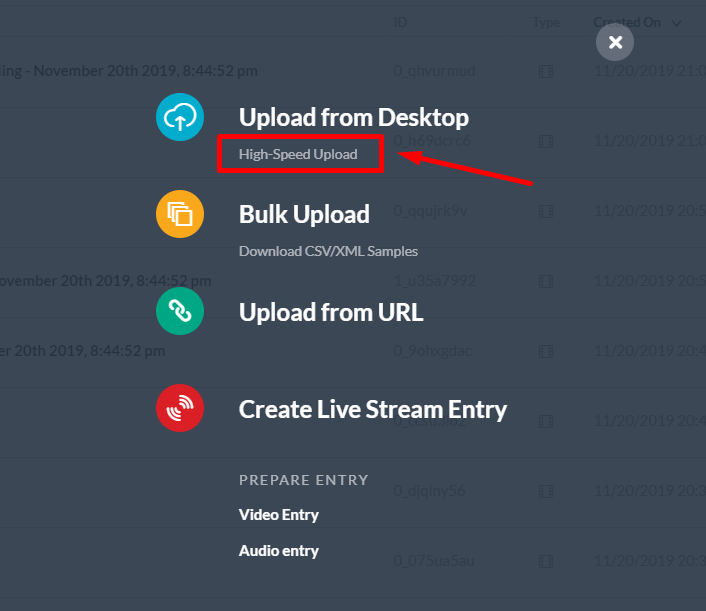
- Open Kaltura’s High-Speed Upload Web page either by clicking the High-Speed Upload button from the Upload menu that is enabled in your KMC account, or by browsing to: https://aspera.kaltura.com. (Requires Credentials)

First-Time Setup of the Web Upload Option
The Workflow:
- Install the Aspera Web Browser Plugin
- Use the Kaltura’s Aspera Upload Web Page to Upload Files for the First Time
Install the Aspera Web Browser Plugin
- Access Kaltura's Aspera Upload Web page at https://aspera.kaltura.com.
- Enter your Aspera account credentials provided by Kaltura.
When accessing Kaltura’s Aspera Upload Web page for the first time, you will be prompted to enter your Aspera account credentials provided by Kaltura. These credentials will be used by all users uploading content via a specific drop folder to your KMC account. Depending on your browser options and your organizational security needs, save your credentials so there is no need to enter them each time you work with this page.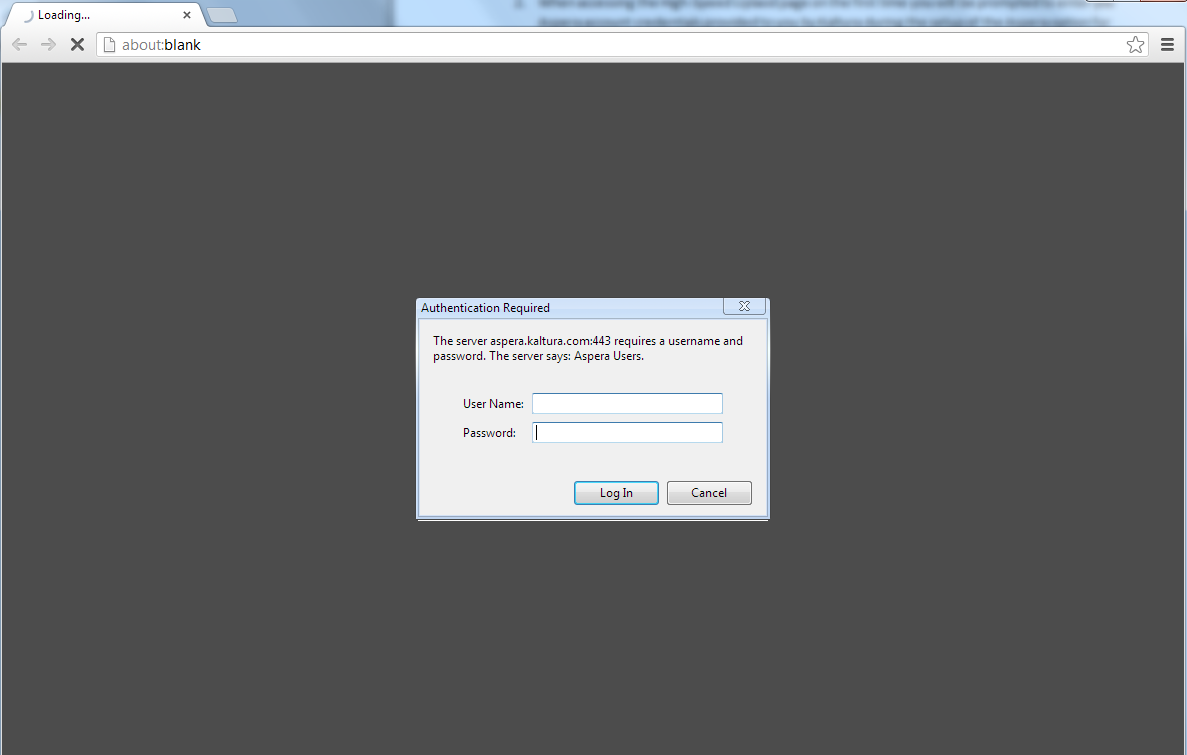
- Click Install Now to install the Aspera Web Browser Plugin.
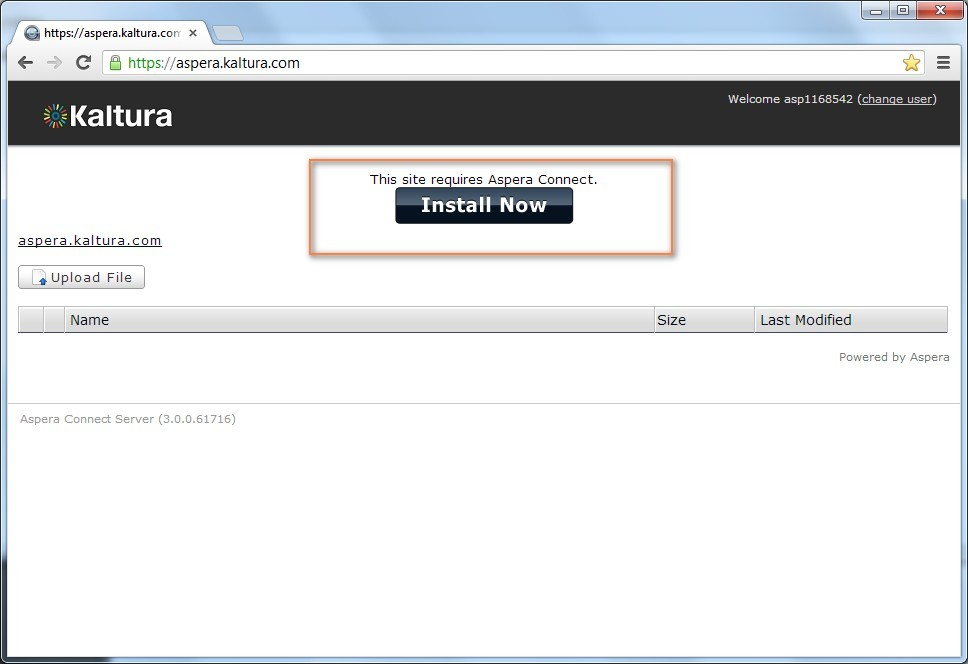
You will be redirected to Aspera’s download page for downloading Aspera’s web browser plug-in for the OS you are using.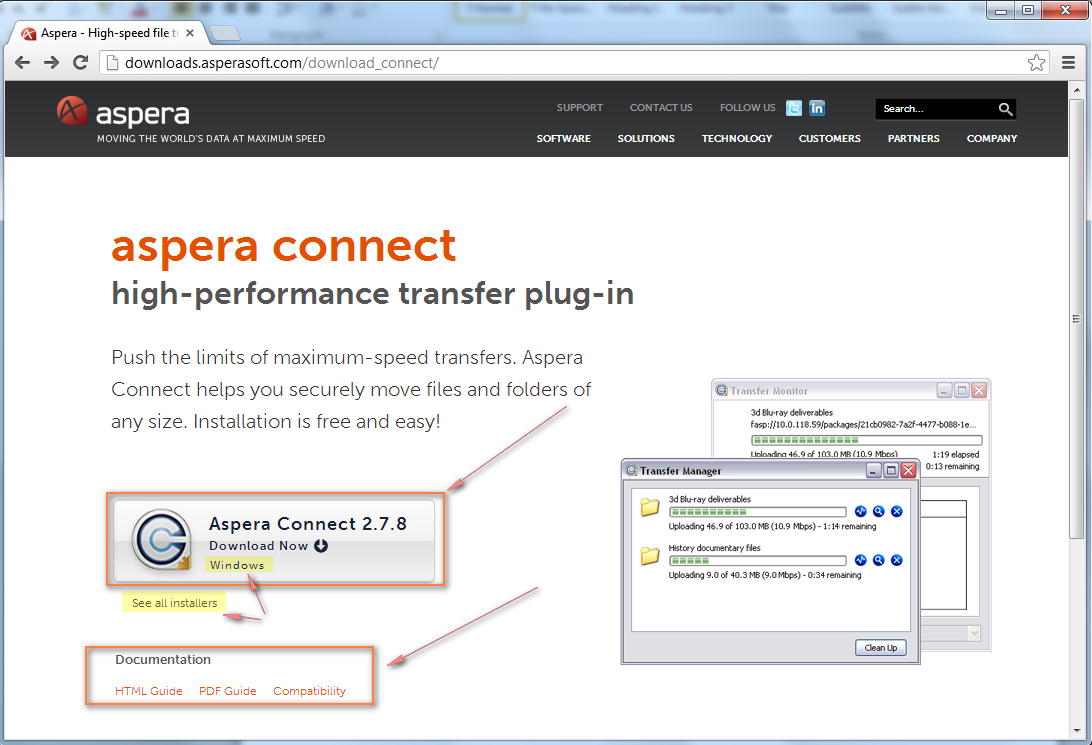
The web browser plugin enables you to upload media in the background and allows you to continue working. The web browser plugin also enables you to monitor the progress of your file uploads to Kaltura, provides a real-time view about your network utilization for the specific uploads, and provides the ability to pause and resume these uploads. For additional information about configuration options of the web browser plug-in and browser version compatibility, see the Aspera Connect 2.7.7 documentation available in HTML format and as PDF. - After the plugin is downloaded, activate its standard installation process:
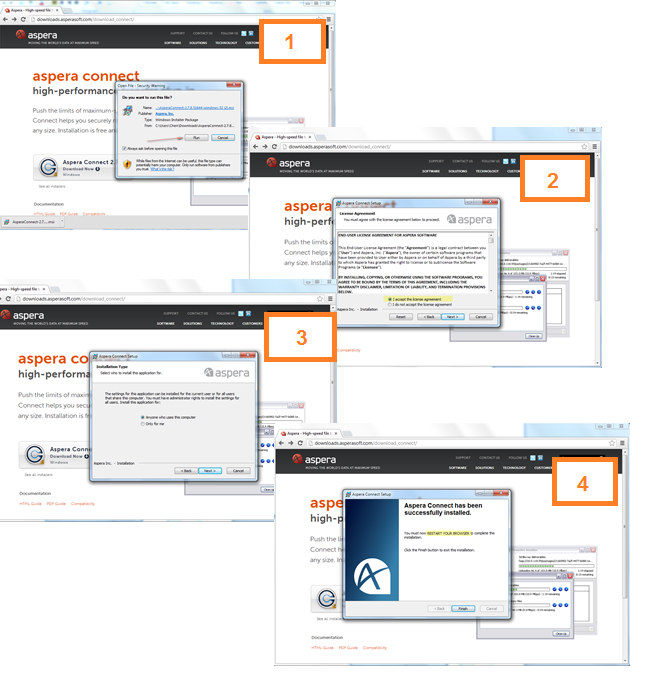
- After installation is completed, the plugin is installed on your computer. You can adjust the plugin preferences as needed, or you can immediately start uploading your content from Kaltura’s Aspera Upload web page at https://aspera.kaltura.com. The plugin is automatically activated when you upload files so there is no need to launch the plugin manually from your computer.


Use Kaltura's Aspera Upload Web Page to Upload Files for the First Time
- On Kaltura’s Aspera Upload Web page click Upload File.
- Select a file or multiple files to upload. Note that selecting a folder for uploading all media files in it, is not supported by the Kaltura drop folder engine.
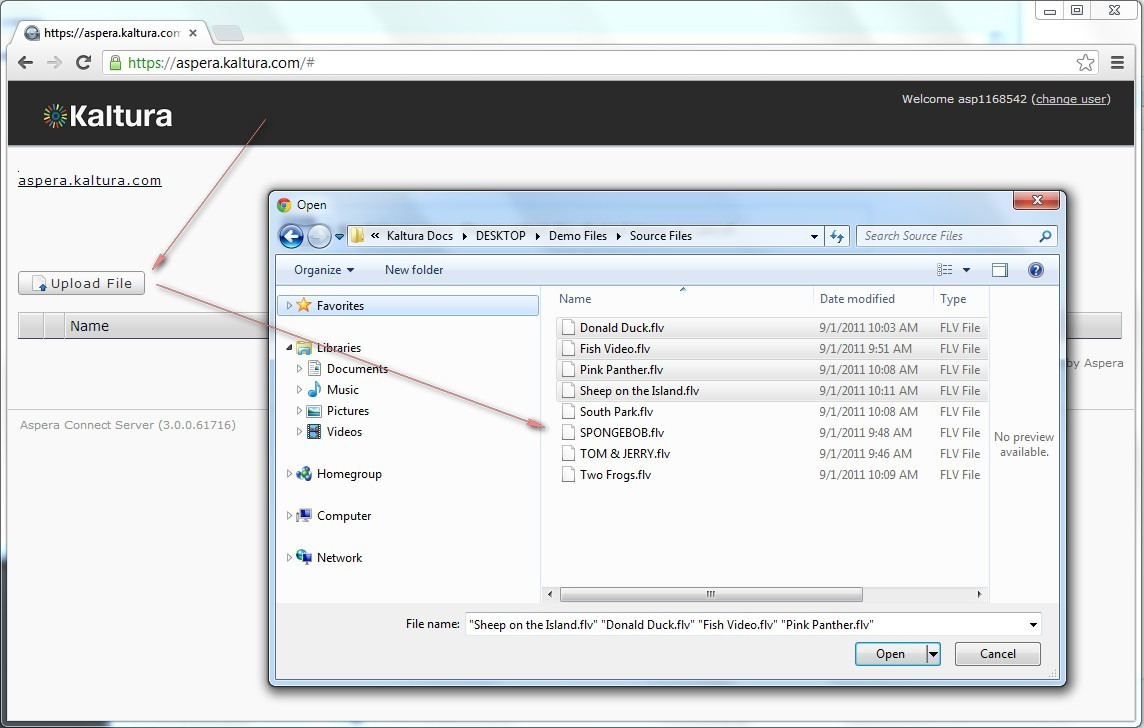
NOTE: According to Aspera’s guidelines for uploading files, you should avoid transferring files with the following characters in the file name: / " : ' ? > < & *
- The first time you upload a file after you installed the web plugin, you will be prompted by a plugin popup to allow the transfer to the aspera.kaltura.com server.
- Check the box Use my choice for all transfers to this Host and click Allow.
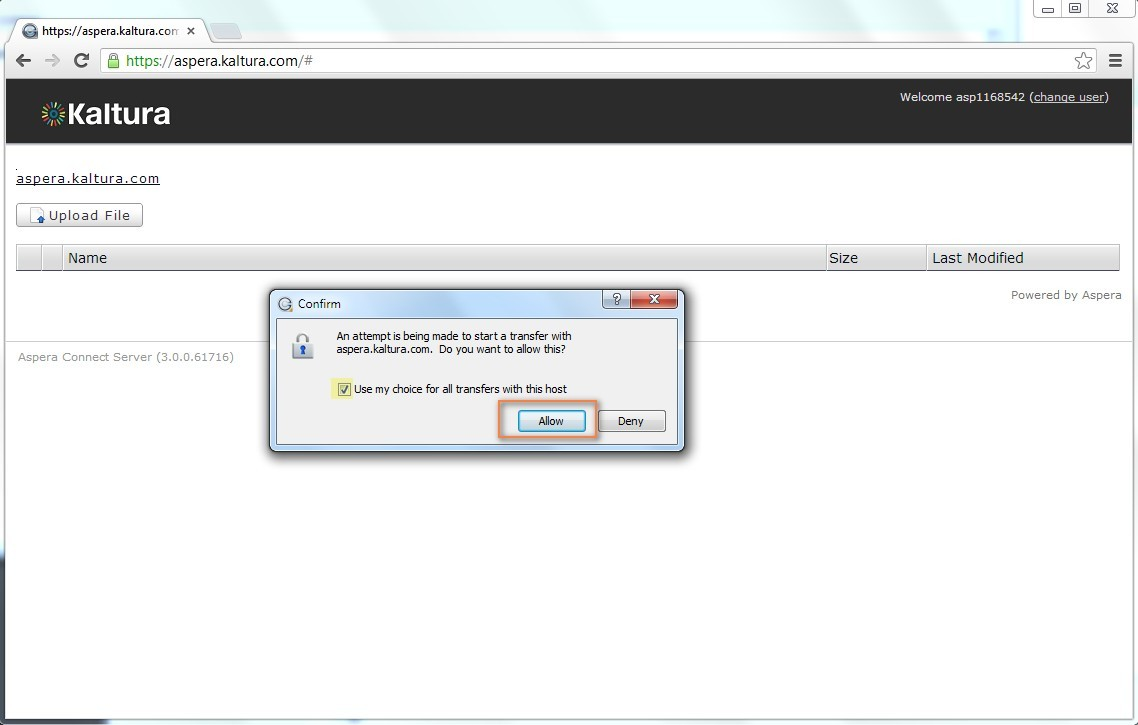
Checking this box sets aspera.kaltura.com as a trusted host within the Aspera Web Plugin security configuration. - An authentication prompt is displayed to enter your Aspera account credentials again.
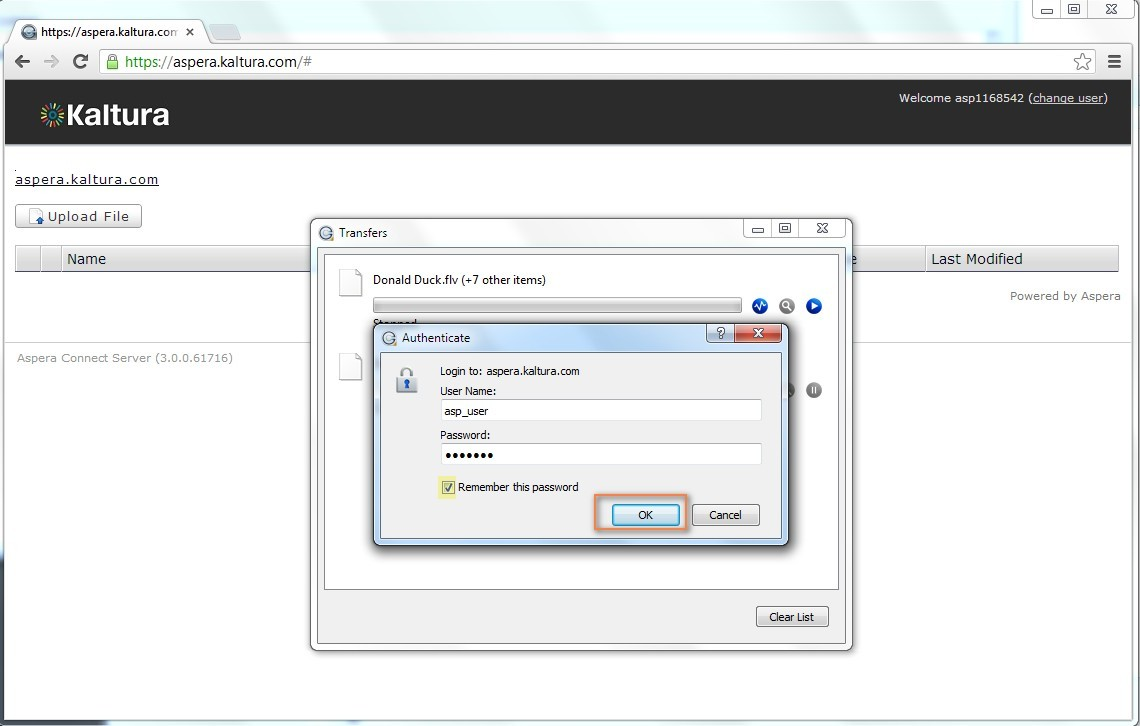
If you check the Remember this password option - your Aspera account credentials will be saved into the Aspera web browser plugin preferences as well under the security>Passwords tab.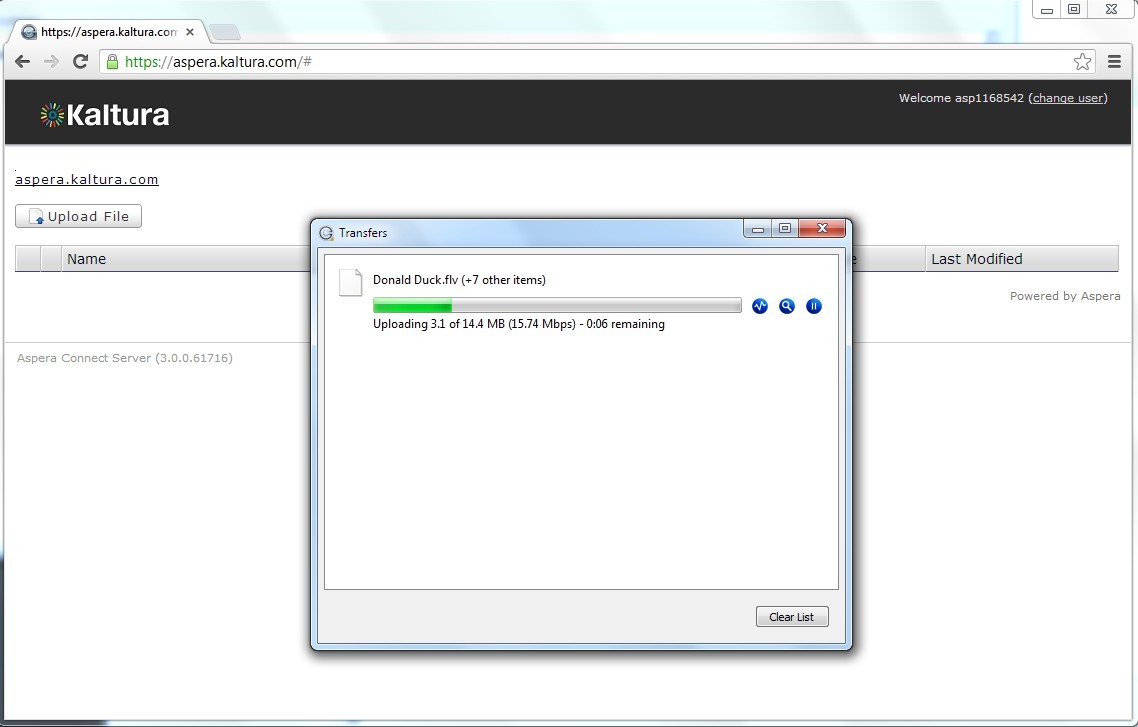


After you set the initial plugin preferences settings, your upload will start immediately and you can monitor the upload progress from the Aspera Web Browser Plugin Transfers window.
If you upload content from the same computer to multiple drop folders in Kaltura via multiple Aspera accounts, make sure you are uploading content to the intended drop folder/KMC, by switching your Aspera user account from the Change User link at the top right corner of the Aspera Upload Web page.
On-Going Uploads via Kaltura’s Aspera Upload Web Page
On an on-going basis all you need to use is the Upload File button on the Upload Web page. You can monitor the progress of your uploads via the Aspera Web Browser Plugin’s Transfers page and you can view the uploaded files in the Upload Web page list until they are ingested to Kaltura.
Uploading Content via Aspera’s Desktop Clients
Please contact Aspera for more information on advanced capabilities supported by their desktop clients and for getting their licenses and support offering. When using one of Aspera’s desktop clients, you should set your Aspera host as: aspera.kaltura.com and use the user credentials provided by Kaltura to your Aspera account on this host.
Managing and Monitoring the Processing of Your Uploaded Files
Regardless of the type of Aspera client you are using, your Aspera account in Kaltura is connected to a Kaltura hosted drop folder and utilizes its built-in automated ingestion process.
A parallel view of files being uploaded via Aspera to its connected Kaltura hosted Drop Folderis displayed from the Drop Folders Page in the KMC. From this page, you can view more detailed information about the current state of file processing by the Drop Folder service, from the time the Aspera upload process is completed until the file is moved to Kaltura storage for transcoding.
To read more about Kaltura’s Drop Folder ingestion flow please refer to article about Kaltura Drop Folders.

Deleting Files from your Aspera Account
By default, files that were successfully ingested to Kaltura will automatically be deleted from your Aspera account a few minutes after their processing was completed. To maintain the automated processing of the drop folder engine, we recommend that files should not be deleted before their processing completion. When there is a need to delete files, the files should be deleted from the Drop Folder page in the KMC. The Delete button in this page allows you to delete a file and all of its related records in Kaltura.
Pausing and Resuming Your Uploads
The different Aspera clients allow you to pause and resume your uploads. Pausing and resuming uploads may be useful when you need to pause some of your already uploading jobs and give priority to a more urgent job. We recommend that you do not pause an upload for more than half an hour, to prevent cases in which paused jobs will be mistakenly processed by the drop folder clean-up service as if their upload was completed.


