About
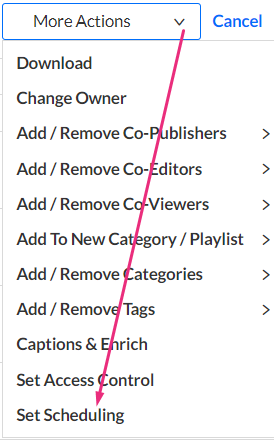
The More Actions menu in Rich Media CMS is used for carrying out single or bulk actions on supported entries. It is available on the Entries page and for document entries on the Documents page.
The More Actions menu stays hidden until you select at least one entry.

The More Actions menu offers a variety of options for performing a single or bulk action.
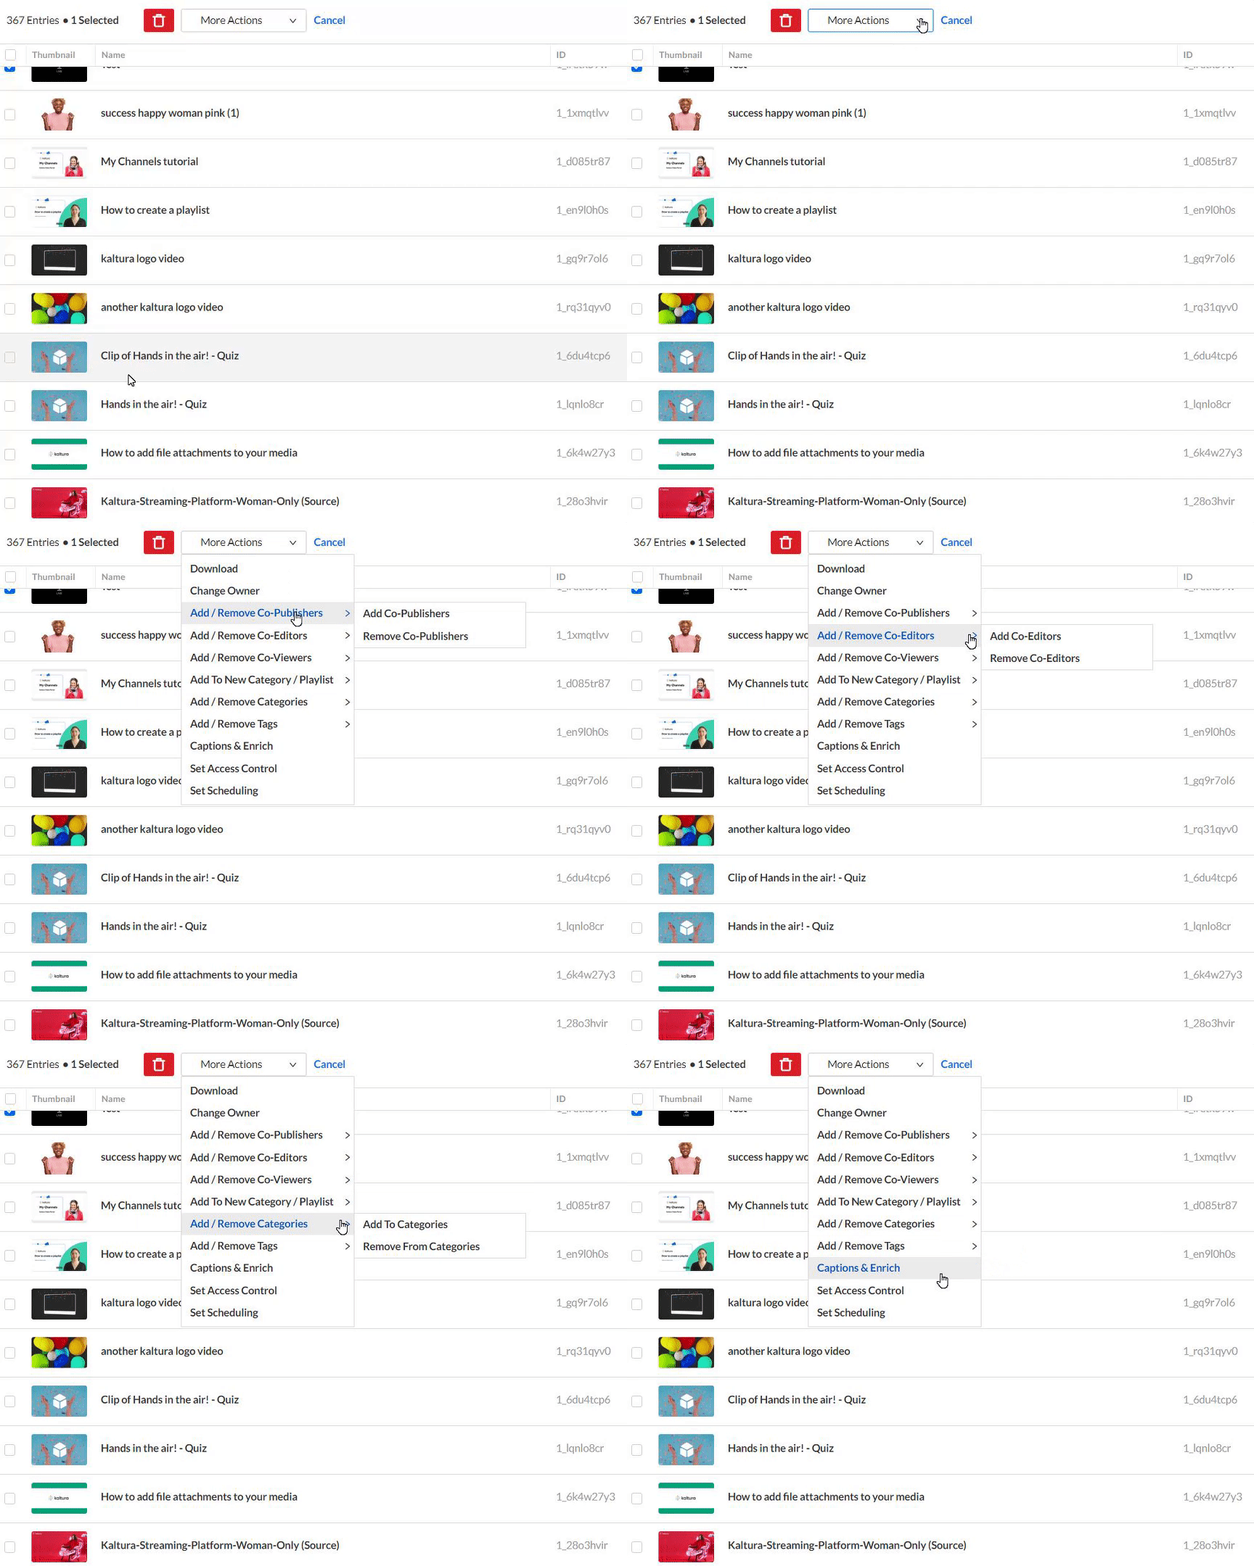
Menu options
- Download – Select to download the selected asset(s).
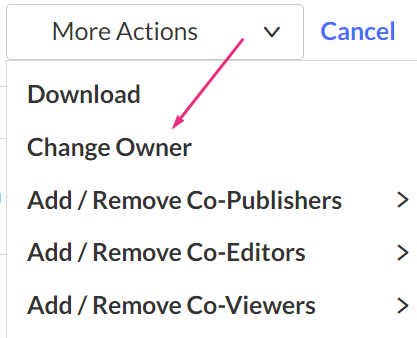
- Change Owner – Use to change the owner of one or more entries.
- Add/Remove Co-Publishers – Use to add or remove Co-Publishers.
- Add/Remove Co-Editors - Use to add or remove Co-Editors.
- Add/Remove Co-Viewers - Use to add or remove Co-Viewers.
- Add to New Category/Playlist - Use to add or remove one or more categories to a playlist.
- Add/Remove Categories – Use to add or remove one or more entries to a new category.
- Add/Remove Tags – Select to add all remove tags from the selected assets.
- Captions and Enrich - Select to order captions and/or enrichment services.
- Set Access Control – Use to set a different Access Control Profile.
- Set Scheduling – Select to edit the scheduling for the selected assets.
Download
This option isn't available for document entries.
- Click the checkbox(es) next to the entry(ies) you want to download.
- From the More Actions menu, select Download.
- Choose the format, also known as the flavor, from the drop-down list.
- Click Download selected entries.
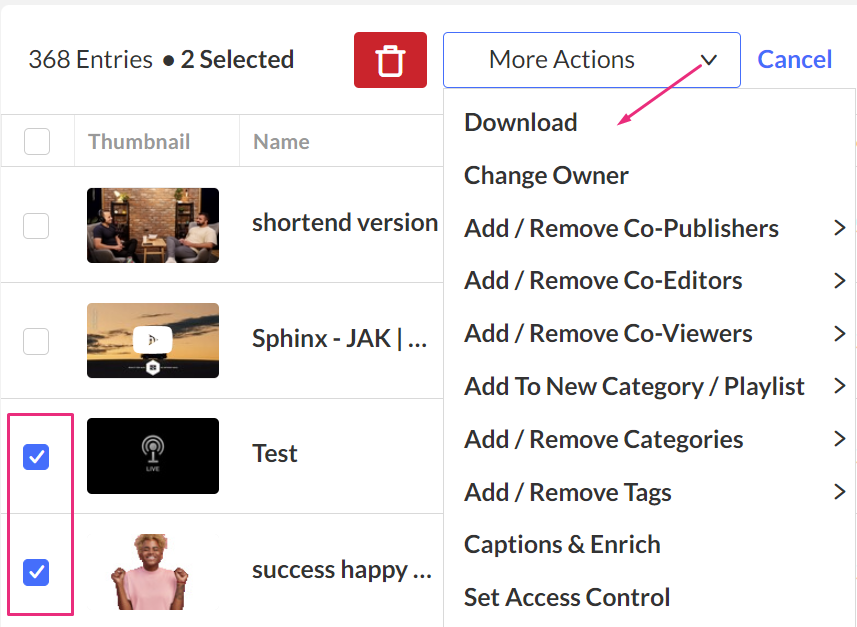
The Download screen displays.
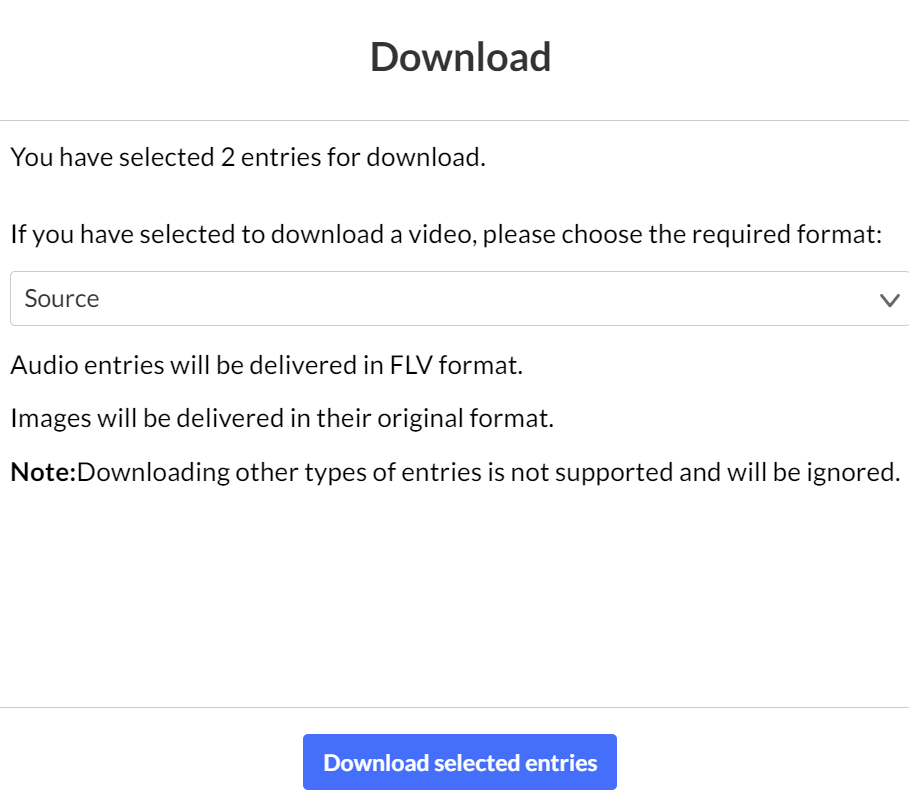
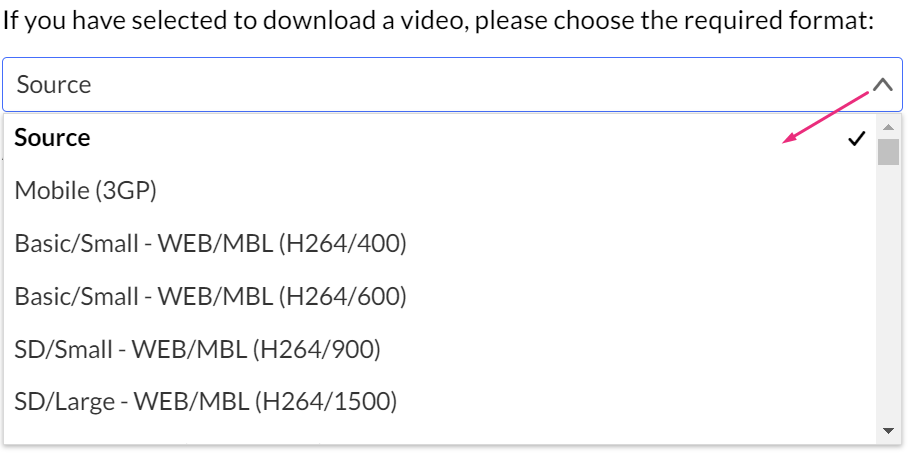
A confirmation message displays.
The download link will be sent out to your email address after processing has been completed.
The download link will expire after 24 hours.
Change Owner
- Click the checkbox(es) next to the entry(ies) you want to change the owner of.
- From the More Actions menu, select Change Owner.
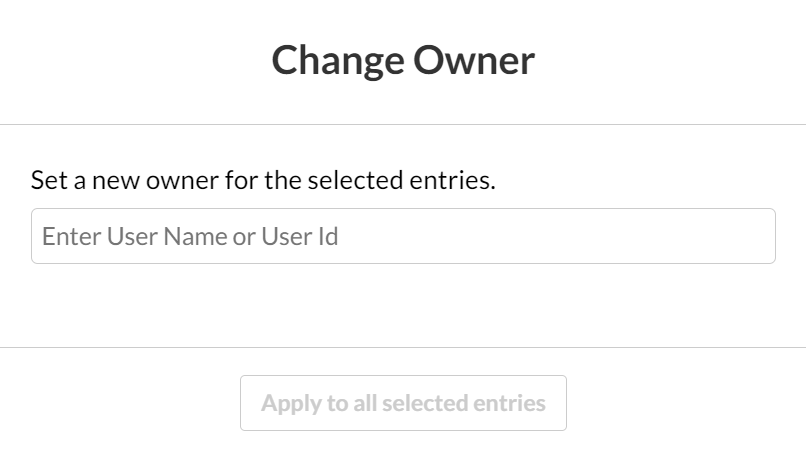
- Enter the new owner’s user name or user ID. You can add users that are available on the site and you can use the auto-complete function.
- Click Apply to all selected entries.
The Change Owner screen displays.
The Users tab lists all users for the Rich Media CMS account, their roles, and account ownership. For more information about user IDs, see our article Manage Rich Media CMS users.
Add / Remove Co-Publishers
Add Co-publishers
Co-publishers have the permission to publish media anywhere that the user has the rights to publish.
To learn more about roles and permissions, visit our article Manage Rich Media CMS users.
- Click the checkbox(es) next to the desired entry(ies).
- From the More Actions menu, select Add Co-publishers.
- Enter the co-publishers' names. You can add users that are available on the site and you can use the auto-complete function.
- Click Apply to all selected entries.
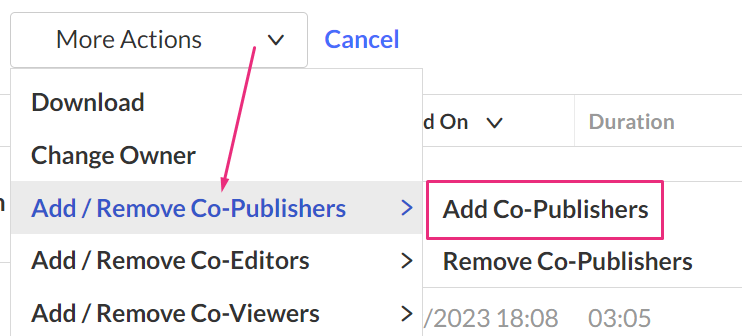
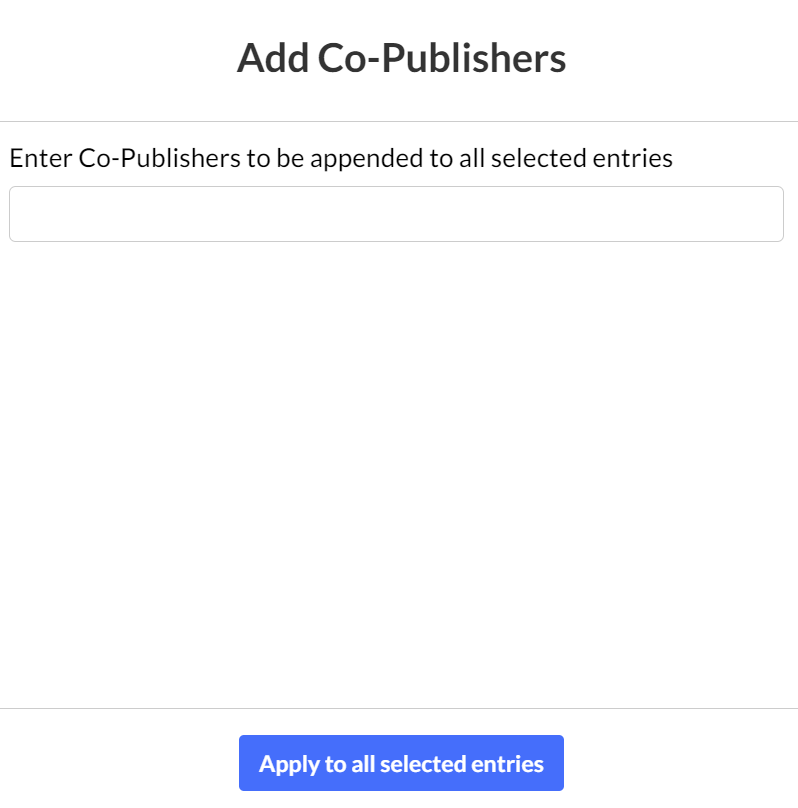
The Add Co- Publishers screen displays.
Remove Co-Publishers
- Click the checkbox(es) next to the desired entry(ies).
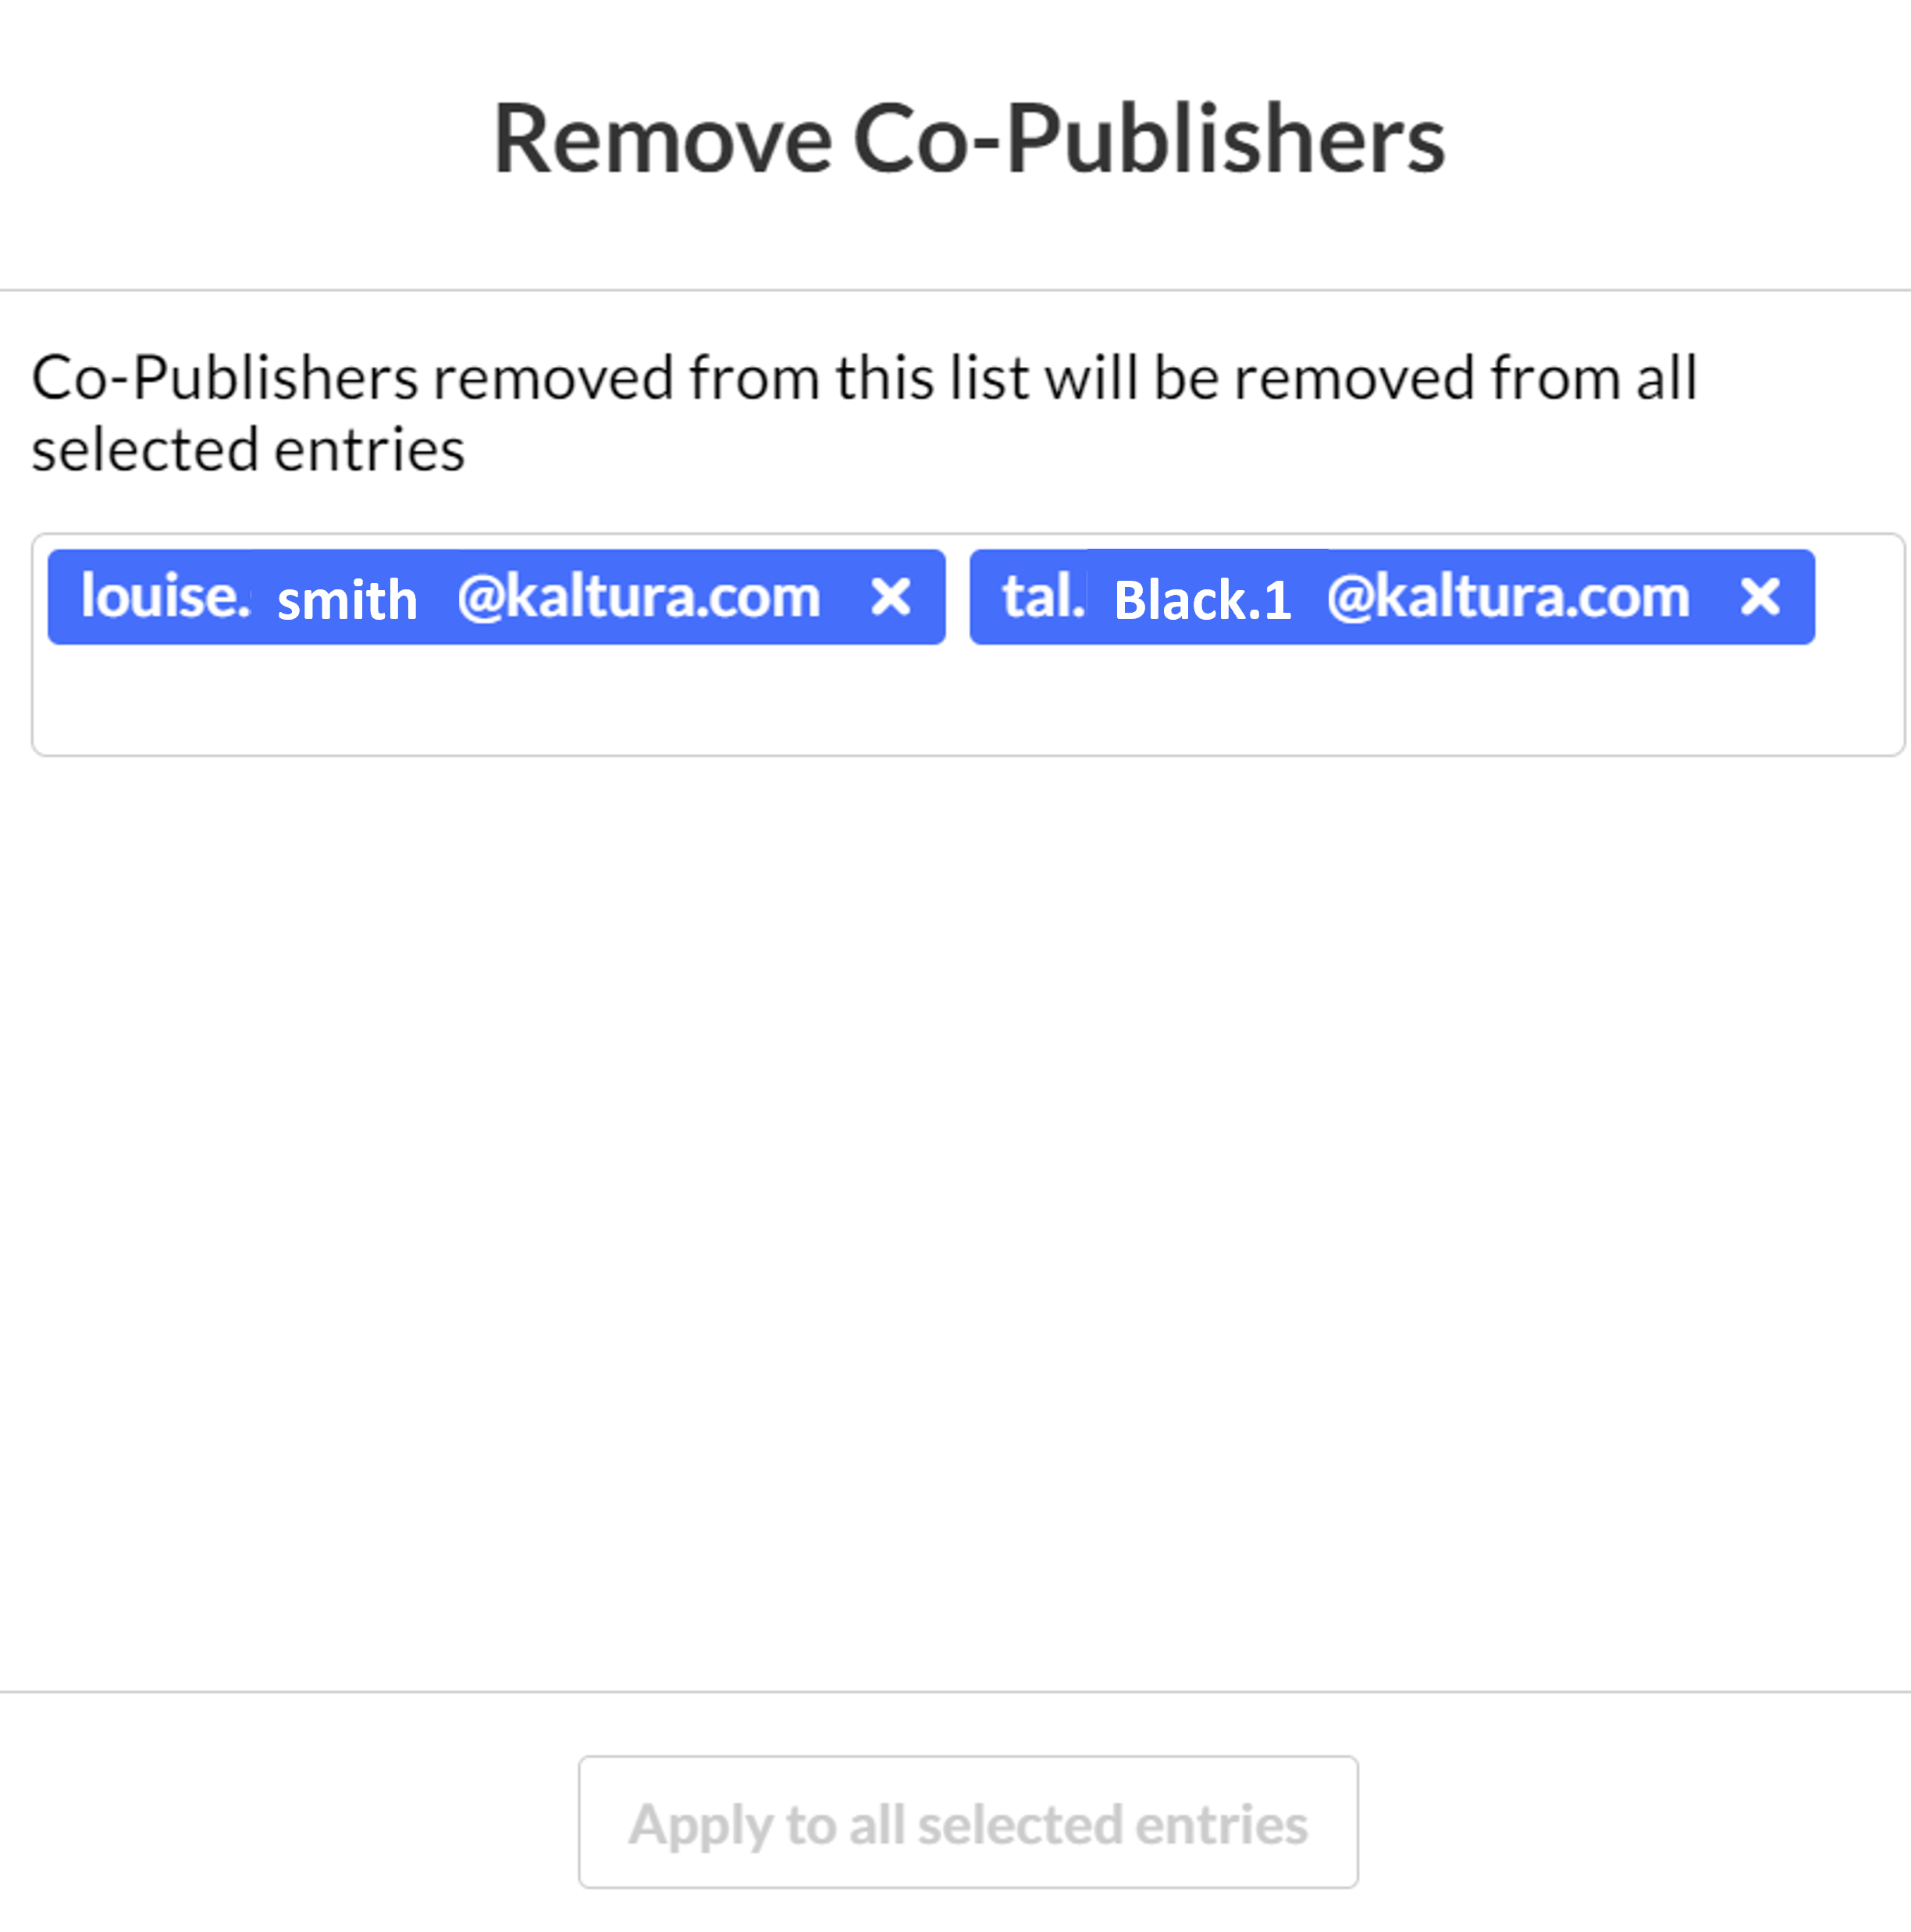
- From the More Actions menu, select Remove Co-publishers.
- Click on the co-publishers you want to remove. If there are no co-publishers for these entries the screen displays: No Co-Publishers to remove.
- Click Apply to all selected entries
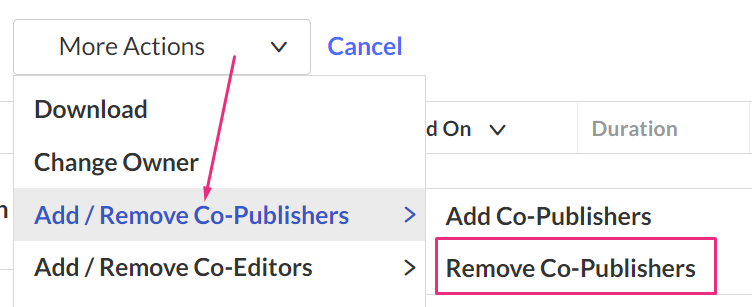
The Remove Co-Publishers screen displays.
Add / Remove Co-Editors
Add Co-Editors
Co-editors have permission to edit the metadata associated with the selected media, for example, customize the look and feel of an entry page.
To learn more about roles and permissions, visit our article Manage Rich Media CMS users.
- Click the checkbox(es) next to the desired entry(ies).
- From the More Actions menu, select Add Co-Editors.
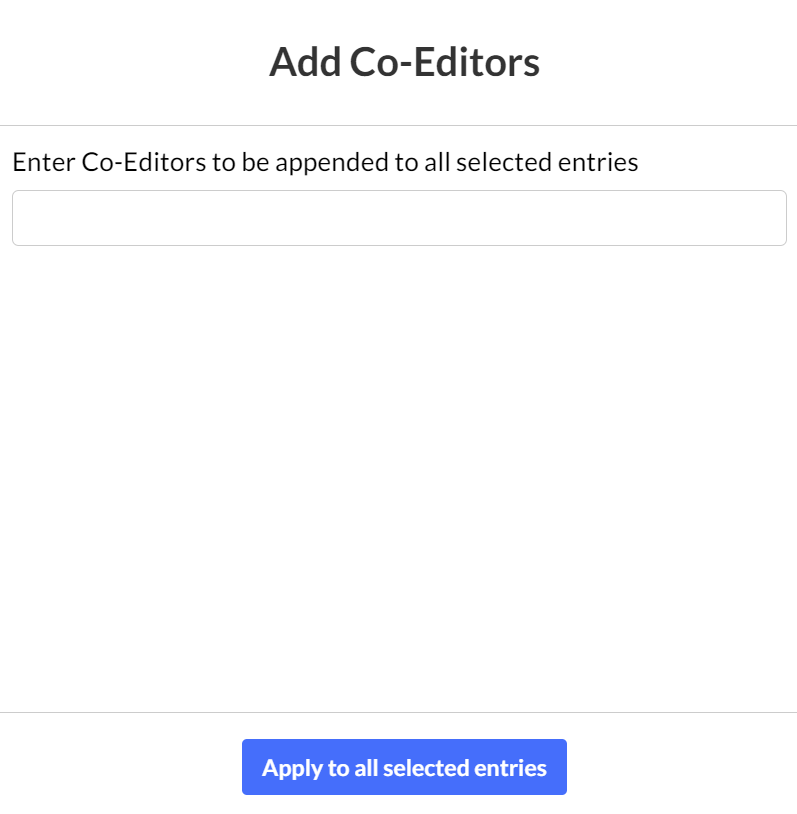
- Enter the co-Editors' names. You can add users that are available on the site and you can use the auto-complete function.
- Click Apply to all selected entries.
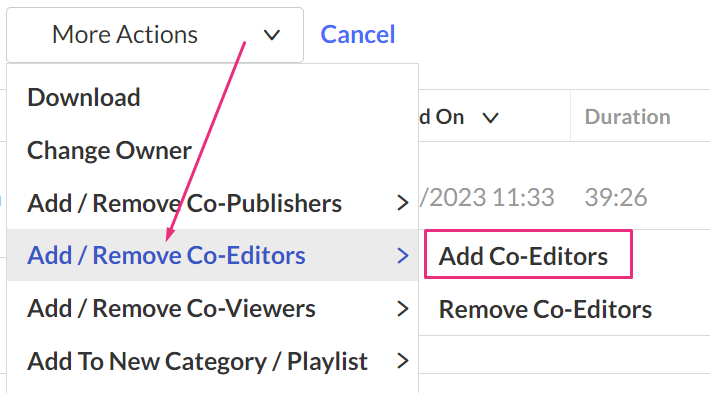
The Add Co-Editors screen displays.
Remove Co-Editors
- Click the checkbox(es) next to the desired entry(ies).
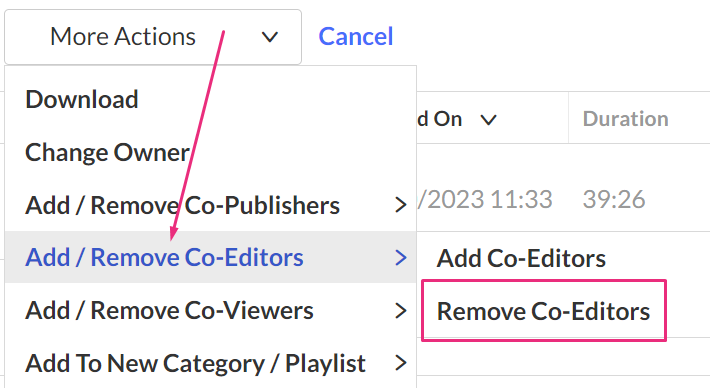
- From the More Actions menu, select Remove Co-Editors.
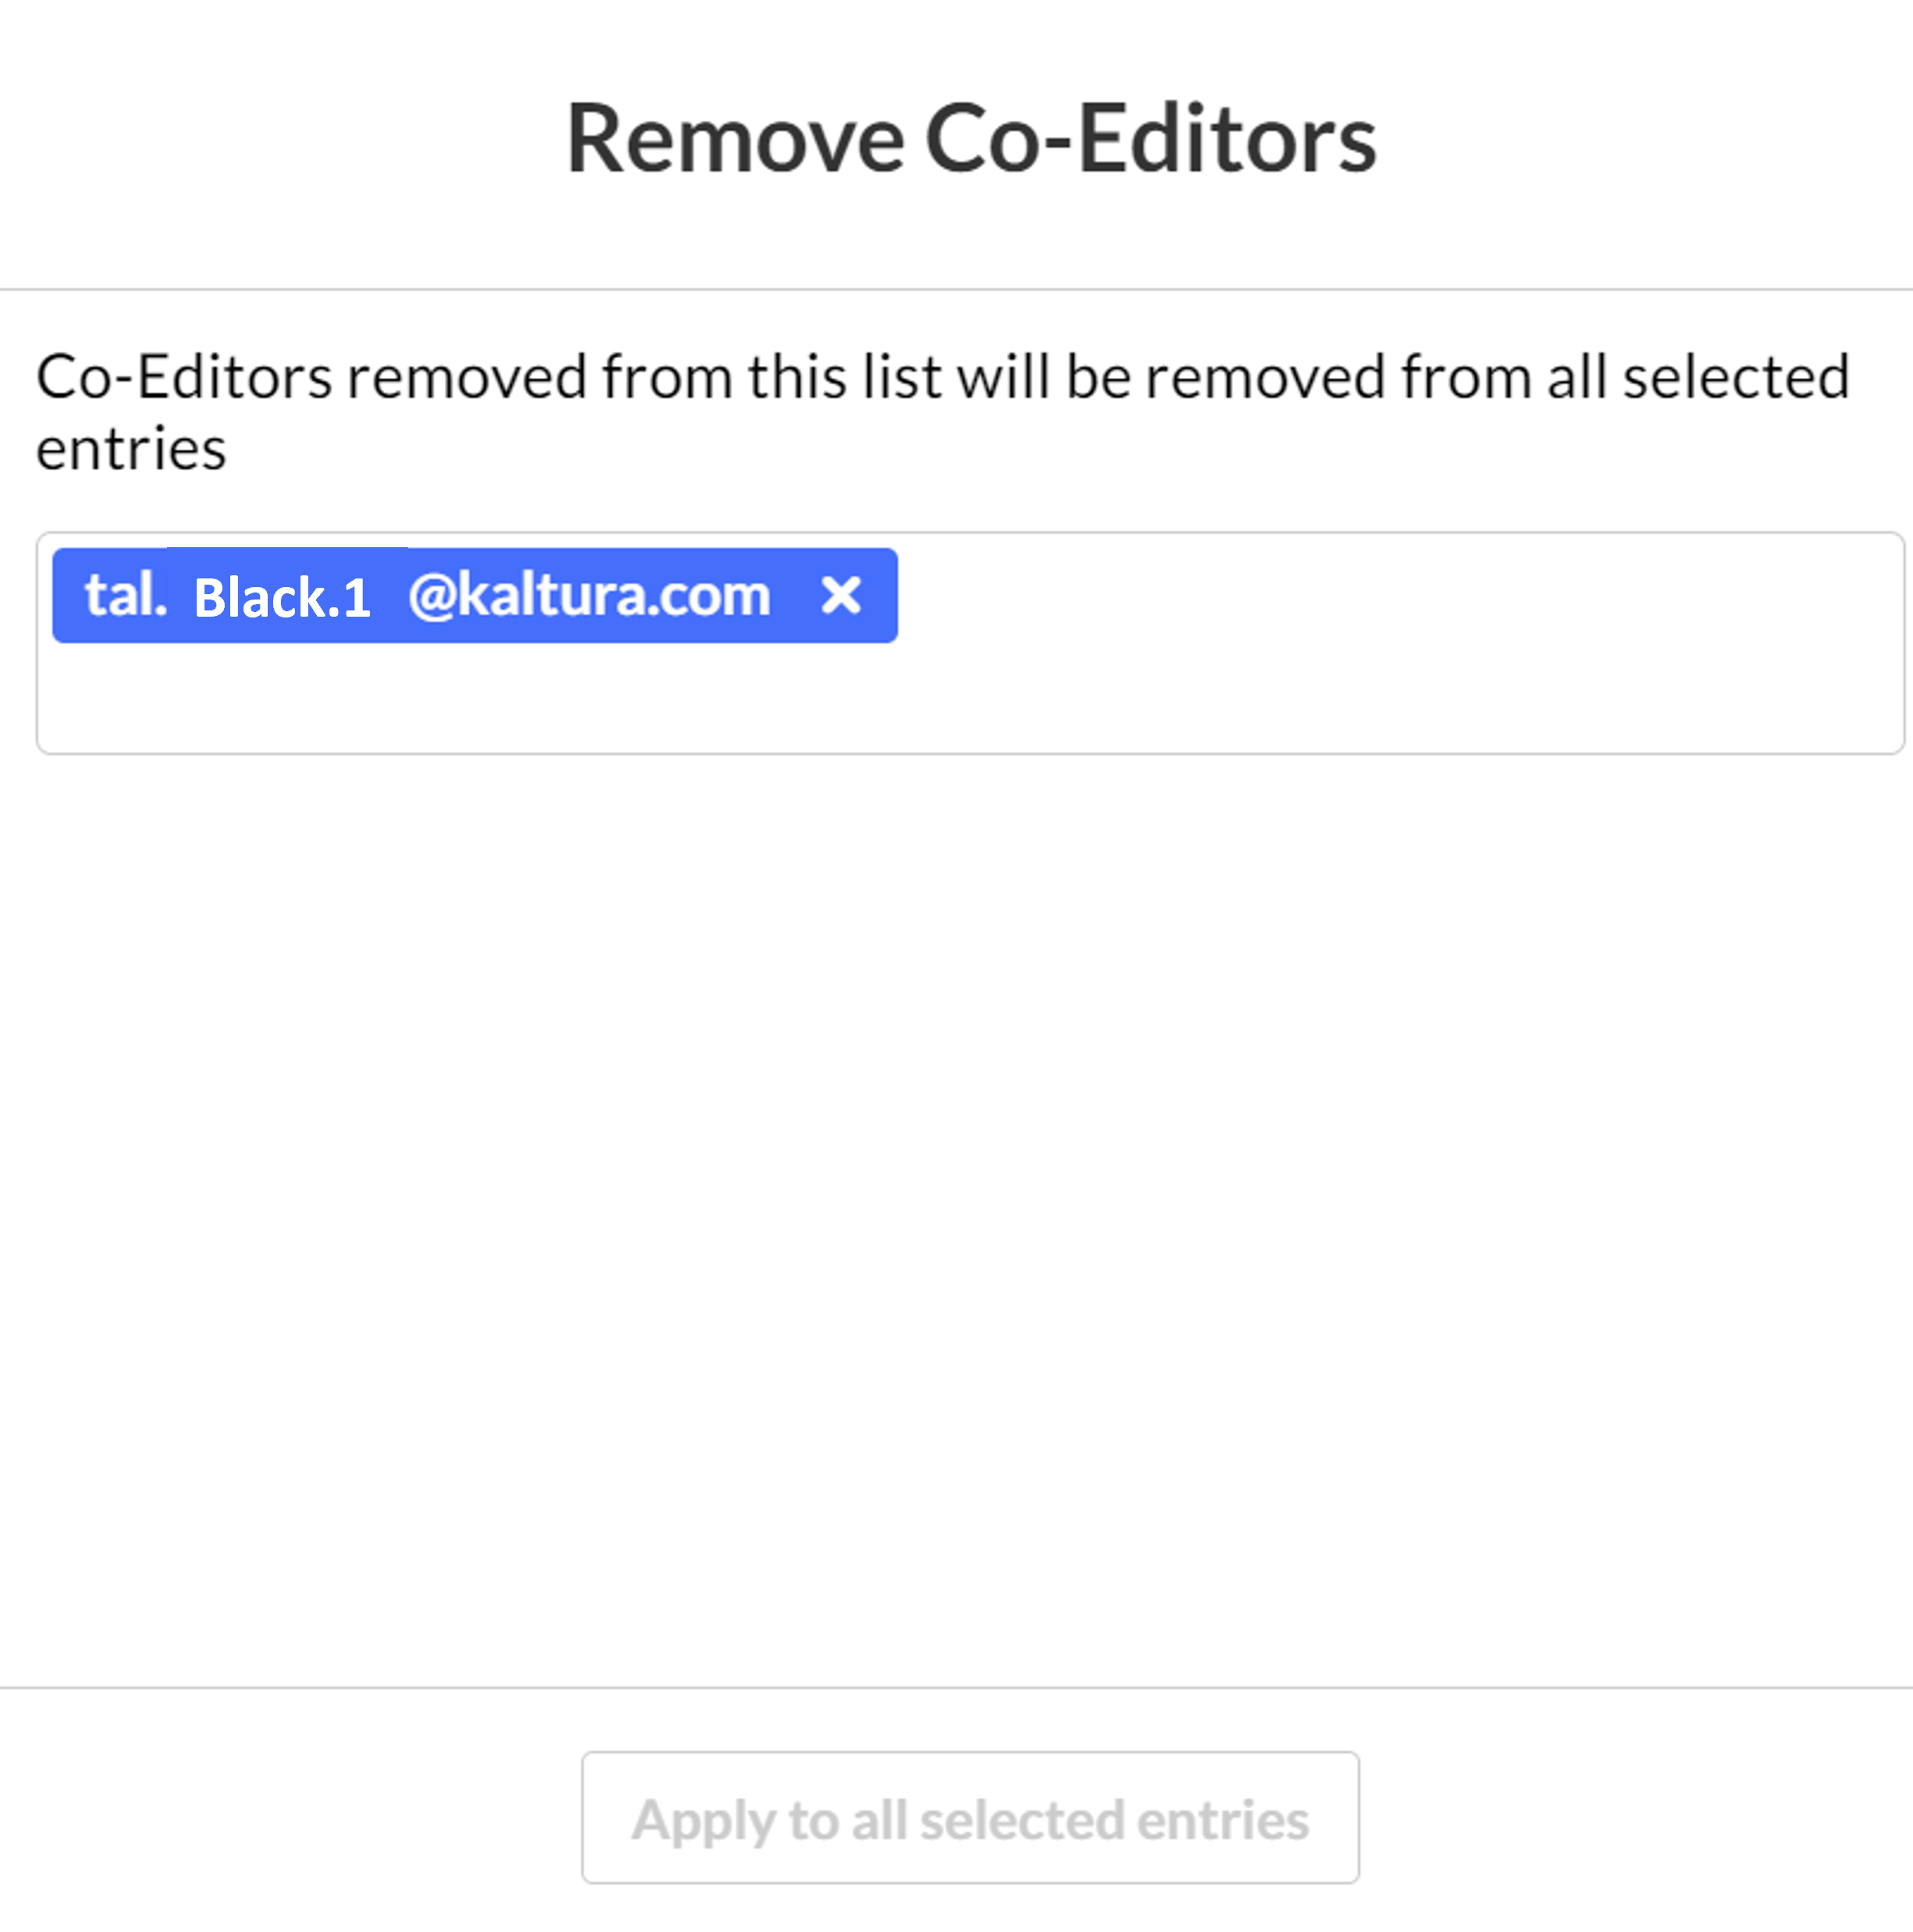
- Click on the co-editors you want to remove. If there are no co-editors for these entries, the screen displays: No Co-Editors to remove.
- Click Apply to all selected entries.
The Remove Co-Editors screen displays.
Add / Remove Co-Viewers
Add Co-Viewers
Co-viewers have permissions to view the metadata associated with the selected media.
To learn more about roles and permissions, visit our article Manage user accounts in Rich Media CMS.
- Click the checkbox(es) next to the desired entry(ies).
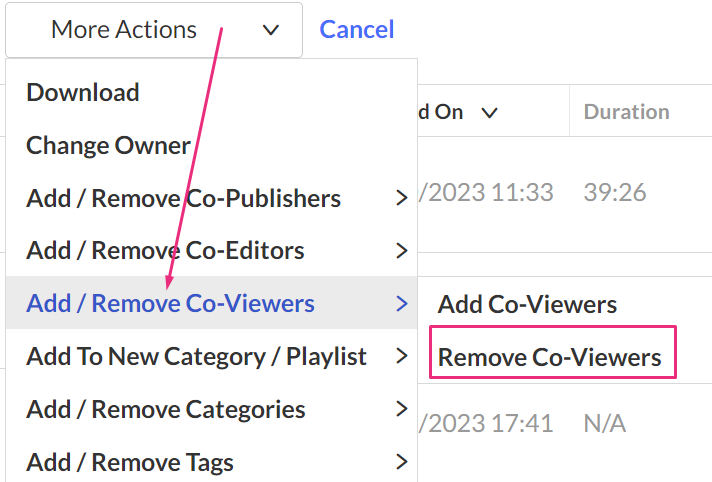
- From the More Actions menu, select Add Co-Viewers or Remove Co-Viewers.
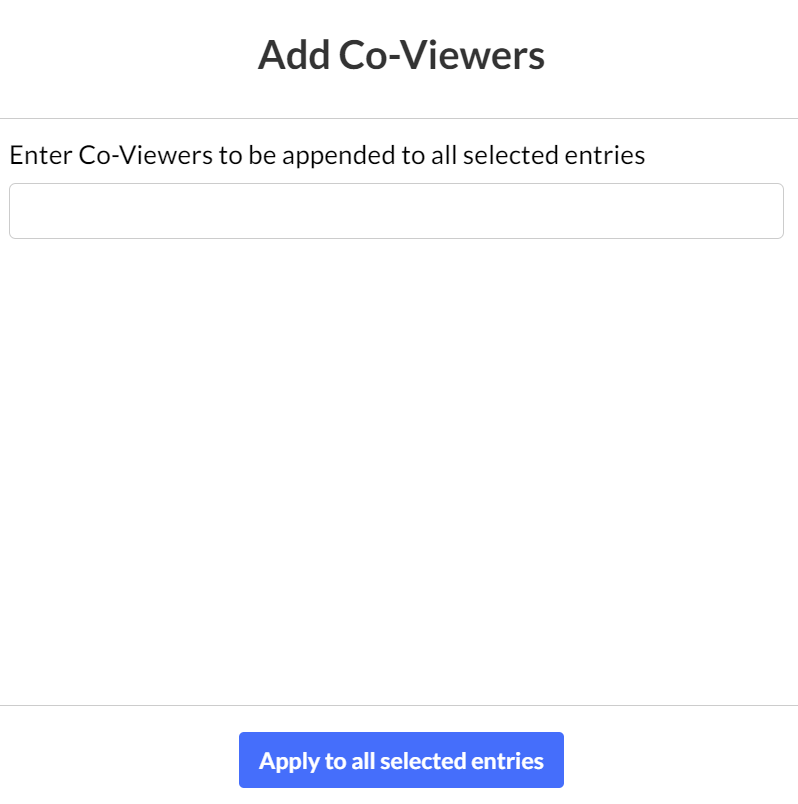
- Enter the co-viewers' names. You can add users that are available on the site and you can use the auto-complete function.
- Click Apply to all selected entries.
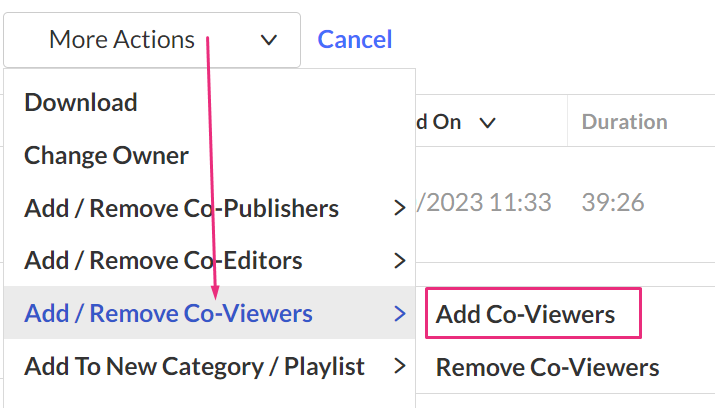
The Add Co-Viewers screen displays.
Remove Co-Viewers
- Click the checkbox(es) next to the desired entry(ies).
- From the More Actions menu, select Remove Co-Viewers.
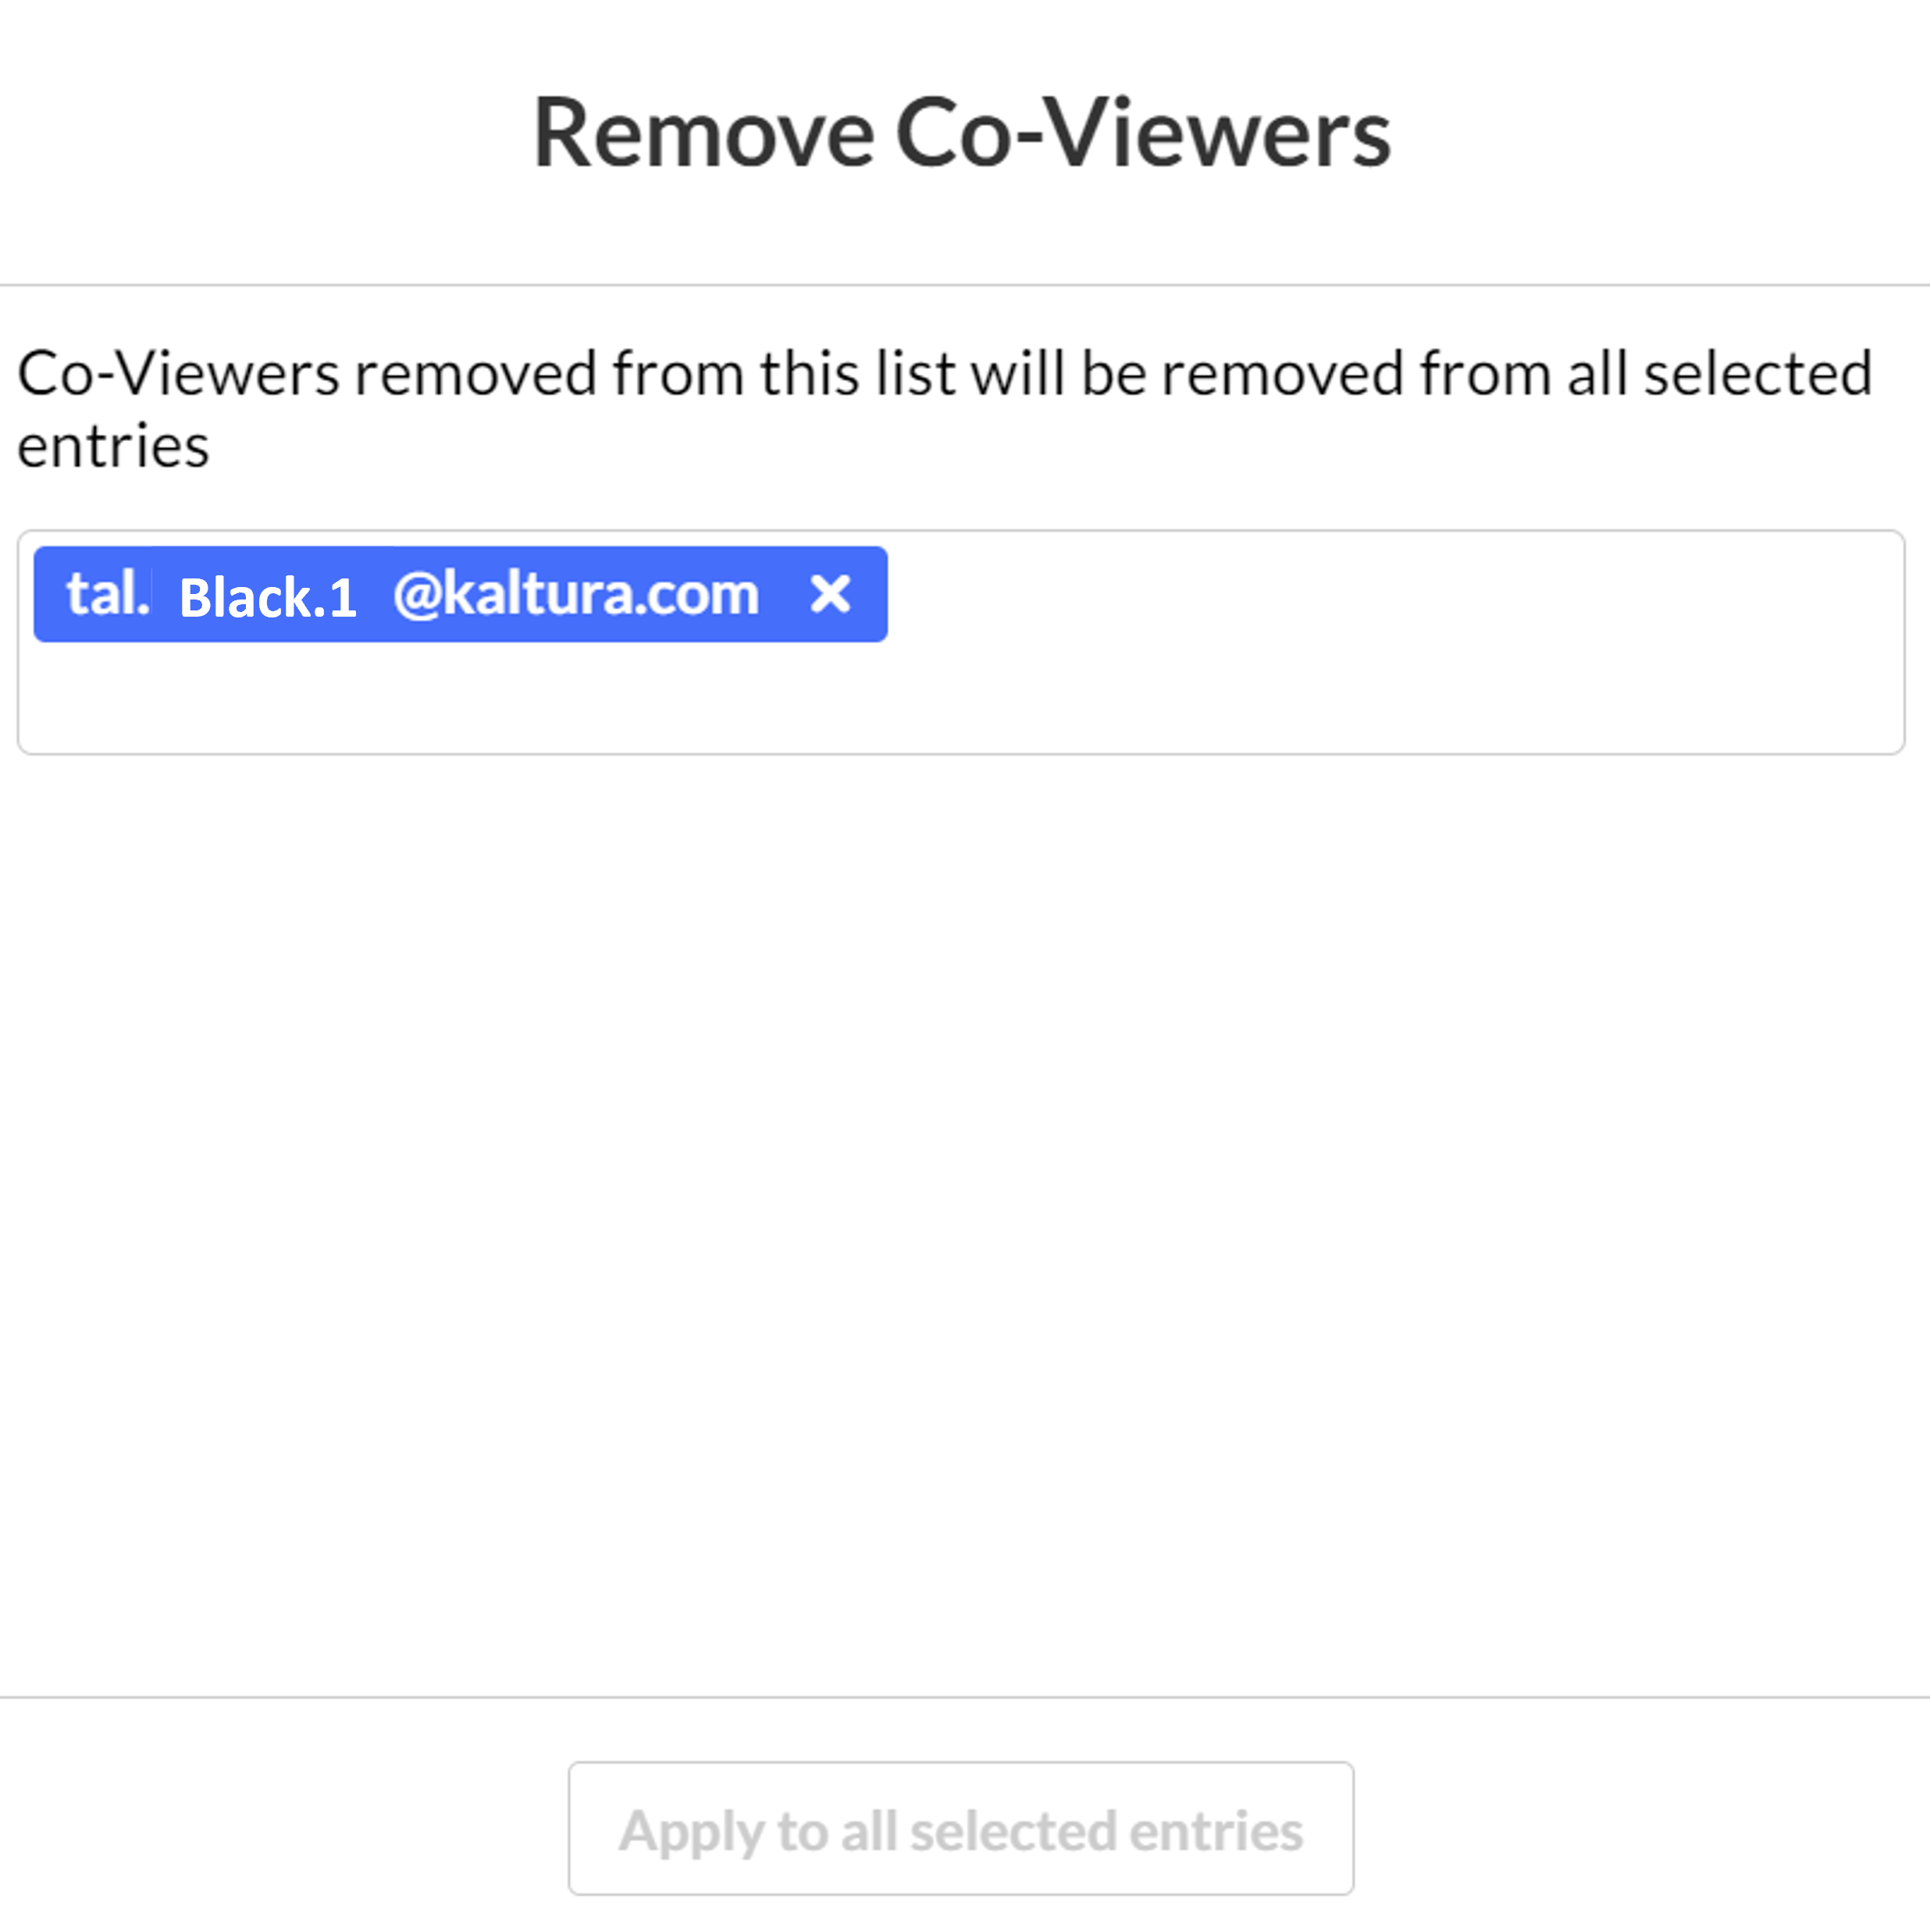
- The Remove Co-Viewers screen displays.
- Click on the co-viewers you want to remove.
- Click Apply to all selected entries.
Add to New Category / Playlist
Add to New Category
- Click the checkbox(es) next to the desired entry(ies).
- From the More Actions menu, select Add to New Category.
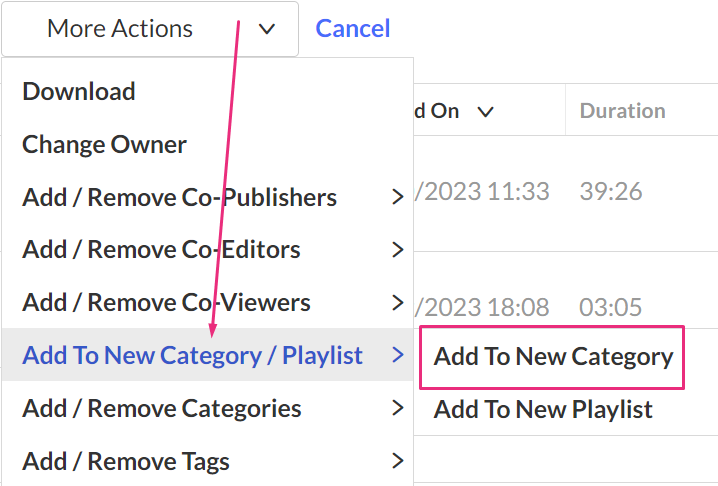
The New Category screen displays.
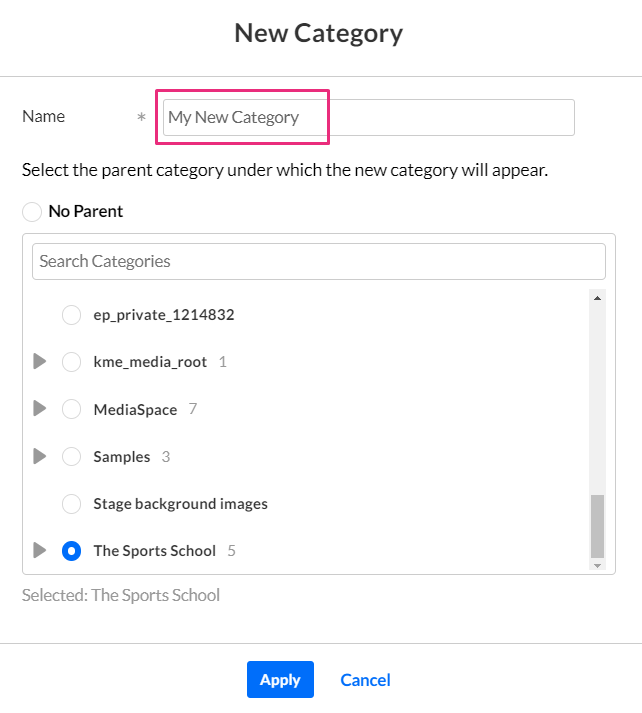
- Type the name of the new category.
- Select the parent category or No Parent.
- Click Apply.
Add to New Playlist
This option isn't supported for document entries.
- Click the checkbox(es) next to the desired entry(ies).
- From the More Actions menu, select Add to New Playlist.
- Under the Metadata section, add the desired metadata:
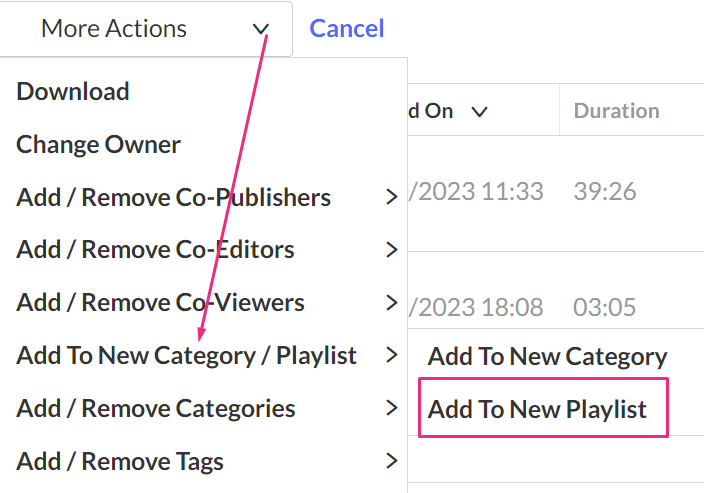
The New Playlist screen displays.
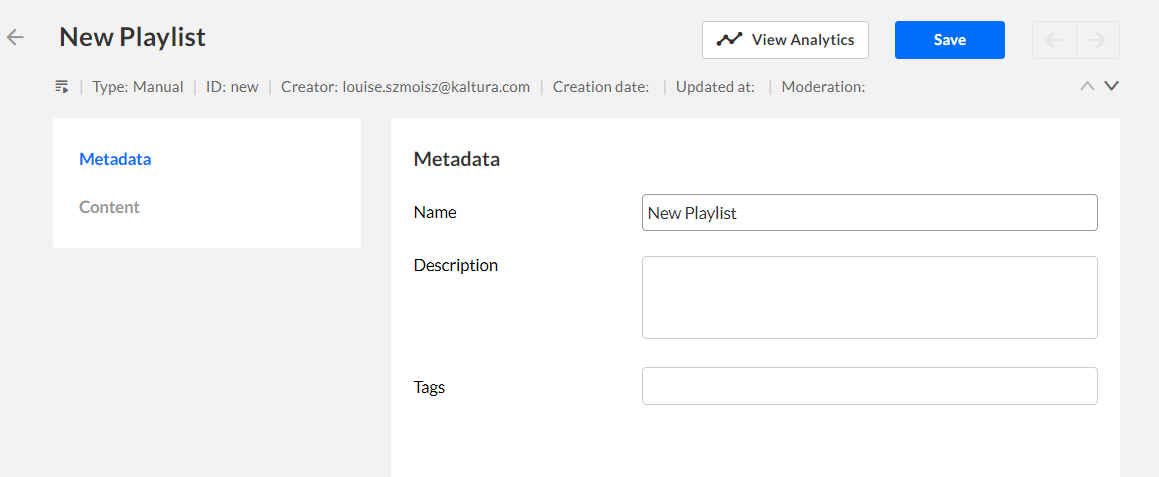
- playlist name (New Playlist is the default name)
- description
- tags
4. Click Save.
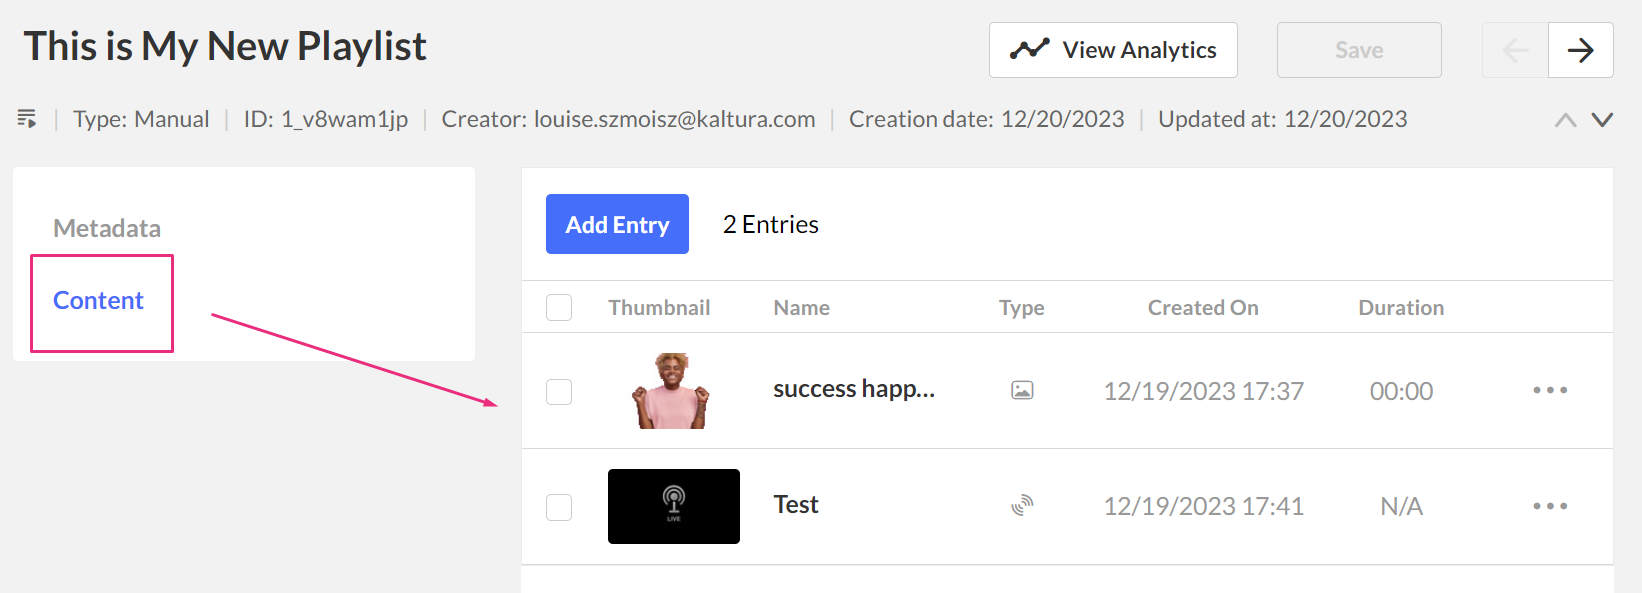
To see the content that was added to your new playlist, click the Content tab.
Add to / Remove from Categories
Add to Categories
- Click the checkbox(es) next to the desired entry(ies).
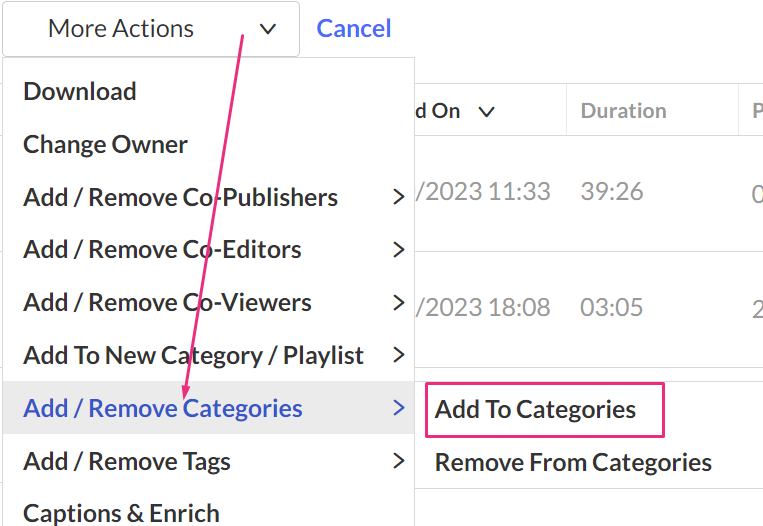
- From the More Actions menu, select Add to Categories.
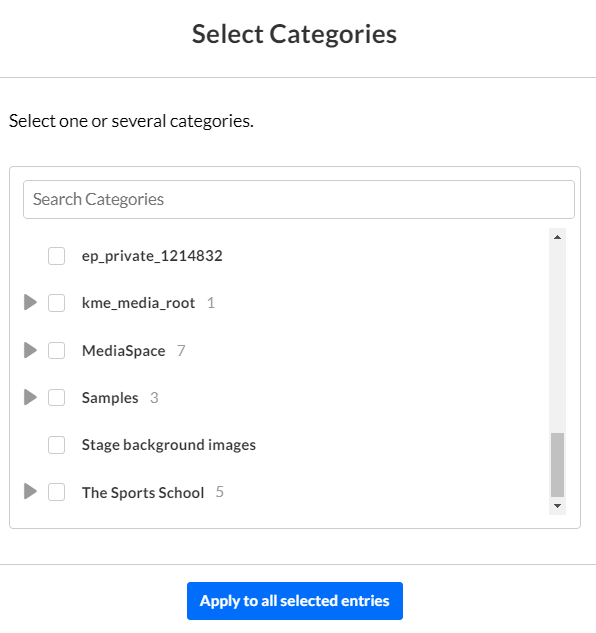
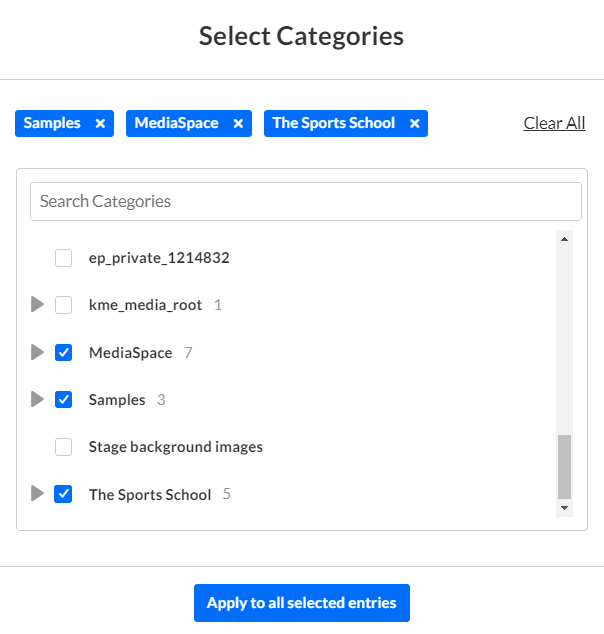
- Click the checkboxes next to the categories you want. You can also search for the category using the Search Categories function at the top.
- Click Apply to all selected entries.
The Select Categories screen displays.
Remove from Categories
- Click the checkbox(es) next to the desired entry(ies).
- From the More Actions menu, select Remove from Categories
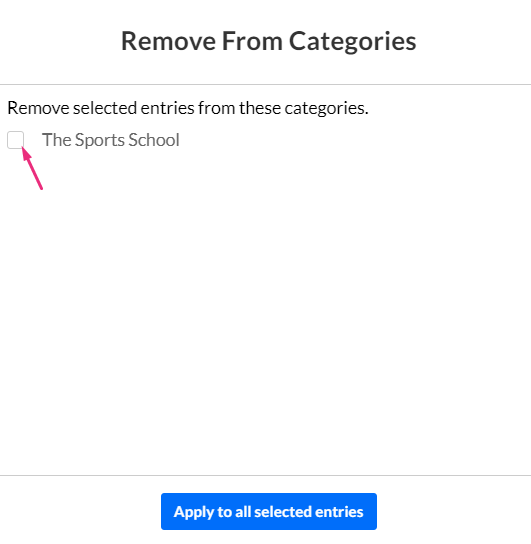
- Click the checkbox next to the category(ies) you want to remove the entries from.
- Click Apply to all selected entries.
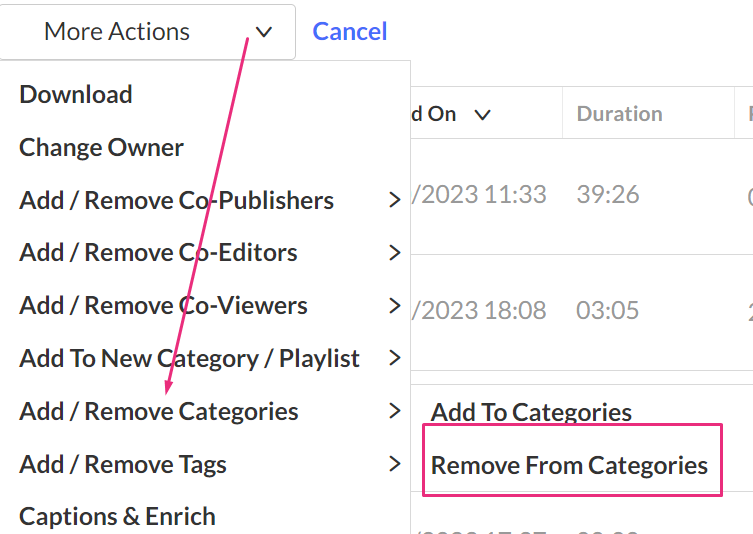
The Remove From Categories screen displays.
To learn more about categories and playlists, visit our articles Managing categories and Creating and configuring playlists.
Add / Remove Tags
Add tags
- Click the checkbox(es) next to the desired entry(ies).
- From the More Actions menu, select Add Tags or Remove Tags.
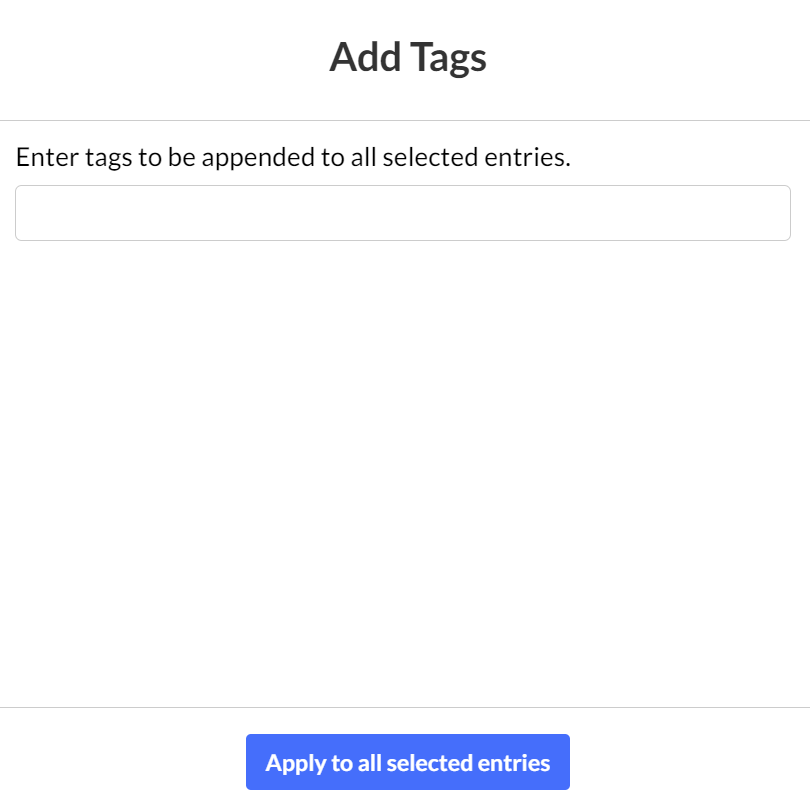
- Type the tag words into the field, hitting enter on your keyboard after each addition.
- Click Apply to all selected entries.
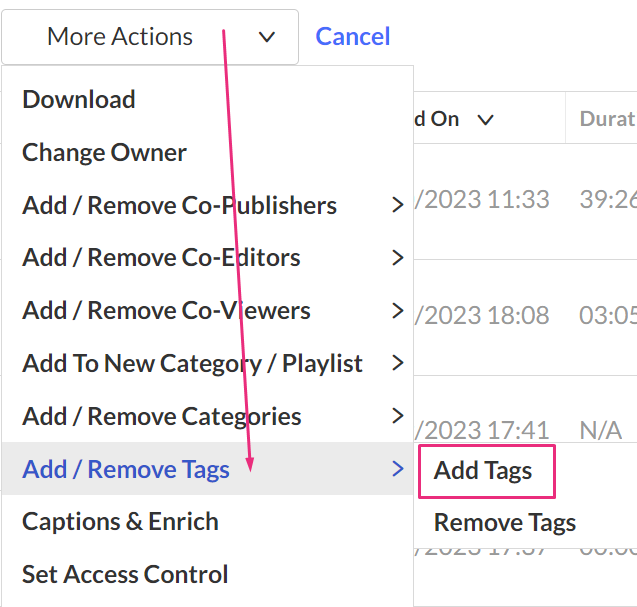
The Add Tags screen displays.
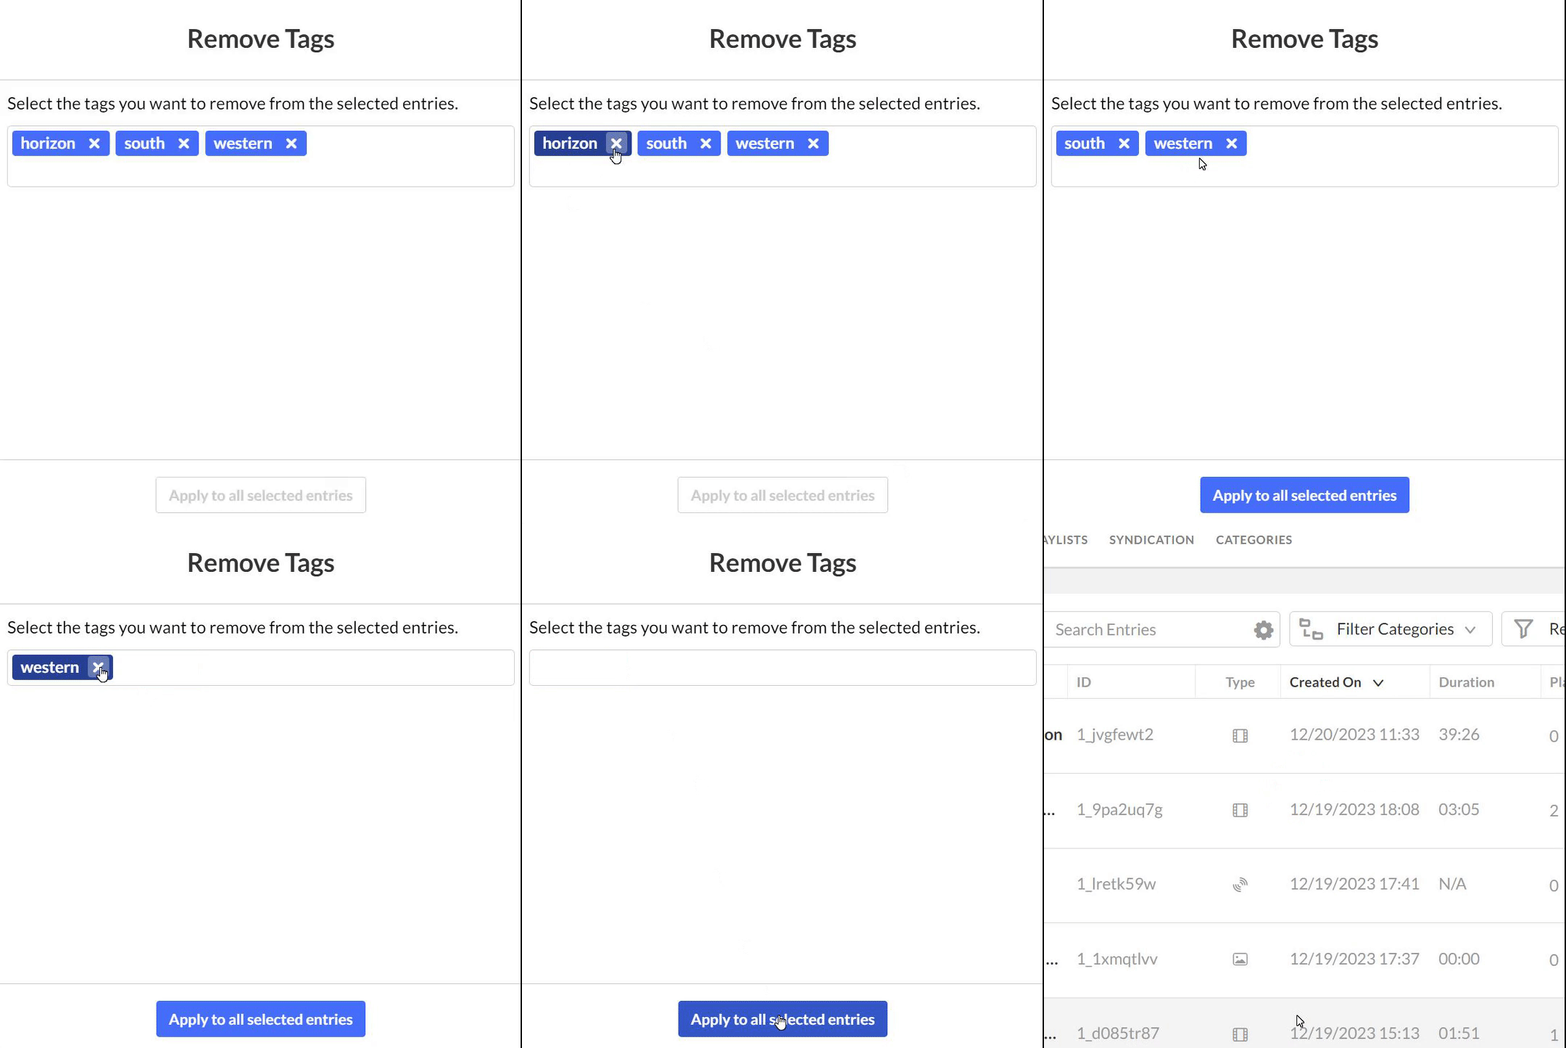
Remove Tags
- Click the checkbox(es) next to the desired entry(ies).
- From the More Actions menu, select Remove Tags.
- Click the 'x' on the tags you want to remove.
- Click Apply to all selected entries.
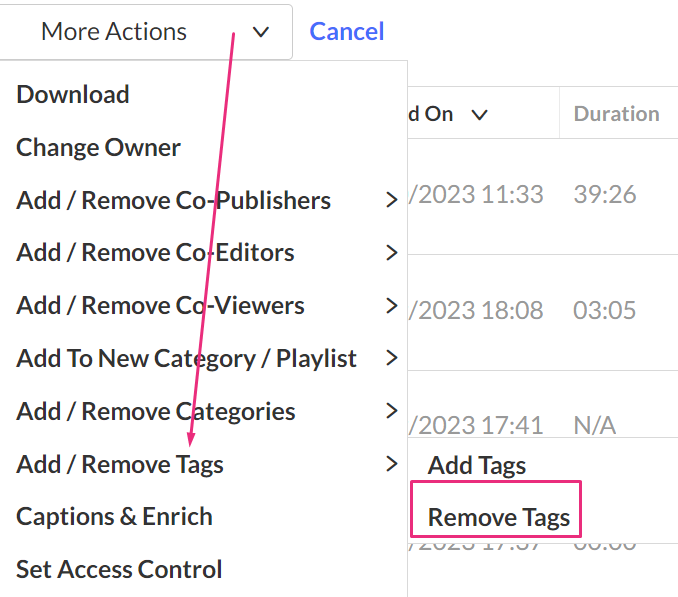
The Remove Tags screen displays.
Captions & Enrich
- Click the checkbox(es) next to the desired entry(ies).
- From the More Actions menu, select Captions & Enrich.
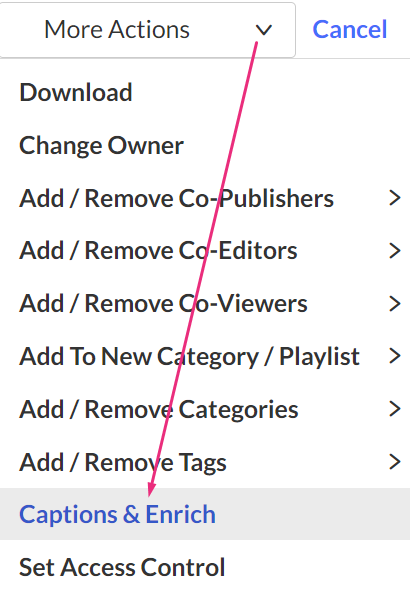
Some entries do not support caption ordering.
The Order Captions & Enrichment Services screen displays.
To learn how to order captions and enrichment services, visit our article Order captions in Rich Media CMS.
Set Access Control
- Click the checkbox(es) next to the desired entry(ies).
- From the More Actions menu, select Set Access Control.
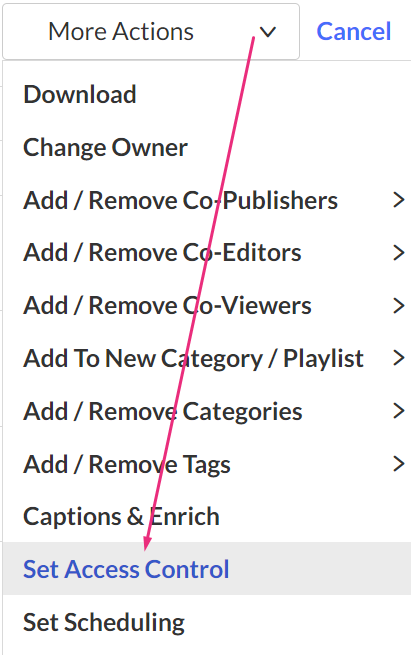
The Set Access Control screen displays.
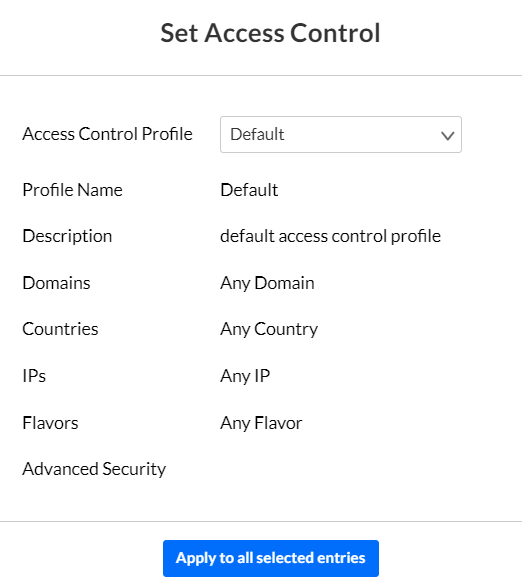
- Select the Access Control Profile.
- Click Apply to all selected entries.
To learn more about access control, visit our articles Access Control and Managing Access Control Profiles.
Set Scheduling
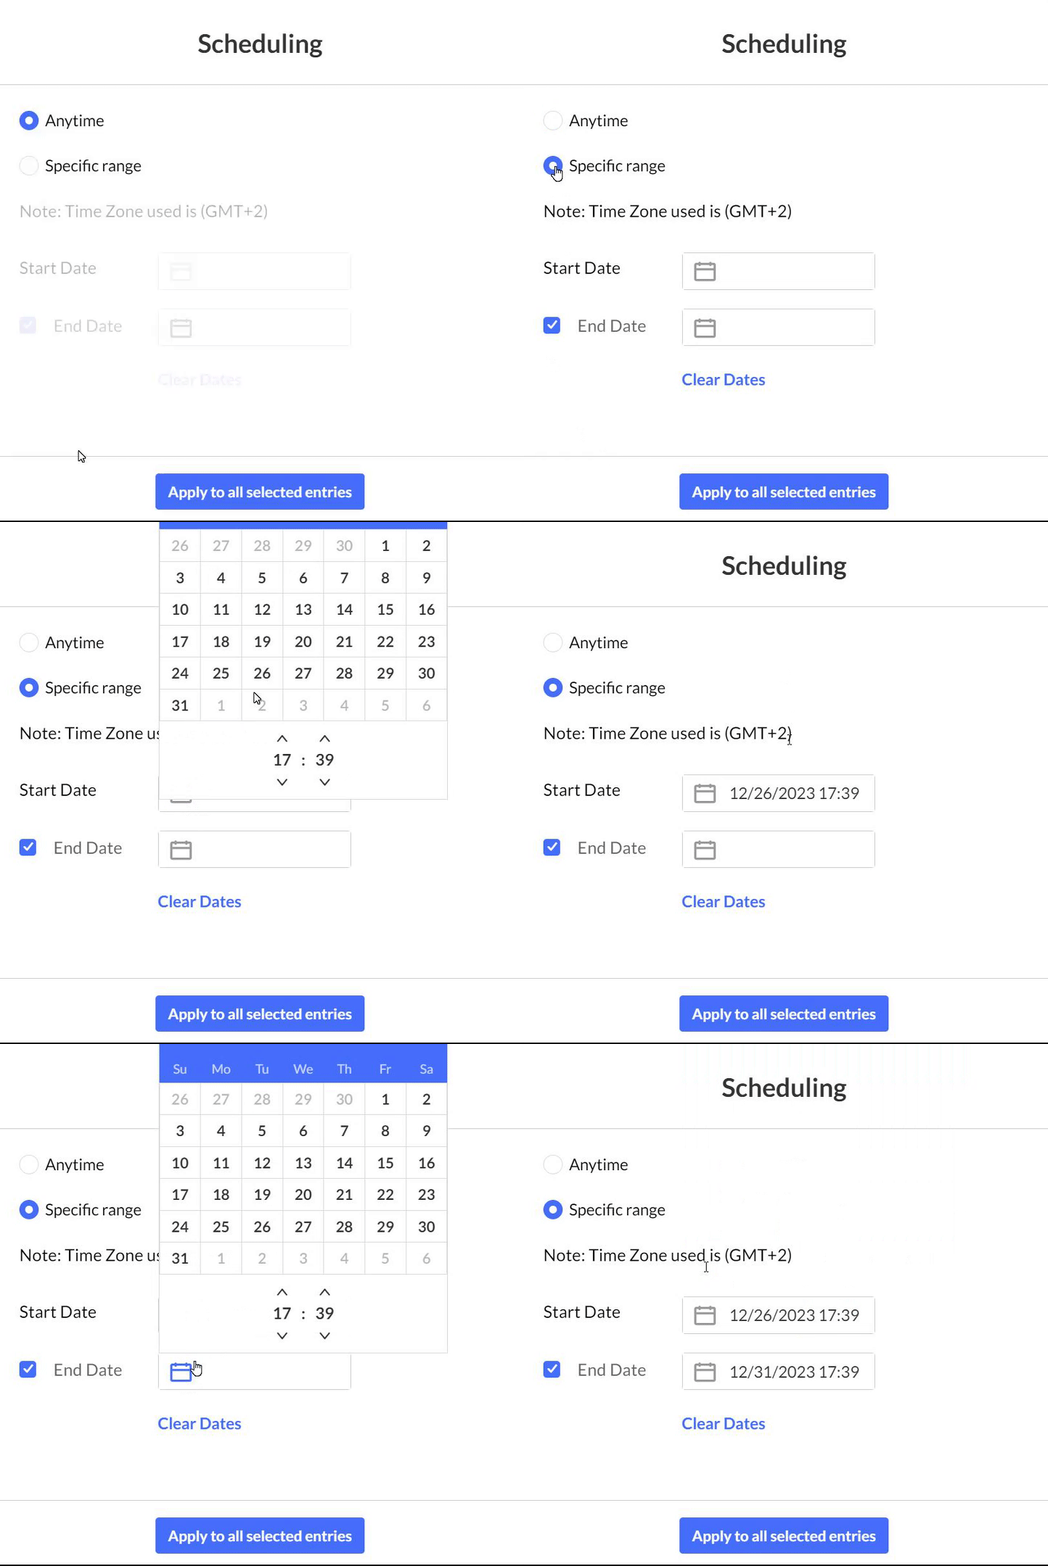
When you want to limit the time in which a media entry is available for viewing, you can configure a schedule, defining a start and end date. Playback will be allowed only within the defined schedule.
- Click the checkbox(es) next to the desired entry(ies).
- From the More Actions menu, select Set Scheduling.
The Scheduling screen displays.
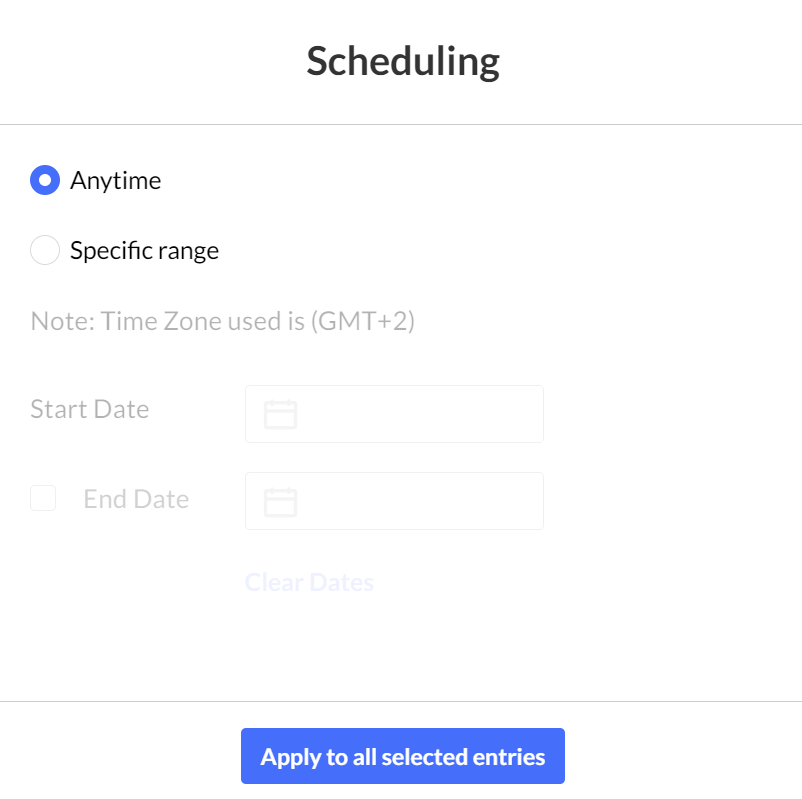
- Set the viewing schedule for one or more entries.
- Click Apply to all selected entries.