About
The stage is where presenting happens. Whether you're sharing your screen or presenting on camera, everything is displayed and managed from this area of your room.
This article explains what’s shown on the stage and how to manage it.
Who's on stage?
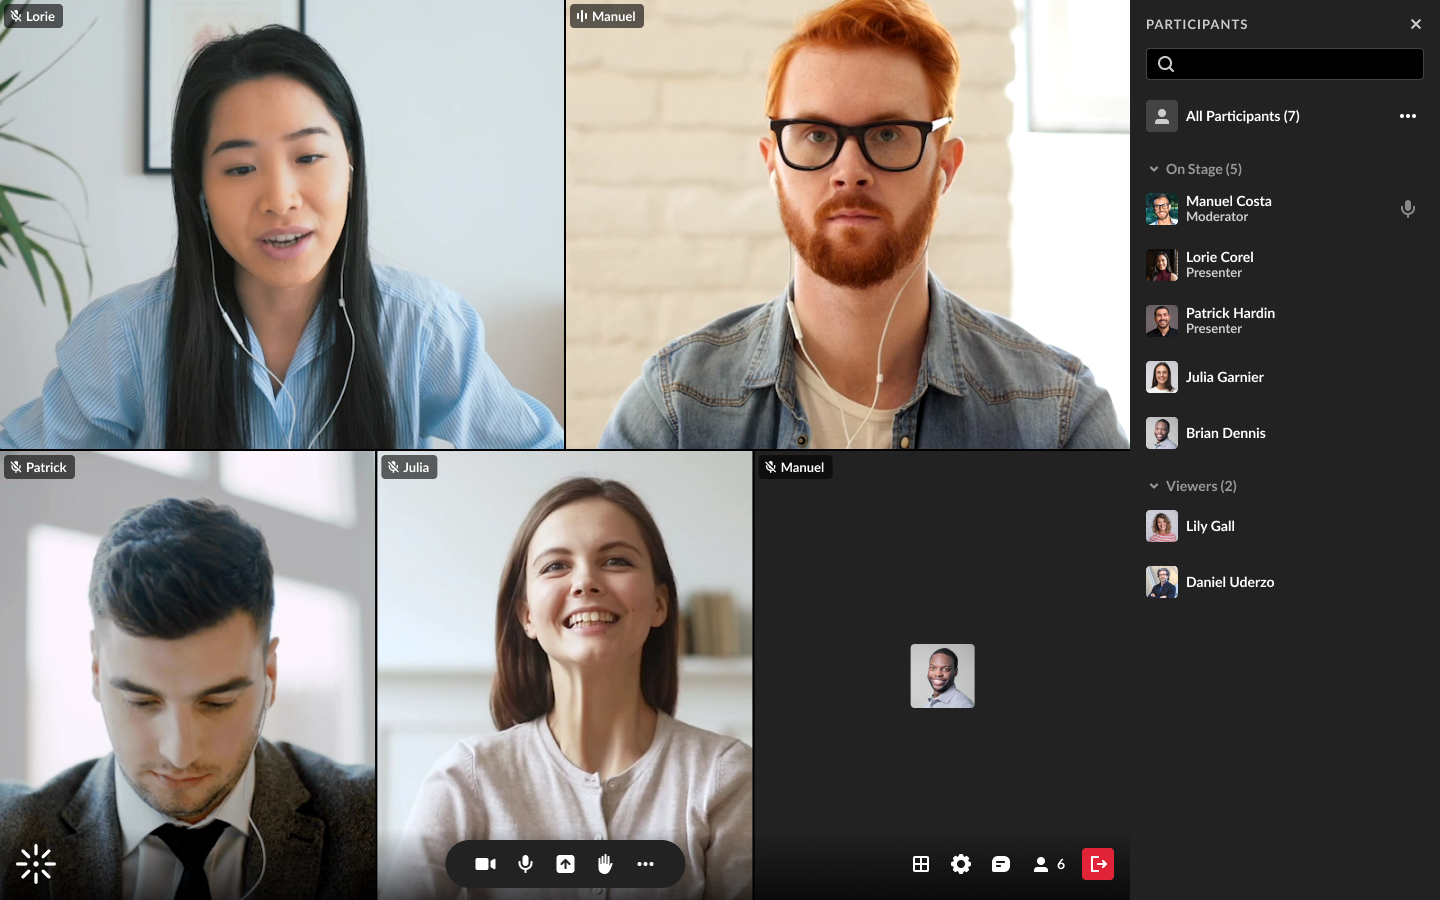
The stage is the main screen in your room, displaying participant or content tiles.
- Up to 25 tiles can be shown at once.
- If there are more than 25 participants, only the most recent 25 will appear.

Webcam tiles
Each tile will show the following information:
Top left:
- Microphone indicator - shows whether the microphone is muted or unmuted, and volume activity if the user is speaking
- Participant name
Top right (on hover):
- Set main camera button
- More options (three-dot menu)
If the camera is on, viewers see the webcam view.
If the camera is off, viewers see the user's initials or profile image on a dark background.
Content tiles
When content is being shared, it appears as the main tile on stage. All other tiles move to the top of the screen.

Managing the stage
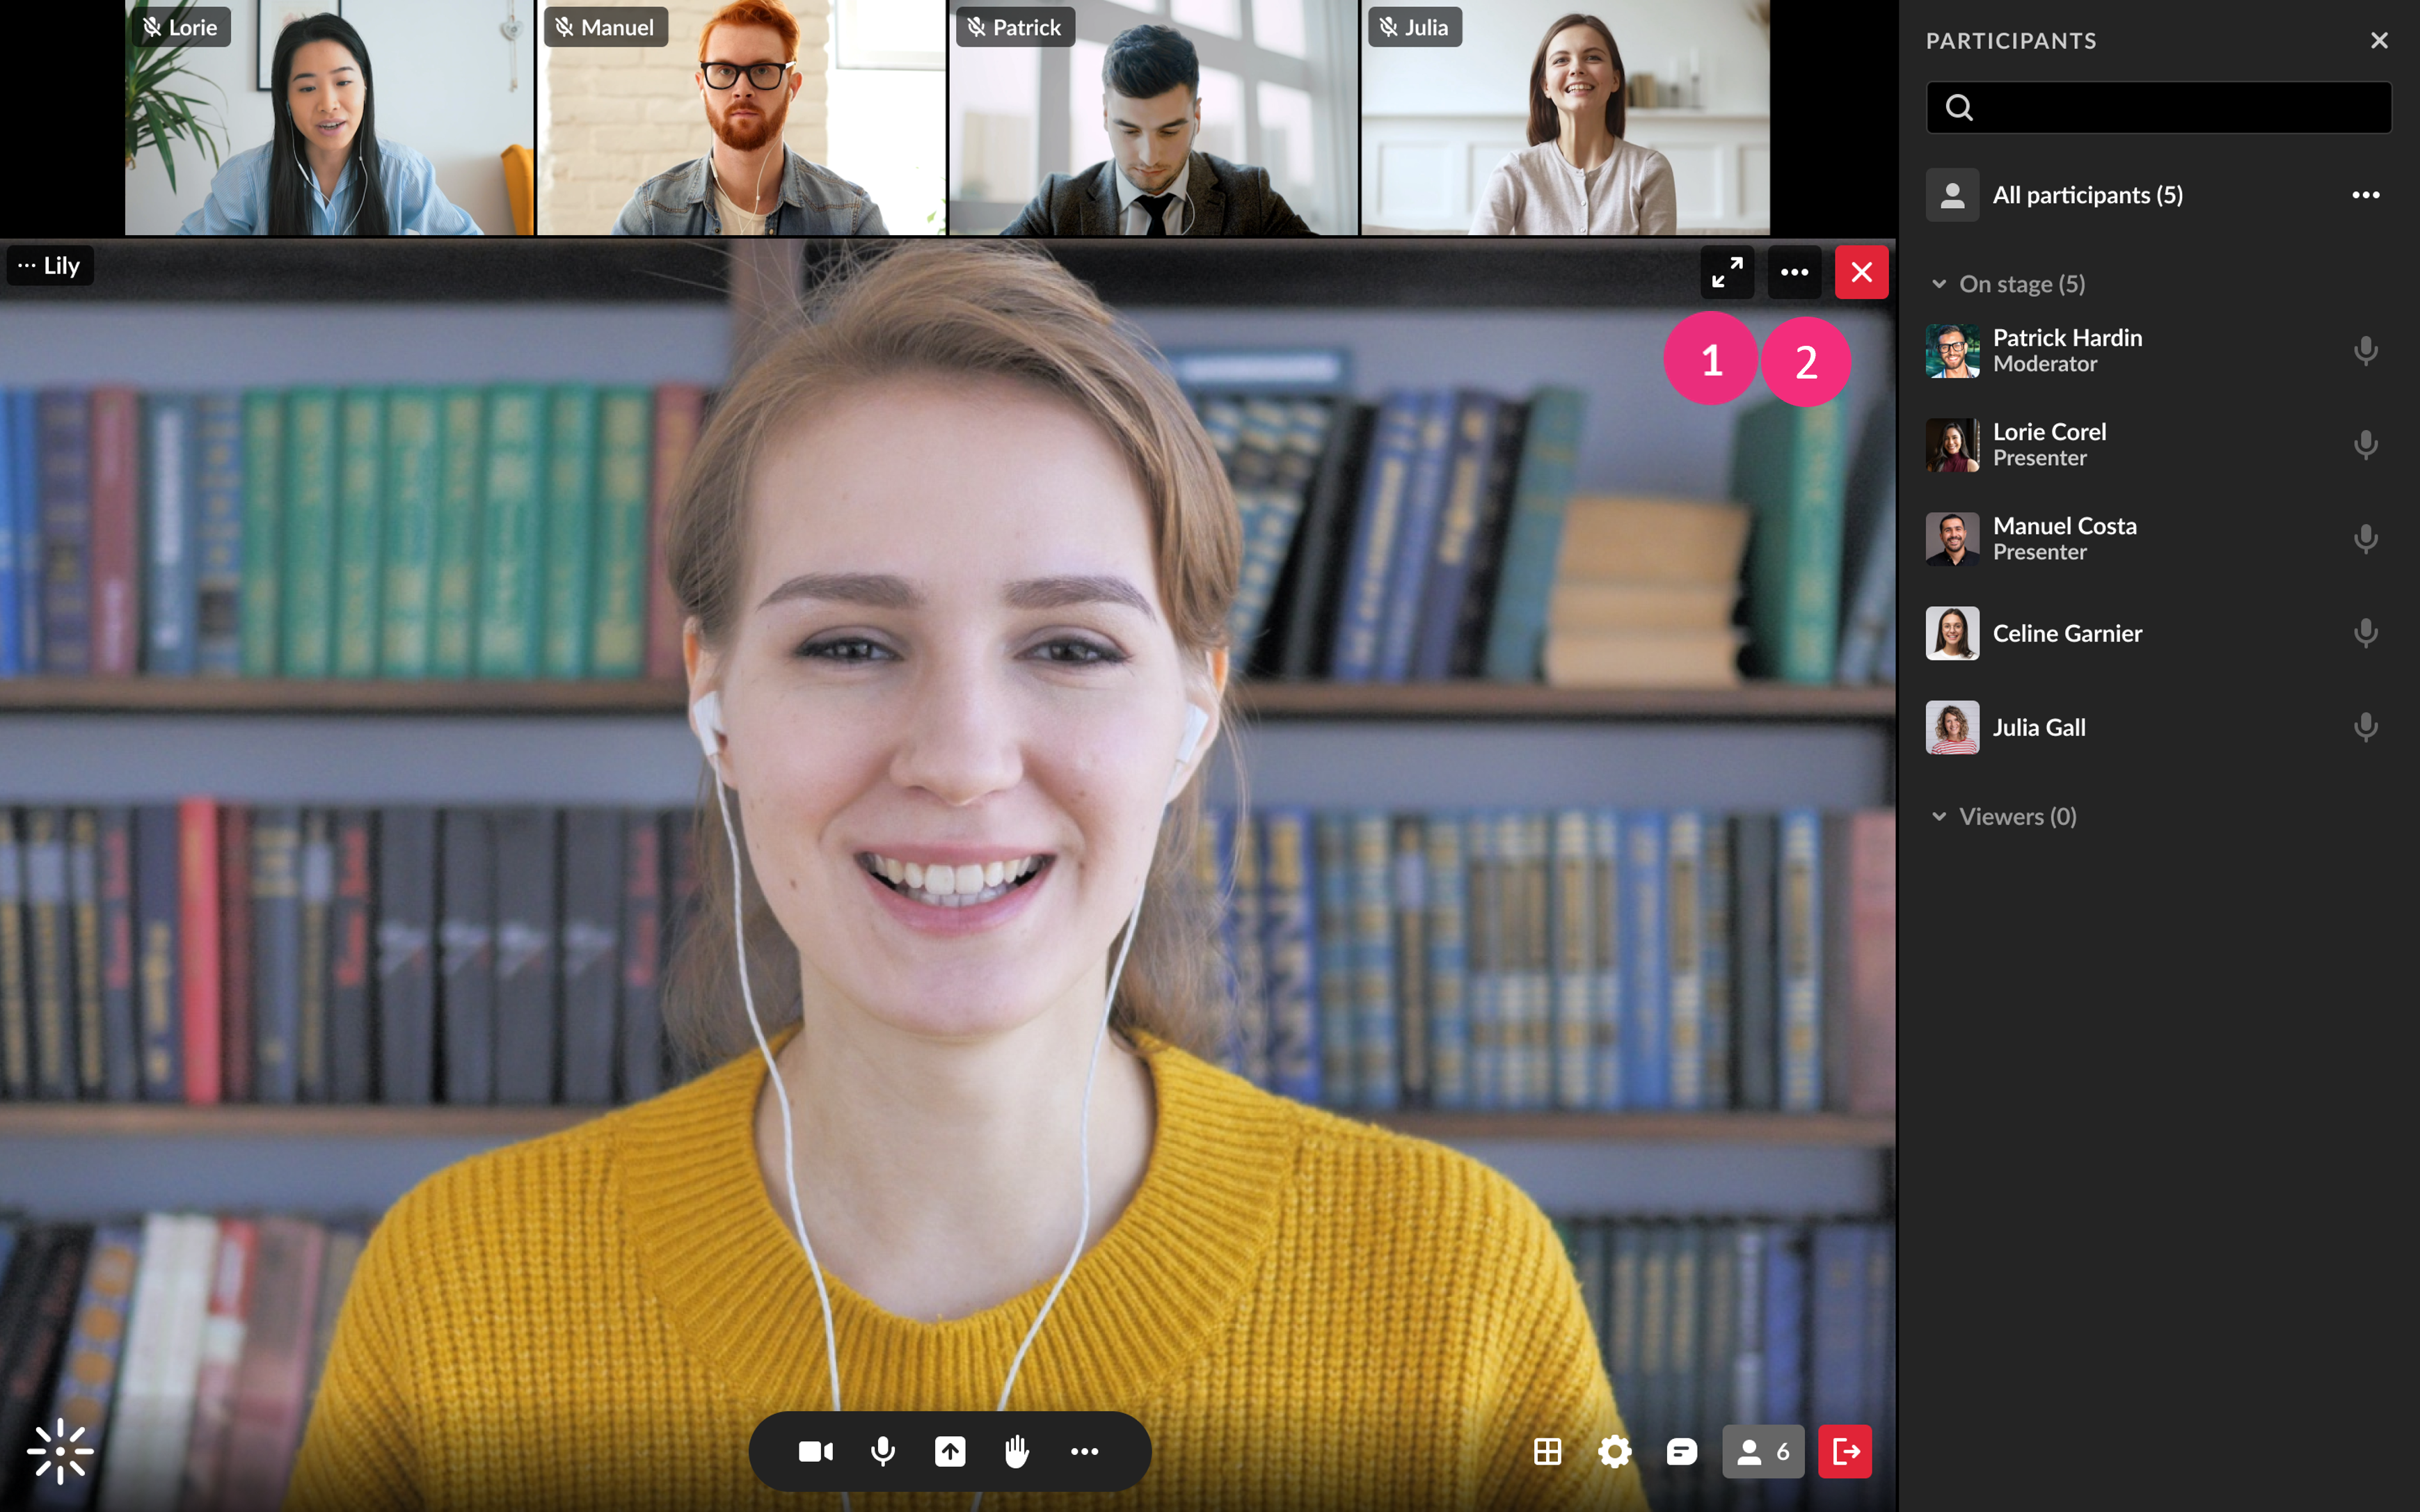
Participants
Participants can hover over any tile to access the following:
- Set main camera button (1) - sets that tile as the main display on their own screen.
- The selected tile becomes the main tile, and all others move to a top tray.
- Click again to remove the highlight.
- More options (three-dot menu) (2) - includes the Fit to frame option, which adjusts the webcam view to fit entirely within the tile.
Picture-in-Picture (Firefox only)
Participants can pop out a video tile and move it anywhere on their screen. To do this:
- Hover over a tile and click the pop-out toggle.
- The popped-out tile can be dragged anywhere or remain on top while navigating to another window.
- The popped-out tile includes buttons to:
- Return the tile to its place
- Pause the camera view
- Mute or unmute the tile’s sound
Hosts / Moderators
Hosts and moderators have extended controls for managing the stage.
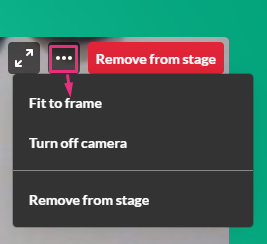
- Highlighting a tile affects the display for all users.
- The three-dot menu includes different functions depending on whether it’s your own tile or another user’s tile.
- Fit to frame
- Turn off camera
- Remove from stage
- Fit to frame
- Turn off camera
- Remove from stage
- Set/unset as moderator
- Edit permissions
- Remove from meeting
On your own tile:
On another user's tile:
Please note the function to set moderators as captioners is not available yet in the Kaltura Room.
To learn more about these options, see Set Participants permissions and Joining on Stage.
Layout menu
Moderators can change the stage layout from the layout selector at the bottom of the screen.
If you're interested in creating more customized scene layouts, check out our Scene Manager.

At the bottom of the screen, simply click the layout selector icon and choose your desired layout.
Available layouts:
- Speakers only – Displays only the active speakers.
- Gallery view – Displays speakers and content.
- Side by side – Highlights the content tile with webcam tiles aligned either vertically or horizontally, depending on the window size. Up to three of the most recent speakers are shown next to the content. This layout is available only when sharing content.
- Content only – Displays only the shared content.
If no content is on stage, the gallery view layout will be selected by default.
The image below shows the gallery view:

The image below shows the side-by-side view:

The following shows content-only view:

