Overview
This article provides standards and best practices for streaming to Kaltura. Herein, you will learn how to stream to a Kaltura endpoint as well as the recommended settings for a successful stream. Additional related Knowledge Center articles are provided at the end of this article for your reference.
Live broadcasting specifications
- Codec: H.264
- Keyframe interval every 2 seconds
- Frame-rate: 25 or 30 fps for speakers, most virtual events; 60 fps is available for sports-like content when higher frames per second is required
- CBR (constant bit rate) mode
Recommended video specs for 1080p broadcasts
- Bitrate: 3.5-5 Mbps
Recommended video specs for 720p broadcasts
- Bitrate: 2-3 Mbps
Recommended audio specs
- AAC (AAC-LC)
- Bitrate: 128kbps or higher
Captions
- RTMP Embedded closed captions (608 and 708) are supported
Recommended transport protocol
- We recommend broadcasting via RTMP or RTMPS protocols for standard broadcasts.
- SRT streaming is also supported and should be considered when network/internet reliability concerns are present or additional security is required.
- Note: Kaltura does not support multi-audio using SRT steaming.
- We recommend to have the stream only transcoded for broadcast once at the source, using one of the protocols mentioned above. (transcoded versus encoded).
- Stream both primary and secondary/backup using independent encoders to insure full redundancy.
- Use diverse network/internet paths for broadcasting to each endpoint with a wired connection.
- Utilize standard Kaltura Cloud Transcoding (set-up by default).
For additional information, please see the Live Transcoding category of our Knowledge Center.
Internet requirements for broadcasting
- Internet connection with at least double the upload speeds required by the total bitrate of the broadcast; ensure that networks used for broadcast are reserved for that use, protecting all available bandwidth for the broadcasts.
- Preferably use independent networks for the primary and secondary streams.
Recommended hardware/encoders
| Enterprise Grade | Prosumer Grade |
| AWS Elemental Live | Telestream WireCast |
| Ateme Titan Live | Open Broadcast Software (OBS) |
| Haivision Makito | vMix |
| Telestream LightSpeed | XSplit |
Multi-audio live streams
For live streams with additional audio tracks, usually additional languages, you will send those as additional RTMP audio-only streams to Kaltura. The primary and secondary/backup RTMP URLs stay the same for each stream; the Stream Name changes according to the table below.
Please note, in a multi-audio configuration, the video stream’s audio is ignored. If the original audio is in English, for example, you must send a separate audio only RTMP stream with the English, using the Stream Name of 1000.
| Stream | RTMP Stream Key (AKA Stream Name) |
| Video | |
| Video Stream | 1 |
| Audio Track Language | RTMP Stream Key |
| English | 1000 |
| Spanish | 1001 |
| French | 1002 |
| German | 1003 |
| Portuguese | 1004 |
| Chinese | 1005 |
| Japanese | 1009 |
| Korean | 1012 |
| Italian | 1015 |
Note: For multi-audio live streams, a one-time setup of your account’s Kaltura cloud transcode profile is necessary. The above languages are pre-configured on your account. Contact your CSM to add additional languages in advance of your multi-audio event.
For additional information, please see How to stream multiple video flavors or multiple audio tracks.
Setting up the stream
You need to copy the RTMP endpoint details (shown below), then configure a constant bitrate RTMP stream in your encoder and paste the details into the fields provided (live broadcasting specifications below).
Setting up the stream - Kaltura Virtual Events
- After you have created a Live webcast session in Kaltura Virtual Events, access the Edit Session page. For more information, see Agenda tab - Add and edit Live Webcast session.
- Click on the Basics tab.
- Scroll down to the Live Stream Details section and click Show on RTMP URLs.
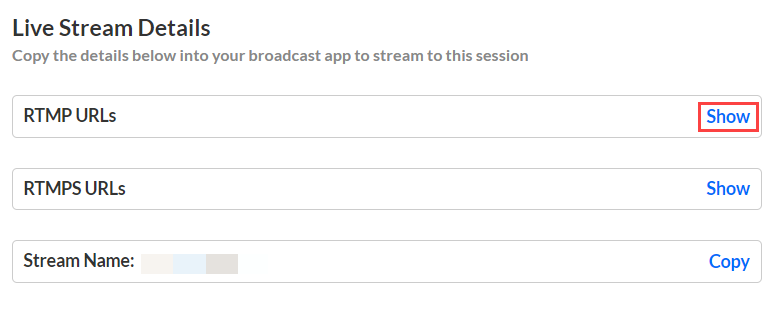
- Copy the live stream details:
RTMP primary URL
RTMP secondary URL
Stream name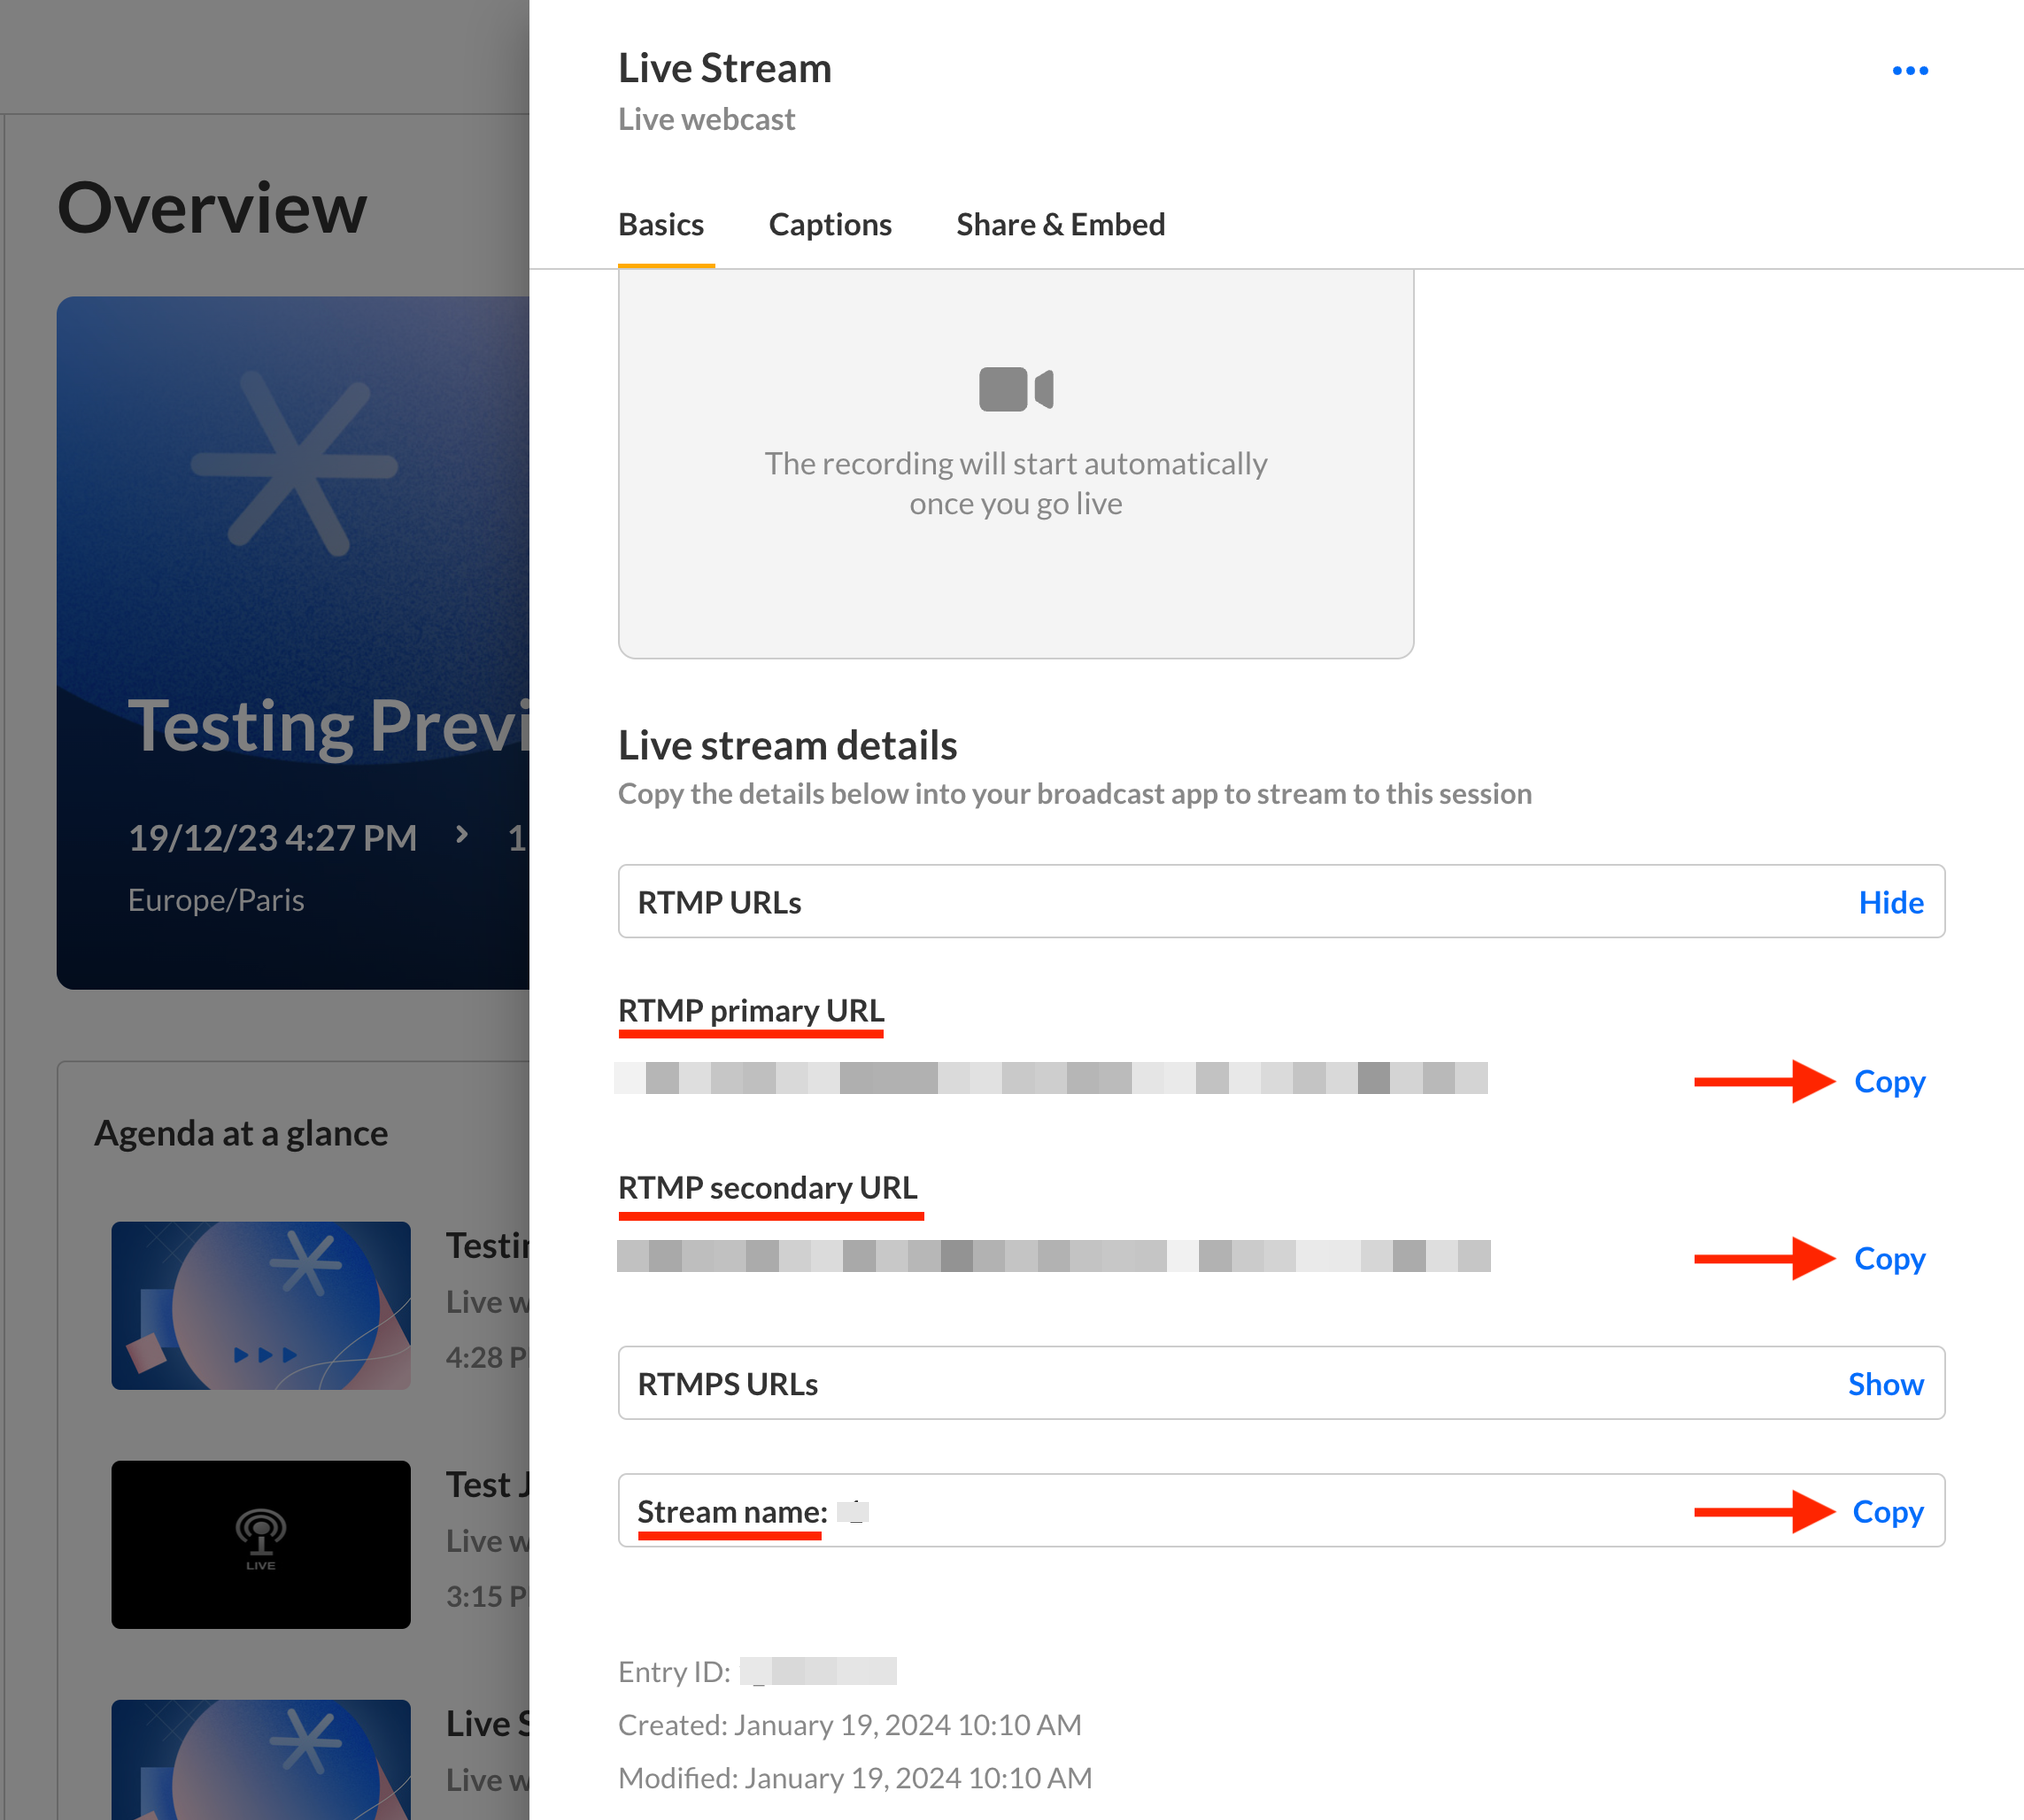
- Paste the live stream details into your encoder(s) to stream the session. For an example on how to do so, see OBS Studio and Kaltura Live Streaming.


Setting up the stream - Rich Media Content Management System (Rich Media CMS)
- After you have created a live entry in the Rich Media Content Management System (Rich Media CMS), access the Entry Details page by clicking on the desired entry. For more information, see Create a live stream entry.
- Click on the Live Stream tab on the left-hand side of the page.
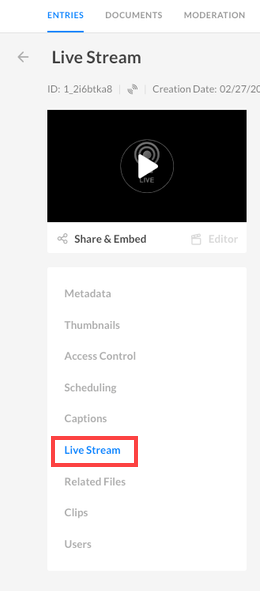
- Copy the live stream details:
Primary URL
Backup URL
Stream name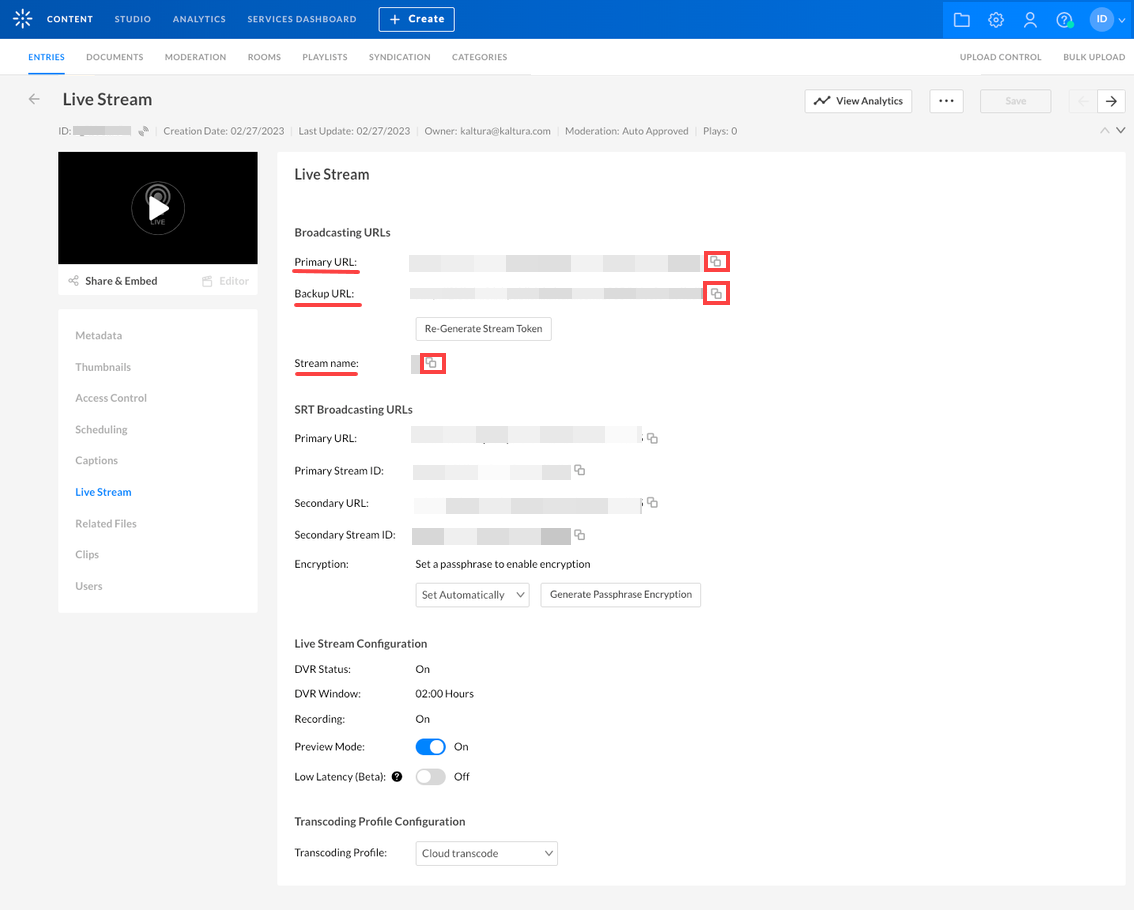
- Paste the live stream details into your encoder(s) to stream the session. For an example on how to do so, see OBS Studio and Kaltura Live Streaming.


Testing
Dry Run, Pre-Event
Broadcast
- Test production entry. Use the same settings and configurations from the event venue (e.g encoders, network connection, cameras, captions setup) as you expect for the event.
- Validate video quality, audio quality and captions.
- While testing, use real video and not static video (moving images)
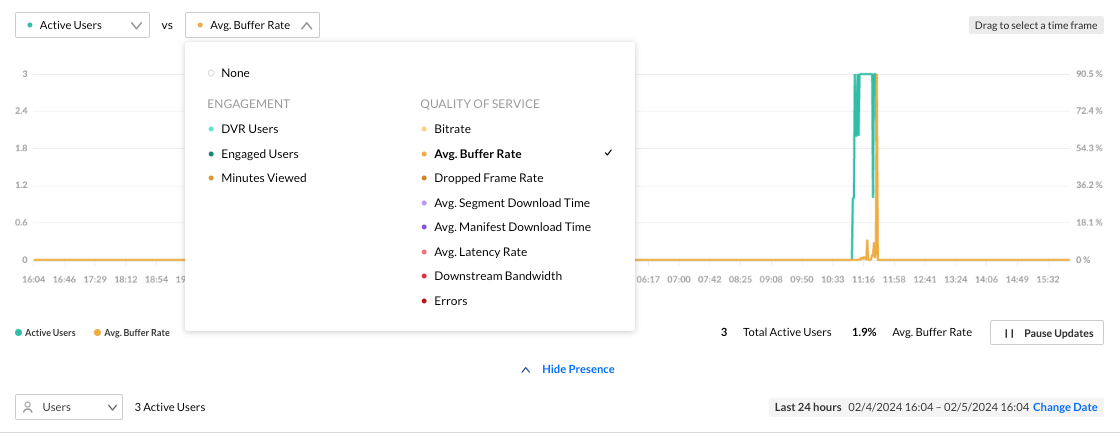
- Review any issues in the real time dashboard in Kaltura Virtual Events or the Rich Media Content Management System (same dashboard in each application) in the stream health logs and Quality of Service dashboard:
Stream Health Logs
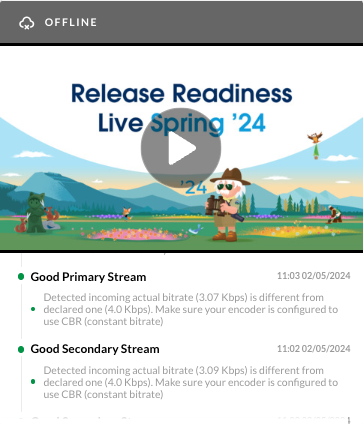
Quality of Service
Captions
- If live captions are provided by Kaltura through Reach, order captions for dry-run testing
- If captions are encoded in advance into the ingested stream, test stream should include captions with words
Post Dry Run
- Delete the recording from the production entry
- Delete any chat messages sent during dry-run testing
Mini Dry Run, Immediately Before Event
- Start and check your preview stream at least 30 minutes before the event, on the production entry. To get to the preview screen:
- Open the session in Kaltura Virtual Events, click on 3 dots, click on “View Analytics”, and navigate to “Real-time dashboard” on the top right.
- Ensure video quality, audio quality, and captions are all working properly.
- In case of any issues, review logs in the Real-Time Dashboard.
- Open the session in Kaltura Virtual Events, click on 3 dots, click on “View Analytics”, and navigate to “Real-time dashboard” on the top right.
- Once you are ready to start streaming to the public, click “Go Live”.
Additional resources
Live and Simulive - technical guidelines
Kaltura network firewall or proxy server settings
How to stream multiple video flavors or multiple audio tracks
Live Encoding Best Practices Guide
Notes
- Other settings may impact the live stream like delivery profiles and access controls. Please ensure your Kaltura account is configured based on account needs.
- For events planned for internal audiences, additional network considerations should be validated ahead of time, including office bandwidth, eCDN solutions, and VPN connections.
