About
This article describes how to set up Kaltura Live Streaming using Open Broadcaster Software (OBS) Studio.
OBS Studio is a free and open-source live-streaming video software.
You may download the OBS Studio from here: https://obsproject.com/.
For assistance with OBS Studio, please visit the OBS Studio Help and/or OBS Studio Forum.
OBS Studio is one of many software-based encoders that may be used to broadcast to Kaltura Live Streaming. For more encoder types, click here.
OBS Studio is especially easy to use and can stream without XML files. Nonetheless, if you are using a different encoder that requires an XML file you can easily obtain it. Kaltura creates an XML file to seamlessly export the live encoder information. You can also export an XML file containing all the Live Stream details that can later be imported to the encoder. If you're unsure about where to find the Live Stream details, review the article for Editing a Webcasting Event.
Kaltura Setup
- Create a live stream entry via the Rich Media CMS. To learn how to do so, see Creating a Live Stream Entry in Kaltura Using the Rich Media CMS.
OR
Create a live stream entry via the KMS/KAF. To learn how to do so, see Creating a Webcasting Event Using the legacy Video Portal. - In Rich Media CMS, Open the live stream entry you created and navigate to the Live Stream tab.
Here you can find the Primary URL and the Stream name.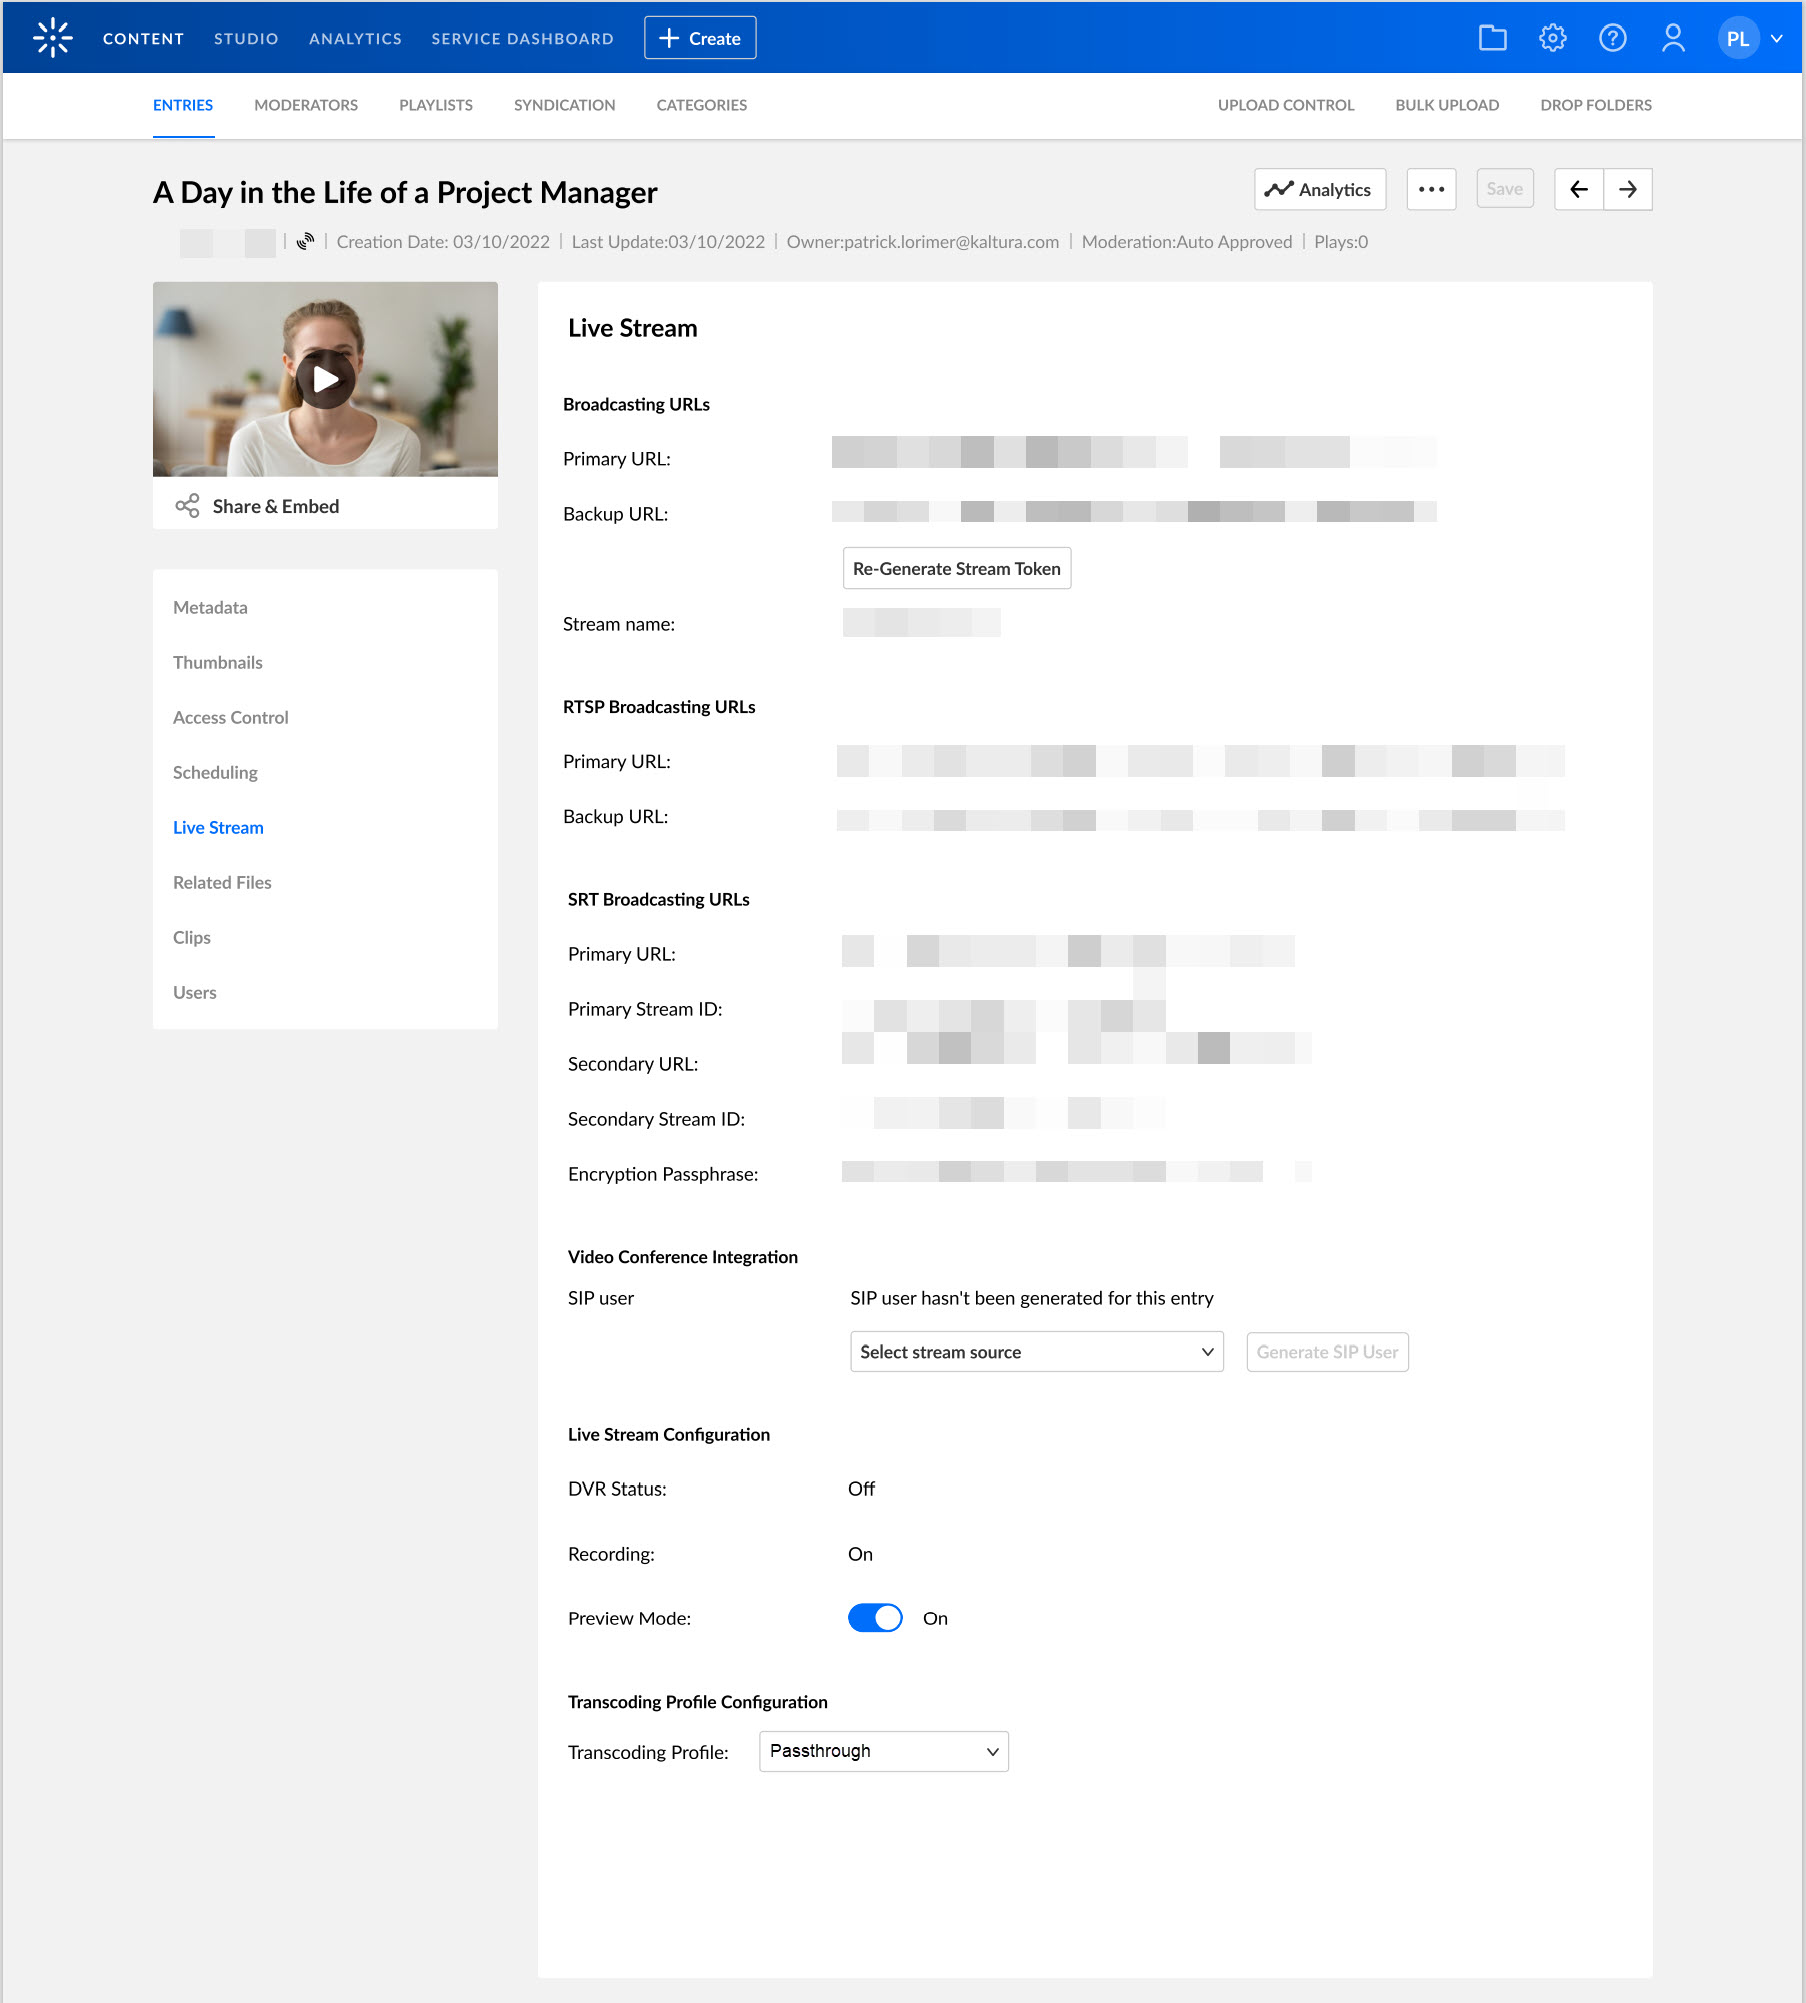

OR
In KMS/KAF, Open the Webcasting event Edit page you created and navigate to the Live Stream tab. Here you can find the Primary URL and the Stream name.
Verify that you have the following Live Stream details from the Webcast Event page:
- Primary URL - the system automatically generates this URL
- Backup URL - the system automatically generates this URL
- Stream Name - the stream name is the stream ID and is generated automatically. It is usually just the number '1' unless more than one video flavor or multiple soundtracks are being streamed simultaneously. If you are broadcasting multiple bit rates or multiple audio tracks from your encoder, you will need to use different stream names for the different flavors. Check this article for further details.
OBS Setup for RTMP streaming
- Open OBS Studio, go to the File menu and select Settings.
- Go to the Stream tab and configure the following:
- Service: Select Custom from the Stream Type dropdown.
- Server: Paste here the Primary URL.
- Stream key: the stream name is the stream ID and is generated automatically. It is usually just the number '1' unless more than one video flavor or multiple soundtracks are being streamed simultaneously. If you are broadcasting multiple bit rates or multiple audio tracks from your encoder, you will need to use different stream names for the different flavors. Check this article for further details.

- Click OK.
- Set up the desired scenes and sources in the OBS Studio. To learn more, see
-
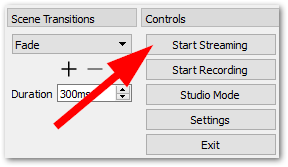
In the OBS Studio's Controls section, click Start Streaming. Your live stream will begin broadcasting to Kaltura. Click Stop Streaming to end your broadcast.


OBS Setup for SRT streaming
- Open OBS Studio, go to the File menu and select Settings.
- Go to the Stream tab and configure the following:
- Service: Select Custom from the Stream Type dropdown.
- Server: Use the URL as the Server Address. Concatenate the stream ID string to the URL by adding ?streamid= between the URL and the stream ID.
<URL>?streamid=<stream_ID> - Stream key: Leave the field empty.

- Click OK.
- Set up the desired scenes and sources in the OBS Studio. To learn more, see
- In the OBS Studio's Controls section, click Start Streaming. Your live stream will begin broadcasting to Kaltura. Click Stop Streaming to end your broadcast.

Streaming Optimization
You may refine the OBS Studio settings to optimize the stream quality. For example, you can adjust the Settings > Output, Settings > Video, Settings > Audio, and others. For more information on optimization, please refer to OBS Studio's Help.
The encoder settings for achieving the best streaming quality depend on several factors, including your hardware capabilities, internet connection speed, and the streaming platform's requirements. To learn more, see Best Practices for streaming to Kaltura.
To ensure a high-quality, stable, and smooth broadcast. Be sure that everything is operating as planned and remember to test your settings before going live.
