About
This guide shows you how to quickly add media to a channel using the Add to Channel button, directly on the channel page. You can add one item or several at once, making it easier to manage your content.
Who can use this
- Channel owners
- Managers
- Contributors
Access your channel
- Select My Channels from the user menu.
- Click the Go to channel button for the channel you want to update.


The channel page opens.
Add existing media
- On the channel page, click Add to Channel at the top right. This button only appears if you have permission to add media to the channel.
- Use the tabs at the top to switch between:
- My Media
- Shared Repository (if available in your environment)
- Search or filter to find the media you want to add.
- Select media by checking the box next to each item. To select all items on the page, use the checkbox at the top of the table.

The 'Select media' window opens.

- If a checkbox is greyed out and already checked, it means the media is already in the channel. You'll also see an alert message confirming this.
- If a checkbox is greyed out and not checked, it means the media is missing required fields and can't be published yet. You'll see a message prompting you to fill in the required information before publishing.
- Mandatory captions before adding to a channel - If your admin has enabled the 'Captions Required' setting, media without captions (including video, audio, or quizzes) cannot be added to a channel. These entries will appear with a grayed-out checkbox and cannot be selected. A message at the top of the page will explain why certain items are unavailable. To add the media, upload or order captions first, or contact the media owner.
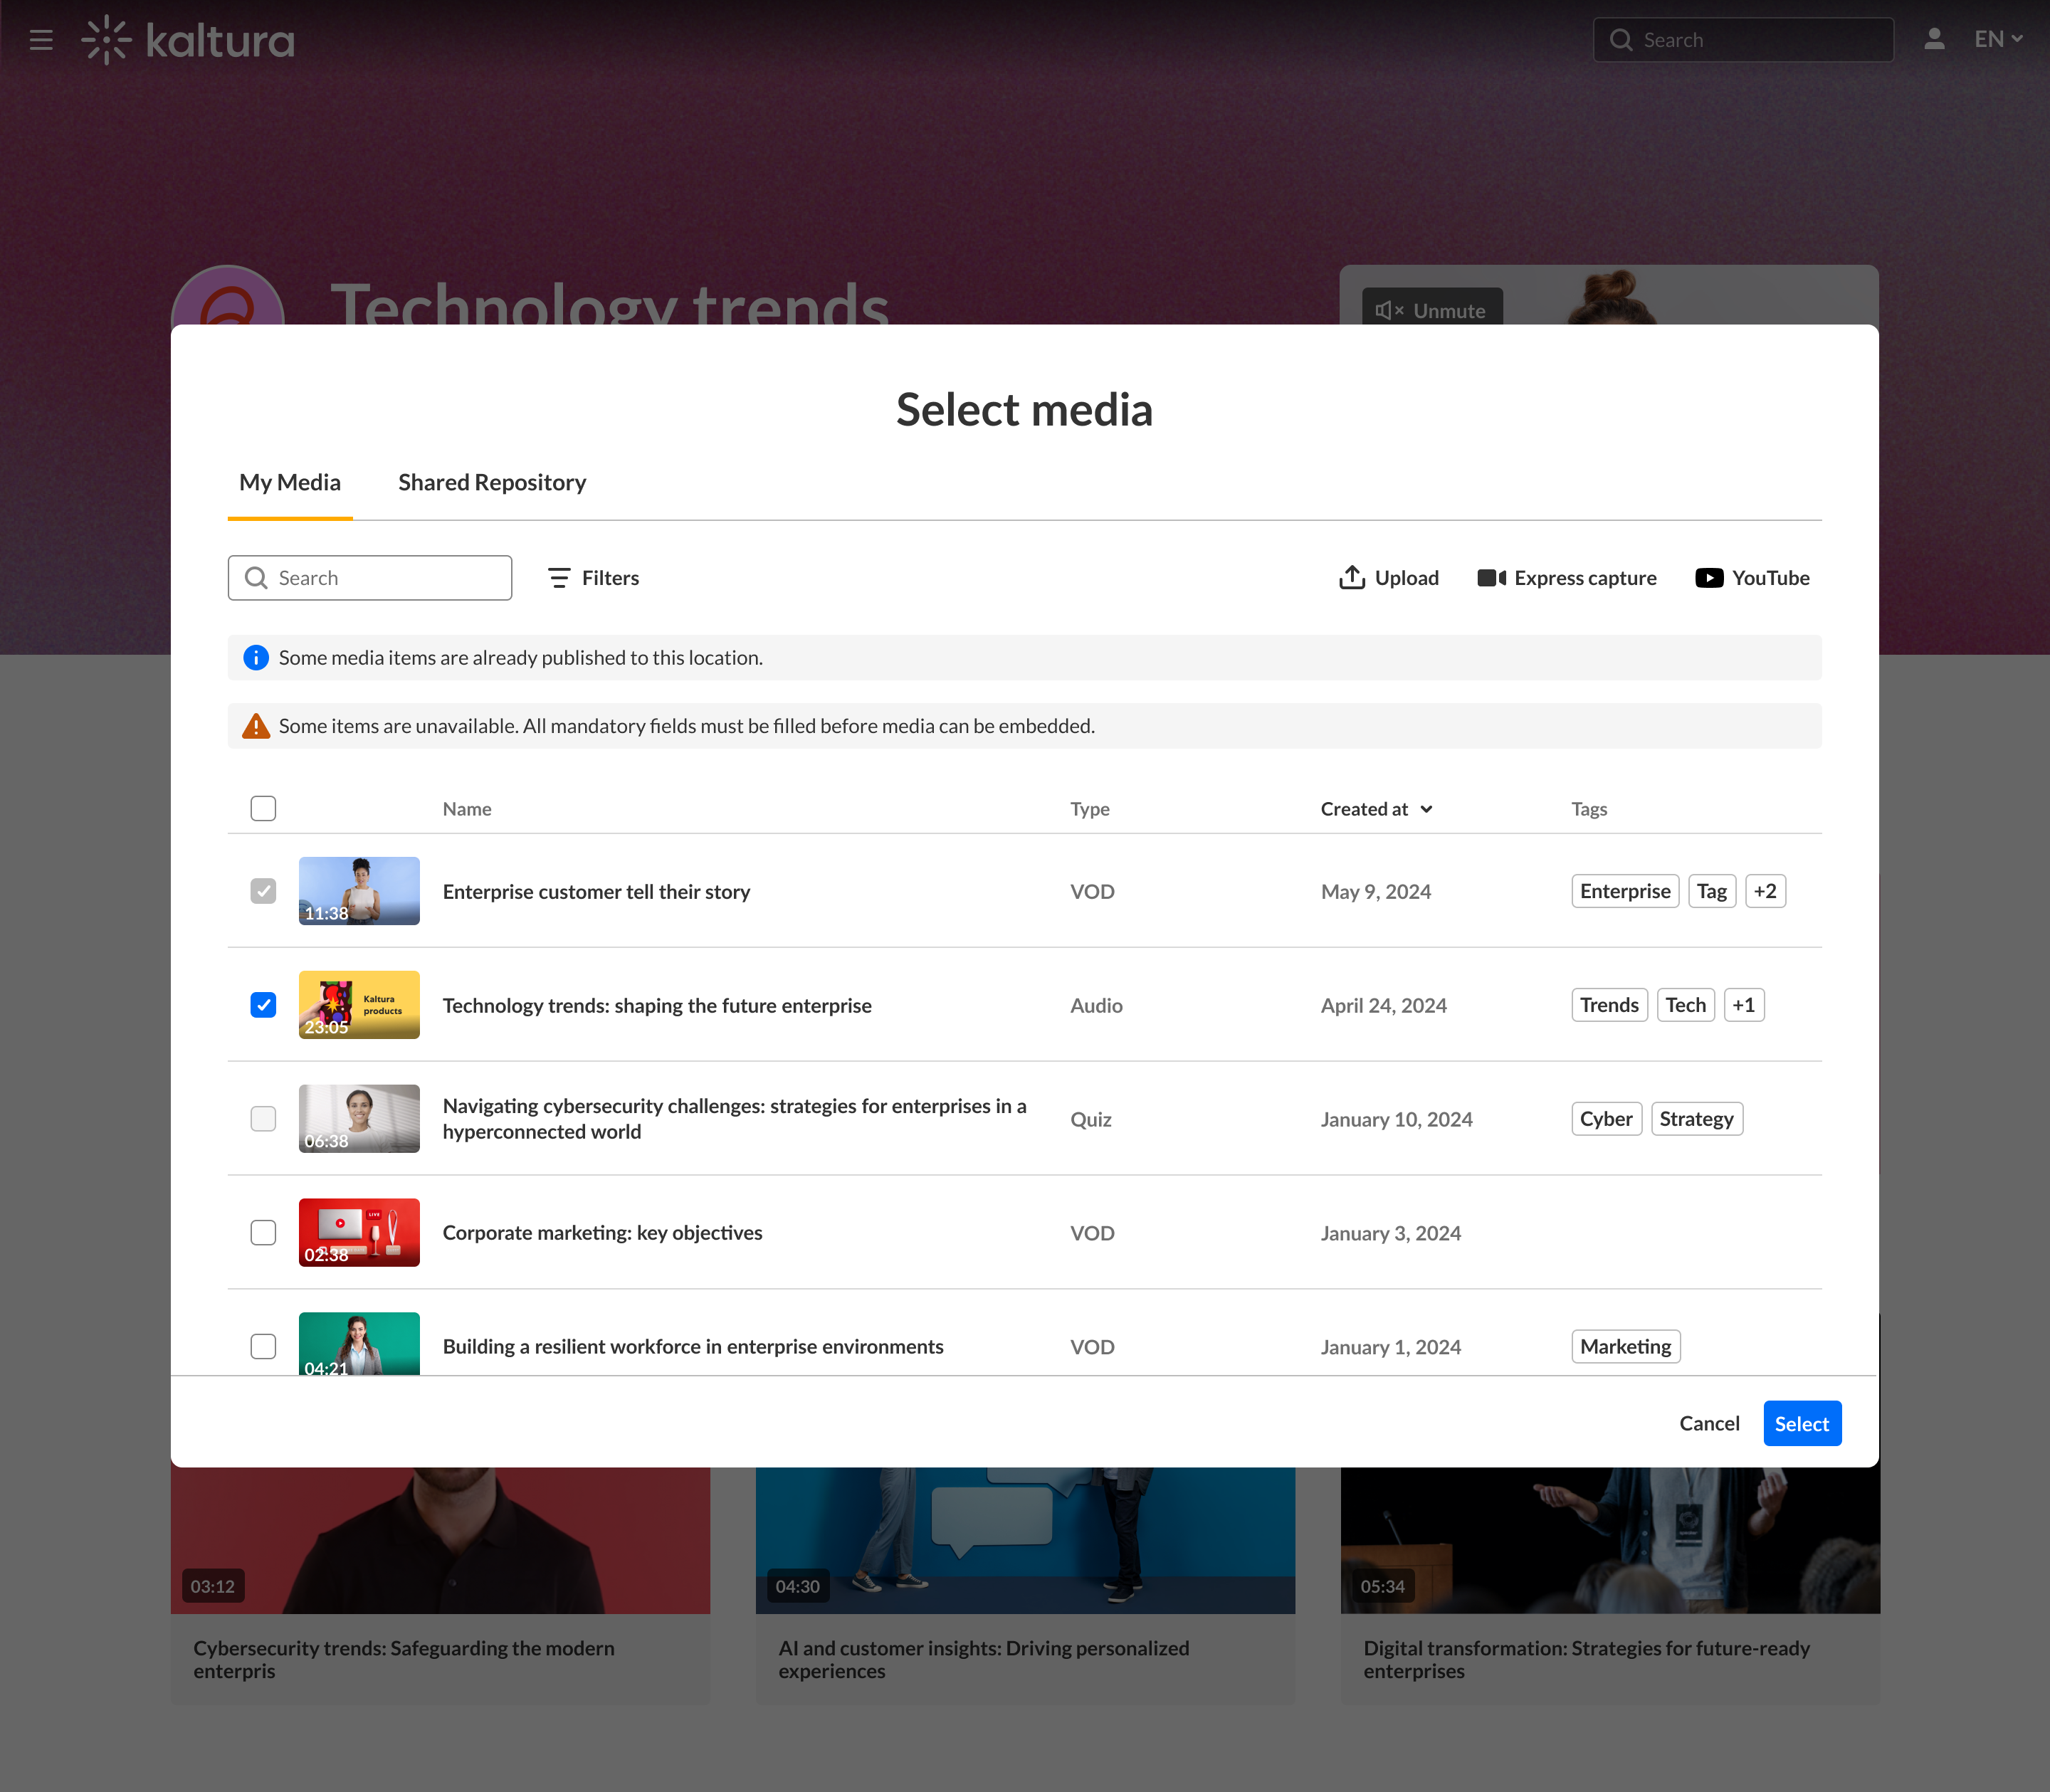 Alert messages show at top for media already added, as well as missing required fields
If you’re adding media to channel that is a Shared Repository, you will see a checkbox labeled “I accept the terms of use.” This must be selected before you can proceed.
5. Click Select at the bottom right (this button becomes active once at least one media item is selected).
A confirmation message appears at the top of the screen.
Once added, your media appears in the channel. If moderation is enabled, it may take time before the media is visible to others.
Add new media
Need to upload or record a new video? Use one of the options at the far right
- Upload - You can upload multiple files at once. After selecting your files, wait for all uploads to complete before clicking Save and Select to return to the media selection screen. Visit our article Upload media for guidance.
- Express Capture - Visit our article Create a recording with Express Capture for guidance.
- YouTube - Visit our article Add a YouTube video for guidance.

If you don’t see the Add to Channel button or can’t find your media, contact your Kaltura administrator. You may not have the required permissions, or the content may not be eligible for publishing yet.
