About
When you finish a recording that you started manually, you can review the recording information and save and upload the recording.
For scheduled recordings, the recording information is predefined and view-only.
Stop and save your recording
- Click Stop. The Recording Complete screen opens.
- Review or update the recording information:
- Title - The title of the recording.
- Username - The user who owns the recording and can access it in My Media in Content Hubs or LMS Extensions. If authentication is enabled, you can’t edit this field.
- Description - A description of the recording.
- Tags - Tags associated with the recording.
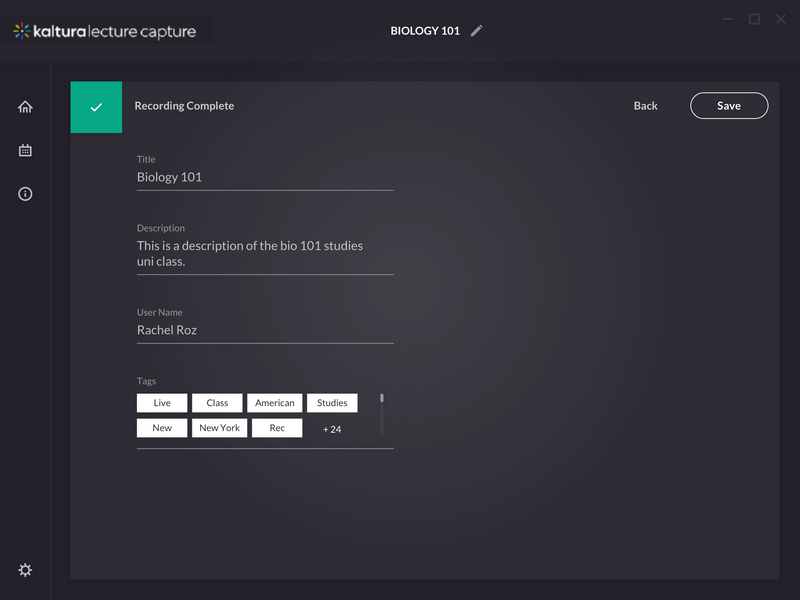
- Click Save & Upload.
If you stopped the recording by mistake, click Cancel to return to the recording in a paused state.
Upload your recording
Lecture Capture automatically uploads the recording and its title, description, and tags to Kaltura. The recording is assigned to the user specified in the Username field.
After the upload is complete, you can find the recording in My Media.
You can close Lecture Capture or sign out of the computer while the recording uploads. If the upload is interrupted by a restart, power loss, or network connection issue, it resumes automatically when the service is available again.
A local copy is also stored on the computer. If the recordings directory wasn’t changed during installation, the default location is C:\Program Files\Kaltura\Classroom\Recordings. After a successful upload, recordings are stored in the completed folder by default.
Administrators can also view uploaded recordings in Content > Entries in the Rich Media CMS.
