About
The Recording Management window helps you view and manage your Capture recordings. It has three main tabs:
- Library - View and manage your recordings, start a new recording, and re-upload recordings if needed.
- Settings - Adjust recording quality and other Capture preferences, view where recordings are stored, and upload logs for troubleshooting.
- Information - View application and user information, sign out, and access the site connected to Capture.

Access the Recording Management window
Launch Capture from your Content Hub or LMS Extension (from the My Media page):
- If Theming is enabled, open the +Create menu and select Capture.
- If Theming isn't enabled, open the +Add New menu and select Kaltura Capture.
When the Capture recorder opens, click Manage.

The Recording Management window opens on the Library tab by default.
For more information about launching Capture, see Create your first recording with Capture.
Library
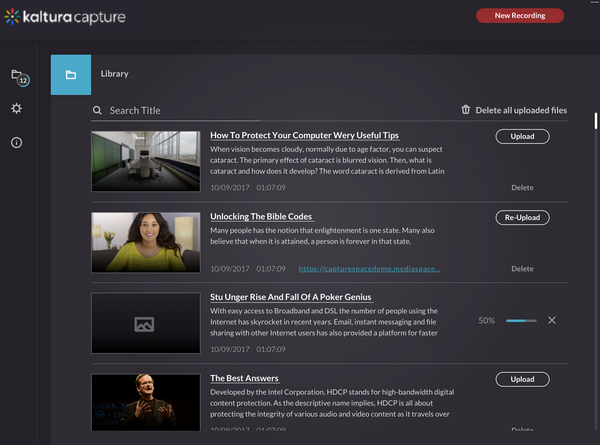
The Library tab is where you can find and manage your Capture recordings.
In the left panel, click the folder icon to open it.

From the library tab, you can:
- View your Capture recordings.
- Start a new recording and return to the Capture recorder.
- Click a recording to open its edit page. If the recording has already been uploaded, you can't change its recording details from this page.
- Open an uploaded recording in My Media.
- Delete a recording from your local library.
- Delete all uploaded recording files from your local storage.
- Re-upload media if a recording needs to be uploaded again. For example, you can re-upload a recording if the original upload was unsuccessful or the uploaded entry was deleted from your site. The recording is uploaded as a new entry.
Edit a recording
From the Library tab, click a recording to open its edit page.
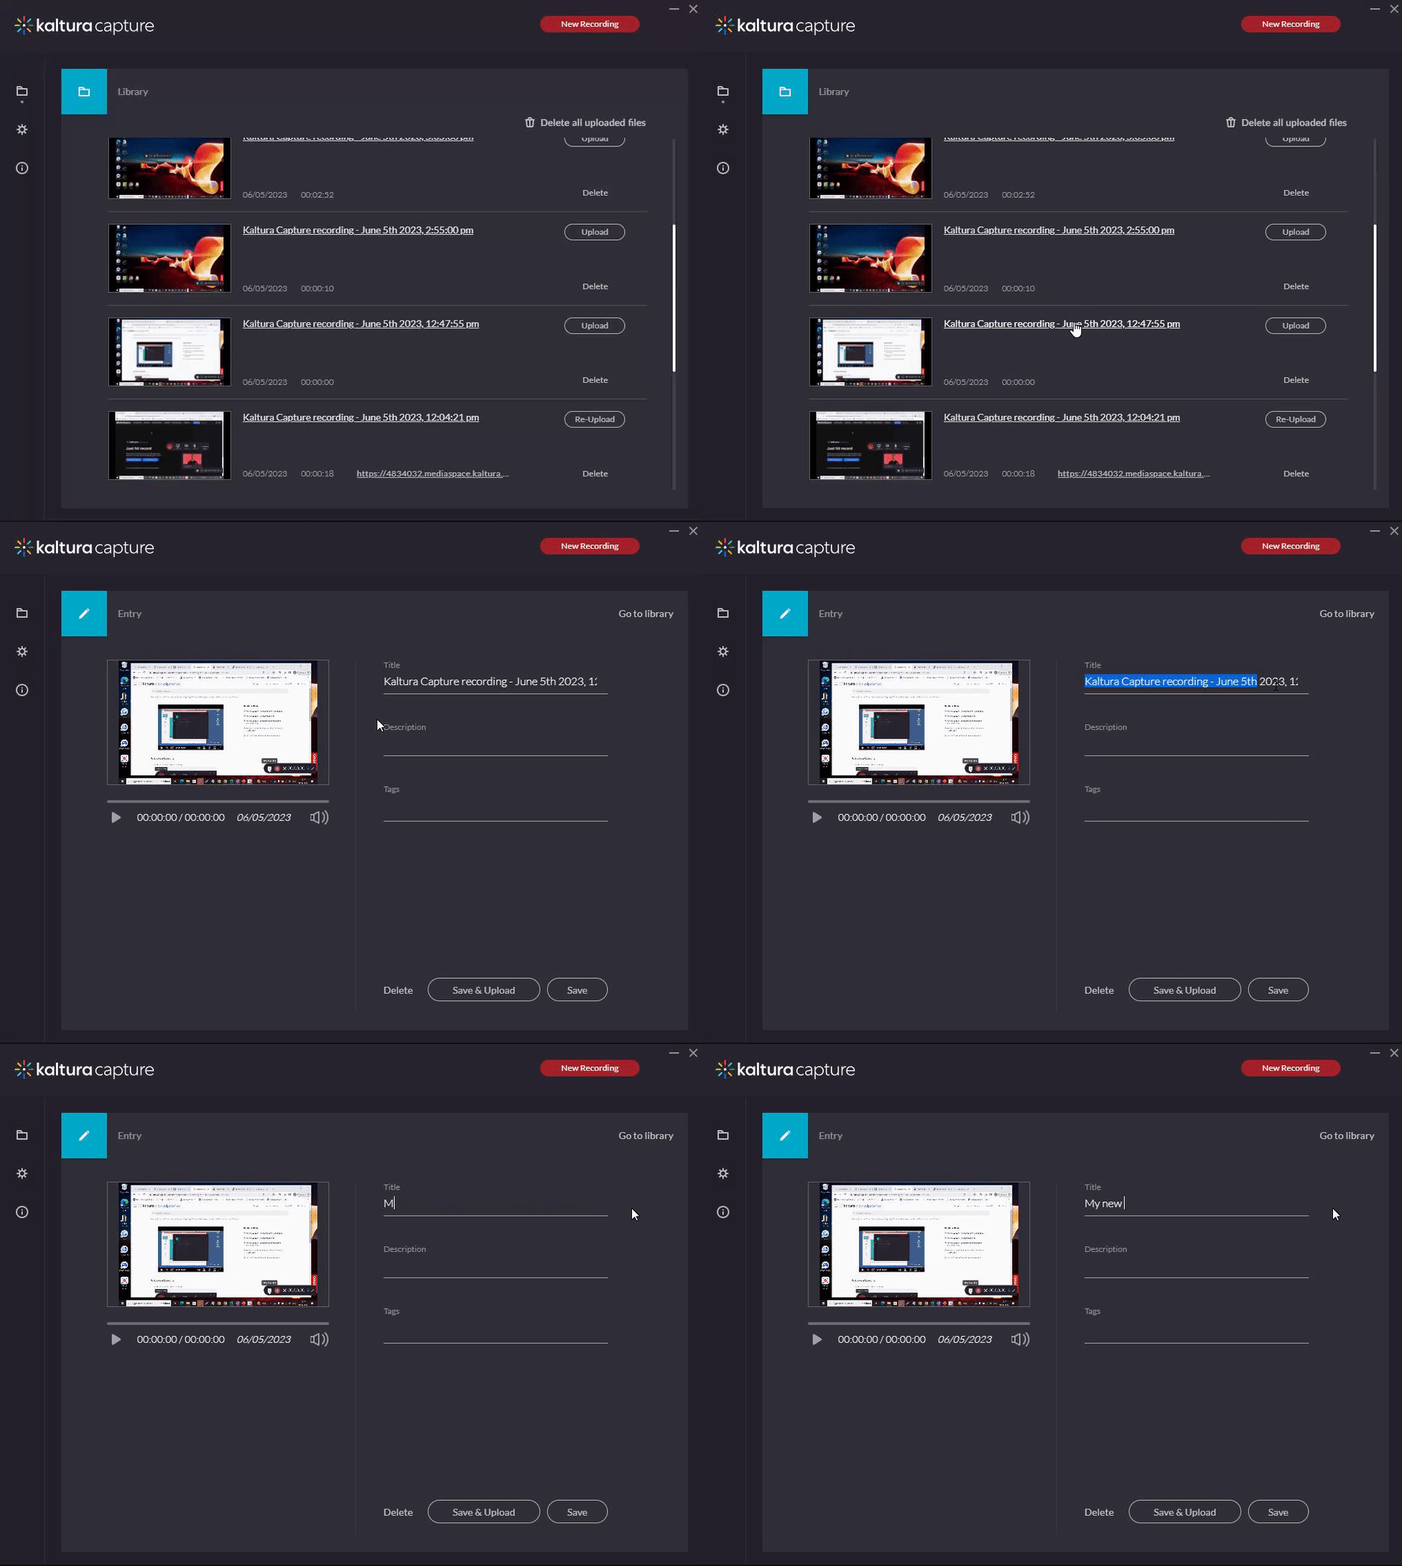
From the edit page, you can:
- Edit the title, description, and tags. If the recording has already been uploaded, you can't change these details from this page.
- Delete the recording from your local library.
- Open the uploaded recording in your Content Hub or LMS Extension using the provided link.
- Play the recording.
Settings
In the left panel, click the gear icon to open the settings.

From the settings tab, you can:
- Change the camera recording quality.
- Change the screen recording quality.
- Enable or disable system audio (Windows only).
- Change the recording name prefix.
- View the recording directory where recordings are saved on your computer.
- Choose whether to highlight the cursor during recordings.
- Choose whether Capture automatically minimizes when recording starts. When Auto minimize when recording is set to Yes, the app minimizes after the countdown. When set to No (default), the app remains visible.
- Upload application logs for troubleshooting. After you click Upload logs and the upload is complete, copy the token and include it in your support ticket.
If your camera or screen doesn't support the selected recording resolution, Capture uses the closest resolution supported by the device.
Information
In the left panel, click the information (i) icon to view information about Capture and the connected user.

From the information tab, you can:
- View the Kaltura Capture version.
- View the connected user. To connect Capture to a different user, sign out and relaunch the application.
- Sign out of Kaltura Capture.
- Open the site connected to Kaltura Capture using the provided link.
