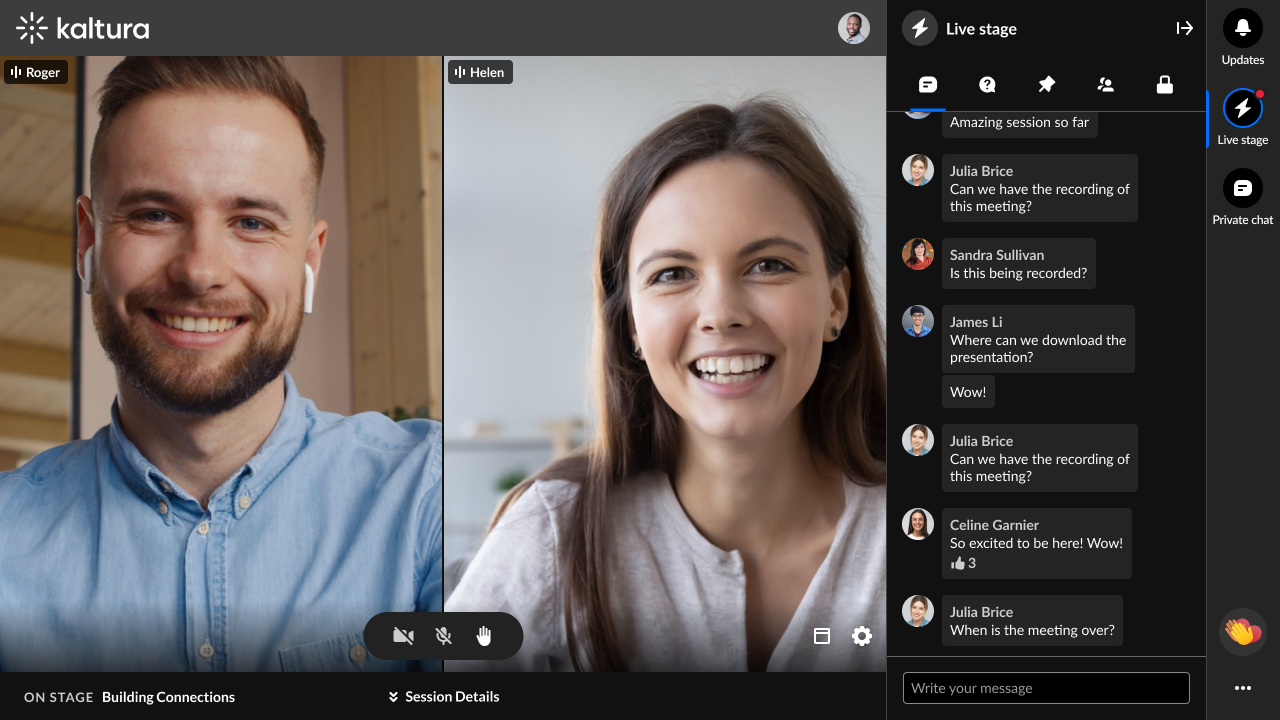
Chat and Collaborate widget


About

This article provides an overview of the Chat & Collaborate widget for both the Attendee and Moderator. 

The Chat & Collaborate widget is supported for desktop and mobile on a web browser.

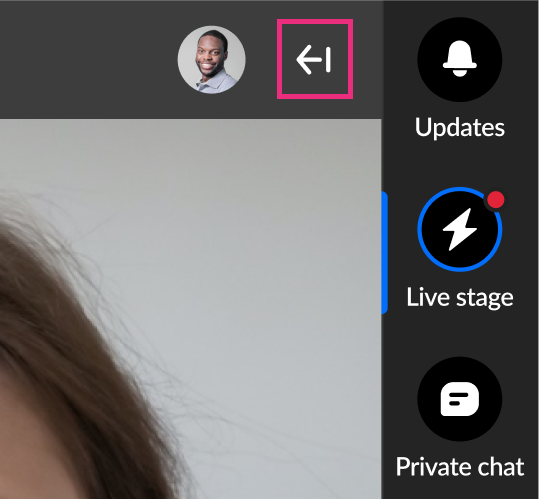
To access the Chat & Collaborate widget on a desktop

  1. Click the "expand" button  in the upper right corner of the screen.
    Attendee View
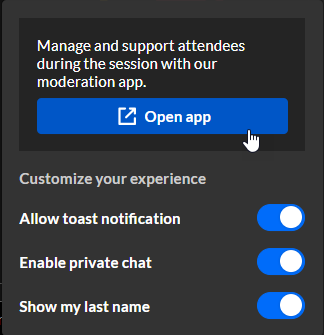
    Your admin may have implemented a Customization popup that may include a disclaimer (or legal consent), that you must accept before using the widget. This disclaimer informs you that the data from private conversations is recorded. The Customization popup also allows you to further customize your experience regarding toast notifications, private chat, and privacy settings.
  2. Once you are finished making your selections, click Accept. The Chat & Collaborate widget displays.
    Attendee View

To access the Chat & Collaborate widget on a mobile

The Chat & Collaborate widget is open automatically when you enter the site. 

Your admin may have implemented a Customization popup that may include a disclaimer (or legal consent), that you must accept before using the widget. This disclaimer informs you that the data from private conversations is recorded. The Customization popup also allows you to further customize your experience regarding toast notifications, private chat, and privacy settings.

Once you are finished making your selections, click Accept. The Private chat displays.

The Chat & Collaborate widget menu

The Chat & Collaborate widget menu is located on the right sidebar in desktop and on the bottom of the screen in mobile. The menu displays differently for an attendee and moderator. It contains three tabs for the attendee and five tabs for the moderator.

Assistant (moderator only)

Looking for more information about this feature? Feel free to contact your Kaltura representative.

The Assistant tab offers moderators peace of mind via several functionalities that empower them to more easily moderate and do more with their time during a session. 

Gain real time insight on your session

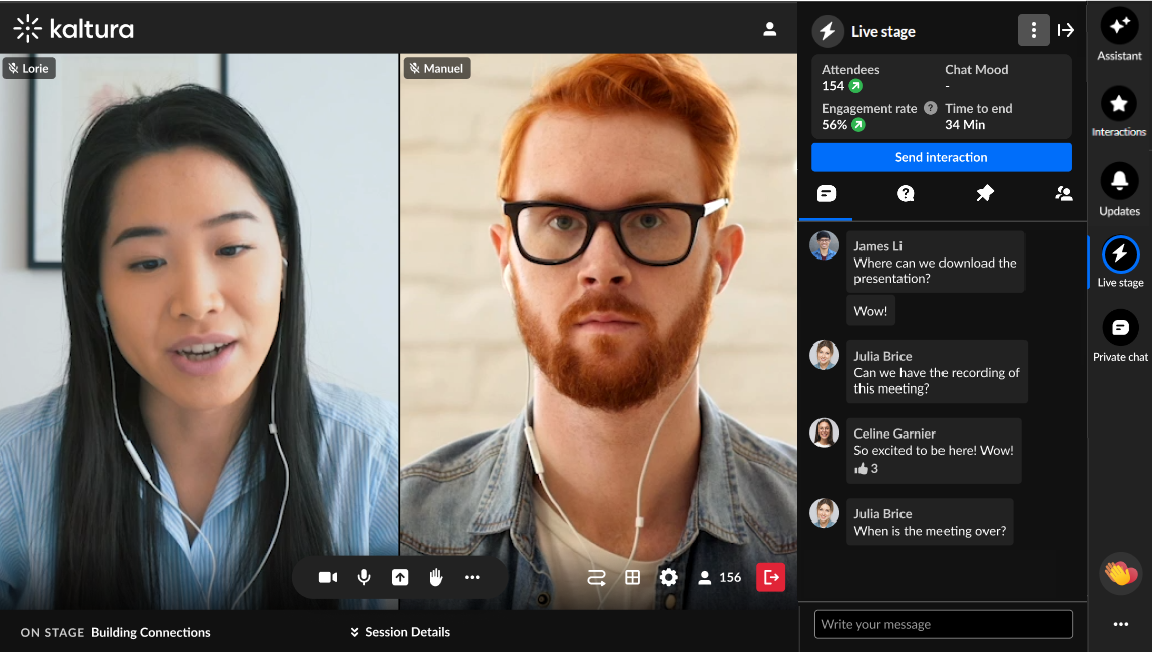
Kaltura pulls a number of crucial data points right into the session, including attendee numbers, turnout rate (percentage of those registered who are actually logged into the session), engagement rate (viewers who watch in full screen or with the focus on the tab and sound on), and time to end. These real time, crucial metrics keep moderators minded of how their session is performing. Depending on how your account is configured, information may display in one of two ways. 

Example 1:

Moderator View - Account Configuration Example 1

Attendees - The number of attendees currently logged into the session.

Turnout - Percentage of those registered who are actually logged into the session. 

Engagement rate - Viewers who watch in full screen or with the focus on the tab and sound on.

Time to end - The amount of time left in your session.

Example 2:

Moderator View - Account Configuration Example 2

Attendees - The number of attendees currently logged into the session.

Chat mood - This feature revolutionizes the way event team members understand and interact with group conversations. Chat mood analyzer uses sentiment analysis to evaluate the atmosphere expressed in group chats and categorizes it into three distinct values. Values presented may be Positive, Neutral, Negative, or Quiet (no new messages in the chat for at least 5 minutes). Chat mood analyzer allows event organizers to gain deeper insights into the overall mood and tone of group discussions; make informed decisions based on the collective sentiment of their team or community; and identify and address concerns promptly, fostering a more positive and productive environment.

As with all AI features, this is officially supported in English only.

Note that upon starting a session, sentiment begins calculating immediately, however values take approximately two minutes to display on screen. 

Engagement rate - Viewers who watch in full screen or with the focus on the tab and sound on.

Time to end - The amount of time left in your session.

Note that in Configuration Example 2 shown above you may still access Turnout by simply hovering over the tooltip on the Attendees insight component. 

These real time, crucial metrics keep moderators minded of how their session is performing.

Choose appropriate engagement methods based on indicators and automatically triggered signals

Kaltura provides indicators and signals to moderators based on metric trends. For example, if engagement rates are trending up, a green up arrow is displayed next to Engagement rate and a pop-up notification displays in the lower left corner of the screen. These indicators and signals prompt the moderator to take appropriate action. In keeping with our same example, now may be a great time to send out a poll!

Moderator View

Moderators are, thus, empowered to choose appropriate engagement methods based on what's going on in their session. 

Other signals prompting moderators to take action accordingly include the following: 

"Time to session - 15 minutes - Webinar starts in 15 min. Open doors for attendees in the lobby."

"Time on session - 5 minutes - Moderator, 5 min left. Send attendees a heads-up now - we're gearing up to roll!"

"Time left on session - 15 Minutes left - Your webinar is about to end. Check out our recommendations."

"Engagement rate - [%] - Your audience engagement rate is dropping, and it's time to boost it."

"Engagement rate - [%] - Your audience engagement rate is getting high, take advantage of the momentum."

"Attendees - [number] - Attendees are dropping dramatically. Time to take actions."

"Attendees - [number] - Attendees are joining your session. Keep up the momentum."

Quickly drive actions to boost engagement

Kaltura provides shortcuts to drive these actions (creating and publishing polls, crowd votes, and chat messages to the group) right inside the Assistant, keeping everything at the moderator's fingertips.

Moderator View

Create and publish a poll, crowd vote, or chat message from the Assistant tab

As stated above, you may choose from any of the automatically generated shortcuts to drive actions. 

  • If you would like to create a poll, click Select poll. You are redirected to the Interactions tab with the poll displayed and text pre-filled for both the question and possible answers. Edit the question and possible answers as desired.
  • If you would like to create a crowd vote, click Select vote. You are redirected to the Interactions tab with the crowd vote displayed and text pre-filled. Edit the text as desired.
  • If you would like to create a chat message, click Select chat message. You are redirected to the Live stage Chat tab with the chat displayed and text pre-filled.  Edit the text as desired.

You may also scroll down and click Generate interactions to generate even more ideas for other possible interactions.

Moderator View

Interactions (moderator only)

The Interactions tab allows a moderator to create and publish interaction tools, including text polls, quiz questions, rating scales, crowd votes, and open-ended questions. The Interactions tab also allows a moderator to create crowd reactions and announcements. The Interactions tab displays only to moderators.

Moderator View

Create and publish a poll from the Interactions tab

  1. Click Poll to begin creating a poll.
  2. Type your question, options (up to 5), decide whether to share results with attendees, save as a draft, or publish now.
    If you choose to save the poll as a draft, you may access it through the Interactions drafts button on the Interactions tab, hover over the draft and either edit it or publish it now.
    If you choose to publish now, it will be published to your attendees immediately, initially displaying as a small toast popup in the lower left corner of the screen, then displaying in the Feed sub-tab of the Live stage tab.

Create and publish a quiz question from the Interactions tab

  1. Click Quiz question to begin creating a quiz question.
  2. Type your question, answers (up to 5), select the correct answer, decide whether to display the correct answer or share results with attendees, save as a draft, or publish now.
    If you choose to save the quiz question as a draft, you may access it through the Interactions drafts button on the Interactions tab, hover over the draft and either edit it or publish it now.
    If you choose to publish now, it will be published to your attendees immediately, initially displaying as a small toast popup in the lower left corner of the screen, then displaying in the Feed sub-tab of the Live stage tab.

Create and publish a rating scale poll from the Interactions tab

  1. Click Rating scale to begin creating a rating scale.
  2. Type your question/statement, choose your rating scale emoji, decide whether to share results with attendees, save as a draft, or publish now.
    If you choose to save the rating scale as a draft, you may access it through the Interactions drafts button on the Interactions tab, hover over the draft and either edit it or publish it now.
    If you choose to publish now, it will be published to your attendees immediately, initially displaying as a small toast popup in the lower left corner of the screen, then displaying in the Feed sub-tab of the Live stage tab.

Create and publish a crowd vote poll from the Interactions tab

  1. Click Crowd vote to begin creating a crowd vote.
  2. Type your question/statement, choose your crowd vote emoji, decide whether to share results with attendees, save as a draft, or publish now.
    If you choose to save the crowd vote as a draft, you may access it through the Interactions drafts button on the Interactions tab, hover over the draft and either edit it or publish it now.
    If you choose to publish now, it will be published to your attendees immediately, initially displaying as a small toast popup in the lower left corner of the screen, then displaying in the Feed sub-tab of the Live stage tab.

Create and publish a crowd reaction from the Interactions tab

  1. Click Crowd reaction to begin creating a crowd reaction.
  2. Hover over the desired crowd reaction and the crowd reaction is highlighted with a Send button.
  3. Click to send the crowd reaction.

Please note:
All users can choose from a set of 5 reactions that display horizontally at the bottom of the Chat and Collaborate widget. See Reactions for more information. 

For moderators, this horizontal list of reactions also contains those reactions that are available to them in the Interactions tab. Moderators can click to expand the list of all available crowd reactions. 

Create and publish an open-ended question

  1. Click Open-ended question to begin creating an open-ended question.
  2. Type your question in the "Write your question here" field, decide whether to share results with attendees, save as a draft, or publish now.

    If you choose to save the open-ended question as a draft, you may access it through the Interactions drafts button on the Interactions tab, hover over the draft and either edit it or publish it now.
    If you choose to publish now, it will be published to your attendees immediately, initially displaying as a small toast popup in the lower left corner of the screen, then displaying in the Feed sub-tab of the Live stage tab.

Create and publish an announcement from the Interactions tab

  1. Click Announcement to begin creating an announcement.
  2. Type a title for your announcement (optional), such as "Mid-webinar alert!". Then type the announcement itself, such as "Get your questions ready for the upcoming Q&A session!".
  3. Click + Add CTA button and additional options display.
  4. Type a label for your CTA button, along with a URL to which users will be directed upon clicking the CTA button. If you change your mind and decide not to include a CTA, you can always clear it by clicking the "trash can" icon.
  5. Choose to save the announcement as a draft or send it immediately to attendees.

    If you choose to save the announcement as a draft, you may access it through the Interactions drafts button on the Interactions tab, hover over the draft and either edit it or publish it now.
    If you choose to publish now, it will be published to your attendees immediately, initially displaying as a small toast popup in the lower left corner of the screen, then displaying in the Feed sub-tab of the Live stage tab.

Updates

The Updates tab displays the notifications sent from the moderator to all participants during the session. The Updates tab displays the same to an attendee and a moderator.

Attendee View

The following shows the Updates tab with a small toast popup in the lower left corner of the screen.

Attendee View

Live Stage 

The Live Stage tab is only for a specific context, for example, a specific session, and displays differently for an attendee and moderator.

The Live Stage tab includes the following sub-tabs:

Chat tab - The Chat tab presents the group chat for a specific context/session. Attendees can write, like, and reply to messages. They can also delete their own messages. Moderators have the additional abilities to pin and delete all messages, block users from the group chat, and access interaction capabilities. The Chat tab displays differently for an attendee and moderator.

Attendee View

  • Type your message in the "Write your message" field to start chatting.
  • Hover over a message and select the "Like" icon to like a message. 
  • Hover over a message and select the "Reply" icon to reply to a message. 
  • Hover over your own message and select the "Trashcan" icon to delete your message.

Moderator View

  • Type your message in the "Write your message" field to start chatting.
  • Hover over a message and select the "Like" icon to like a message. 
  • Hover over a message and select the "Reply" icon to reply to a message. 
  • Hover over any message and select the "Trashcan" icon to delete the message.
  • Hover over a message and select the "Pin" icon to pin the message to the top of the list. 
  • Hover over a message and select the "Block" icon to block the user. 
  • Click one of the interaction "cards" at the top of the screen to access interaction capabilities.

Q&A tab

The Q&A tab is used by attendees to ask questions to the moderator. This tab is used by moderators to answer questions from session attendees. 

Single thread versus Multi thread (multiple question threads) capability

Your Admin may choose between maintaining a single conversational thread (default) or multiple conversation threads per user. Single thread configuration means one single thread will contain all the questions that an attendee asks. Multi thread configuration means each question that an attendee asks is given its own separate thread. In other words, attendees may have several chats/threads open with a moderator at the same time. This allows for organization of questions based on context. 

Single thread (default):

Attendee View

Multi thread:

Attendee View


We will be demonstrating the multi thread capability in this article.  Please contact your Kaltura representative for additional information.

The Q&A tab displays differently for an attendee and moderator.

Attendee experience

When posing your very first question to the moderator (no question threads exist between you and the moderator)

  1. Click the Ask new question button.
    Attendee View
    The Write your message field displays.
    Attendee View
  2. Type your question in the "Write your message" field and press Enter. The conversation thread (denoted by the question header at the top) displays with the question as the first message. The moderator then answers your question in that conversation thread. 
    Attendee View
  3. You may click the back arrow to the left of the question header to exit the thread and navigate back to the Q&A tab with the question list. Your first question thread is displayed.
    Attendee View
  4. You may click on that question thread at any time to return to it and continue your chat with the moderator.

Create a new thread with the moderator (one or more question threads already exist between you and the moderator)

  1. Click the Ask new question button.
    Attendee View
    The Write your message field displays.
    Attendee View
  2. Type your question in the "Write your message" field and press Enter. The conversation thread (denoted by the question header at the top) displays with the question as the first message. The moderator then answers your question in that conversation thread.
    Attendee View
  3. You may click the back arrow to the left of the question header to exit the thread and navigate back to the Q&A tab with the question list. Your question threads are displayed.
    Attendee View
  4. You may click on that question thread at any time to return to it and continue your chat with the moderator.

Attendees have the following additional capabilities in the Q&A tab: 

  • Hover over a message and select the "Like" icon to like a message.
  • Hover over a message and select the "Reply" icon to reply to a message. 
  • Hover over your own message and select the "Trashcan" icon to delete your message.

Moderator experience

For the moderator, if there are no messages from attendees, the following is displayed.

Moderator View

If there are messages from attendees, the following is displayed. 

Moderator View

The number of pending chats and claimed chats are displayed, along with arrows allowing you to either expand or collapse both lists. 

To read a pending or claimed chat, click on the chat (not the Reply button)

To claim a pending chat and begin a one-on-one conversation with that attendee -

  1. Click the Reply button to the right of an attendee's name. A one-on-one conversation is initiated with that attendee.
    Moderator View
  2. Type your message in the "Write your message" field. Notice a message above the field reads "Answering as [Session Name], indicating that you are talking in the chat as a moderator, and you are not in a private chat. 

To navigate back to the Q&A tab, click the back arrow. 

To "un-claim" and send the chat back to pending chats, click the three dots and choose Send back to pending chats button.

Moderators have the following additional capabilities in the Q&A tab, just as they do in the Chat sub-tab. 

  • Hover over a message and select the "Like" icon to like a message. 
  • Hover over a message and select the "Reply" icon to reply to a message. 
  • Hover over any message and select the "Trashcan" icon to delete the message.
  • Hover over a message and select the "Pin" icon to pin the message to the top of the list. 
  • Hover over a message and select the "Block" icon to block the user. 
  • Click one of the interaction "cards" at the top of the screen to access interaction capabilities.

Feed tab -The Feed tab contains several components, similar to a social media feed. Attendees and moderators use this tab to view items such as messages pinned by moderators and interactions (polls, rating scale polls, and crowd vote polls). The Feed tab displays differently for an attendee and moderator.

Attendee View


Moderator View

Moderators may:

  • Publish a question with an answer from the moderator app and it will display on the Feed tab.
  • Hide results of a poll, end polls, and unpublish polls on the Feed tab, or from the moderator app
  • Pin a message from the Chat and Q&A tabs and it will display on the Feed tab as a "pinned message". (A message that was pinned can also be unpinned by a moderator.)
  • Click one of the interaction "cards" at the top of the screen to access interaction capabilities.

Backchannel tab - The Backchannel tab is a space where moderators can chat privately with other moderators. This tab contains several components similar to the Chat tab, but only for moderators in a specific context/session. In other words, the Backchannel tab displays only for moderators who have been added as such in a particular session. Moderators can write, like, and reply to messages from other moderators. They can also delete their own messages. 

The following figure depicts a Backchannel tab with no messages posted. 

Moderator View

The following figure depicts a Backchannel tab populated with moderator messages. 

Moderator View


  • Type your message in the "Write your message" field to start chatting with other moderators.
  • Hover over a message and select the "Like" icon to like a message. 
  • Hover over a message and select the "Reply" icon to reply to a message from another moderator. 
  • Hover over any one of your messages and select the "Trashcan" icon to delete the message.
  • Click one of the interaction "cards" at the top of the screen to access interaction capabilities.

Note the alert at the bottom of the Backchannel tab. Because the Backchannel and Chat tabs function similarly, this alert helps remind moderators that they are in a "Moderator-only" area.  


Private chat

The Private Chat tab is where you may have a 1:1 chat with another participant. The Private Chat tab displays the same to an attendee and a moderator.

Click on the Private Chat tab, then click the Connect with attendees button.

Attendee View

Suggested connections are displayed, or you may search for a connection using the Search bar.

Attendee View

Once you've chosen your connection to chat with, that person receives a message that you would like to connect. The request will be in pending state until he/she chooses to "accept" or "ignore" it. In our example below, Nova Jones has sent this user a request to connect. In addition, this user has sent Contance Chen a request to connect.

Attendee View

Once accepted, the private chat initiates. 

Private chats are not connected to a specific session or context. The ability to chat privately with a connection continues after the session ends.

Settings

A participant may decide to configure their own settings. Click the three dots and a list of options displays. 
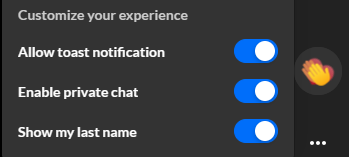
Click the desired option to enable it.

  • Allow toast notification - Some examples of toast notifications include new polls, messages sent specifically to you, or updates. 
  • Enable private chat - Chatting 1:1 with other participants. 
  • Show my last name - Displaying your full name, not just your first name.

Reactions

  1. The possible reaction types display horizontally. Click on the Reactions icon (clapping hands).  
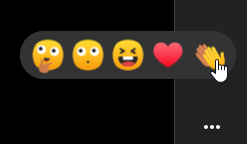
  2. Click on the desired reaction.
    The reactions you initiate will display to everyone in the session.
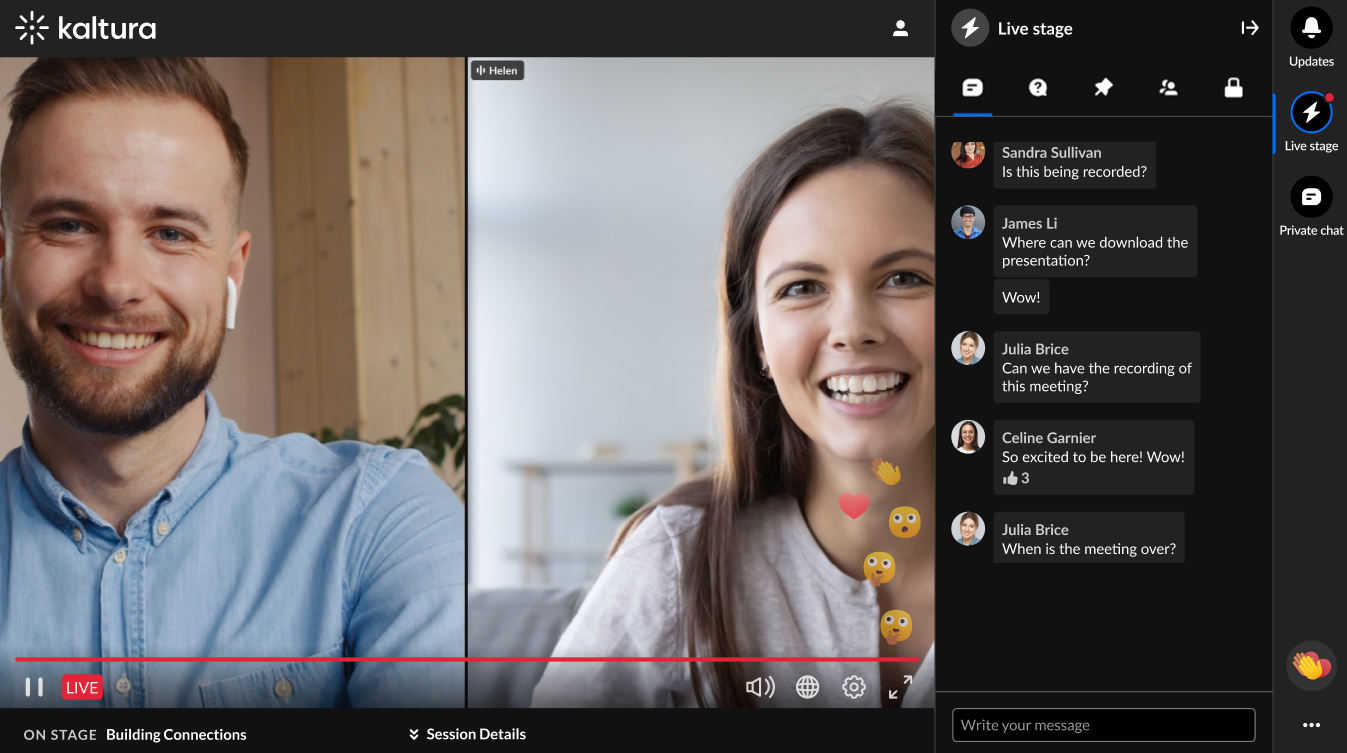
    Attendee View
Was this article helpful?
Thank you for your feedback!
In This Article
Related Articles
Back to top

Never miss a thing!

Subscribe to our customer newsletter and our release notes updates, so you always get the best out of Kaltura.
Newsletter