About
The Salesforce integration for Kaltura Virtual Events sends your event registrants and attendees to Salesforce, so your marketing team can follow up with them there.
Each registrant arrives in Salesforce as a lead with their registration details. You can update the lead later with their attendance and engagement data.
To send data to Salesforce, first add Salesforce to your Kaltura account, then enable it for a specific event.
The screens in this article show a single-session event. The same actions apply to a multi-session event.
Before you start
Complete the one-time setup in Salesforce. For the steps, see Set up Salesforce to receive data from Kaltura Virtual Events.
Add the Salesforce integration to your account
Create one integration for each event template, because each template has its own registration form. After you set up an integration for a template, you can enable it for all events created from that template.
- On the Kaltura Virtual Events home page, select Integrations in the left panel.
- Select Add integration. The New integration window opens.
- In the Select integration type dropdown, select Salesforce.
- In the Name of integration box, enter a descriptive name.
- In the Registration data pulled from dropdown, select the event template that your events use.

- In the Events data section, select the data to send to Salesforce:
- Registrants information: Selected by default. You can't clear it, because it creates the lead in Salesforce.
- Attendees data: Select to update the lead record when registrants log in to the event.
- Attendees engagement and activity: Select to sync attendee activities to their lead record. This process is manual. After the session ends, event organizers can select Sync engagement data to update the lead with engagement data, such as viewing rate or reactions.

- Select Next. The Salesforce authentication window opens.
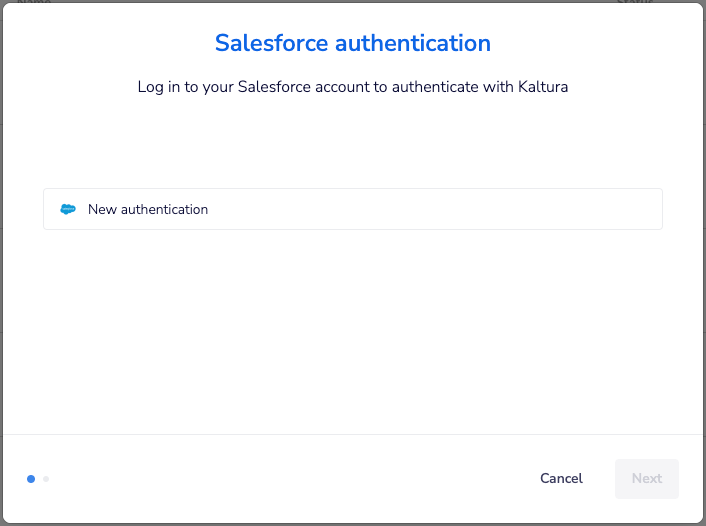
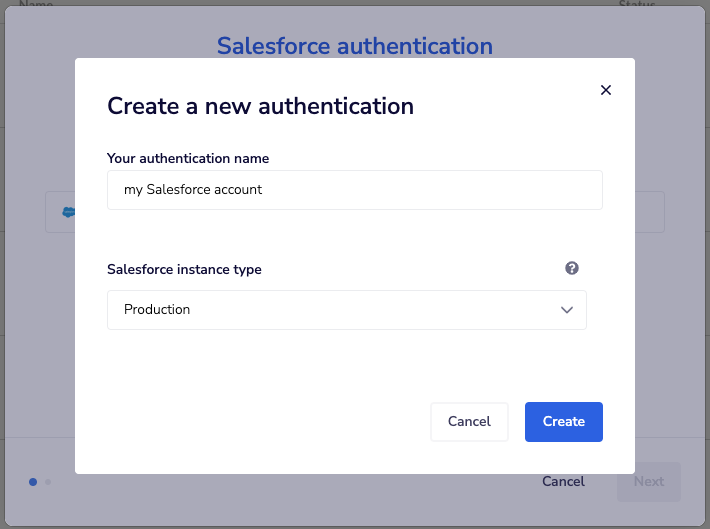
- Select New authentication. You do this one time. After that, your account is selected automatically, and you only select Next. The Create a new authentication box opens.
- In the Your authentication name field, enter a name for the authentication.
- In the Salesforce instance type dropdown, select the type that matches your Salesforce account.
- Select Create.
- Log in to your Salesforce account.
- Allow the required permissions to authenticate with Kaltura. The Map your Salesforce lead fields window opens.
- Choose the Kaltura fields from the drop-down options.

- For each Kaltura field, select the matching field in Salesforce Leads fields. You must map all the required Salesforce fields.

- Select Next.




The My integrations page shows the new integration with the status Active.

The integration doesn't send data until you enable it for an event. To enable it, see Enable the integration for a specific event below.
Manage or delete the integration
You can delete an integration only if it isn't enabled on an event.
To manage or delete an integration, select the three dots to the right of the integration, and then select Manage or Delete.

Enable the integration for a specific event
- In the left panel, select Home. The Home page opens.
- In the event list, select the three dots at the end of the event row, and then select Edit.
 The Overview page of the event opens.
- In the left panel, select Integrations. The Integrations page opens and lists the integrations that apply to this event.
- Next to your Salesforce integration, select Enable. A panel opens on the right with the integration settings.
- In the Campaign id box, enter the campaign ID. This associates the leads with their program in Salesforce.
You can find the campaign ID in the URL when you select the campaign in Salesforce. For example, in
https://xxxxxx.lightning.force.com/lightning/r/Campaign/70103000000cqmPAAQ/view, the campaign ID is70103000000cqmPAAQ. - To sync data automatically when the event ends, select the Automatic sync checkbox.

- Select Enable.


Manually sync all enabled integrations
Resync data is available after you enable an integration. Use it after a late integration setup or if a sync was incomplete.
Resync data only refreshes registration and attendance information. It doesn't include engagement data.
- On the Integrations page, select Resync data.
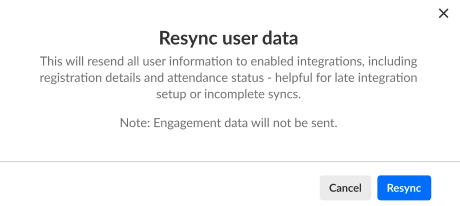
 The Resync user data dialog opens.
- Select Resync. A message appears to confirm that the integration data was synced successfully.

Manage or sync engagement data per integration
After you enable the integration, the Salesforce row on the Integrations page shows Disable and a three-dot menu.

You can do any of the following:
- Select Disable to stop the data sync to Salesforce for this event.
- Select the three dots, and then select Manage to edit the information that identifies this event in Salesforce, such as the campaign ID or program ID.
- Select the three dots, and then select Sync engagement data to send attendee engagement data to Salesforce and update the lead after the event is over.
For more information, see Set up Salesforce to receive data from Kaltura Virtual Events.