Slides are an integral part of a Kaltura Webcasting event, and provide attendees with the option of seeing the slides along with the speaker without live mixing capabilities. The slides are also available in the VOD for metadata and search purposes.
The product recommendation is to use pptx files.
PDF files can be uploaded if you manually enable the file manager filter to show all files when uploading a slide deck. However, PDF file capabilities might be limited and will not support indexing and text search features as practiced in the pptx format presentations.
Uploading Slides
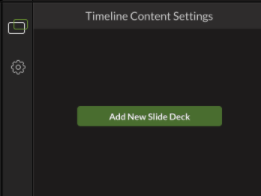
The Webcasting Application enables you to upload the slide deck, change the deck in-mid broadcast, and even run a broadcast without the slide deck. These options are enabled through the Timeline Content Settings, located on the bottom right-hand side of the application.
To add a new slide deck
- Click Add New Slide Deck, browse the slide deck, and select it to upload.
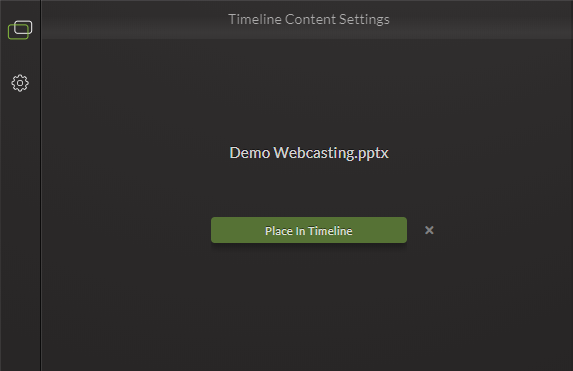
- When the slide deck has been uploaded, the slides will not be broadcasted until you click Place in Timeline.
The following illustrates slides after they are placed in the Timeline.
- Click Replace Slide Deck or Clear Timeline to replace or clear. Confirm the removal of the previous slide deck and the upload of the new deck.
- To apply the slides to the event click on the Stage tab of the Webcasting Application and use the arrow to progress.
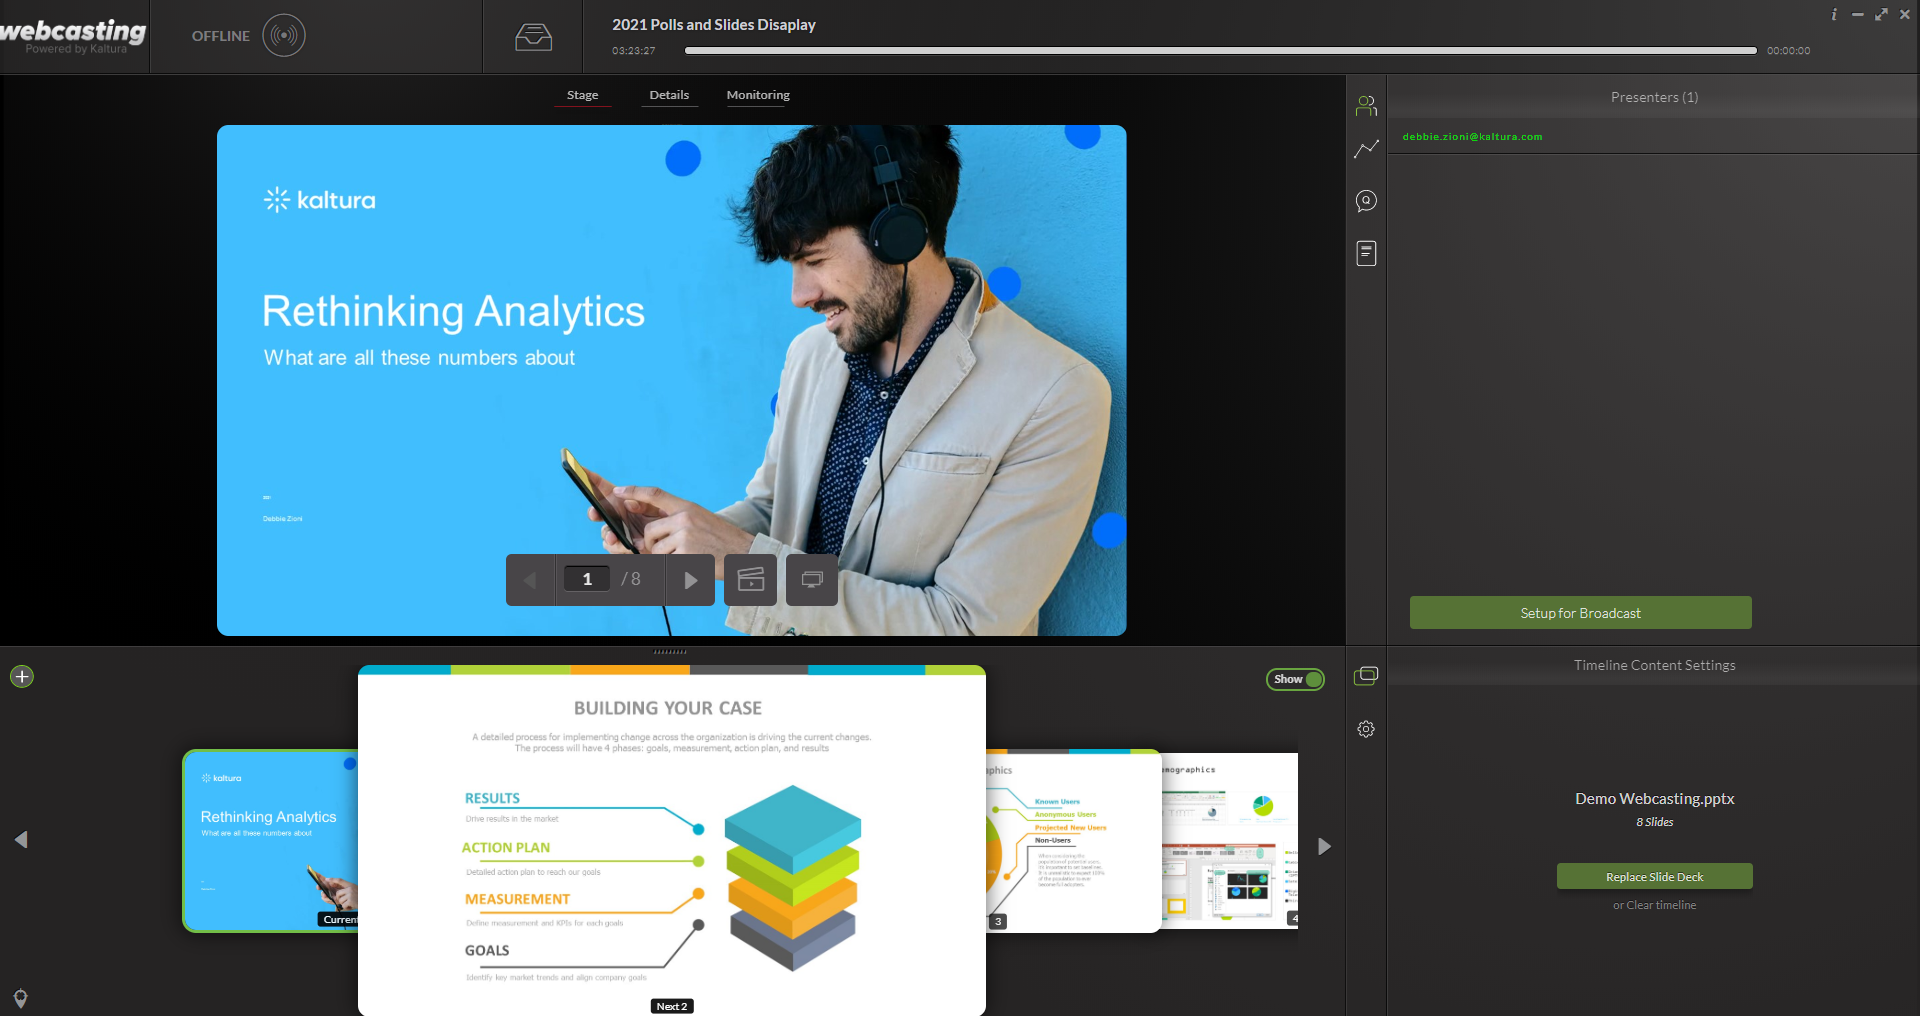
- To hide the upload section, click the show/hide button
 .
.


Show/Hide Slides and Polls
This feature allows you to:
- Utilize Multiple polls during the broadcast
- Obtain full control over the visibility of the slide deck along the entire duration of the broadcast.
The Show/Hide button on the timeline displays or hides slides and polls. The default is Show. A presenter may run a poll during a live event and then select to 'Show poll results'. Afterwards the presenter may want to clear the poll results and continue with the broadcast and may want to run additional polls. The Show/Hide Slides & Polls toggle provides the option to clear the poll display from the screen.
Presenters may select when to stop/start displaying slides or polls during the event.
If there are no items in the timeline to hide or show, the Show/Hide button is disabled.
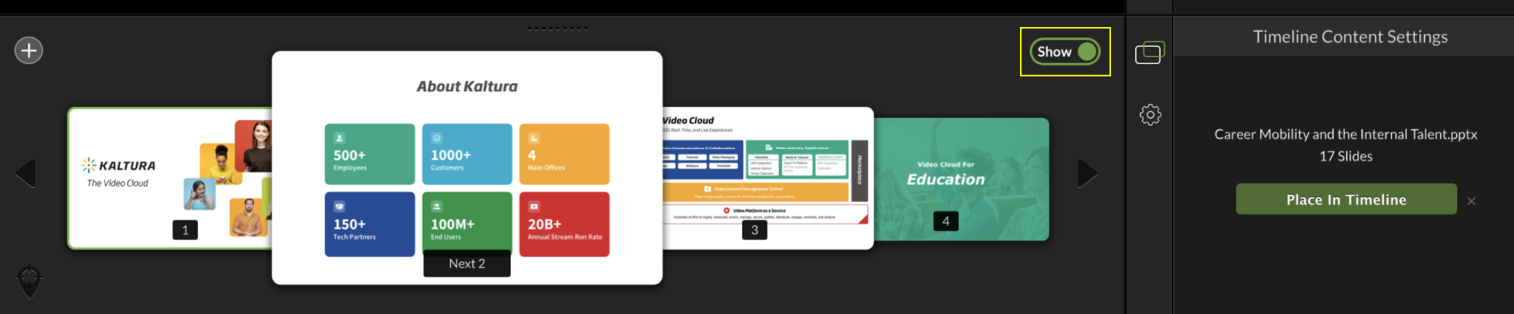
In the following example, poll information is displayed to users. Note the Show button is toggled on.
In the following example, poll information is hidden to viewers. Note the Hide button is toggled on.

New slides for chapters are not displayed when the slides/polls toggle is set to Hide.
Broadcasting Slides
The current slide will be broadcast only after you apply the uploaded slide deck to the Timeline area at the bottom of the Webcasting Application. The slides are broadcast alongside the video. At any point during the event, the producer, moderator, and presenter can advance or backtrack to a specific slide in the presentation.
As part of the processing for slides, each slide is turned into an image file. All text in the slide is extracted to enable search and discoverability of slides both during the live event and when viewing the VOD.
Slide animations and videos embedded in slides will not be available as part of the slide broadcast in Kaltura Webcasting.
To broadcast a specific slide
At any time during the live event, you may navigate to a specific slide using one of the following methods:
- Using the arrows that appear on the current slide to advance or backtrack to a previous slide
- Entering a slide number in the box on the current slide
- Double-clicking a slide in the timeline
Anyone with the Webcasting Application can change slides. This means that if someone changes the slides, the slides will be updated for everyone that has the application open.
Navigating Slides
At any point during the event, the producer, moderator, and presenter can advance or backtrack to a specific slide in the presentation.
To navigate between slides
- At any time during the live event, you may navigate between slides using one of the following methods:
- Using the arrows that appear on the sides of the slide presentation to advance or backtrack to a previous slide
- Entering a slide number in the box on the current slide
- Double-clicking a slide in the timeline
Slide Visibility
At any time during the broadcast, you can decide to toggle the slides & polls visibility (show/hide) through the Producer Application by clicking on the Show/Hide button
Once the slides & Polls are set to hide, an indication will be shown in the Producer Application stage

Extending Your Presentation to Another Display Screen
The Kaltura Webcasting software enables you to extend your presentation to another display screen using the projector icon. Clicking the projector icon enables you to show the live event on an extended screen to a local audience.
Browsing Slides in the Presentation Timeline
You can browse through the slide deck on the timeline area during a live broadcast, preview other slides, and skip directly to present a designated slide.
- Press the arrow buttons on the sides of the slide deck timeline, or use [Alt + right arrow] or [Alt + right arrow] keyboard shortcut.
Clicking and holding the arrow will accelerate the slide browsing speed. - When you are browsing, changing slides on the slide presentation will not affect the slides viewed in the timeline. Click the Sync Timeline and Presentation icon [Alt + up arrow] on the lower left of the timeline (or [Ctrl + G] keyboard shortcut) to show the next slide in the center of the timeline and sync the timeline and presentation.
Note: The slide that appears in the middle of the screen is the next slide, not the current slide, while the timeline shows a preview of the entire slide deck.
Note: You can also use an external clicker to switch slides, as long as you map the clicker to the same keyboard shortcuts as defined in the application.
Displaying Speaker Notes
To display speaker notes from your PowerPoint presentation
At any time you can display or hide the notes that were created and uploaded with your presentation. Click on the Notes icon to display or hide your notes.
![]()
Modifying and Changing Slides
You can easily navigate through video content using slides and chapters in Kaltura Players using the Navigation Menu. You can add, edit, and delete chapters and slides when editing videos through the Kaltura Legacy Video Portal. For more information, see Manage Chapters and slides.
In addition, slides and chapters are automatically created when a presentation is recorded using Kaltura Webcasting. See Recording PowerPoint slides for details.
