About
The Inperson module facilitates the setup and customization of the in-person check-in process for hybrid events. It manages both in-person and hybrid registration, providing options to configure relevant fields and customize the check-in flows and experience according to your event needs.
With the convenience of using QR codes, attendees can check in independently or with the assistance of a 'gatekeeper', making the process smooth and efficient.
To learn about the attendee check-in process, check out our article In-person attendance.
Applies exclusively to Events.
Prerequisite
To get started, make sure to enable both the Theming module and Basesiteregistration module.
Configure
- Go to your Configuration Management console, and navigate to the Inperson module. You can also navigate directly: https://{your_site_URL}/admin/config/tab/Inperson.
 The 'Inperson' module page displays.
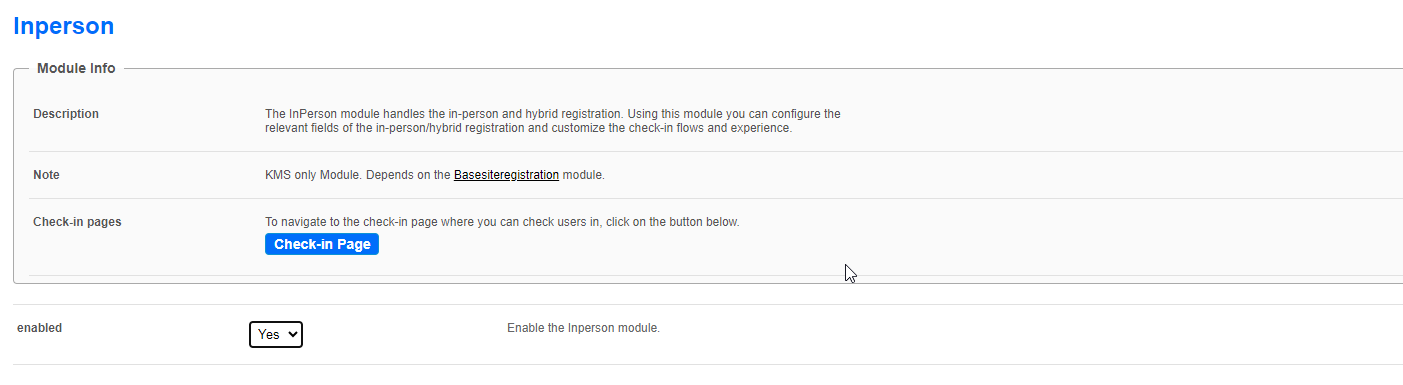 Check-in pages - After configuring the module, you can click Check-in page to preview the gatekeeper's view and / or begin checking in users, or you can navigate directly to the check-in page using this link: {your_base_site_URL}/inperson.
- enabled - Set to 'Yes' to enable the module
 The 'Inperson' module page displays.
 Check-in pages - After configuring the module, you can click Check-in page to preview the gatekeeper's view and / or begin checking in users, or you can navigate directly to the check-in page using this link: {your_
Assign gatekeepers
In the allowedGroupOrUsers section, select a group of users or individuals (gatekeepers) who will be permitted to access the check-in pages on their devices. Only these users can access the pages; others will get 'access denied'.
- Click +Add "allowdGroupOrUsers".
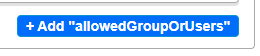 A new section displays.
 - Click Select Users / Groups.

- Enter the name or ID in the box that opens.

-
Click Submit.
 A new section displays.

The users' IDs are sourced from the Manage Users section of the Configuration Management console.
Set user check-in type
QR codes are created per user, per event.
CheckInUsersType
(For information on user types, see the section below Where do the user types come from?)
Select from the drop-down menu which types of users can check in:
- All registered users - all registrants can check-in, excluding deleted / blocked users
- In-person registrants only - only users who registered and selected 'in-person event' during registration can check-in
- Access granted only* - only users who registered and were granted access from the Manage Users page or via integrations (usually used for paid events) can check in
*Users in the 'Access granted only' category are managed in the Manage Users section of the Configuration Management console, as follows:
- Locate the user and click on the Actions menu at the far right.
- Select either Grant in-person access or Deny in-person access.
- Click OK.


A confirmation displays.
Where do the user types come from?
In the registration form, users indicate their attendance preference (in-person, online, or both) via a designated field. This aligns with the 'checkinuserstype' selected in the module settings.
To configure this field, access the Registration Form Editor through the Basesiteregistration module, and choose 'Attendance Type' from the drop-down menu.

Administrators can see and update user’s attendance information in the Manage Users section of the Configuration Management console under User Information.
If a user attends one event in person and another event online, their information will be updated accordingly under In Person Events. This ensures accurate user details are maintained for each event attended, regardless of whether it's in person, online or both.

Customize check-in page
logo - Upload a logo which will appear at the top of the Welcome page. Leave empty to use the logo of the event site.
Every page in the check-in flow will have the same logo.
titlePrefix - Enter a title prefix (plain text) for the top of the Welcome page. Default is 'Welcome to'.
title - Enter a title (plain text) for the top of the Welcome page. Leave empty to use the site title.
bannerImage - Upload a banner image to be displayed on the center of the page. Recommended size is 1920 x 1080. Leave empty to use the default.
Example of Welcome page:

displayUserSearch - Choose Display or Hide to give attendees the extra option of checking in by name in addition to checking in by QR code.
- Hide - only the 'Scan QR code' option will display on the screen
- Display - a 'Search by name’ option will also display on screen, as shown in the image below:

enableGenerateQR - Set to 'Yes' to allow attendees to generate a new QR code during the check-in process, if necessary. You can also choose an email template for this purpose.
See GenerateQREmailTemplate below. This option will display text below the QR scanner, as shown in the image below:

allowEditDetails - Set to 'Yes' to allow attendees to edit their personal details during the check-in process.
You have the option to send customized emails to in-person event attendees, separate from those sent to online attendees.
Choose email templates
You can choose an email template, which includes the QR code, to send to attendees.
Please note that in order to include a QR code in your emails, you need to add the token {QRCODE} to the body of the template, for example: Here is your {QRCODE}. This will output: Here is your + the generated QR code.
When choosing an email template, we recommend sending the QR code to the user after they confirm their email address, rather than immediately after they complete registration.
Choose one or more from the following options:
GenerateQREmailTemplate - Choose an email template to send the attendees who request a new QR code during the check in process. To configure email templates, click Configure email templates. Visit our article emailTemplates if you need help.
PostCheckinEmailTemplate - Choose an email template from the drop-down menu to send the in-person attendees after they completed check-in. To configure email templates, click Configure email templates. Visit our article emailTemplates if you need help.
inPersonPostRegistrationEmailTemplate - Choose an email template to send the attendees who selected 'in-person attendance' or 'both in-person and online attendance' after they completed the registration. To configure email templates, click Configure email templates. Visit our article emailTemplates if you need help.
inPersonPostRegistrationIcal - Choose an email template to send the attendees who selected 'in-person attendance' or 'both in-person and online attendance' after they completed the registration. To configure email templates, click Configure email templates. Visit our article emailTemplates if you need help.
inPersonPostConfirmationEmailTemplate - Choose an email template to send the attendees who selected 'in-person attendance' or 'both in-person and online attendance' after they confirmed their email address. To configure email templates, click Configure email templates. Visit our article emailTemplates if you need help.
inPersonPostConfirmationIcal - Choose an email template to send the attendees who selected 'in-person attendance' or 'both in-person and online attendance' after they confirmed their email address. To configure email templates, click Configure email templates. Visit our article emailTemplates if you need help.
When you have finished configuring the module, click Save.
How does it look?
After configuring the module, click the blue Check-in page button at the top of the module page to preview the 'gatekeeper's' view and / or to begin checking in users.

