About
Use the Languages module to customize interface text in Content Hubs, the legacy Video Portal, and LMS Extensions.
You can add custom languages, replace translated text, import or export text exceptions, and create tokens for text such as email templates.
The Languages module is case-sensitive.
Watch this video for an overview of customizing language and text in the video portal.
Before you start
In the Application module, configure the languages available on your site:
- languageConfiguration – Choose a single-language or multi-language instance.
- languageSelection – If you chose a multi-language instance, select the languages users can choose from.
- language – Select the default language for new users.

The languages available in languageSelection include Kaltura’s built-in languages and any custom languages previously added by an administrator.
In Content Hubs, selecting Arabic, Hebrew, Persian (Farsi), Urdu, Yiddish, Syriac, Divehi (Maldivian), Pashto, or Sorani Kurdish as the display language also changes the site layout to right-to-left.
Configure the Languages module
Go to your Configuration Management console, locate the Languages module in the left panel, then select it. You can also go directly to https://{your_site_URL}/admin/config/tab/languages.
The Languages page displays.

Download interface text
Use DownloadLocaleText to download the current interface text for the languages used on your site.
- Click Download Texts. A ZIP file downloads with the interface text files.
- Open the file for the language you want to customize. The files contain the words and phrases displayed in the site interface.
- Edit the text using a translation editor, such as Poedit. The file you upload as a custom language must be in binary
.moformat.

Example of an English PO file:

Add a custom language
If the language you need is not available, add it under UploadCustomLanguage.
- Click +Add "UploadCustomLanguage".
- Complete the following fields:
- languageAdminName – Enter the name displayed to administrators in the languageSelection and language fields of the Application module.
- languageClientName – Enter the name displayed to users in the language drop-down menu.
- languageCode – For LMS integrations, select the language code used to synchronize the interface language with the hosting application.
- localeFile – Upload your customized
.mofile. You can convert a.pofile to.moformat using a translation tool. - localeIcon – Click Upload Flag to add a flag icon to the language drop-down menu in the legacy Video Portal. Supported formats are JPG, JPEG, BMP, PNG, GIF, TIF, TIFF, and ICO. For best results, use an image measuring 30 × 26 pixels. Larger images are resized automatically.
- languageId – Enter a unique language ID for application use.
- Click Save.
The custom language fields display.

In LMS Extensions, the LMS determines the interface language. To override its default text with a custom language, set languageCode to match the language code used by the LMS.
Replace interface text for a language
Use LanguageException to replace a specific interface string without uploading a complete custom language file. You can use exceptions to change terminology or provide text for multi-language events.
- Download the English PO file from DownloadLocaleText and find the
msgidfor the text you want to replace. - Click +Add LanguageException.
- Complete the fields:
- Language – Select the language to which the exception applies.
- msgid – Copy the exact
msgidfrom the PO file. The value is case-sensitive. - Exception – Enter the replacement text.
- Click Save.

Additional fields display.


You can also replace a term with another term in the same language:

The Language list comes from the available PO files. If a PO file is removed, its exception can remain in the configuration, but the replacement text does not display.
Export or import language exceptions
Use importAndExportExceptions to manage language exceptions in a CSV file.
Export exceptions
- In the importAndExportExceptions section, click Expand.
- Click Export Exceptions.

An additional field opens.

A CSV file containing your configured exceptions downloads.
The CSV file has no header row. Its three columns contain the language, msgid, and exception text, in that order.

Import exceptions
Importing a CSV file replaces all existing language exceptions. Export your current exceptions first if you need a backup.
- Under importAndExportExceptions, go to the Import field and click Choose file.
- Select the CSV file containing the exceptions you want to import.
- Click Save.

Create custom tokens
Use CustomToken to insert reusable text into fields such as email templates and disclaimers.
You can give a token a different value for each language. When the site language changes, the corresponding value displays.
The following system tokens are reserved and cannot be used as custom token IDs: {FIRSTNAME}, {LASTNAME}, {TITLE}, {COMPANY}, {COUNTRY}, {EMAIL}, and {URL}.
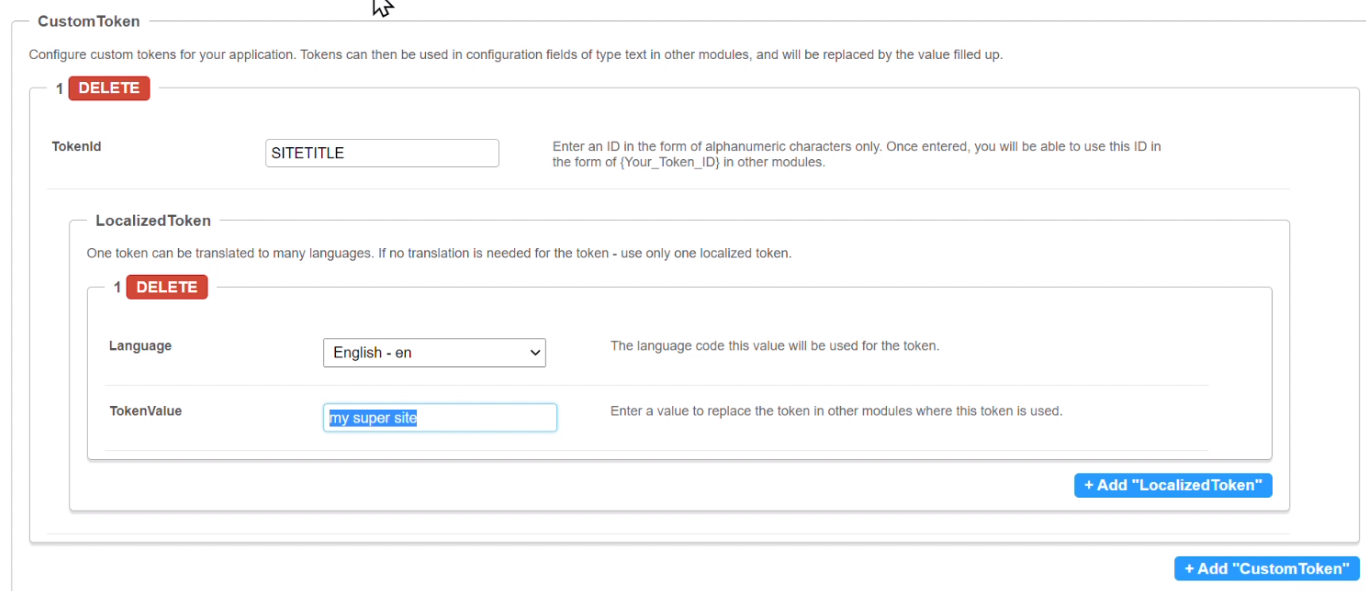
- Click +Add "CustomToken".
- In TokenID, enter an alphanumeric ID. You will use the ID in other modules in the format
{Your_Token_ID}. - Click +Add "LocalizedToken".
- Complete the fields:
- Language – Specify the language code for this token value.
- TokenValue – Enter the text to display wherever the custom token is used.
- Click Save.

The TokenID field displays.


The language and value fields display.

Add another localized token for each additional language you need. If the value does not need translation, add one localized token.
Custom token example
In this example, SITETITLE is the token ID.
The token is inserted in the Disclaimer field inside curly brackets.
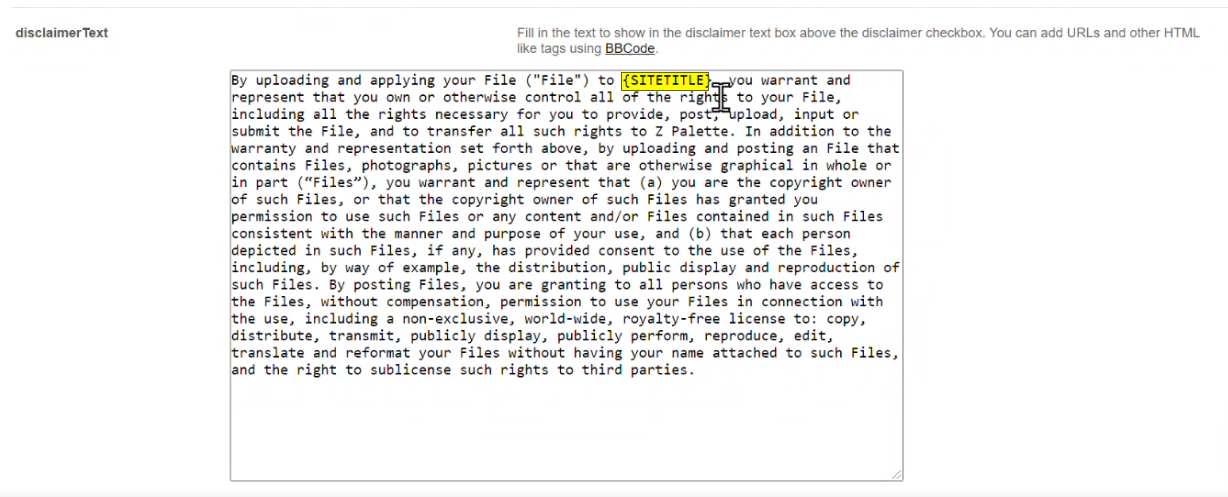
The configured TokenValue, “my super site,” replaces the token in the displayed disclaimer. You can change the value without editing the disclaimer itself.
You can also add a value for another language, such as “Los Videos” for Spanish:
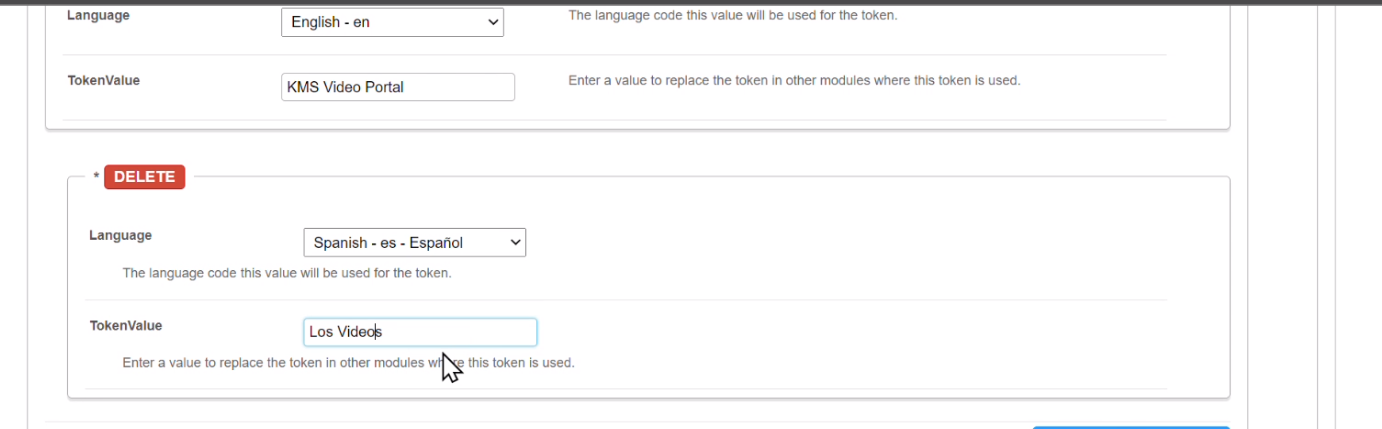
When the site language changes, the disclaimer displays the token value configured for that language.

