About
Salesforce integration for Kaltura Virtual Events allows you to receive and sync data on your event registrants and attendees from Kaltura to your Salesforce account.
Using Kaltura Salesforce integration each registrant is sent to Salesforce as a lead with their registration information which can be later updated with their attendance and engagement data.
To connect your Kaltura account to Salesforce you will first need to create an integration on your account level and then you can connect it to the different events you or your colleagues create.
The screens shown here represent a multi-session event. The same actions apply when working with single session.
Before you start
-
Make sure to follow the steps detailed on https://knowledge.kaltura.com/help/kaltura-data-sharing-integration-for-salesforce-how-to-set-up-salesforce for a one time setup of campaign members custom field, statuses, and custom object for engagement data.
-
For each event registration form, you will map the fields to your Salesforce lead record. Therefore, you need to create an integration per event template. For example, if you have five event templates, you need to create five integrations and map the different fields on your registration form to your Salesforce lead record. Once the integration is set for the template, you can use it on all events created from this template.
-
Make sure you map ALL the required fields on your Salesforce lead form so that leads will be submitted successfully.
Integration settings
There are two levels of integration settings on the Kaltura Virtual Events management interface.
- Account Level
- Event Level
Account level
The account level may be set up so that you can connect different events to use for the Salesforce integration.
Set up the Salesforce integration on the account Level
Each integration needs to map the registration form fields to the lead records on Salesforce. Each Kaltura Virtual Events registration form is set up by the template per event.
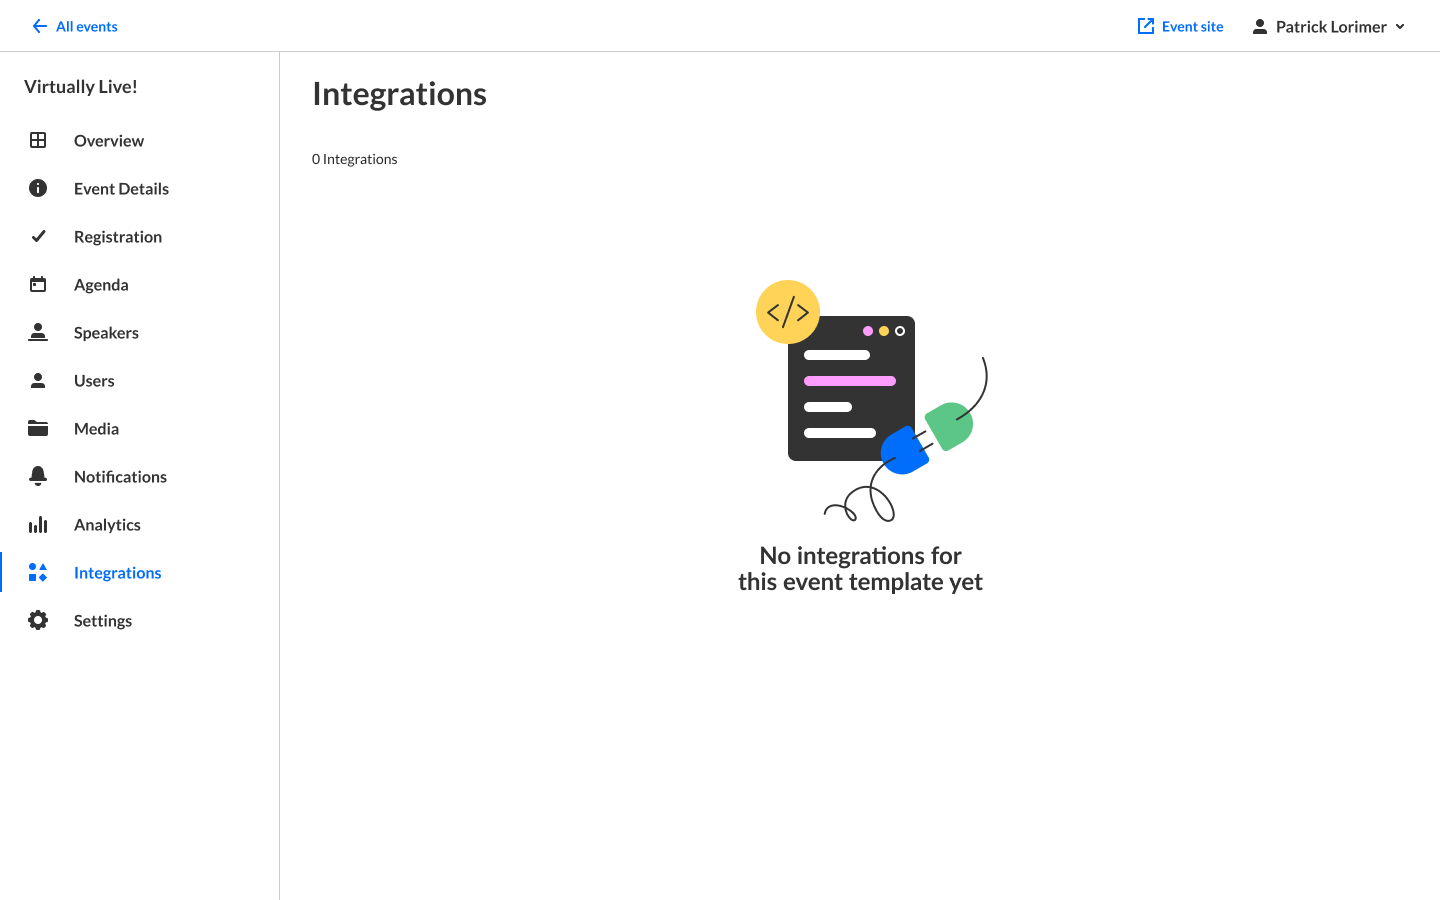
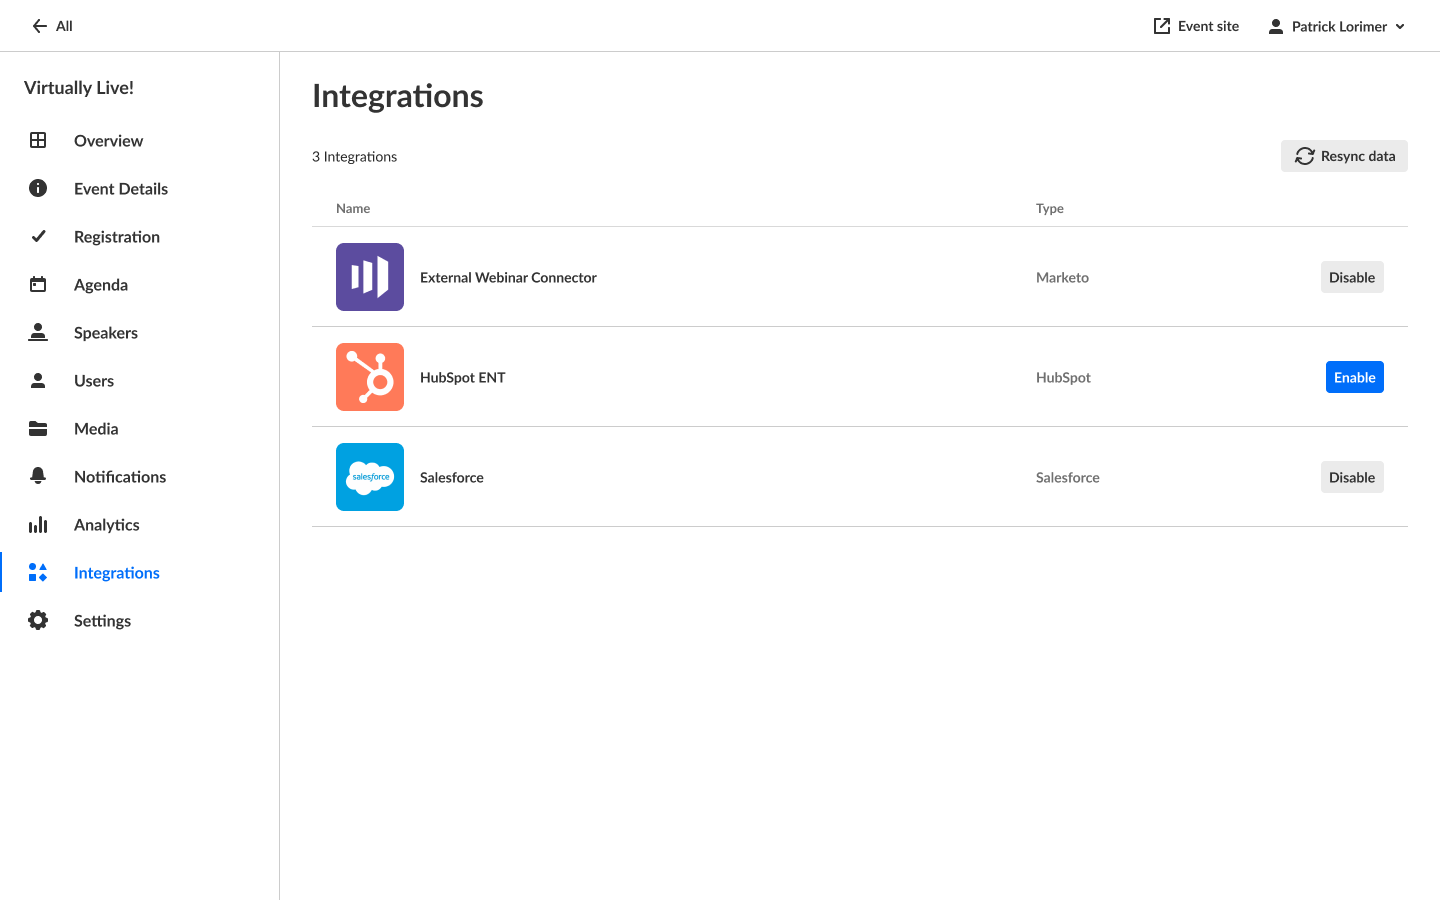
- On the Kaltura Virtual Events screen navigate to the Integrations tab.
- Click Add Integration. The first time you view this tab, the list is empty. A list of other existing integrations that were created for this account/partner are displayed after subsequent use.
 The New Integration window is displayed.
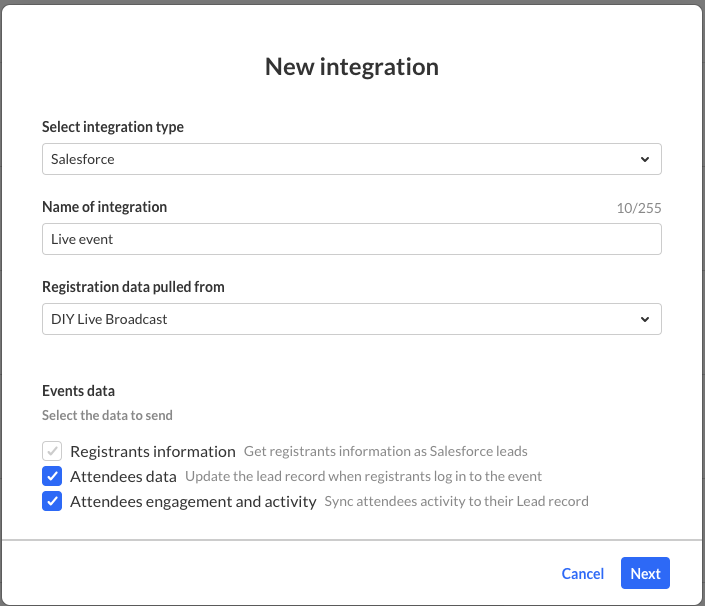
- Select integration type, Salesforce
- Enter a Name for the integration. We recommend using a descriptive name, for example Interactive Salesforce Integration.
- Select the event template Data Origin Template. Each event template has its own registration form and needs to be created as separate integration.
- Select the Kaltura Virtual Events Data you would like to send to Salesforce.
- Registrants Information - (lead or registrants' information) Checked by default to get registrants information as Salesforce leads. The registrant information is mandatory. That is the part that creates the lead in Salesforce.
- Attendees Data - Check to update the lead record that was created when registrants login to the event. The lead record is updated with the attendants information.
- Attendees Engagement and Activity - Check to be able to sync attendees activities to their lead record. This process is manual. When the session is over and event organizers want to obtain attendees' engagement information they may click Sync Engagement Data to update the lead with their engagement data such as viewing rate or reactions.
- Click Next.
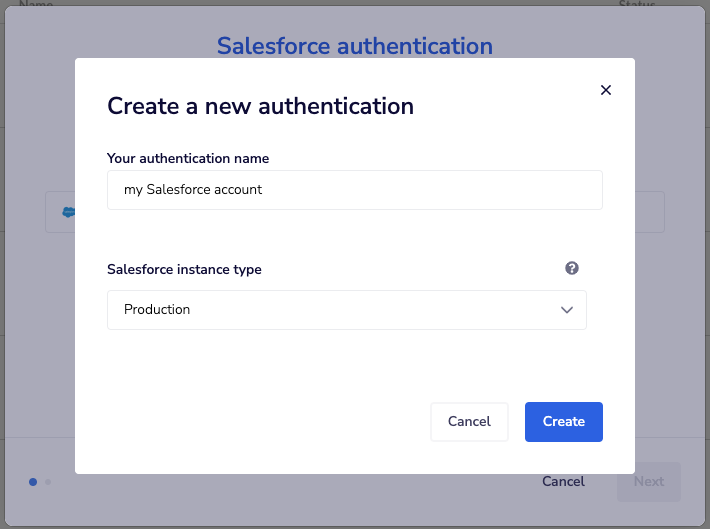
- Click New authentication. This is done once, and then your account will be auto selected and you can just click Next.
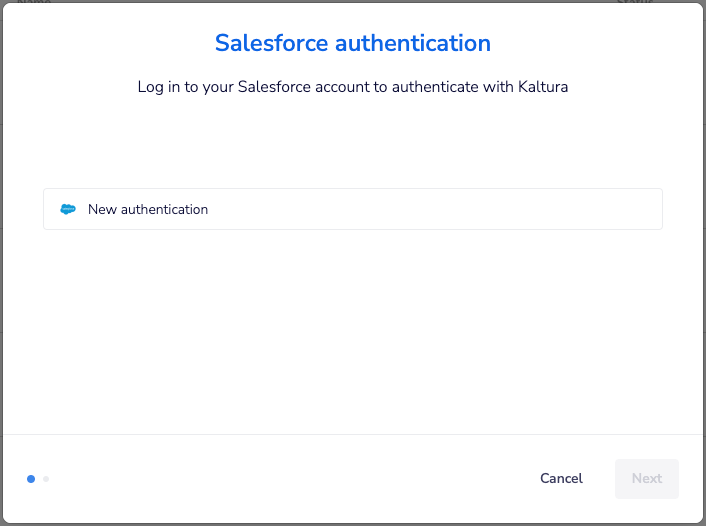
- Click Create and log in to your Salesforce account and allow required permissions to authenticate with Kaltura.
- Map the different fields on Kaltura registration form to Salesforce Lead fields.
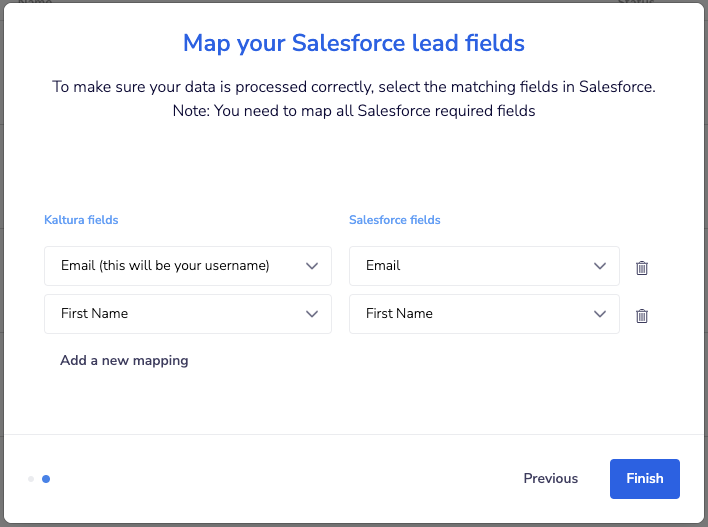 For example, first name, last name, email, and company. These fields must be mapped to a Salesforce record.
 - Click Finish.


 For example, first name, last name, email, and company. These fields must be mapped to a Salesforce record.
Salesforce has required fields that Kaltura must be aware of so the leads will be submitted successfully. The admin must make sure Salesforce required fields are mapped to Kaltura fields and comply with any other validation rules set on their Salesforce account.
The new integration is displayed.

Manage and/or delete the Salesforce integration on the account level
You can then manage and/or delete the integration by clicking on the three blue dots to the right of the desired integration and selecting the appropriate option.
Deleting an integration is only available if the integration is not yet enabled on an event.

Other integrations will eventually be added, and the screen will display multiple integrations.
Each integration is different per the event template/registration form. Only Active integrations may be enabled on events. If an integration is disabled - you may have missing information on the integration, such as incomplete field mapping.
Integrations are not enabled until you enable the integration per event. This process sets the grounds for the event organizer(s) to turn it on.
Event Level
Setup a Kaltura Salesforce integration for a specific event
-
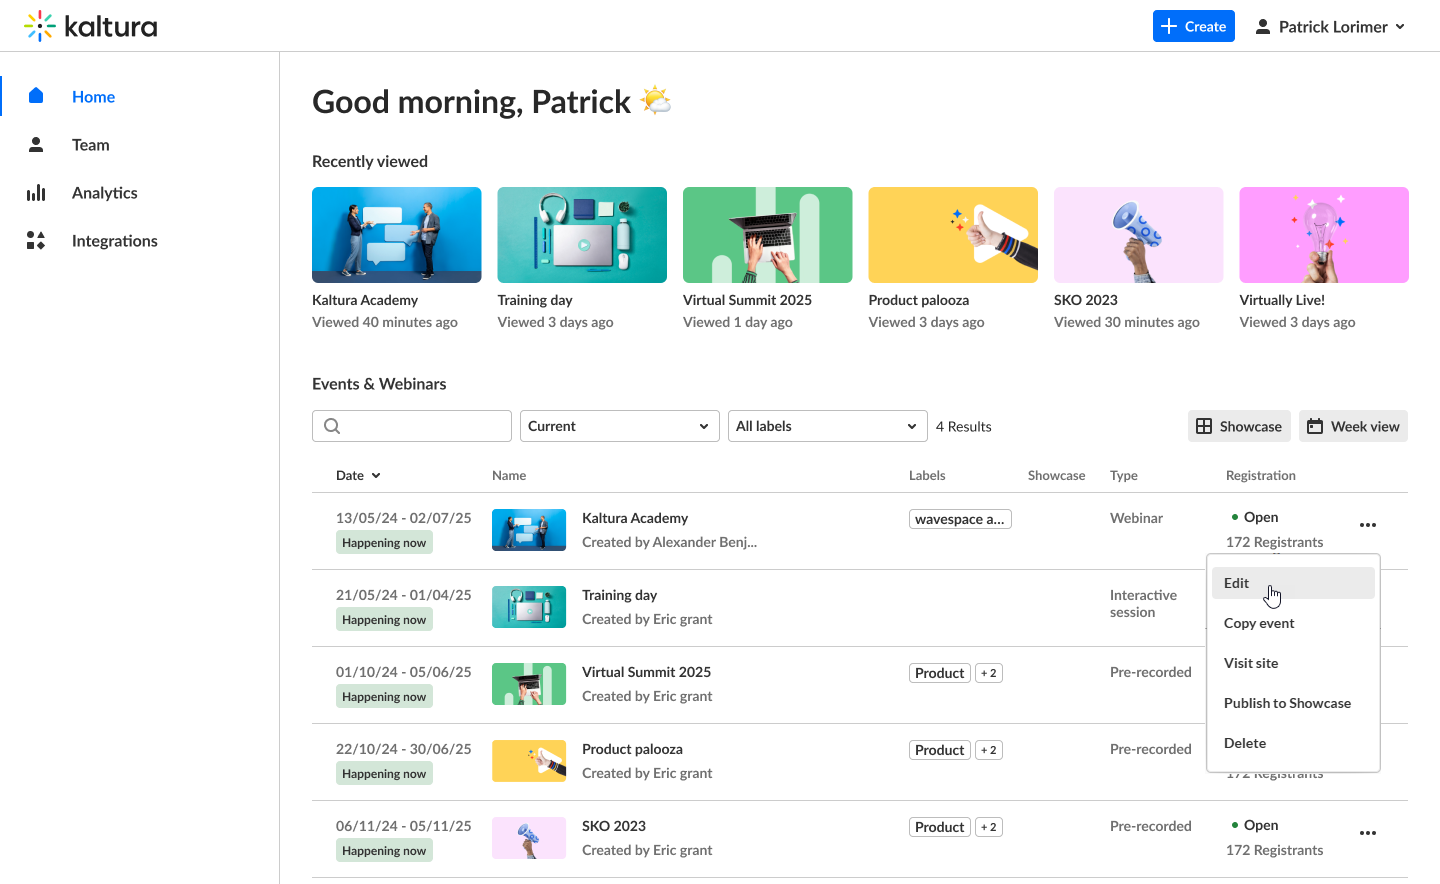
From the event list, Select Edit from the actions menu to edit the event to which you would like to add the integration.
 The Event window displays.
-
On the Event window, navigate to the Integrations tab. Now that you are you on a specific event, you will see only the integrations that apply for that event.
-
Click Enable.

- Enter the Campaign id. This will associate the leads to their relevant program on Salesforce.
You can find the Campaign id in the URL when you have the campaign selected. For example, https://xxxxxx.lightning.force.com/lightning/r/Campaign/70103000000cqmPAAQ/view, 70103000000cqmPAAQ is your campaign ID.
- Click to enable Automatic sync if you would like to automatically sync data one hour after the event ends.
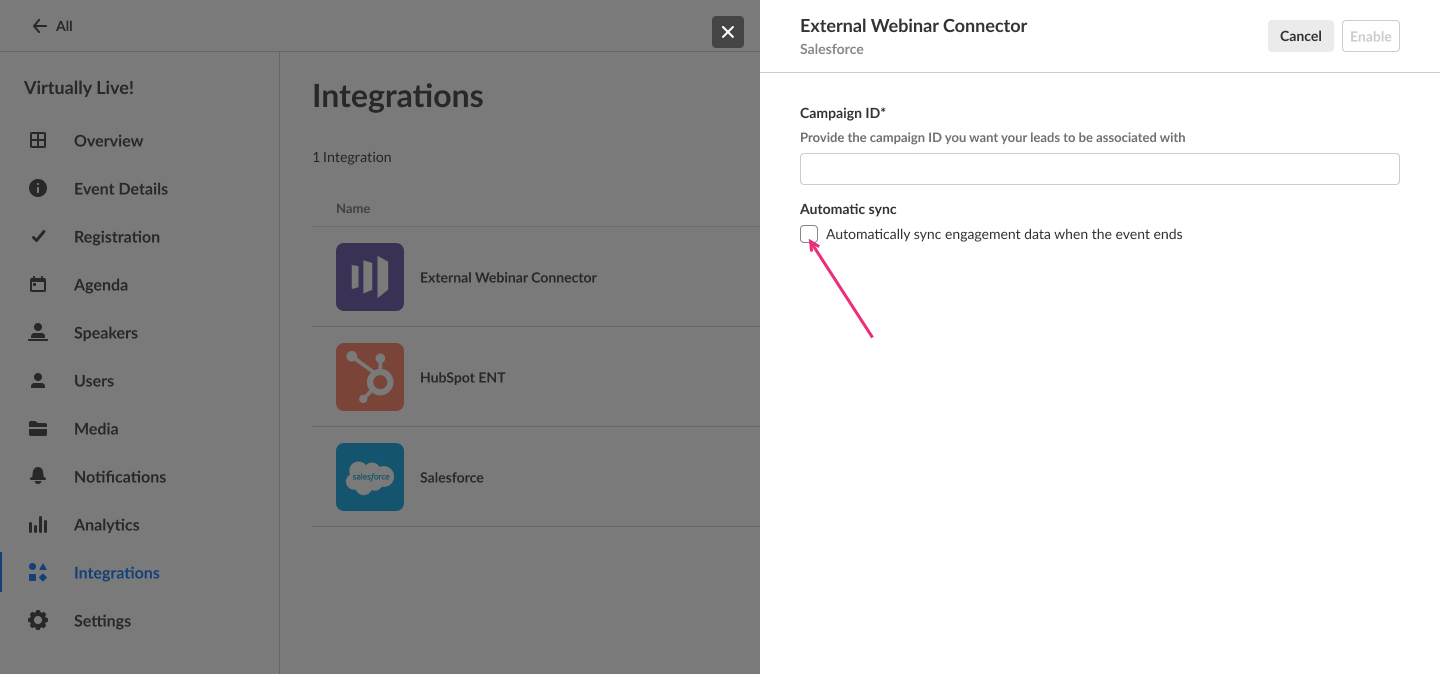
- Click Enable. You receive confirmation that the integration was enabled successfully.
 The Event window displays.


Manually sync all enabled integrations
- Click the Resync data button to manually sync all active/enabled integrations.
- Click Resync to confirm your action.
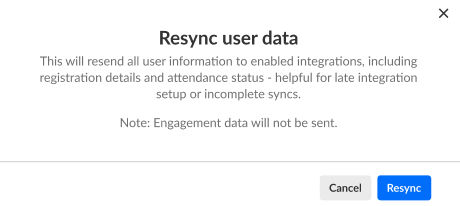 You receive confirmation that the integration data was successfully synced.
The Resync data button only refreshes registration and attendance information. Engagement data is not included in manual resyncs.

 You receive confirmation that the integration data was successfully synced.
Manage or sync engagement data per integration
After the integration is enabled, you may disable, manage or sync engagement data.

On the Integrations tab, locate the Salesforce integration and choose one of the following:
- Click Disable to disable an integration. Disabling an integration stops the data synchronization to Salesforce for this event.
- Click Manage to edit the additional info / Salesforce identifiers (e.g., campaign/program ID) for this event.
- Click Sync engagement data to send attendees engagement data and update the lead with additional insights once the event is over.
For more information about the Salesforce Integration, see Kaltura Data Sharing Connector for Salesforce.
