About
Transcoding is the process of converting media files from one format to another, ensuring they can be viewed across various devices and platforms.
In this guide, we'll walk you through the steps to customize transcoding settings for your media assets, ensuring optimal quality and compatibility.
Please note that we do not recommend users configure their own transcoding profiles. The default profile that we provide should suffice for most use cases. If you still wish to create your own transcoding profile, please consult with our transcoding experts first to ensure the best results.
Create a transcoding profile
- Log into Rich Media CMS and click the settings icon.
The settings page displays.
- Click the Transcoding tab.
The Transcoding Profiles page displays.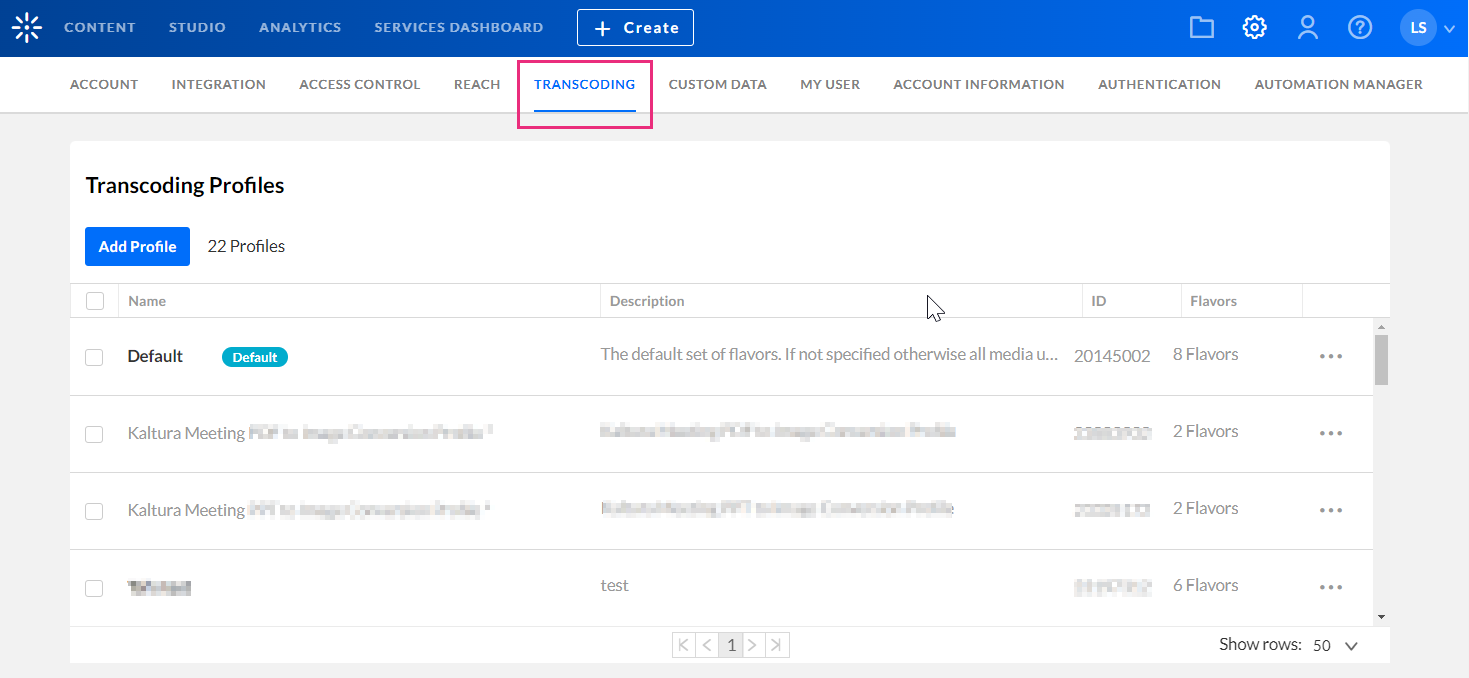
- Click Add Profile.
The Add Transcoding Profile screen displays.
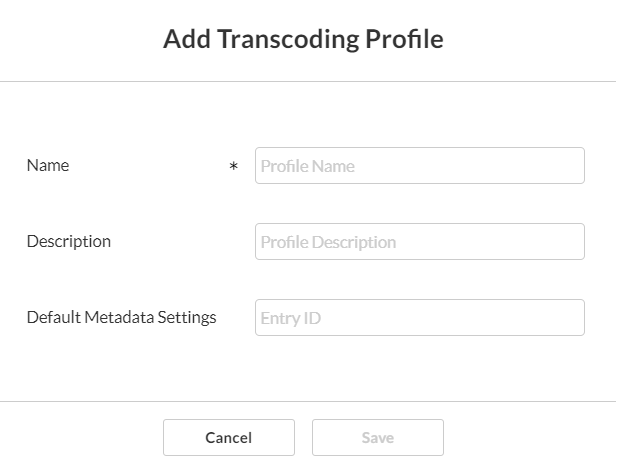
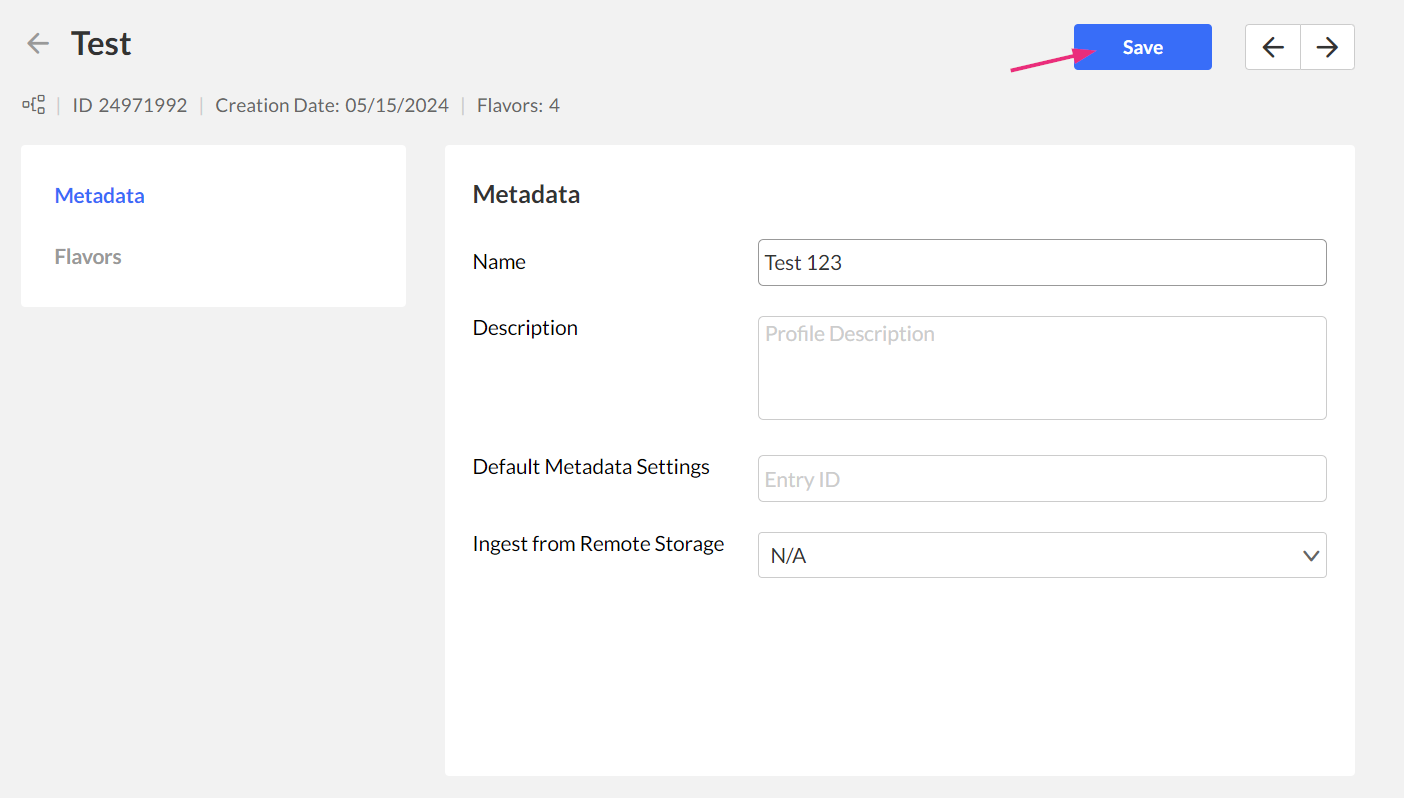
- Enter a Name and Description for the profile.
- Enter the Entry ID for the Default Metadata Settings (optional). To learn more, visit our article Create a Custom Metadata.
- If you have Remote Storage configured on your account, select Ingest from Remote Storage.
- Click Save.
The Flavors tab displays.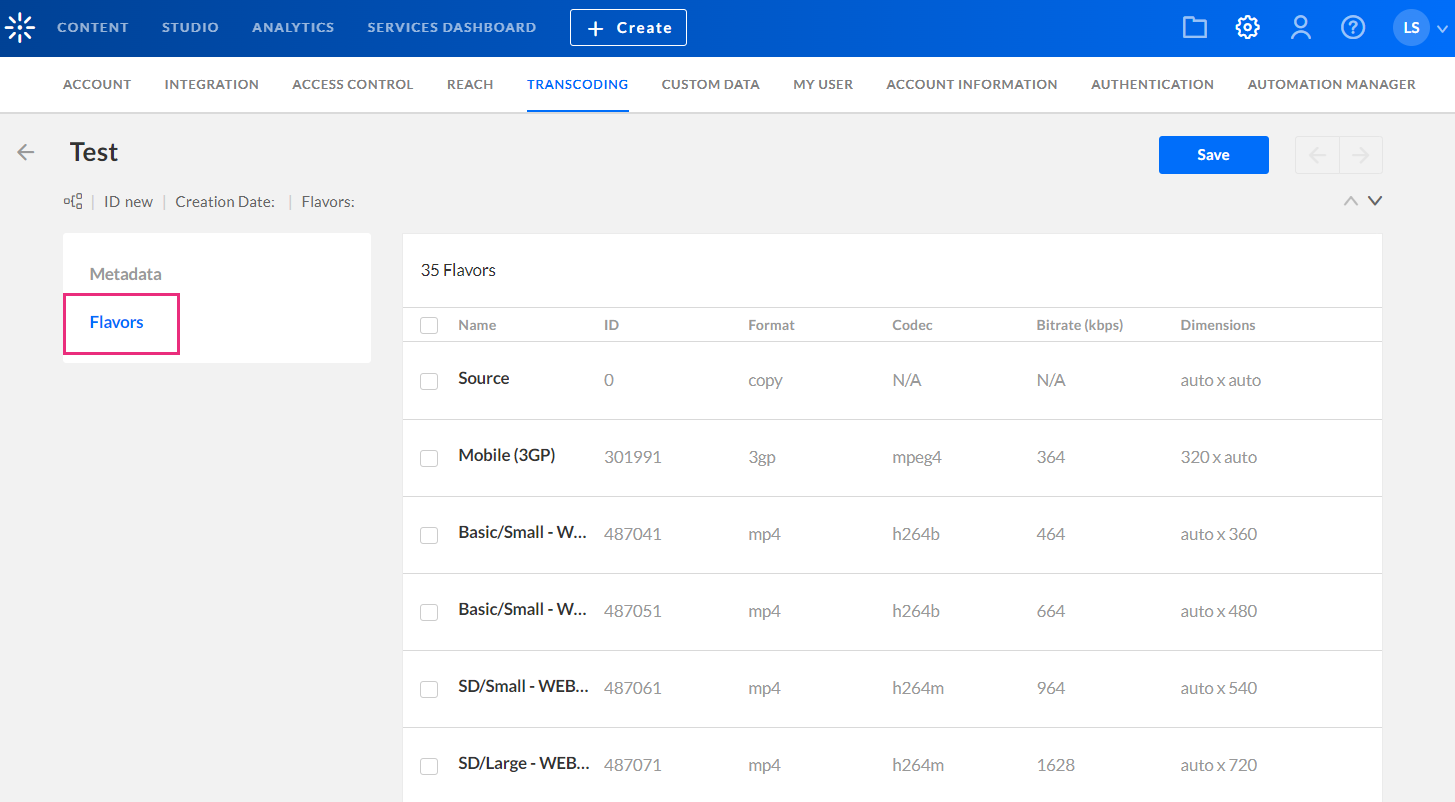
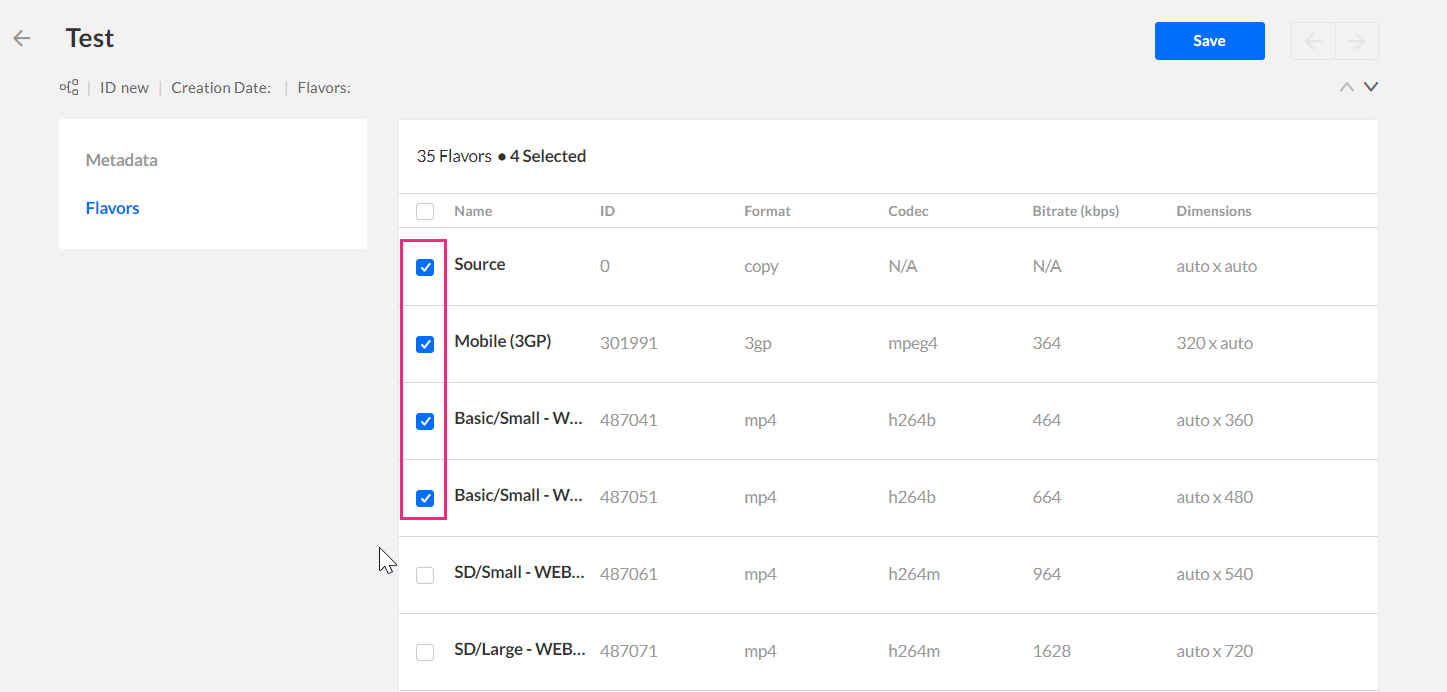
- Select the flavors (out of the available flavors on your account) to apply to the source media you upload.
- Click Save.


The entry’s metadata fields are added to the transcoding profile. Each new entry that is transcoded using the profile will include those metadata fields. You can use the Metadata entries as “metadata templates” for adding metadata to multiple files.


Avoid using only the source flavor. Source-only videos don’t support adaptive streaming and may cause playback issues. For best results, include at least one additional flavor (for example, SD or HD).
Edit a transcoding profile
- Navigate to the desired profile and click the three-dot menu at the end of the row.
- Select Edit.
The Metadata page displays.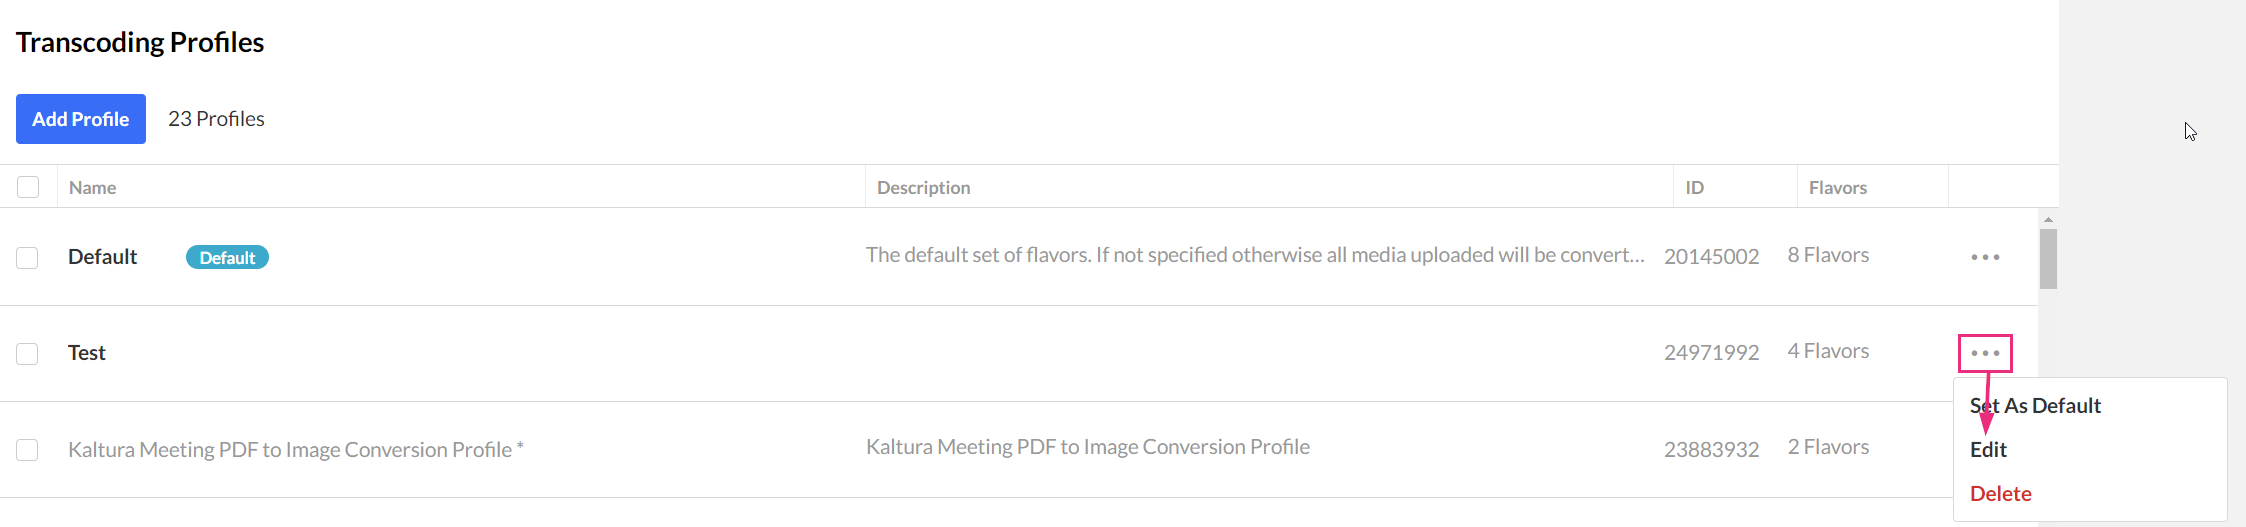

Edit metadata
- Make the desired changes.
- Click Save.

Edit flavors
- Click the Flavors tab.
- Locate the flavor you want to edit and hover over the space at the end of the row. A pencil icon appears.
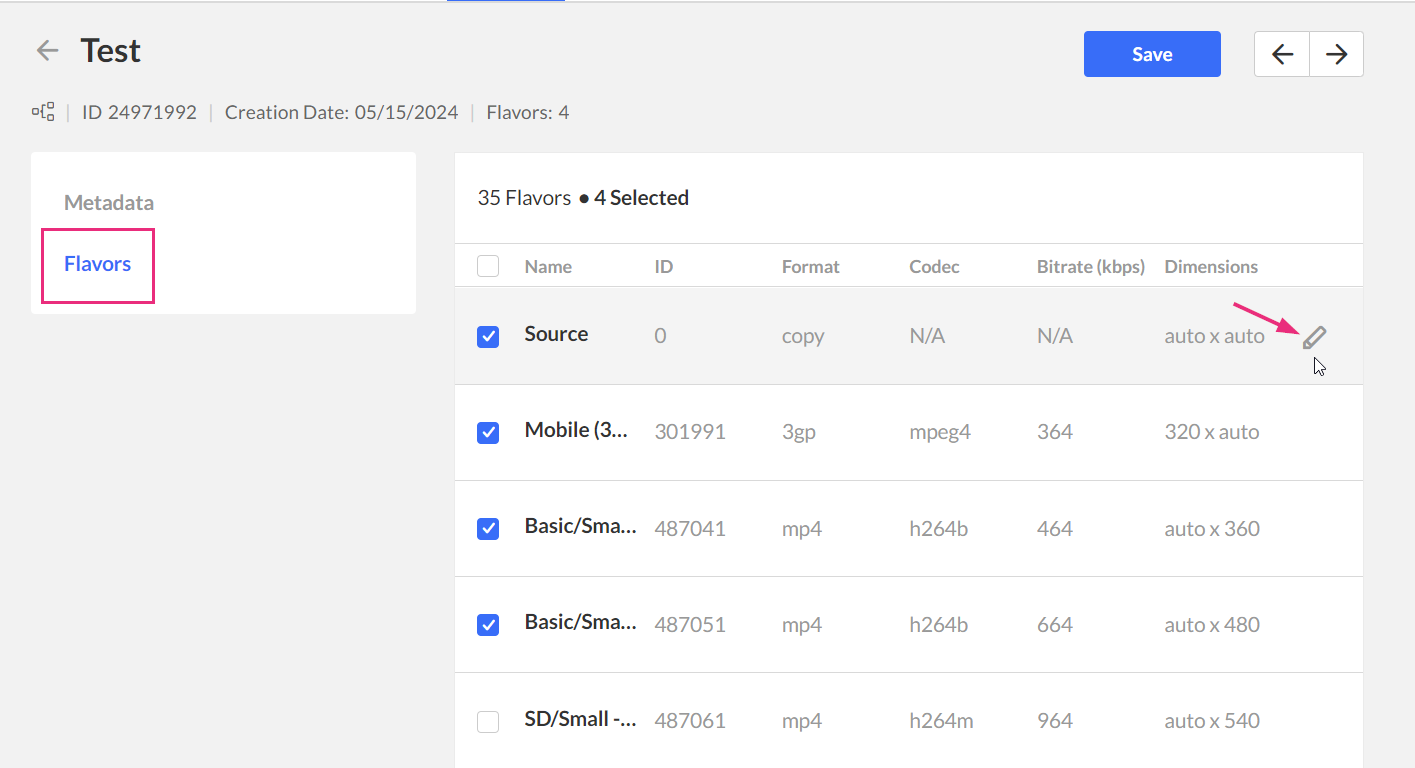
- Click the pencil icon.
- The Edit Flavor Settings window displays.
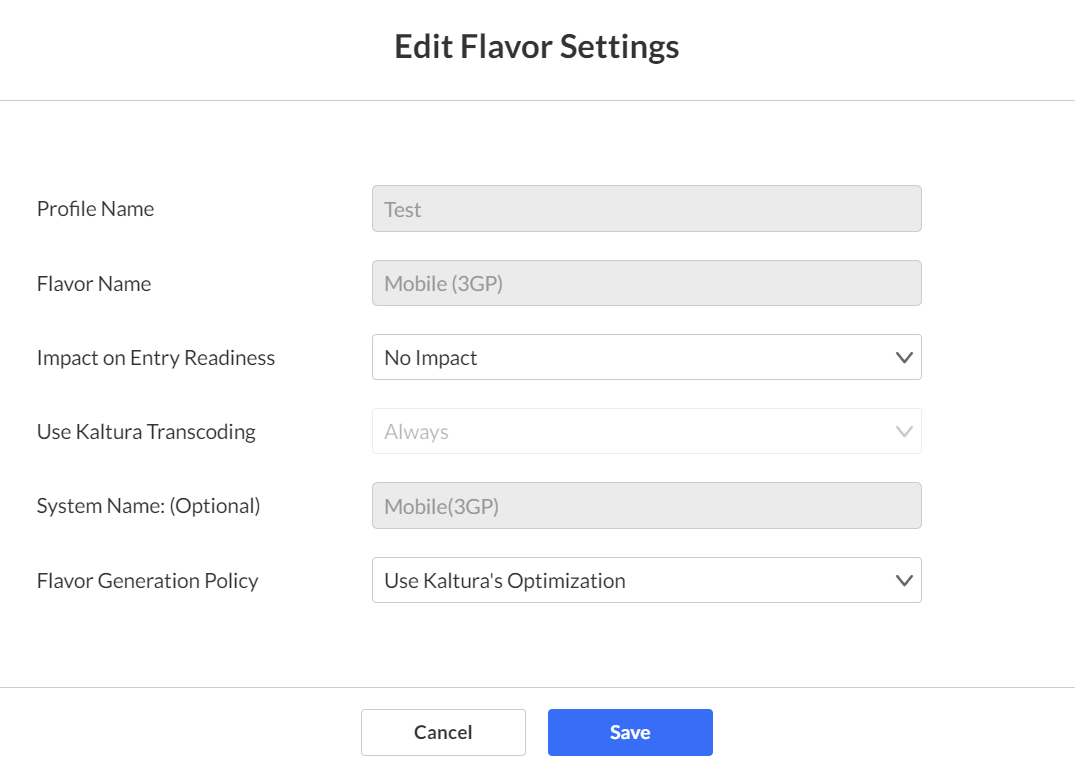
- Make your edits. The following options can be edited for each transcoding flavor selected in a transcoding profile:


- Impact on Entry Readiness – Determines the impact of each specific transcoding flavor on entry readiness for publishing.

The options are:- No Impact – Determining entry readiness is not affected by the presence of this transcoding flavor. This is usually the default setting for the “Source” transcoding flavor.
- Required – The entry will not be set to a Ready state until the processing of the specific transcoding flavor is complete. To expedite video readiness we recommend applying the ‘Required’ setting to a single flavor that is required for playback on each required environment. For example, if the source file is an MOV that cannot be played on the web, flagging only one lowest quality FLV or MP4 flavor as ‘Required’ will ensure the video will be published as quickly as possible while the other flavors are being prepared.
- Optional – The entry may be set to a Ready state before the processing of the specific transcoding flavor is complete. When no other Transcoding Flavor within the Transcoding Profile is set as required, completion of the processing of any Optional flavor sets the entry to the Ready state. We recommend using this option for most flavors to increase speed of readiness.
- Use Kaltura Transcoding – Determines whether to use the Kaltura transcoding engine for generating each specific transcoding flavor. This option is enabled only when your account is set to support the ingestion of multiple bit-rate transcoding flavors generated by your local transcoder. If Kaltura performs transcoding of all flavors except the ‘source’ file, this option should be set to Always.
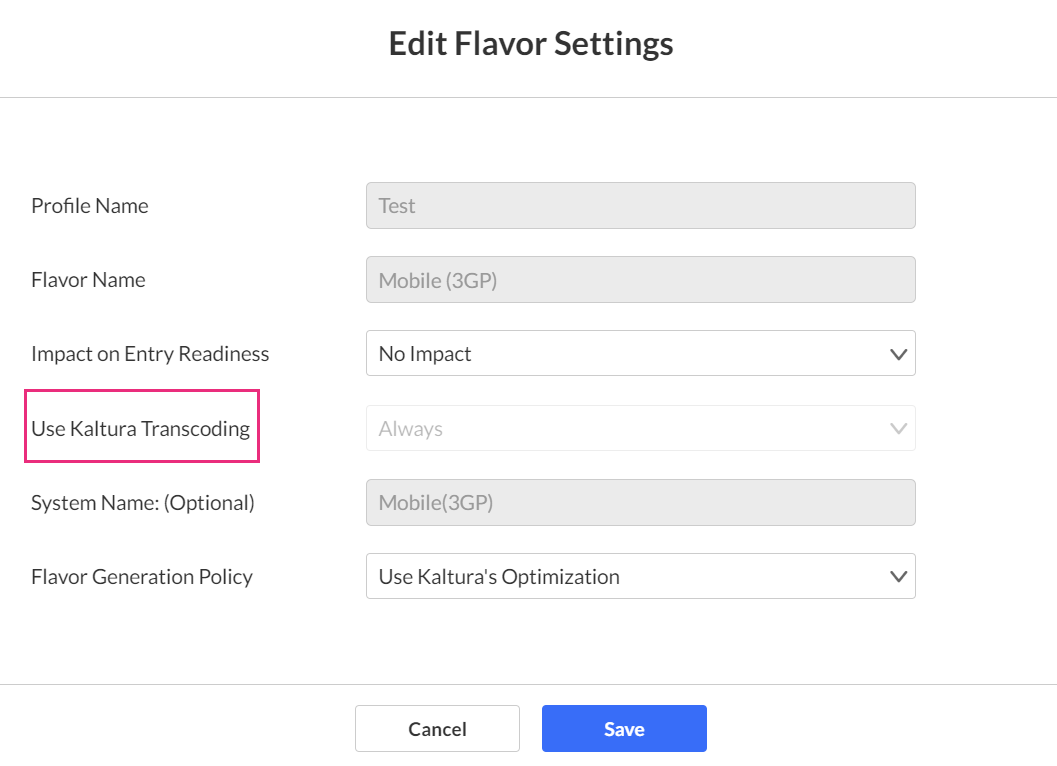 The options are:
- Always – Kaltura’s transcoding engine always will be used for generating the specific Transcoding Flavor.
- Never – The Kaltura transcoding engine will not generate the specific transcoding flavor. This is a fixed setting for the “Source Flavor” which always is added to the entry with no additional processing. This option should also be used when your account’s content ingestion workflow relies on a local transcoding engine and when the ingestion of the previously transcoded Flavor to Kaltura should always take place, bypassing Kaltura’s conversion processing.
- As a Fallback – The system expects to add this transcoding flavor from a local transcoding engine, but will use Kaltura’s transcoding engine as a fallback to convert to this flavor when the flavor is not received as part of the ingestion request. This option adds flexibility when you want to use your local transcoding engine while utilizing Kaltura’s transcoding engine as a fallback option.
- System Name (Optional) – The system name is used to identify the flavor in client-side applications. For example, to mark a specific flavor as suitable for playback on iPad devices, the system name was set to iPad.
- Flavor Generation Policy – You can bypass Kaltura’s transcoding optimization, and force specific flavors to be generated even when though they are detected as redundant by the Kaltura transcoding optimization module.
- Use Kaltura’s Optimization - Kaltura’s optimization routine decides whether it is worth-while to create a flavor (For example if the source video is of lesser quality than the flavor, the optimization routine will not create the flavor).
- Force Flavor generation –Select this option to override the Kaltura optimization routine and create a flavor regardless of whether or not it is redundant quality wise (For example, when a publisher has to distribute the video through a broadcast channel that requires specific flavor specifications, the flavor must be created.)
- Set the ID from the Transcoding Profiles to the conversionProfileId in your CSV.
- Set the ID from the Transcoding Profiles List to the conversionProfileId in your XML file.


The same flavor may have different settings in a different transcoding profile, which allows for greater publishing flexibility.
Assign a transcoding profile to a bulk upload
To assign a transcoding profile other than the default profile to a bulk upload
