About
For single session events, the "Landing page" appears for your users before they log in.
For multi-session events, the "Lobby (coming soon) page" acts as a waiting room until the event site is open.
You may customize the look of your Landing and Lobby pages.
This feature must be enabled on your account for multi-session events. If it is not, please contact a Kaltura representative about enabling it.
Navigate to the Landing or Lobby page customization screen
There are two ways to reach the Landing or Lobby page customization screens.
From the Event details page:
- After creating a new event, navigate to the Event details page; from the Events page, click the Event details tab.
- Click the Customize button in the Landing or Lobby page section.
From the Event site editor page:
- After creating a new event, navigate to the Event site editor page; from the Event page, click the Event site editor tab.
- Click the pencil "edit" icon in the Landing page or Event lobby section.
The Landing page or Event lobby customization screen displays.

The name of the page and whether the page is published or not is displayed on the upper left corner of the screen.

The Landing page and the Event lobby are always named as such and are always published.
Page settings
Click the gear "Page settings" icon. The Page settings area displays.

The Page settings area allows you to type a browser tab title (optional) for your Landing or Lobby page. By default, the Browser tab title is pre-filled with "Save the Date". If you would like to change it, delete the pre-filled text, type as desired, then click Save.
Configuration components
The configuration components are listed on the left side of the screen and the preview of the Landing or Lobby page is shown on the right.
Hero - Background image, event name, dates, live counter, and registration button.
Banner - Grab attention in high-traffic areas with the banner to promote your content.
Free text - Write anything you like.
Speakers - Add a gallery of speakers to your Landing or Lobby page, showing all your events speakers, their photos, titles, and bios.
Looking for information about other components? Feel free to contact your Kaltura representative.
Add a component
- Click + Add section to add a new component (section) to the Landing or Lobby page. The Add section panel expands to the right and displays a list of available components.
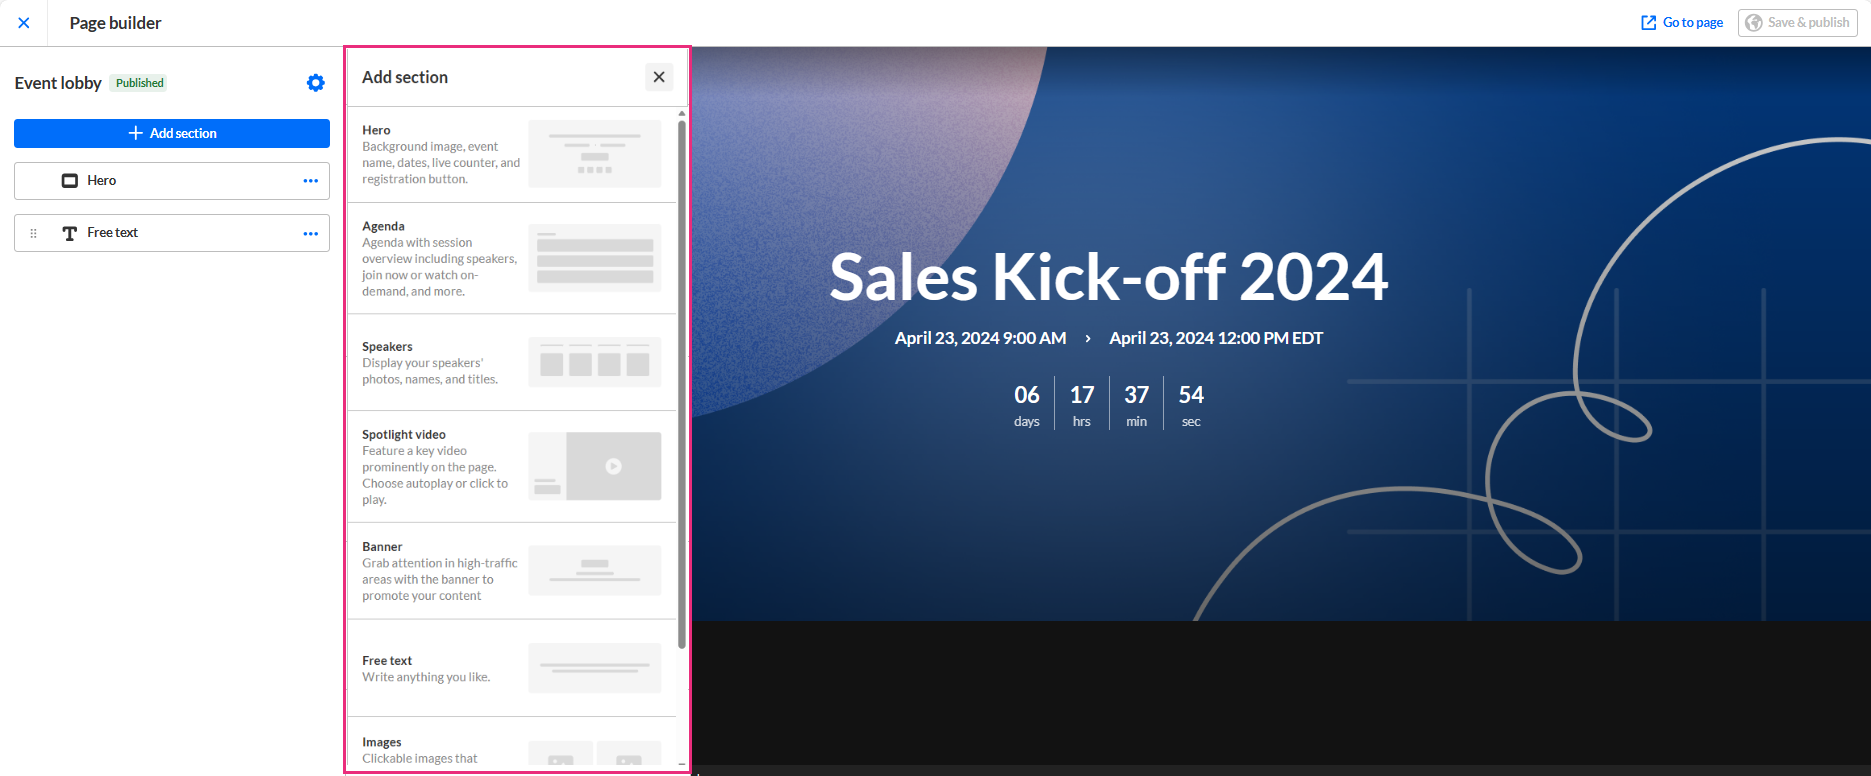
- Hover over the desired component and click Add. In our example below, we are adding a Free text component.
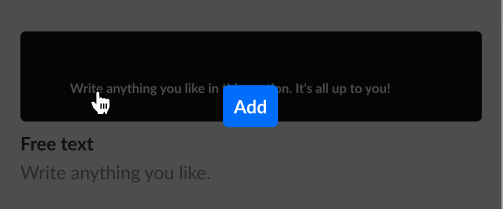 The editable Free text component displays.
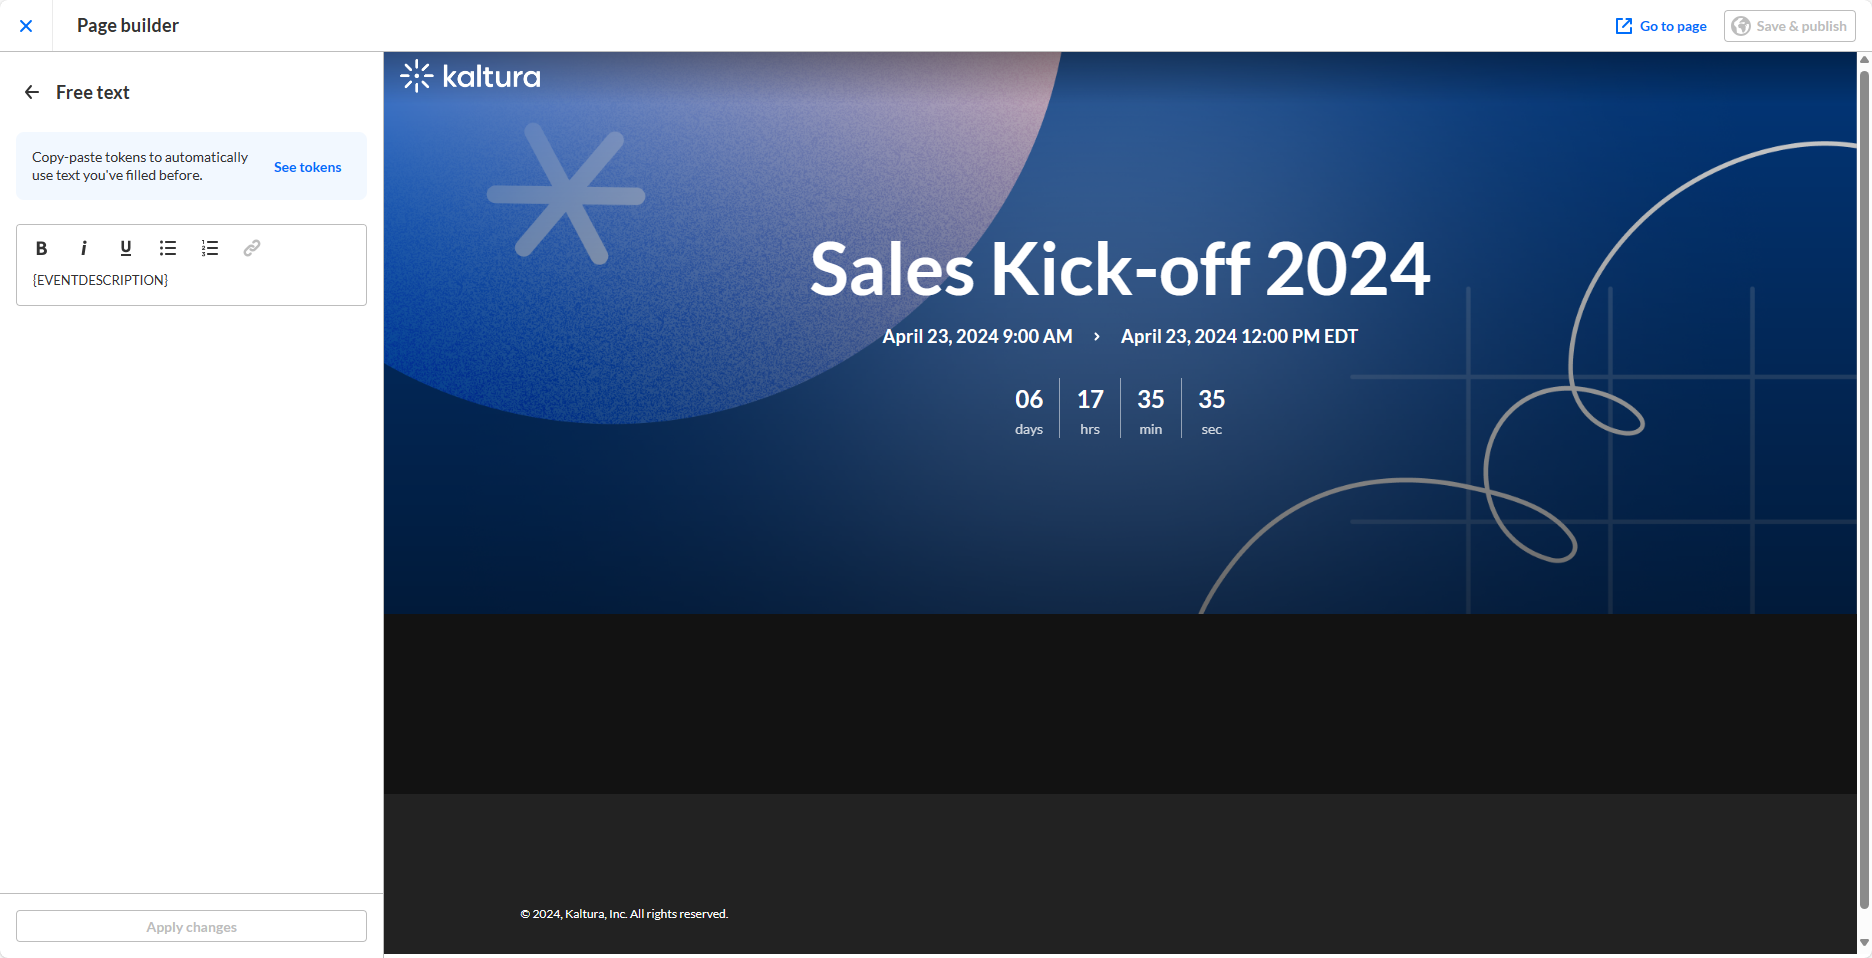
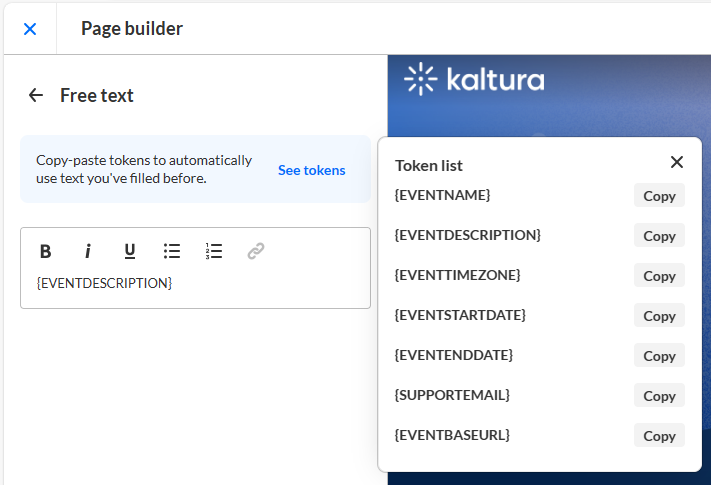
- By default, the free text component is pre-filled with the event description, indicated by the token {EVENTDESCRIPTION}. If you choose to keep this pre-filled text, simply click the arrow to the left of the component name. This will take you back to the main view. If you would like to change it, delete the pre-filled text and type as desired. You may also click See tokens to copy a different token from the list that displays on the right.
- After your finished making changes, click Apply changes.
Note - The Hero component may only be added once (and is already enabled by default). When hovering over a Hero component that has already been added, a notification displays that this section can only be added once.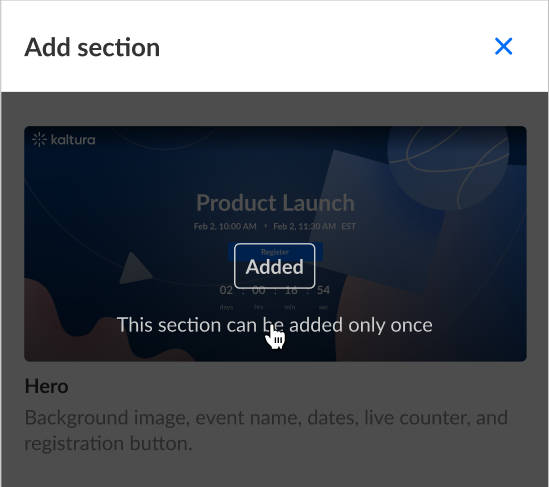

 The editable Free text component displays.


Edit, duplicate, or remove a component
- Click the three blue dots to the right of the component title to edit, duplicate, or remove that component. Note - Actions are component-specific AND many depend on whether the component is already added. For example, you may not duplicate or remove the Hero banner, so "Duplicate" and "Remove" will not display as options for the Hero banner.
Example: Free text actions when a Free text component has already been added to the page -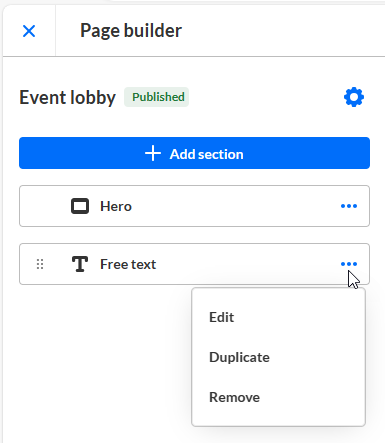 Example: Hero action -
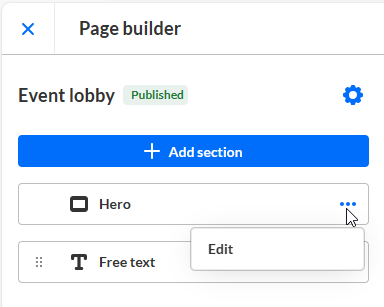 For the purposes of this article, we've chosen to edit the Hero banner.
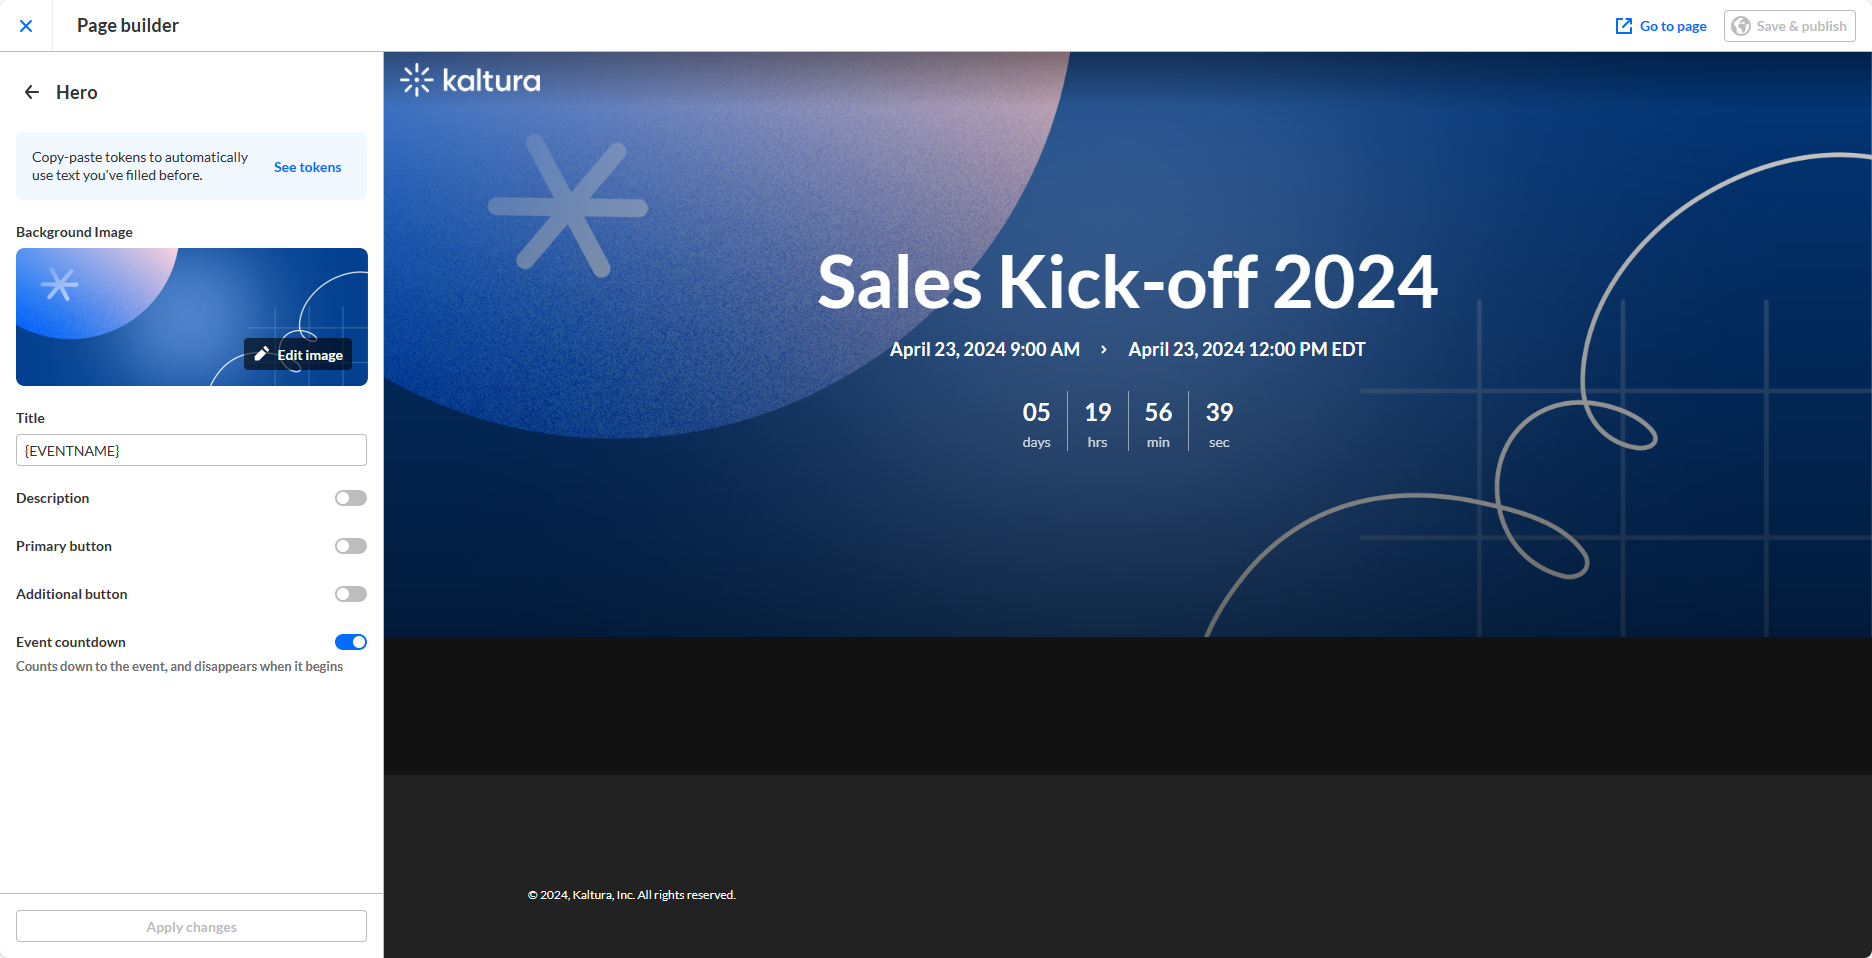
- Edit the following:
- Edit image - Replace the Hero banner image.
- Title - By default, this is set to the Event Name, indicated by the token {EVENTNAME}. If you would like to change it, delete the pre-filled text and type as desired. You may also click See tokens to copy a different token from a list that displays on the right.
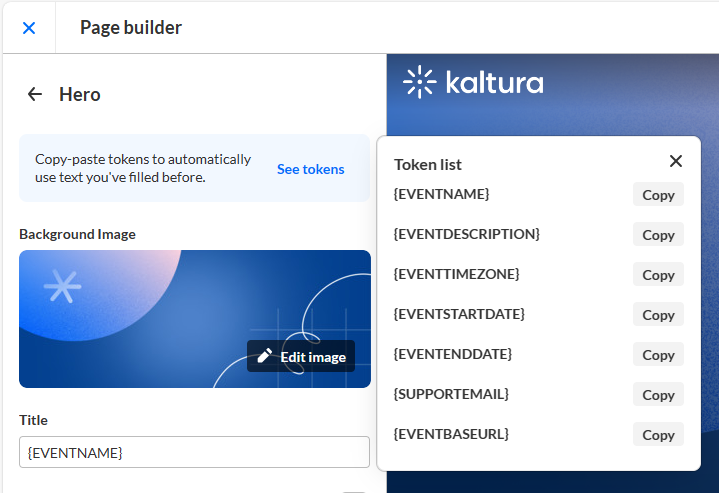
- Description - Enable or disable. When enabled, by default, this is set to the event description, indicated by the token {EVENTDESCRIPTION}. If you would like to change it, delete the pre-filled text and type as desired. Here, too, you may also click See tokens to copy a different token from the list that displays on the right.
- Primary button - Enable or disable. When enabled, you may choose the type of primary button (Registration, Login, or Custom), the text for the primary button, and (in the case of Custom), the Destination (set by default to the event base URL, indicated by the token {EVENTBASEURL}). The behavior of each type of button is as follows:
Registration button - Displays when the event registration opens (opens the registration as a side panel).
Login button - Displays when the event is open for attendees.
Custom button - Displays at all times (you can use it to redirect to other URLs / pages as well as open the registration in a new tab "/register"). - Additional button - Enable or disable. When enabled, you may choose the type of primary button (Registration, Login, or Custom), the text for the primary button, and (in the case of Custom), the Destination (set by default to the event base URL, indicated by the token {EVENTBASEURL}). The behavior of each type of button is as follows:
Registration button - Displays when the event registration opens.
Login button - Displays when the event is open for attendees.
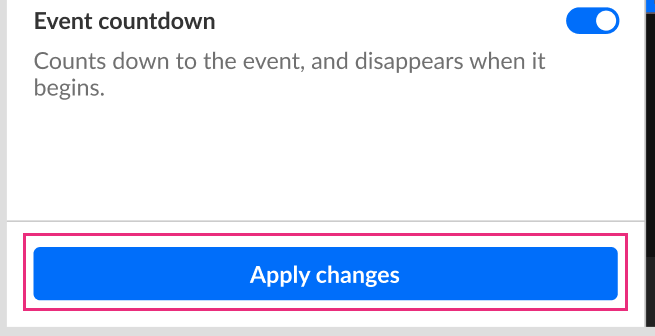
Custom button - Displays at all times. - Event countdown - Enable or disable the Event countdown which counts down to the event and disappears when the event begins. If disabled, the default text shown on the Landing or Lobby page is "Coming soon".
- Once you are finished editing the component, be sure to click Apply changes.
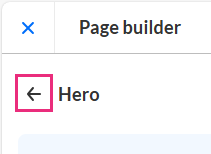
- Go back to the main view by clicking the arrow to the left of the component name.
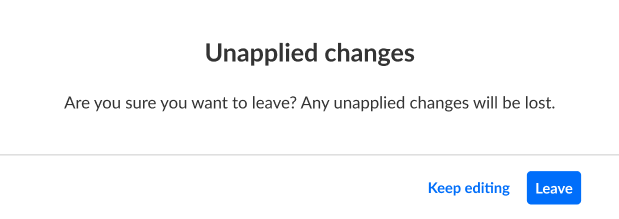
 Note - If you attempt to go back before you have clicked the Apply changes button, you will be notified that you have unapplied changes. You may click Keep editing to return to editing mode and apply changes, or you may click Leave and lose all unapplied changes.
 Example: Hero action -
 For the purposes of this article, we've chosen to edit the Hero banner.


 Note - If you attempt to go back before you have clicked the Apply changes button, you will be notified that you have unapplied changes. You may click Keep editing to return to editing mode and apply changes, or you may click Leave and lose all unapplied changes.

Reorder components
You may reorder the components (sections) by dragging and dropping them into the desired order.
Note - the Hero banner is the only component that is not movable.

Go to the Landing or Lobby page
Click Go to page in the upper right corner of your screen to navigate to the Landing or Lobby page and see how it looks!

Save and publish your changes to the Landing or Lobby page
Once you are finished customizing the Landing or Lobby page, be sure to click Save & publish in the upper right corner of your screen. You are redirected to the Event site editor page and you receive confirmation that your changes were saved successfully.

