About
AuthBroker is a "gateway" that sits on the partner (account) level and manages authentication to Kaltura via external Identity providers (IdP).
AuthBroker works with the Security Assertion Markup Language (SAML) and Open Authorization (OAuth 2.0) protocols. AuthBroker users are "shared users" (users who are shared between applications / instances in the partner).
AuthBroker works with a higher version of SAML and you no longer need to set up a new profile for each new account. You can set up profile(s) just once and easily use them in multiple applications/instances.
To use Authbroker, you must first subscribe to the applicationRegistry, and have a virtual event ID in the Application module. After configuring the AuthBroker module, you must also make one configuration in the Auth module - set authNAdapter to "Kaltura Auth Broker - {name of application}" and authZAdapter to "Kaltura Auth Broker".
Prerequisite
Before connecting the Rich Media CMS and Event accounts to AuthBroker, you must have created a SAML profile using the steps in Create and Manage SAML Profiles.
Configure
The AuthBrokermodule lets you enable new authentication methods by registering with the available Auth profiles on your account.
Once subscribed, ensure to set up the Auth method in the Auth module. Remember to set a main alias and register your application in the Application module first.
If you don't see this module in your Configuration Management console, please contact your account representative to enable it.
Go to your Configuration Management console, and navigate to the Authbroker module. Your link should look like this: https://{your_KMS_URL}/admin/config/tab/authbroker.

The 'Authbroker' page displays.

Subscribe to a profile
- enabled - Set to 'Yes' to enable the module. When enabled, admins can activate new authentication methods by registering with the available Auth profiles on the account.
- Click Subscription page. (Please note that you must enable the module first in order to access the Subscription page.)
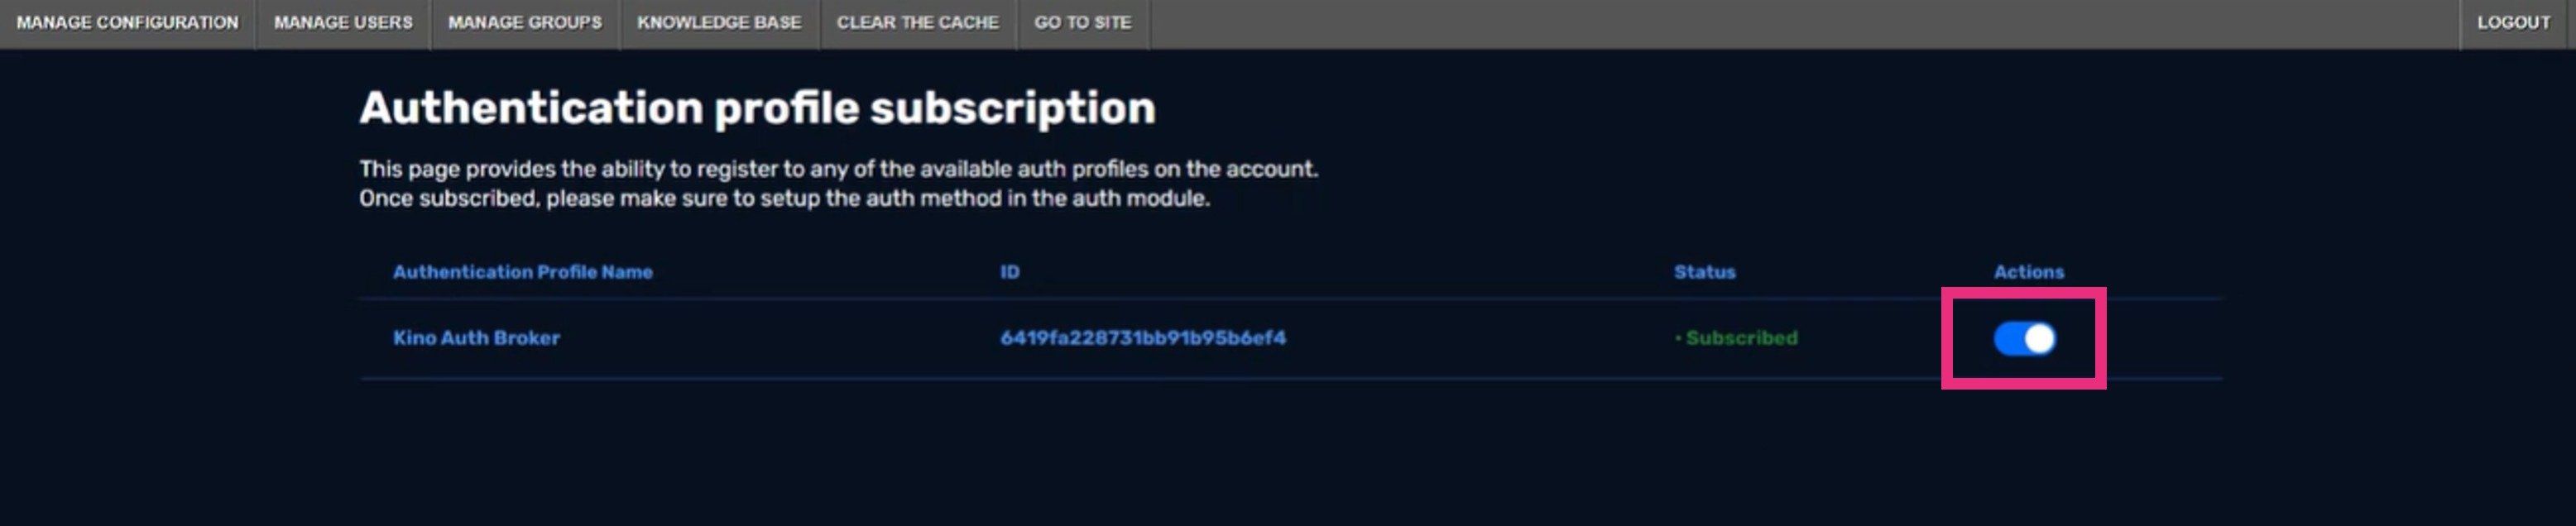
- To subscribe, just click the toggle on.

The authentication profile subscription window displays. Here you can view all the authentication profiles that were created on your account in Rich Media CMS.

If there are no profiles on the subscription page, you can learn how to create them in our article Create and manage SAML profiles.
When toggled on, your Kaltura legacy Video Portal (aka MediaSpace) can now use that authentication profile. If a few profiles were created, you have the option to subscribe to as many as you want.
Once you have subscribed to a profile, you can configure the settings for it, as follows:
Configure profile settings
defaultRole - Choose a default role from the drop-down menu for all users authenticating via the authentication profile(s) selected in the subscription page:
- viewerRole
- privateOnlyRole
- adminRole
- unmoderatedAdmin
rolesMapping
Role mapping lets you assign specific application roles to users based on their profile information, rather than only relying on a default role. With role mapping, you can link users to designated roles by setting values in their profiles. When users log in, the system checks for these values and assigns the appropriate role. If no specific value is found, it falls back to the default role.
- Click +Add "rolesMapping".
- Configure the following:
The rolesMapping section displays.

fieldLocation - Select where the IDP attribute is stored on the Kaltura partner level - within the User object or User profile. (An IDP attribute refers to specific information or data associated with a user's identity within an Identity Provider system. This attribute could include details such as the user's first name, last name, email address, country, or any other information relevant to their identity and access privileges.)
fieldName - Enter the name of the field you want to use for mapping the respective object, for example, 'country'.
fieldValue - Enter the value that should map to an application role, for example, 'US'.
The Video Portal can read and match any value within a multi-value field, such as "Groups". For example, if a user profile contains "Groups": ["KalturaAdmin", "group2", "group3"], any of these values can be used to assign the relevant role.
applicationRole - Choose a role from the drop-down menu that will be assigned if there’s a match for the value in the field.
- viewerRole
- privateOnlyRole
- adminRole
- unmoderatedAdmin
defaultGroups
Set default groups for all users authenticated via the Auth profiles selected in this module.
- Click +Add "defaultGroups".
- GroupID - Type in a label, for example, 'AB_users', so that everyone who logs in will be added to this group ID.

useInternalLogoutPage - Select 'Yes' or 'No' to use Kaltura's internal logout page instead of redirecting the user to the IDP once logout from the Video Portal has finished.

If you select 'No', a window will appear prompting you to enter the URL where the user should be redirected after logging out, for example, 'video.kaltura.com/logout'.

Finally, click Save to save your configuration settings.
Quick start instructions for using Authbroker login
Pre-start
- Create a SAML profile in the Rich Media CMS.
- Navigate to the Application module (https://{your_KMS_URL}/admin/config/tab/application). Enter a virtual event Id and subscribe to the applicationRegistry.
Step 1: Authbroker module
- Navigate to the Authbroker module (https://{your_KMS_URL}/admin/config/tab/authbroker).
- Click Subscription page. (Please note that you must enable the module first in order to access the Subscription page.)
- Next to the desired profile, click the toggle on.

- Click Save.
The Authentication profile subscription page displays.
Step 2: Auth module
- Navigate to the Auth module (https://{your_KMS_URL}/admin/config/tab/auth).
- authNAdapter - set to Kaltura Auth Broker - {name of your application}
- authZAdapter - set to Kaltura Auth Broker
- Click Save.


To learn more about the Auth module and its capabilities, check out our article Auth Module.
