About
This guide will show you how to embed video portal content into an AICC-compliant Learning Management System (LMS).
This guide is for non-Theming users.
For technical support, contact Kaltura Customer Care. For all other inquiries, reach out to your Customer Success Manager.
Prerequisite
Before getting started, make sure you have a private channel set up in your video portal with the content you want to embed. To learn more about setting up channels, visit our article Create a new channel.
Copy the embed link from video portal content
- Log into your video portal. If you need help, follow the instructions in our article Log into your video portal.
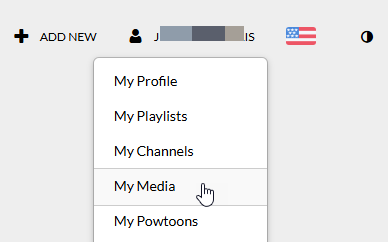
The video portal homepage displays. - On the homepage of the video portal, choose My Media from the user drop-down menu.
The My Media page displays.
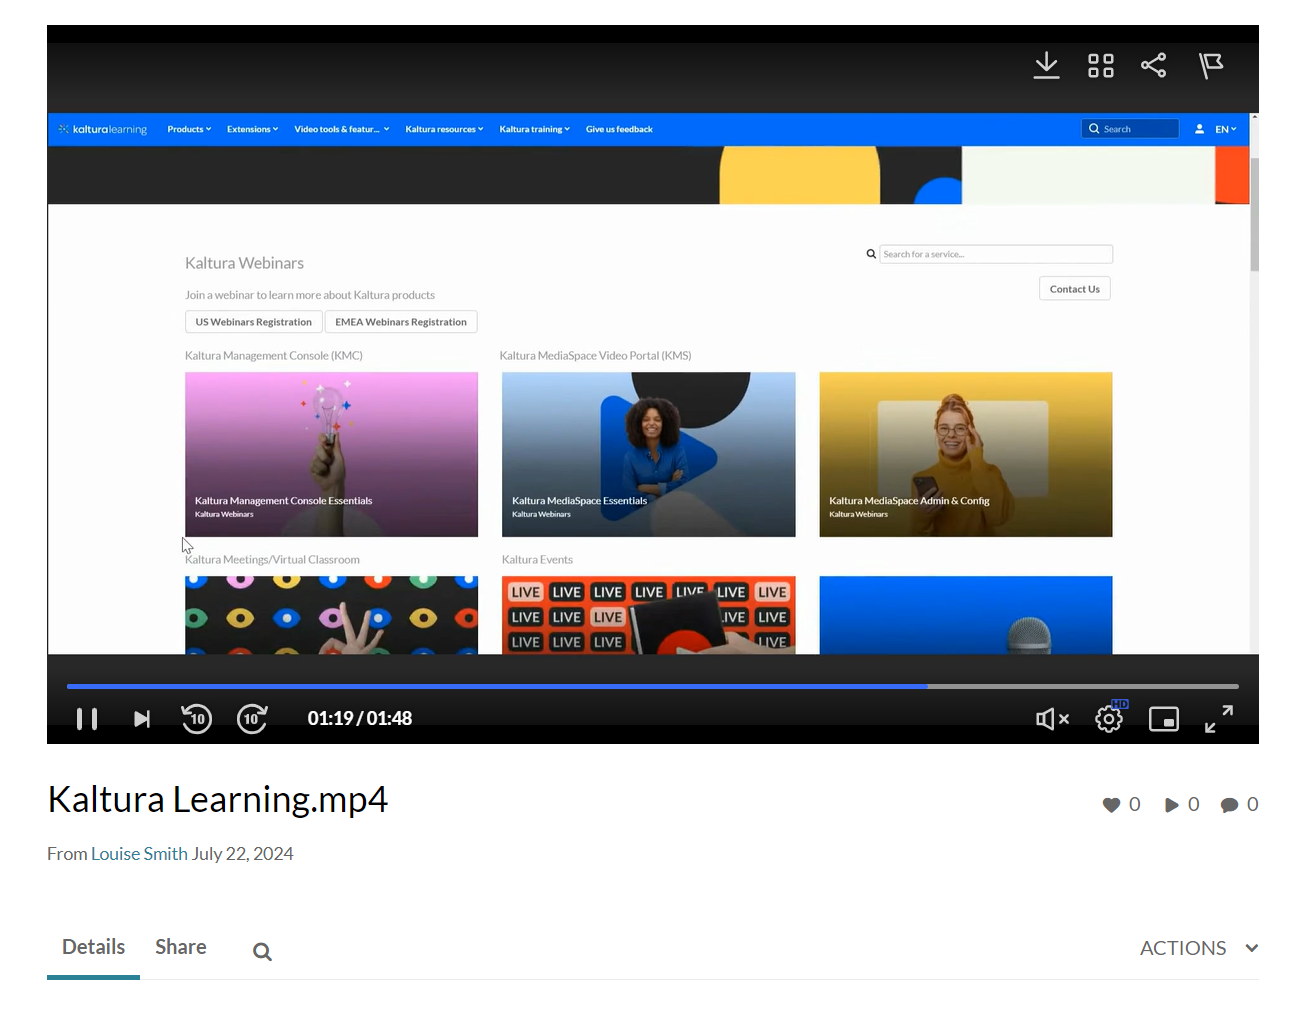
- Click on the thumbnail or name of the desired media.
The entry page displays.

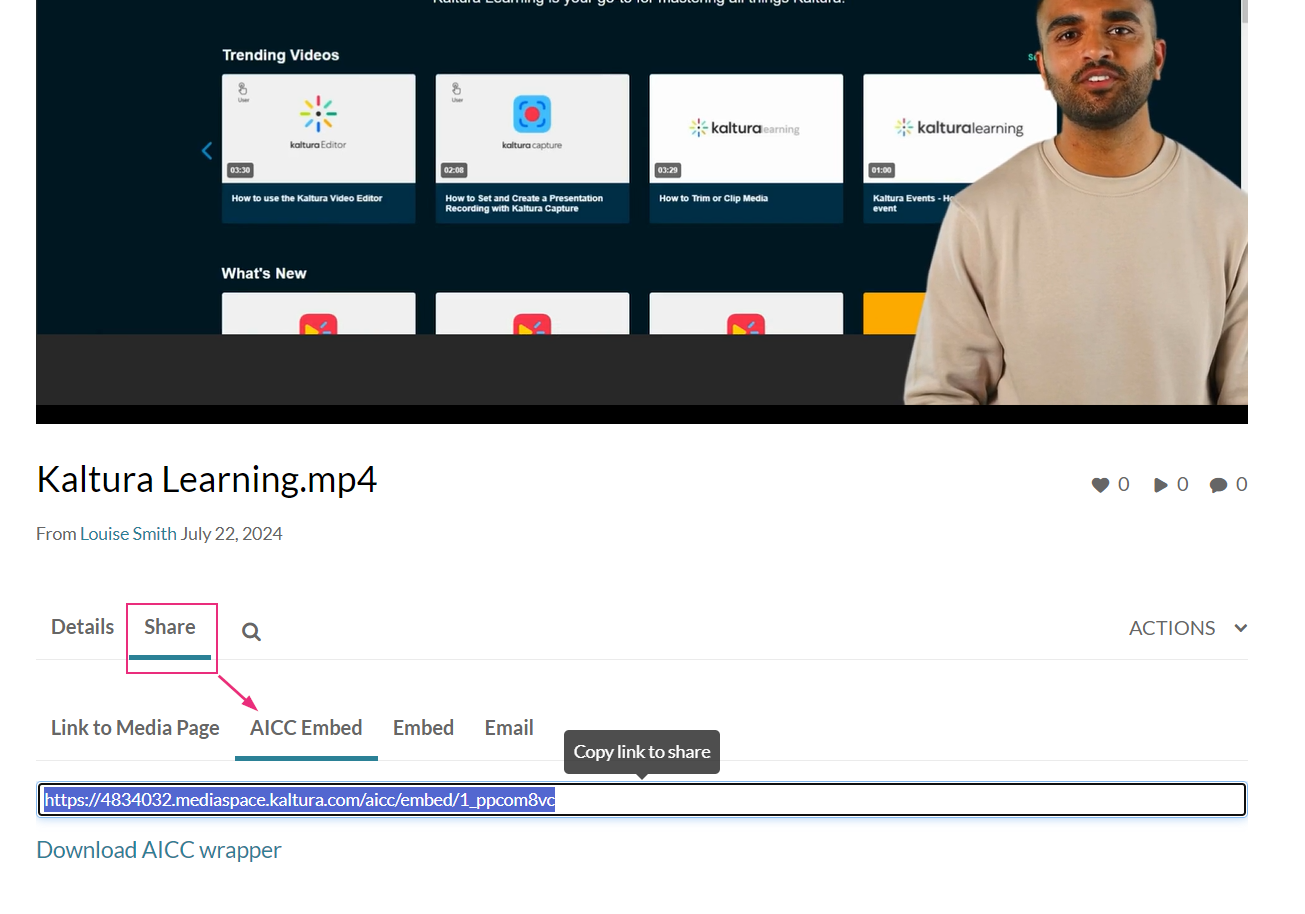
- Below the media, click on the Share tab.
- Click on the AICC Embed tab (the tab’s name is set by your administrator).

- Copy the URL. This URL includes the current video portal instance and the entry ID required to link back to the relevant section in the video portal.

If the AICC embed tab is not displayed, contact your Kaltura Account Representative. They need to set enabledContextAccessRestriction to ‘No’ in the Configuration Management section of the video portal.
Embed content into an AICC-compliant LMS
Each AICC-compliant LMS is different and the process for embedding content varies depending on the product. Following is a brief overview of how to do it using Saba Cloud.
Import content into Saba Cloud
- Log into Saba Cloud.
- From the upper left-hand menu, choose Admin.
- Click on Learning Admin.
- Click on Manage Content.
- In the Content Library, click on desired folder and click Import.
- Type name and Security Domain.
- Choose AICC from Content Format.
- Type Player Template.
- Select All Devices from Mobile Device Compatibility.
- Select Video from Content Type.
- Type version number.
- Expiration Date.
- Click Use as Evaluation if desired.
- Click Next.
- Paste your AICC link into the URL field.
- Click Import.
Add content to a class in Saba Cloud
- Return to the homepage of Saba Cloud.
- From the upper left-hand menu, choose Admin.
- Click on Learning Admin.
- Click on Manage Classes.
- In the Classes section, search for and click on desired class.
- Click on the Activities tab.
- Click Add Activities > Attach Content.
- Click Browse.
- Click on the media that you uploaded.
- Click Add Activities.
- Click Save.
- Click Save and Publish.
- Check all the boxes in the push activities pop-up window and click Save to make this item available to existing users.
This document is maintained by Kaltura’s Professional Services team. Please send comments or corrections to your Customer Success Manager. Ask them to forward it to the Professional Services team. We are committed to improving our documentation and your feedback is appreciated.


