About
This article describes how to add an Interactive room session to your event.
Interactive rooms allow attendees to connect with others during your virtual event. Hosts can use this collaboration space to provide demos with advanced moderation controls, breakout rooms that allow smaller group interactions, and so much more! Engage attendees through interactive tools like chat, breakout rooms, live polls, screen sharing, whiteboard, and more. Enhance your event experience by adding an interactive session with the speaker right after the session for a small group of attendees to interact with the speaker in a more intimate environment.
This article pertains only to multi-session events.
Some behavior described here applies to a non-default configuration. Customer-specific variations are highlighted where applicable.
Access Add session capability
There are two ways to add a session to your event:
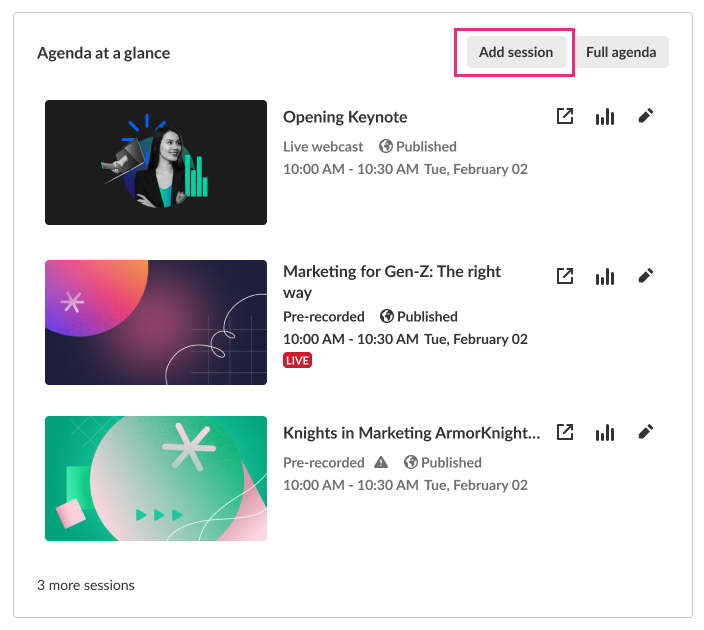
- On the Event Overview page, in the Agenda at a glance section, click Add session.
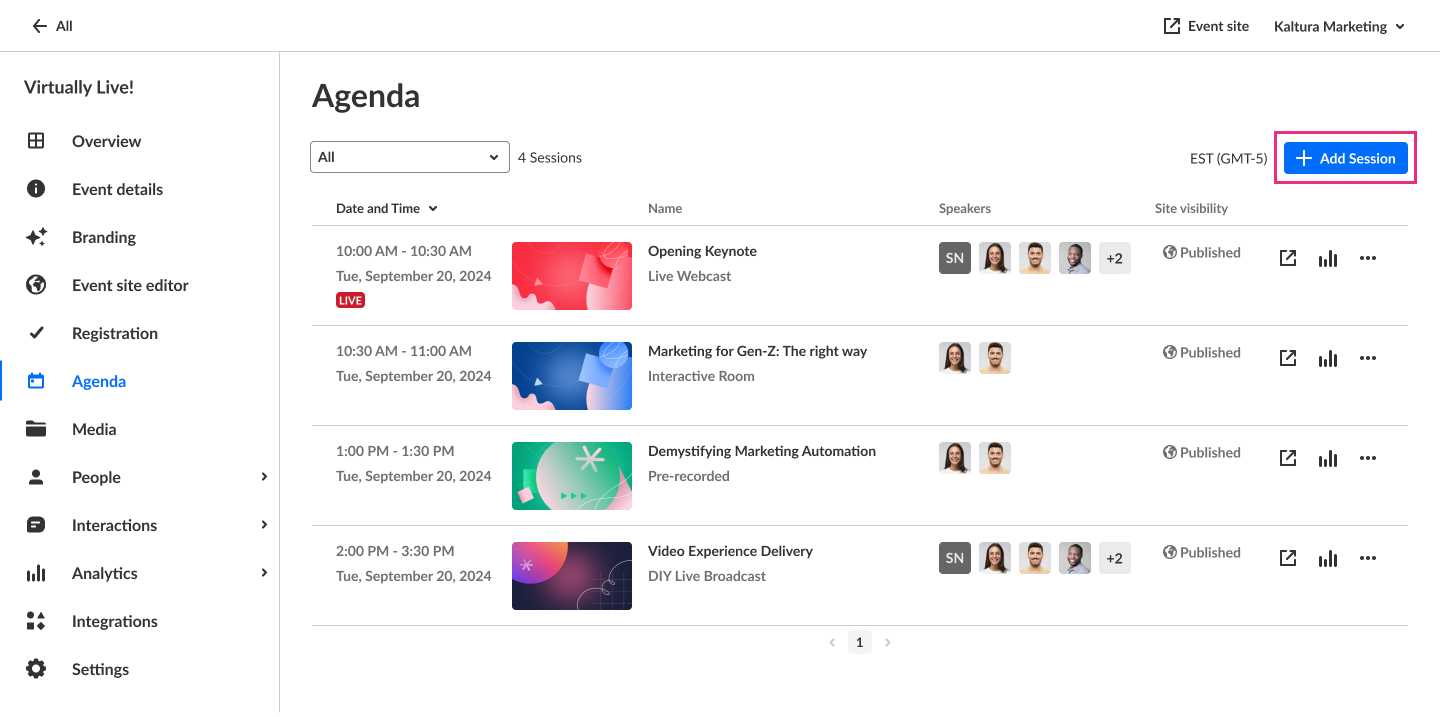
- On the Event Agenda page, click + Add session.
The Add session pop-up screen displays.
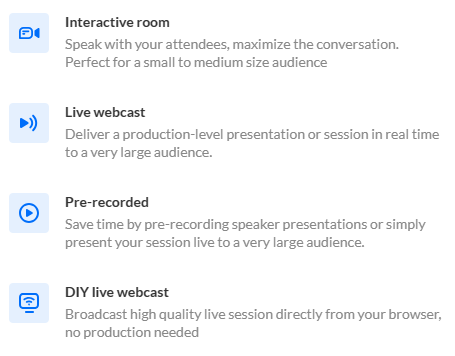
Select Interactive room. The New session - Interactive session screen displays.

-
You may add the following information:
- Header - Click Replace thumbnail and choose the desired file. We recommend using an image size of 1920x1080 px.
- Title (required) - A title for your session (char limit is 120). Please note: Characters "<" and ">" are not supported.
- Description - Type a description for your session.
When entering a URL in the Description field, use "http(s)://" (full path) for external links.
- Tags - Apply existing or create new useful, relevant tags for your session to help categorize it within the event. You may then filter your Agenda page and the Agenda section of Page builder based on these unique tags.
- To apply a tag - Click in the Add tags field. Start typing the first few letters of a tag and a list of matching tags will populate for you. Click to select the checkbox next to the desired tag.
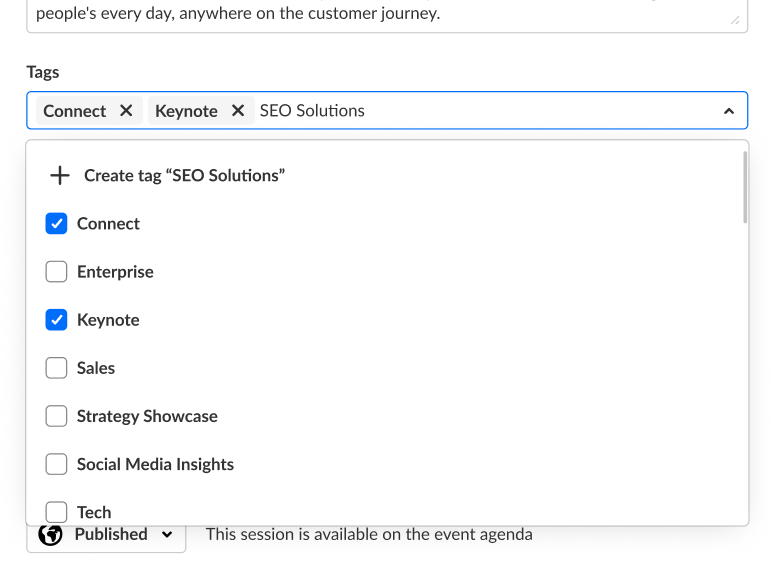
- To create a new tag - Type your new tag in the Add tags field, then click +Create tag "[tag name]".

- To detach a tag from a session, simply click "X".
Session tags are visible to event attendees.
- To apply a tag - Click in the Add tags field. Start typing the first few letters of a tag and a list of matching tags will populate for you. Click to select the checkbox next to the desired tag.
- Date (required) - Choose the day your session will start.
- Time (required) - Choose the time your session will start.
- Duration (required) - Choose the duration of your session (in minutes). Max duration is 1440 minutes (24 hours).
-
To add speakers to this session, click in the Speakers field and start typing the name of a user who has been assigned a Speaker role. The matching user displays below. Click to select the user.
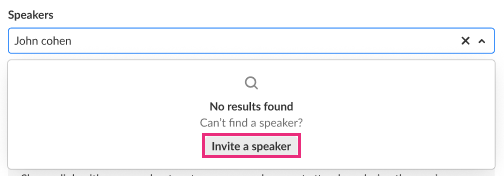
 If no results are found, click Invite a speaker. This re-directs you to the Speakers page where you can invite speakers to your event.
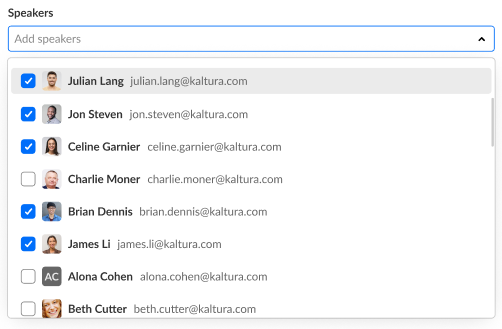
 To see a list of all available speakers, leave the Speakers field empty. You can browse the list and click to select speakers.
 Speakers are displayed on the event agenda in the same order you select them here. Click outside of the Speakers area to see the speaker line up.
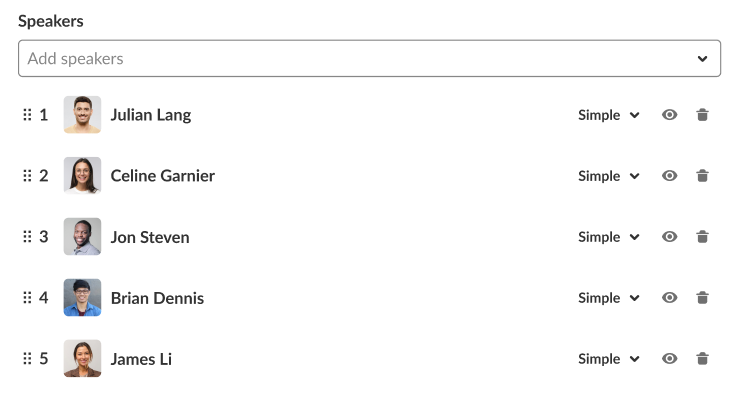 To manually reorder speakers, grab the 6 dots to the left of the speaker number and drag to the desired spot in the list.
 - To add moderators (required) to this session, click in Moderators (required) field and start typing the name of a user who has been assigned a Moderator role. The name is auto filled. Click to select the user.

- Click to activate Kaltura's AI assistant for this session.
Looking for more information about this feature? Feel free to contact your Kaltura representative.
 You are asked to confirm your action.
 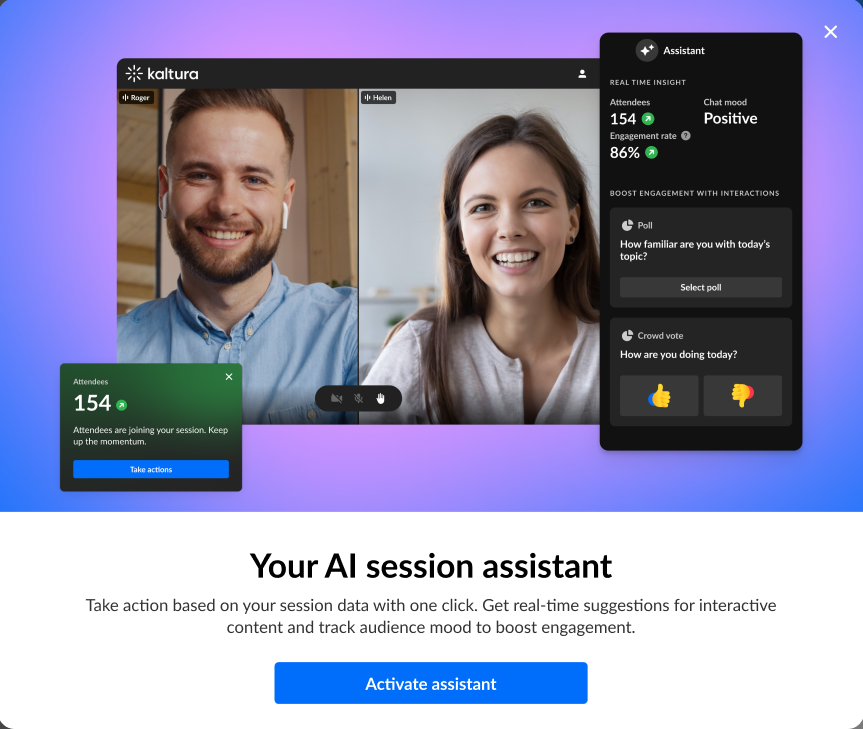 Click Activate assistant. You may click the "X" button to cancel the action.
When activated
- The Assistant tab displays for moderators in the Chat and Collaboration widget. The Assistant tab provides information on attendee numbers, chat mood (results of sentiment analysis), engagement rate (viewers who watch in full screen or with the focus on the tab and sound on), and time to end.
- The Live stage tab of the Chat and Collaboration widget displays the same information for moderators.
When deactivated
- The Assistant tab does not display for moderators in the Chat and Collaboration widget.
- The Live stage tab of the Chat and Collaboration widget displays information on attendee numbers, turnout (percentage of those registered who are actually logged into the session), engagement rate (viewers who watch in full screen or with the focus on the tab and sound on), and time to end.
- Choose visibility of the session.
Private - The session will be available only for team members, not for attendees.
Unlisted - The session will be reachable via direct link only.
Published - The session will be available on the event agenda. - Certification - Click the check box if you would like to assign this session to your Continuing Professional Education (CPE) program.
- The Additional information section appears only if your account includes custom metadata. The fields in the Additional information section will help you capture extra details about your session. For example, sometimes values in specific fields are required to generate a certificate for your CPE program.
- Once you are finished completing the fields, click Create. (The Create button is enabled only after you've begun filling in the fields.) The new session is now added to your event.
 To show or hide a speaker on the event site, click the "eye" icon. Speakers who are marked as hidden are still shown here in the Speaker list but appear "grayed out" and do not have an order number.
 To remove a speaker from the list, click the "trashcan" icon.
 To choose a speaker's permissions, click the arrow to the right of their permission setting and click to select either Simple speaker (default) or Advanced speaker.

 If no results are found, click Invite a speaker. This re-directs you to the Speakers page where you can invite speakers to your event.
 To see a list of all available speakers, leave the Speakers field empty. You can browse the list and click to select speakers.
 Speakers are displayed on the event agenda in the same order you select them here. Click outside of the Speakers area to see the speaker line up.
 To manually reorder speakers, grab the 6 dots to the left of the speaker number and drag to the desired spot in the list.