About
This article describes how to design the registration form attendees will be required to complete in order to officially register for your webinar, unpublish/re-publish the registration, and enable Webhook.
Design the registration form
1. Navigate to the Registration page; from the site page, click the Registration tab.
The Registration page displays.

2. In the Registration form box, click the blue Edit button.
The Registration form displays. This is where you customize the registration form attendees will be required to complete in order to officially register for your webinar.
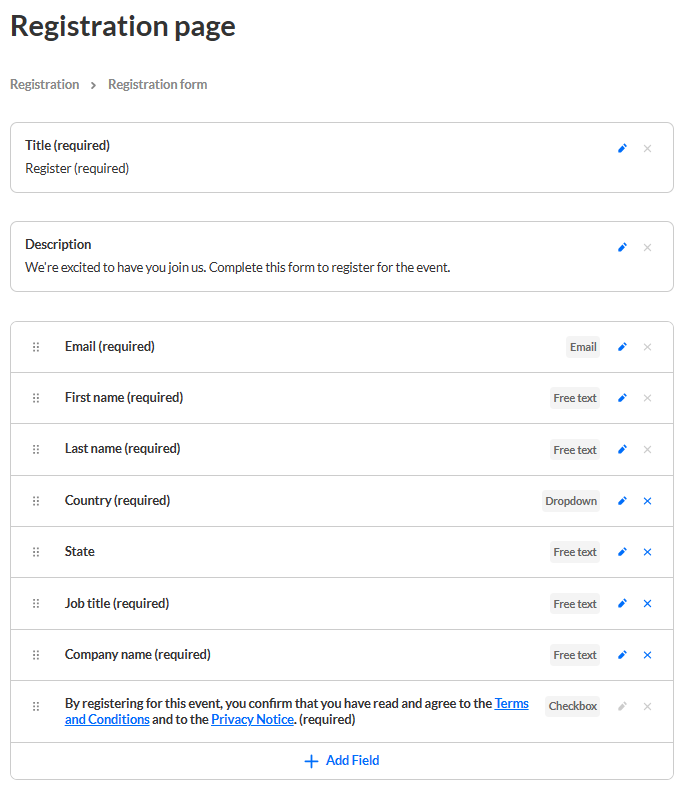
Following are the edit actions available on the Registration form:
Certain fields (i.e., First name, Last name, and Email) are required; therefore, they are not editable.
- Edit title - Click the blue edit (pencil) icon next to the title, make your edits, then click Done.
- Edit description - Click the blue edit (pencil) icon next to the description, make your edits, then click Done.
- Edit a field's display name and whether or not it is a required field - Click the blue edit (pencil) icon next to a field, make your edits, then click Done.
- Remove fields - Click the "X" next to a field. The field is returned to the + Add field list.
- Add fields - Click + Add field and choose from a list of available fields.
If all available fields are added to a section, the + Add field button is disabled.
- Manually reorder fields - Grab anywhere on a field and a hand icon displays. Drag the field to the desired spot in the same section or to the desired spot in a different section of the Registration form.
3. Once you are finished editing the Registration form, click Save. A notification that the Registration form was updated successfully is displayed.
The Save button for the Registration form is disabled, and only becomes 'clickable' after at least one edit is made.
Please be aware that the Registration form is automatically published when you create a webinar. the edits you make to the Registration form will only display to new registrants going forward. Information for those who registered before you made the edits to the Registration form, will not be changed.
If you have integrations enabled on your account, and integrations exists for this webinar, please note that removing or editing fields on the Registration form will impact these integrations. All possible Registration form fields should be mapped to the 3rd party integration. Webinar Managers should be cognizant of fields that are required on the 3rd party integration when removing or editing fields on the Registration form.
Unpublish/publish registration
The Registration form is automatically published when you create a webinar. You may unpublish registration by clicking the red Unpublish button that is now displayed on the Registration page. If unpublished, you may also re-publish the registration by clicking the Publish button.
Enable webhook
Kaltura supports webhook registration. Use the following steps to enable webhook registration.
- Navigate to the Registration page; from the site page, click the Registration tab.
The Registration page displays.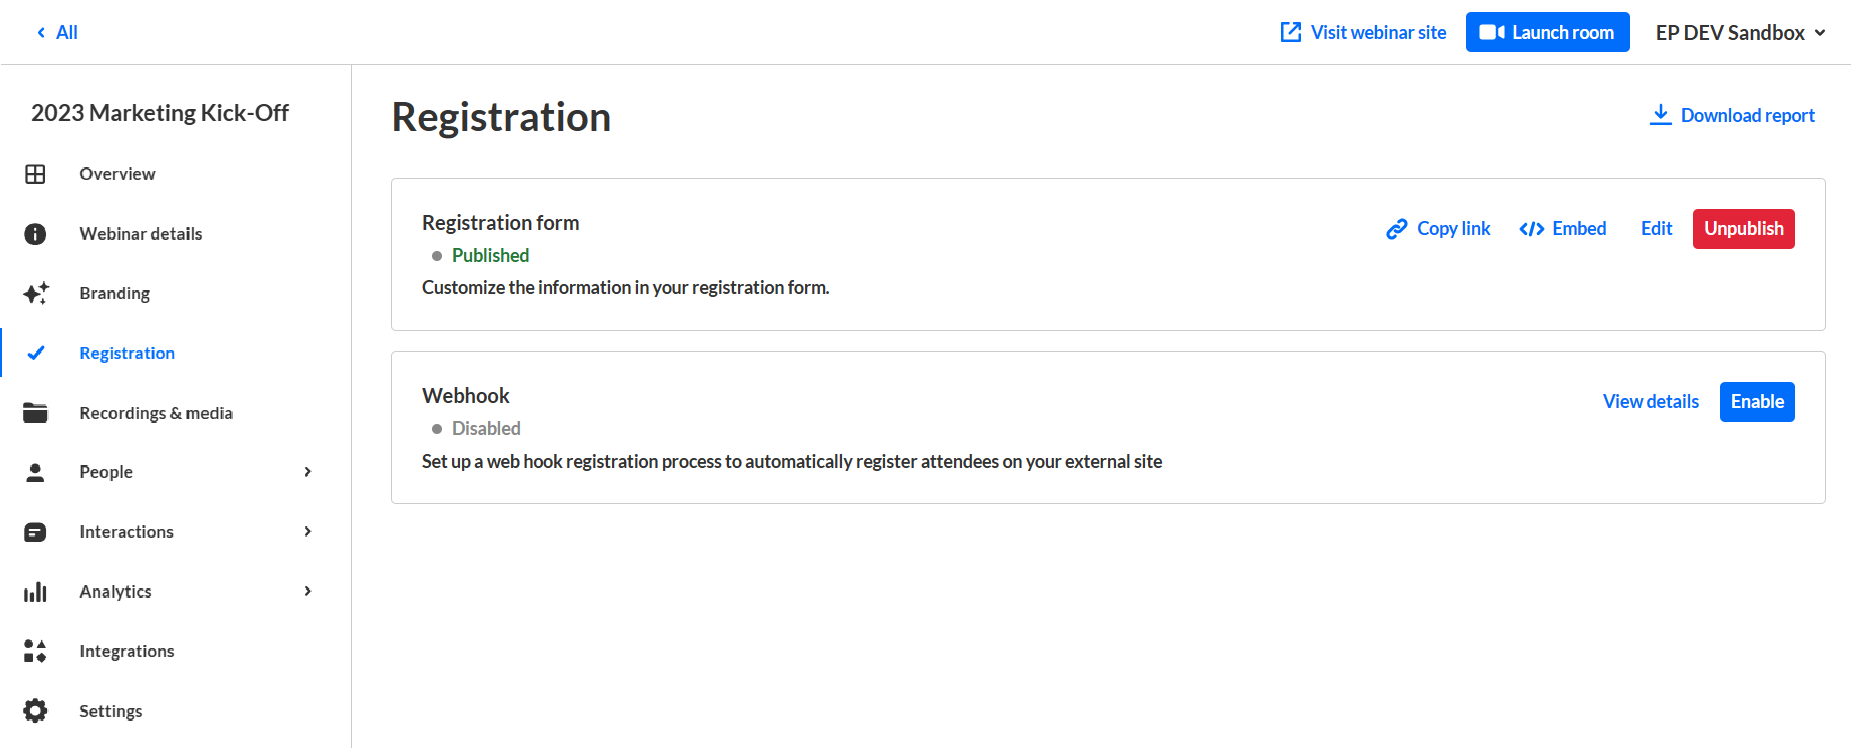
- In the Webhook box, click the blue Enable button.
You receive a message that the webhook has been enabled successfully.
You may disable webhook by clicking on the red Disable button that is now displayed in the Webhook box.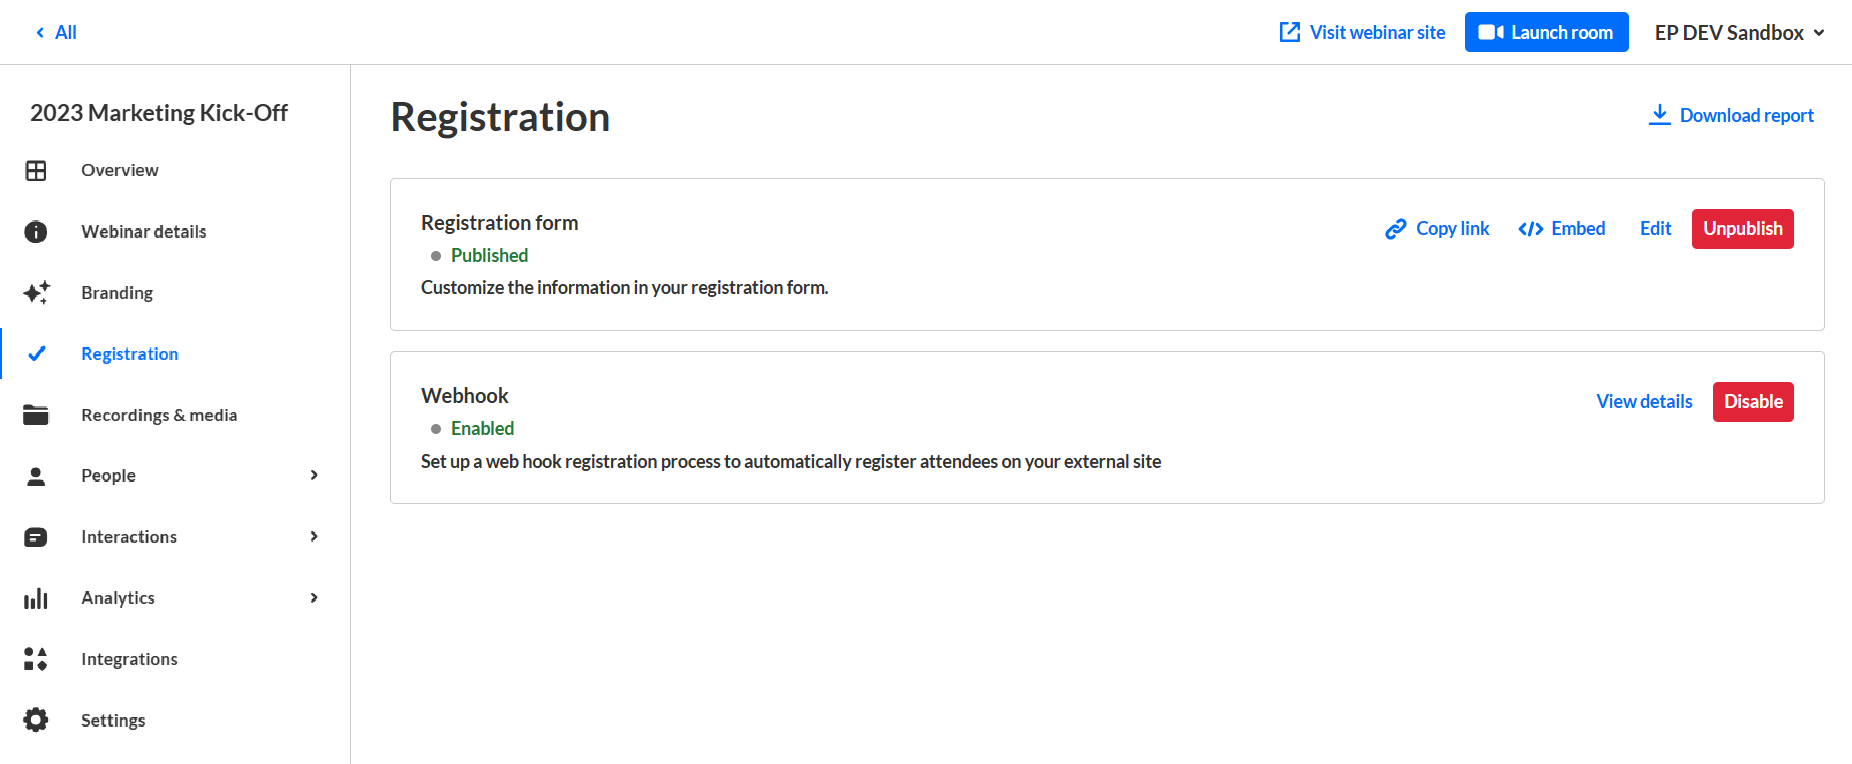


View webhook details
In the Webhook box, click the View details button. The Webhook Details page displays.
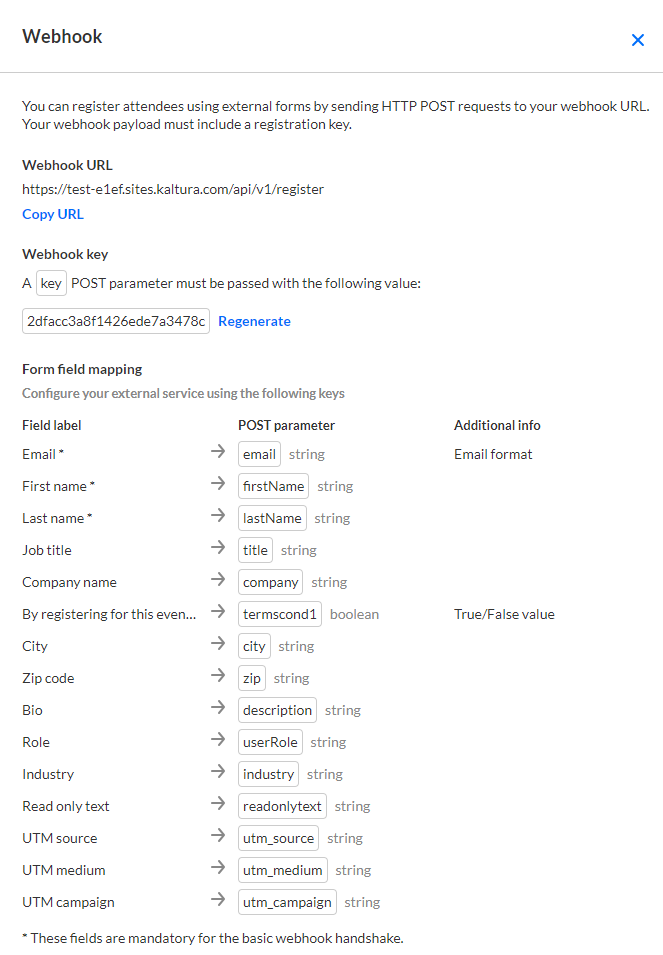
This is where you may copy parameters to paste into your external marketing system, thus configuring the webhook handshake.
- Click Copy URL to copy the webhook URL.
- Click Regenerate to regenerate the registration key.
- Click Copy value to copy the country code.
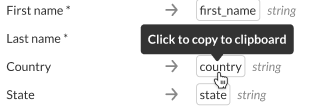
- Hover over any ID and a pop-up message instructs you to click to copy this ID to your clipboard.
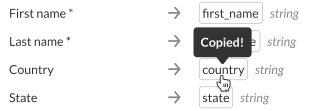
 After clicking on the ID, you receive confirmation that the ID was copied.
 After clicking on the ID, you receive confirmation that the ID was copied.

Tracking the source of your registrants
As a webinar manager, is it critical to discern which marketing campaigns are driving (or drove) the most traffic to your webinar. This knowledge is key to better allocating budgets for current and future campaigns.
Kaltura tracks the source of your registrants through the use of UTM (Urchin Tracking Module) parameters that are embedded as hidden fields in the registration form. UTM parameters consist of the following:
Traffic source (utm_source) - Are your registrants coming from Facebook, LinkedIn, Google, etc.?
Medium (utm_medium) - Are your registrants coming as a result of an email, social media, a referral, etc.?
Campaign name (utm_campaign) - What campaign drove your registrants here? You can base this on your own campaign naming conventions.
This resulting data is displayed as part of the Registration Report.
