If you're setting up a new event, we recommend using Live Studio, our modernized live event experience. See Introduction to Live Studio for more information. If your organization is still using the legacy webcasting product, this article still applies.
Overview
The Kaltura Webcasting Outlook Add-In allows you to quickly and effortlessly create and launch a Kaltura Webcast from within Outlook, making Webcasting more accessible to everyone in the organization. The Kaltura Webcasting Outlook Add-In features include:
Creating Webcast events directly from the Outlook Webcast Add-in
Editing previously created Webcast events directly from the Outlook Webcast Add-in
Launching the Webcast Application from Outlook
Sending the link for the created Webcast event via email from Outlook
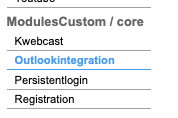
KMS Admin
To enable the Outlook module in KMS
Contact your Kaltura representative to add the module to your KMS, Once available, enable the feature on your KMS by selecting Yes in the enabled field.
Once enabled, you can continue to configure the additional fields in order to generate the add-in XML file that will be installed in the Office 365.
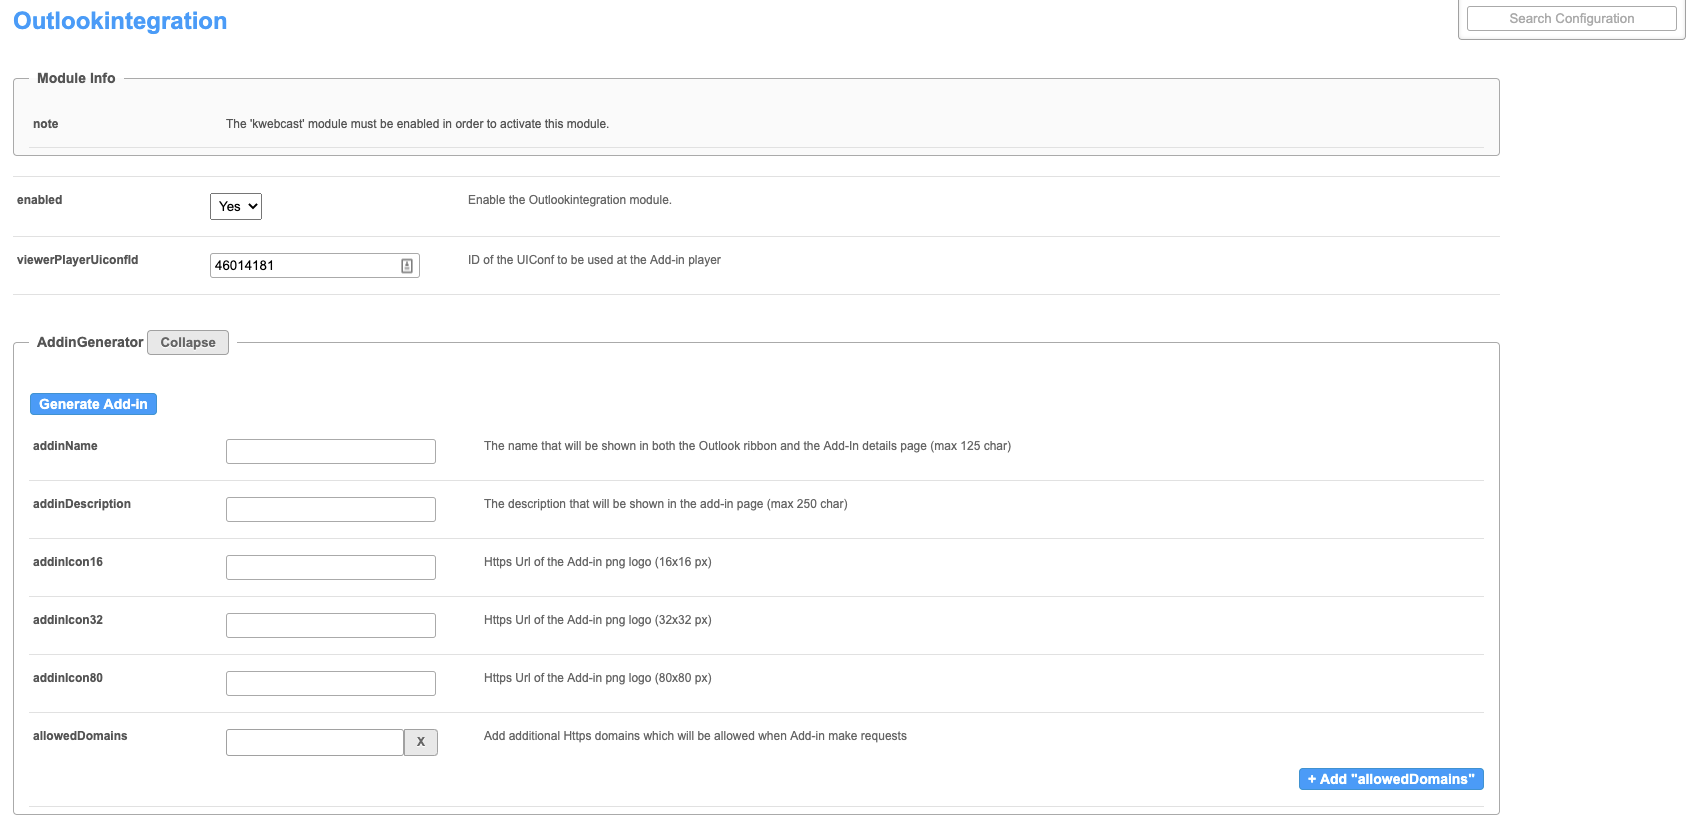
Add-In Generator
Viewer Player UICONF
The player that will be loaded for the attendees when viewing the webcast within Outlook. The add in will generate a player that is customized for the Outlook viewing experience
Add-In Name
The name that will be displayed in the Outlook Ribbon

Add-In Description
The description showed in the Add-In details page
Add-In Icons
The Outlook add-in needs three resolutions tin order to be installed properly, 16px, 32px, 80px. Upload the icons to any secure server (HTTPS) and paste the URL for each icon in the correlating field. The icons provided will be used across Outlook for the add-in.

Allowed Domains
Whitelist all the top level domains that the KMS uses in the log-in process, redirects included. In the case that a domain is accessed without configuring it in the configuration, the result will be that Outlook will open a browser window with that domain in the URL. All the domains must be secured domains (HTTPS). After adding a domain, click on the + Add "allowedDomains" button to add additional domains.
Save & Generate Add-In
Once the configuration is complete, click on the  button to apply the configuration to the XML file and click on the
 button to download the configured XML file.
Installing the Outlook Add-In
Admin Installation
To install the Outlook add-inn
You will need to request the XML Manifest file that will eventually be uploaded and installed in your Office 365 account as a custom add-in. The XML file contains vital information that allows the add-in to link to your organization's KMS and to various other configurations.
Office 365 has various ways to install the add-in. Detailed documentation can be found here.
Recommended Approach for Deploying Office Add-ins
Microsoft's recommended approach for deploying Office add-ins is as follows::
Consider rolling out add-ins in a phased approach to help ensure your add-in deployment goes smoothly. We recommend the following plan:
Roll-out the add-in to a small set of business stakeholders and members of the IT department. Evaluate if the deployment was successful, and if so, move on to step 2.
Roll-out to a larger set of individuals within the business who will be using the add-in. Again, evaluate results and, if all went well, go to the next step of a full deployment.
Full rollout to target audience of users.
Depending on the size of the target audience, you may want to add or remove roll-out steps.
User Installation
- If you want to install the add-in for one user only, you can install it via the Outlook Get Add-Ins panel:

- Go to My add-ins and scroll all the way down and select the Add from file option from the Add a custom add-in dropdown:
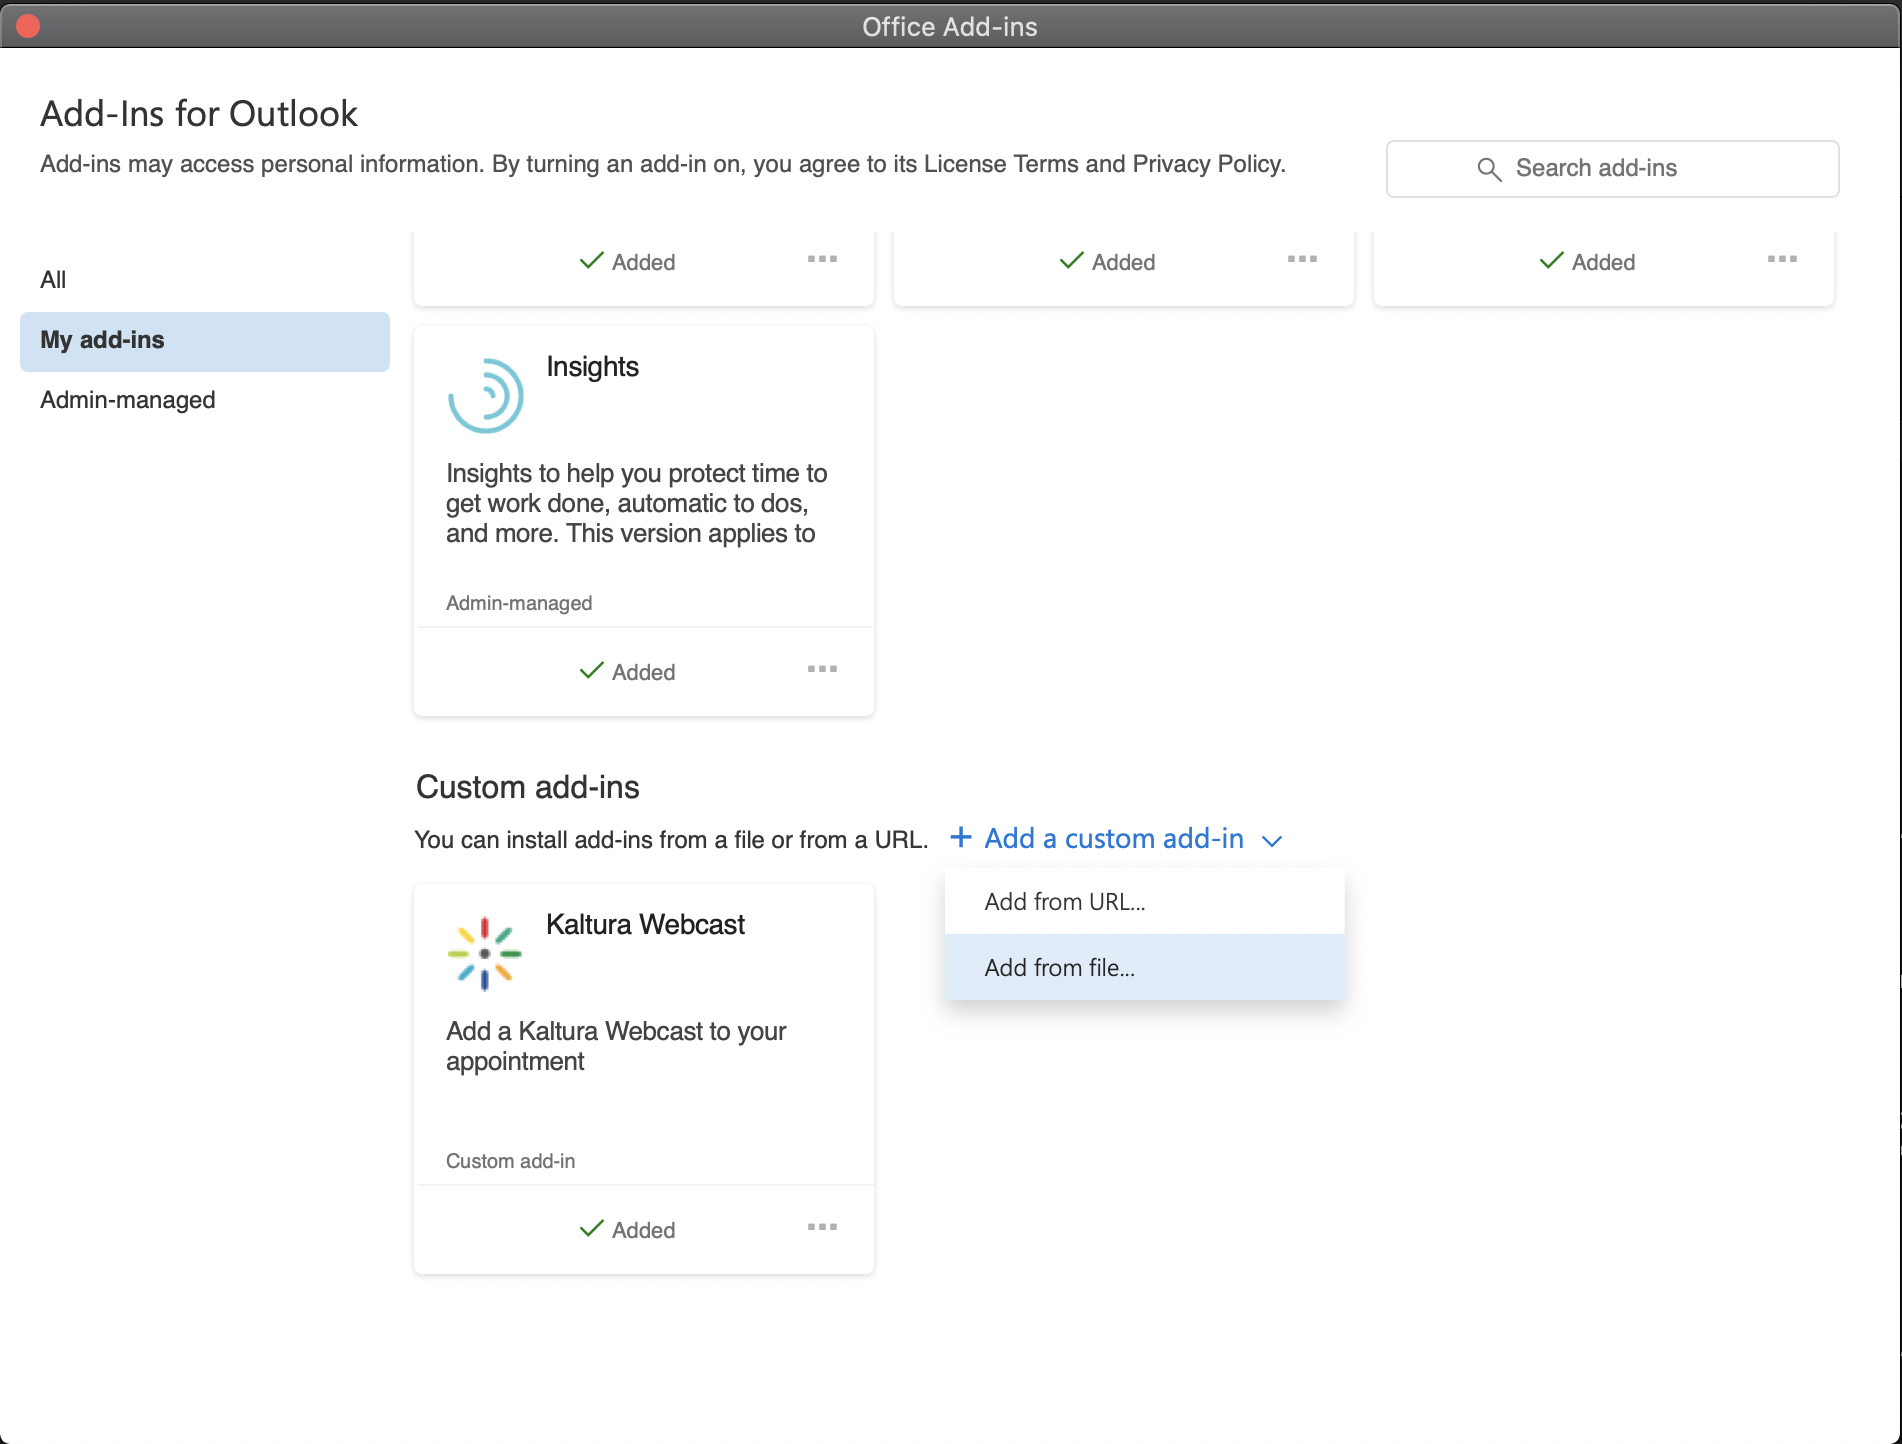
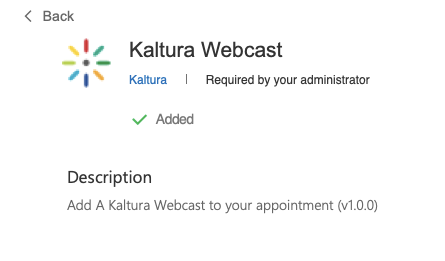
- Select the XML that was given to you by the Kaltura representative.


Creating a Webcast
After the add-in is installed in Office 365, all users that were included in the add-in deployment will have the Kaltura Webcasting button in their Ribbon section in the New Meeting view.
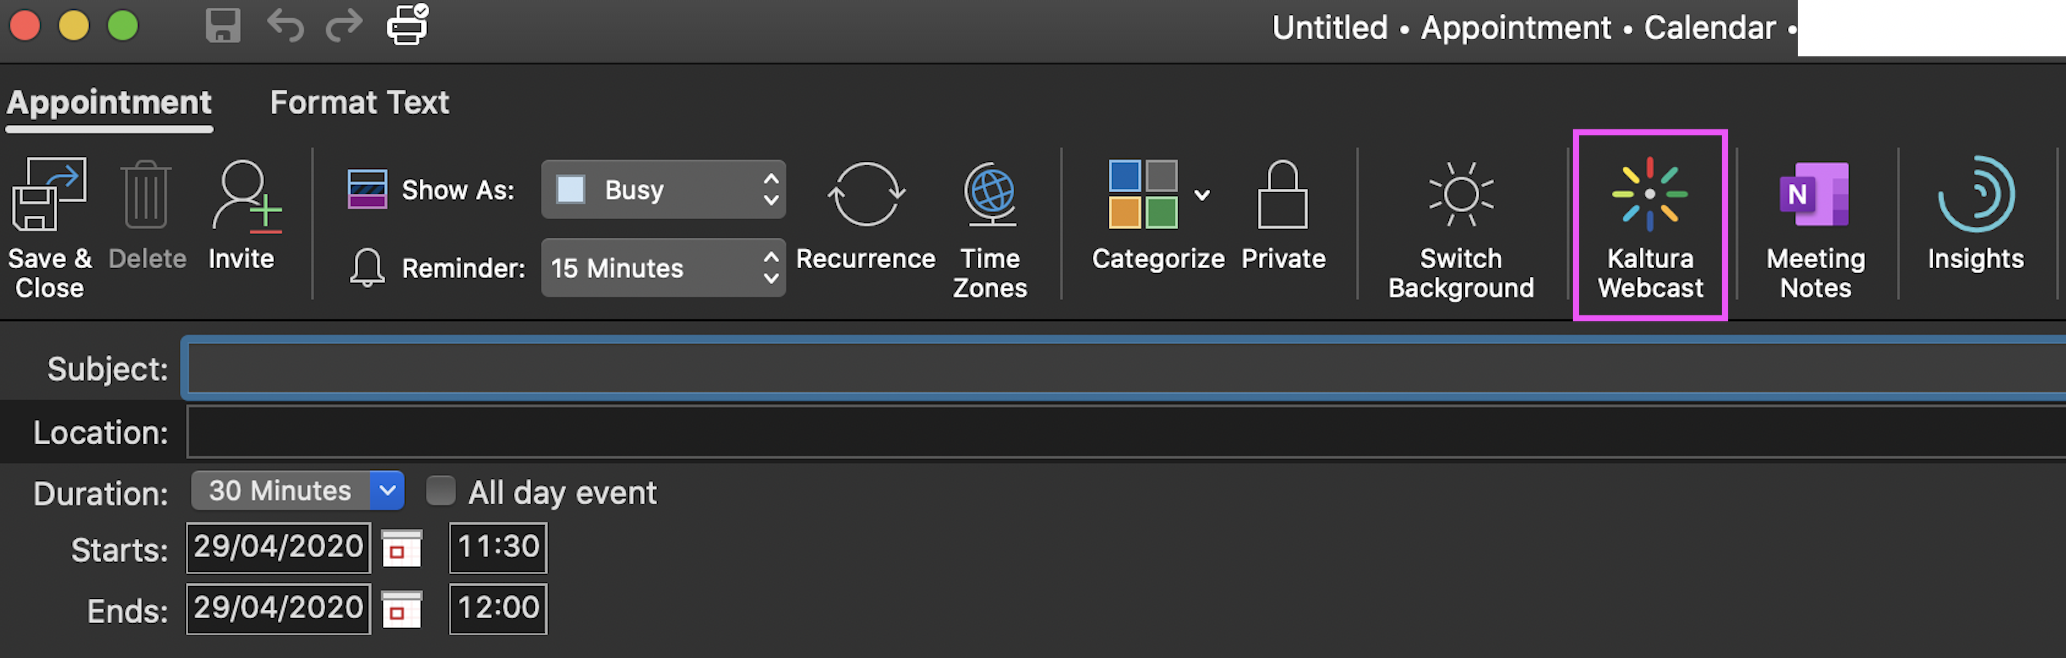
To create and associate a webcast in Kaltura to an Outlook meeting
- Click on the Kaltura Webcast button in the New Meeting view.
Depending on your organization's Kaltura MediaSpace login configuration, there is a good chance that you will be asked to log into MediaSpace via your login provider.
 After you login, a webcast event is created for you with the name of the meeting. If no event has been inserted, then the default name of "Webcast Event" is given to the webcast.
By default, the webcast that is created is unlisted to ensure a seamless workflow, Once the invite is sent to participants, everyone that has access to that KMS will be able to view the webcast. The default webcast's publishing status (unlisted) may only be changed n KMS by any of the Webcast event's collaborators.
Meeting Options
Body
After the Webcast is created, the invitation information is added in the meeting invitation body, for you to easily invite the webcast participants.

Location
In the Location field, the add-in adds the URL of the meeting that has been created to make it easier for the webcast participants to find/ attend. If for any reason this isn't the behavior you want, you can always erase the location field value and change it to whatever suits your use-case.
Updating the Webcast
After the webcast is created, the association between the webcast and the meeting stays persistent and each time that you open the meeting and click on the Kaltura Webcast add-in the same webcast event is shown.
To update the Name,Time or Date
- Update the Name or the Time of the meeting and the webcast will update automatically.
After updated, a banner is displayed above the meeting body, indicating that the webcast has been updated.

If you want to edit any other information you will need to login into the correlating KMS and update the information there. The Name, Time and Date will always be updated to show the date in Outlook. If you update any one of these fields in KMS and then open the meeting and the add-in, the Date, and Name will be updated to the values in the Outlook meeting
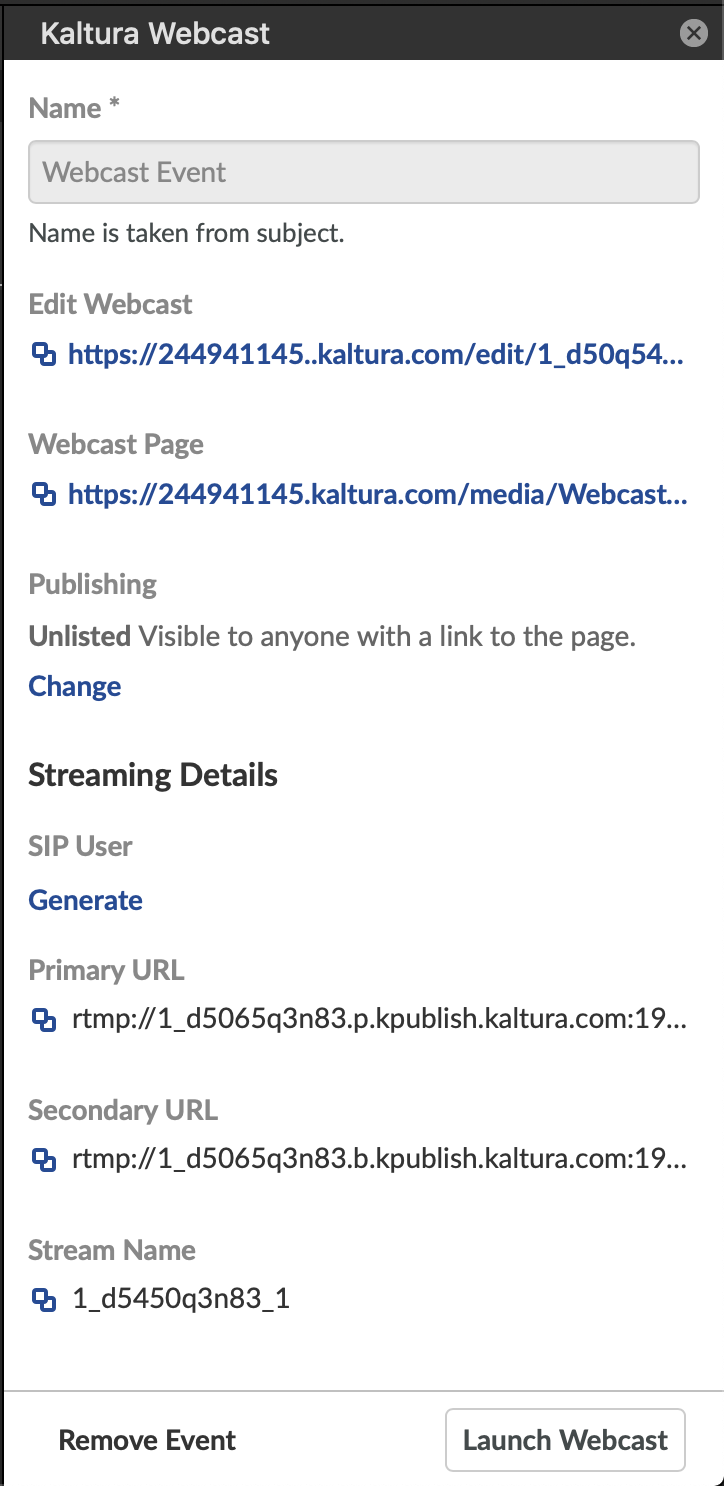
Add-In Webcast Panel
Configuration
The following lists the various configurations and information shown in the Kaltura add-in panel:
- Name - This is the name of the webcast as shown in MediaSpace, This name stays in sync with the meeting name.
- Edit Webcast - This is the link to MediaSpace, You may want to go and spice up the webcast appearance by adding any one of various options such as Presenters, Thumbnail, etc.
- Webcast Page - This is the link to where the participants can view the webcast in MediaSpace.
- Publishing - the publishing configuration of the webcast. By default the status will be unlisted unless configured otherwise in MediaSpace. Clicking on the Change button opens a browser to the webcast page where you can change the publishing configuration.
- SIP User - This option is no longer in use. Use RTMP live streaming to broadcast with Kaltura Live from your video conferencing tool of choise. Check the following guidelines for Zoom and WebEx.
- Primary URL - If you want to stream to the webcast using an external encoder, use this URL to configure the encoder to properly stream the webcast.
- Secondary URL - Use this URL as the secondary stream URL for encoders that support it.
- Stream Name - Configure the stream name in the encoder to properly stream the broadcast.
Remove Event
You can remove the association of the webcast to the meeting by clicking on the Remove Event button. The Remove Event button DOES NOT DELETE the event, it only removes the association of the webcast in MediaSpace to the meeting and closes the add-in panel. The information added to the meeting body and location are not deleted so as to not harm any content that might have been added.
The next time you click on the Kaltura Webcast add-in, a new webcast is created and associated to that meeting.


Launch Webcast
If the Webcast Application has not been previously downloaded, the Launch Webcast button opens a browser with the Webcast Application download page. In addition, for those that have the Webcast Application installed, the application opens with the correlating webcast ready to start broadcasting.


Meeting Attendees
When sending the meeting invite to attendees that have the Kaltura Webcast add-in: if the attendee clicks on the Kaltura Webcast add-in while viewing the from the meeting in Outlook, you can then see the webcast right within Outlook. In addition you also have the ability to join the webcast from within MediaSpace which is the preferred viewing experience.

