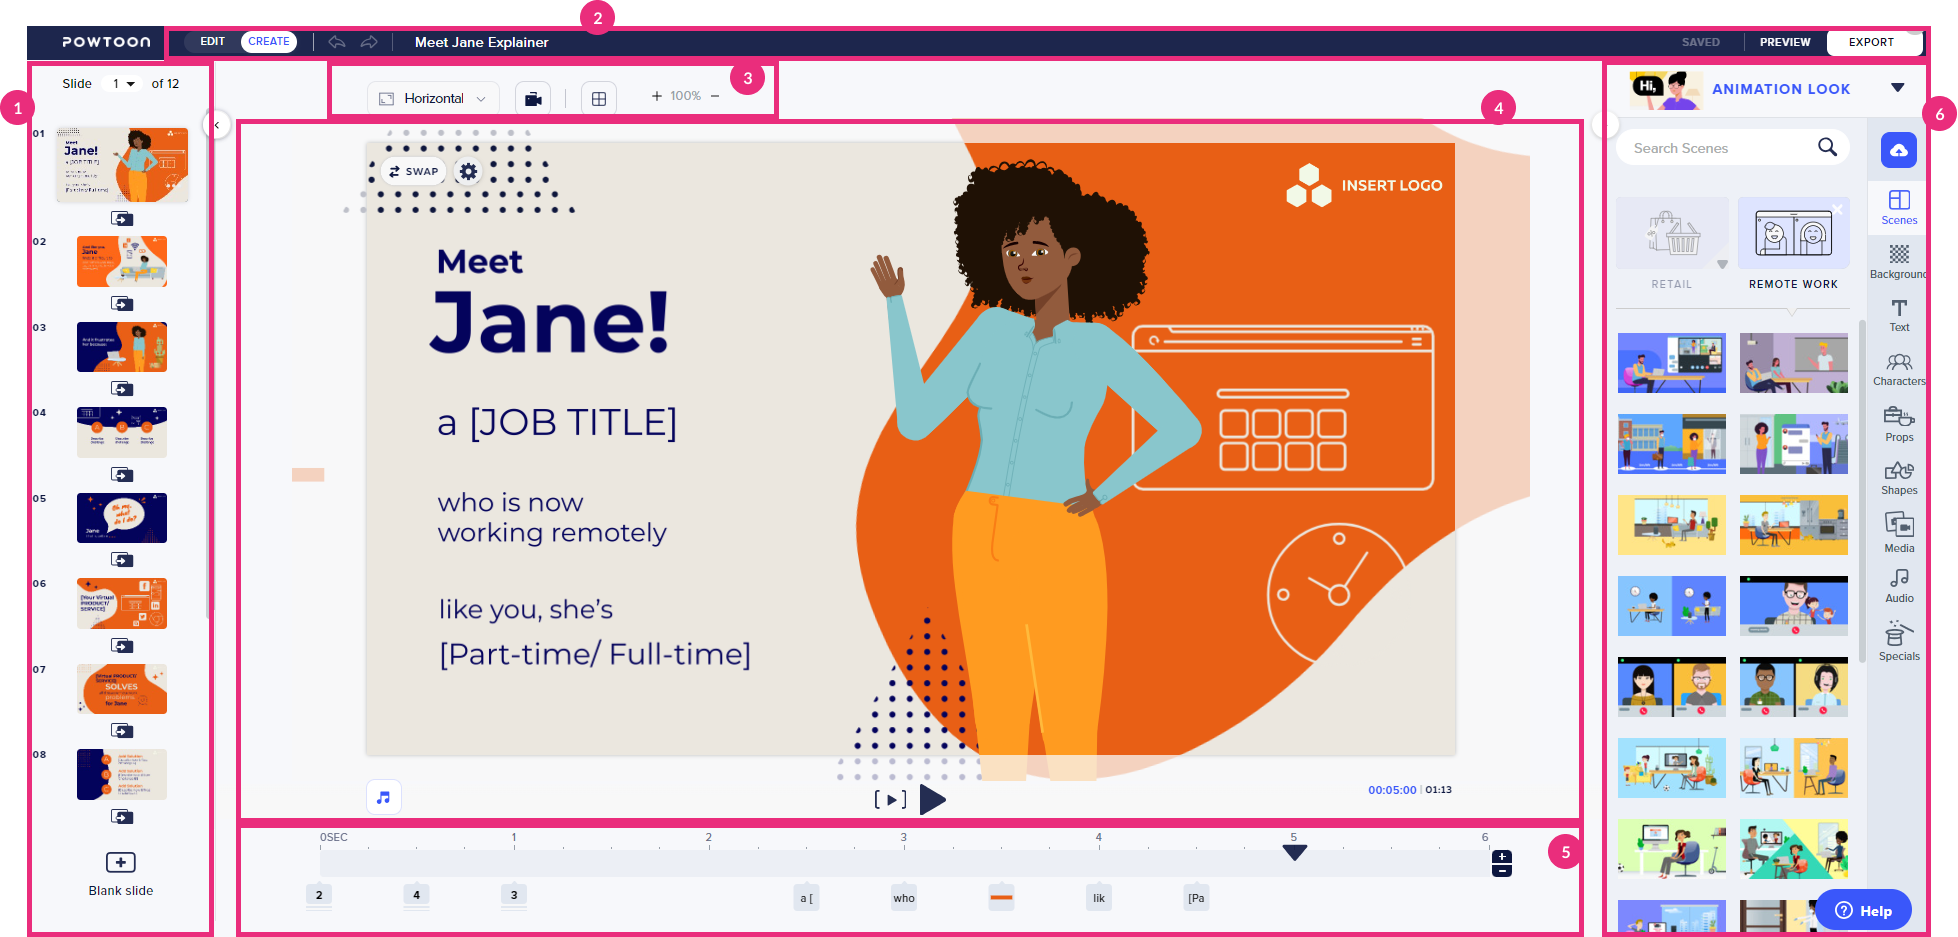
Let's get to know the Powtoon Studio!
Left side slide panel (1) is used to display all the slides in thumbnail view. You can use this view to perform many actions, including adding, deleting, and duplicating slides. You can use a template slide or a blank slide.
Top bar (2) here you will find the Studio Mode toggle. Use this toggle to switch between Edit and Create mode. This gives you basic editing tools such as cut, copy, paste, delete, etc.
- Edit mode provides a streamlined and straightforward workspace, with only the tools best suited for working with templates.
- Create mode includes all the Studio tools and content. The timeline is displayed and all the tabs and libraries can be accessed.
- Undo / Redo
- Preview & Export to preview and export the Powtoon to your Video Portal or KAF applications.
- Save
Stage control (3)
- Set ratio - Horizontal, square, verticle
- Show / Hide Camera
- Grid
- Zoom In / Zoom Out
Stage (4) is the area on which you build your scene using all the content available in Powtoon.
- The play button. Click this button to play the Powtoon from the time at which the playhead is positioned until the end of the Powtoon.
- Click the Sound icon to access the Sound Control panel, used to manage the sound in your Powtoon.
Timeline (5) is used to time all the objects on the slide.
Right side tabs panel (6) The tabs (Scenes, Background, Text, Characters, etc.) are the entry points to all the content in the Powtoon Studio. After selecting a tab, several libraries are displayed with content specific to the tab.
In the following example, clicking the Scenes tab displays the following libraries: Intros, Specifics, Image Grids, Situations, and Concepts.
- Choose a looks for your Powtoon
- Upload your media
- Scenes
- Background
- Text
- Characters
- Props
- Shapes
- Media
- Audio
- Specials
