This article documents the legacy KME Room. For information on the new room, please visit the new Kaltura Room documentation.
Save time finding files during your session by using playlist to organize your files ahead of time. You can add up to 50 items to your playlist at a time.
Add Uploaded Files To Your Playlist
- Click Files.
- Click the Add File button and/or select the file/s you want to share in the live session.
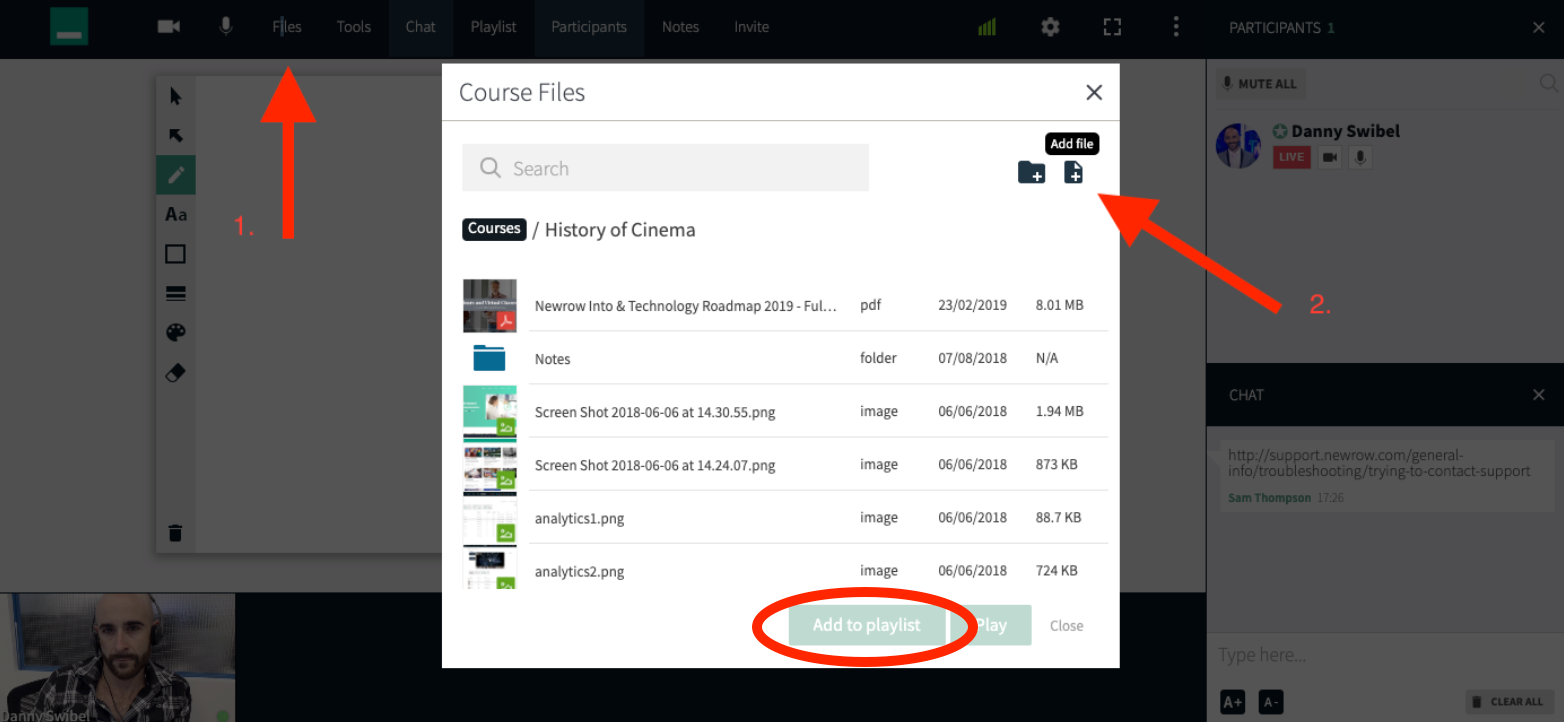
- Click the Add To Playlist button.
💡You are limited to 50 items on the playlist at once. The Add to playlist button will be grayed out or not clickable if you are already at 50. Remove items from the playlist to free up space.
💡Use "Control + Click", "Command + Click", or "Shift + Click" to select multiple files at one time.
Add YouTube Videos To Your Playlist
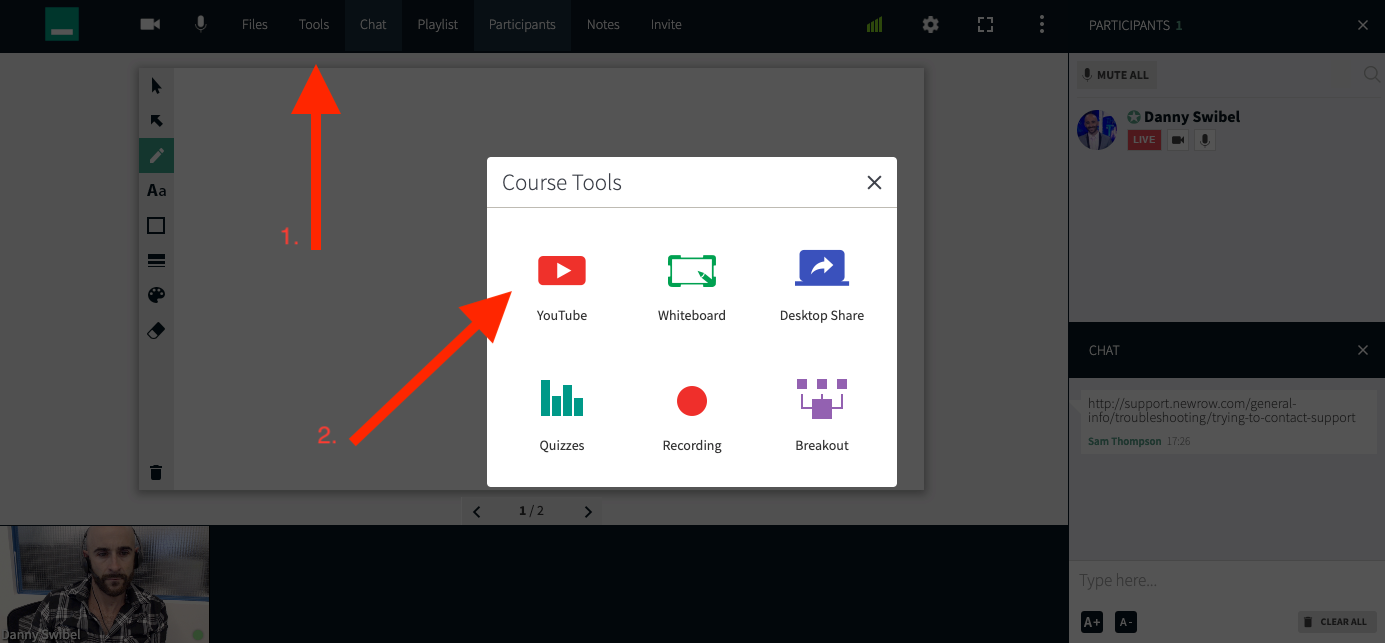
- Click Tools.
- Select YouTube.
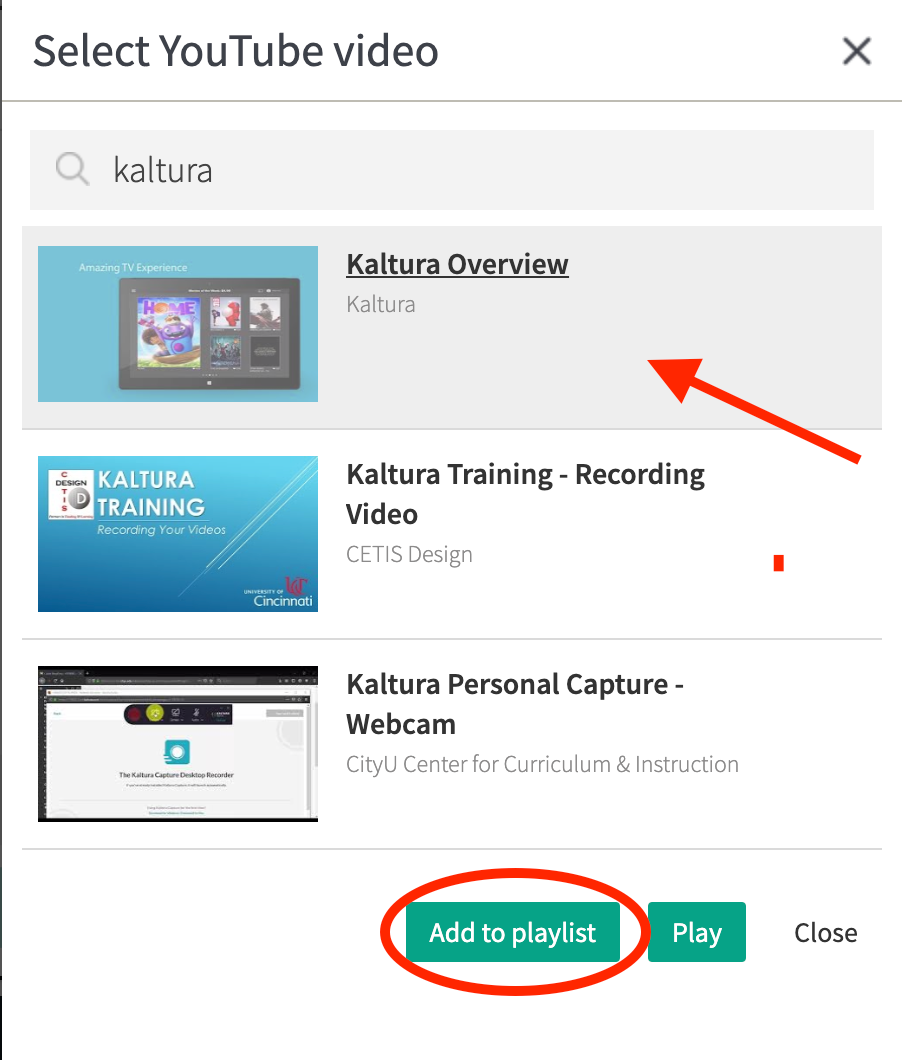
- Search for and select the YouTube videos you want to share.
- Click the Add To Playlist button.
Add My Media/Gallery Videos To Your Playlist
- Click Tools.
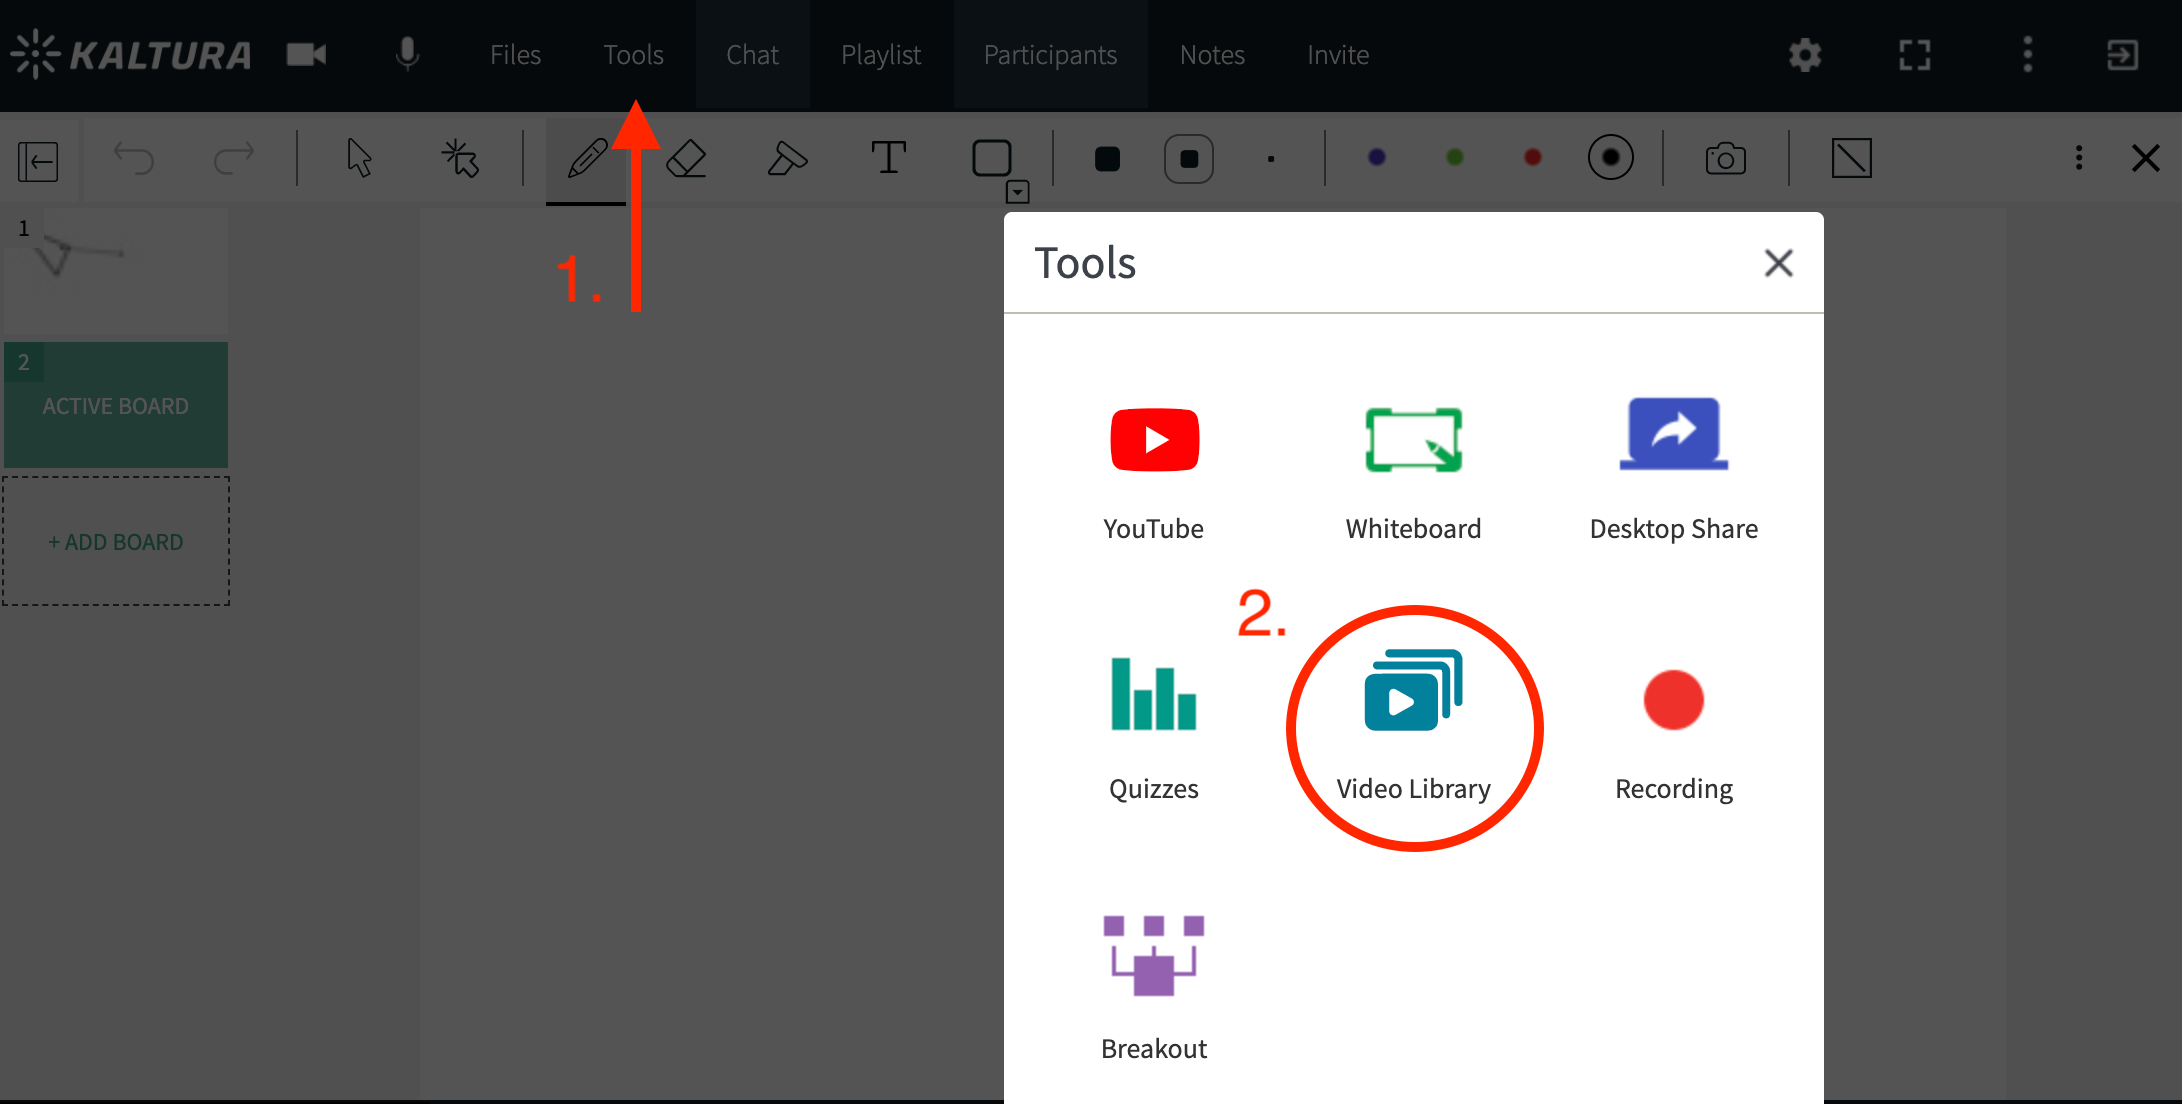
- Select Video Library.
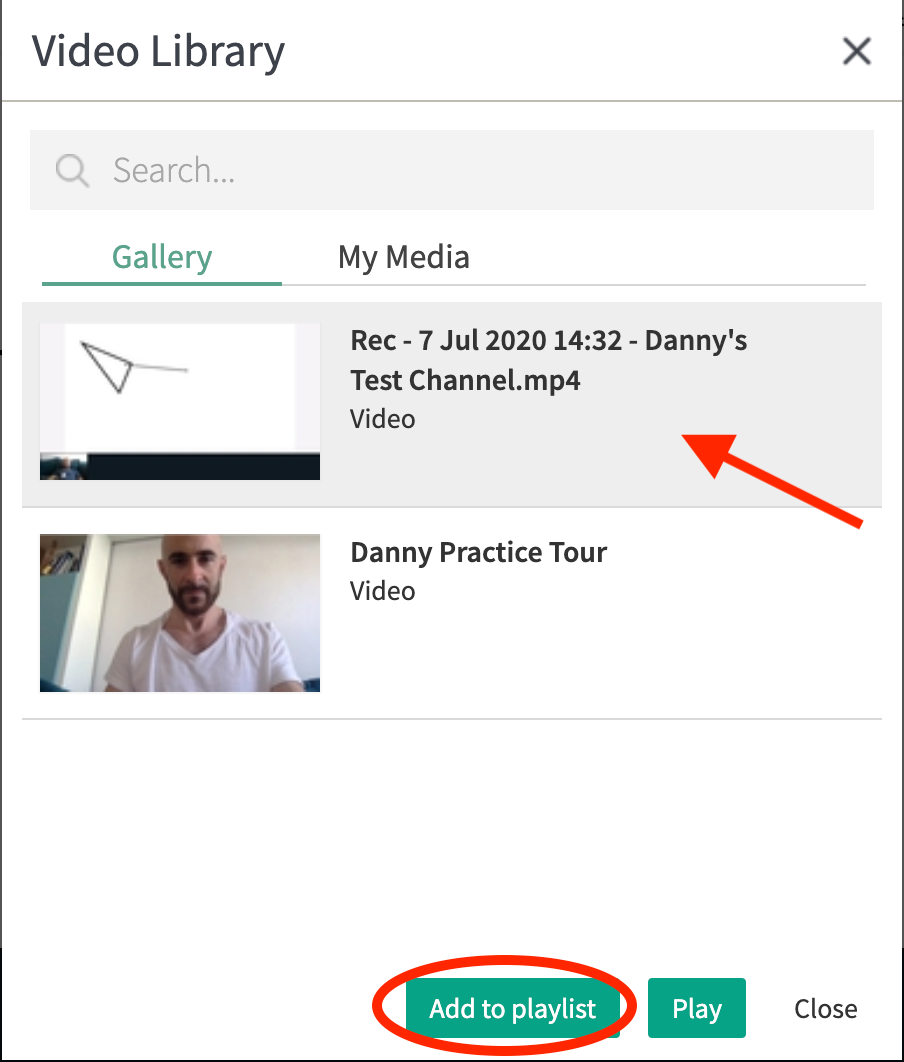
- Search for and select the videos you want to share in Gallery or My Media.
- Click the Add To Playlist button.
View Your Playlist
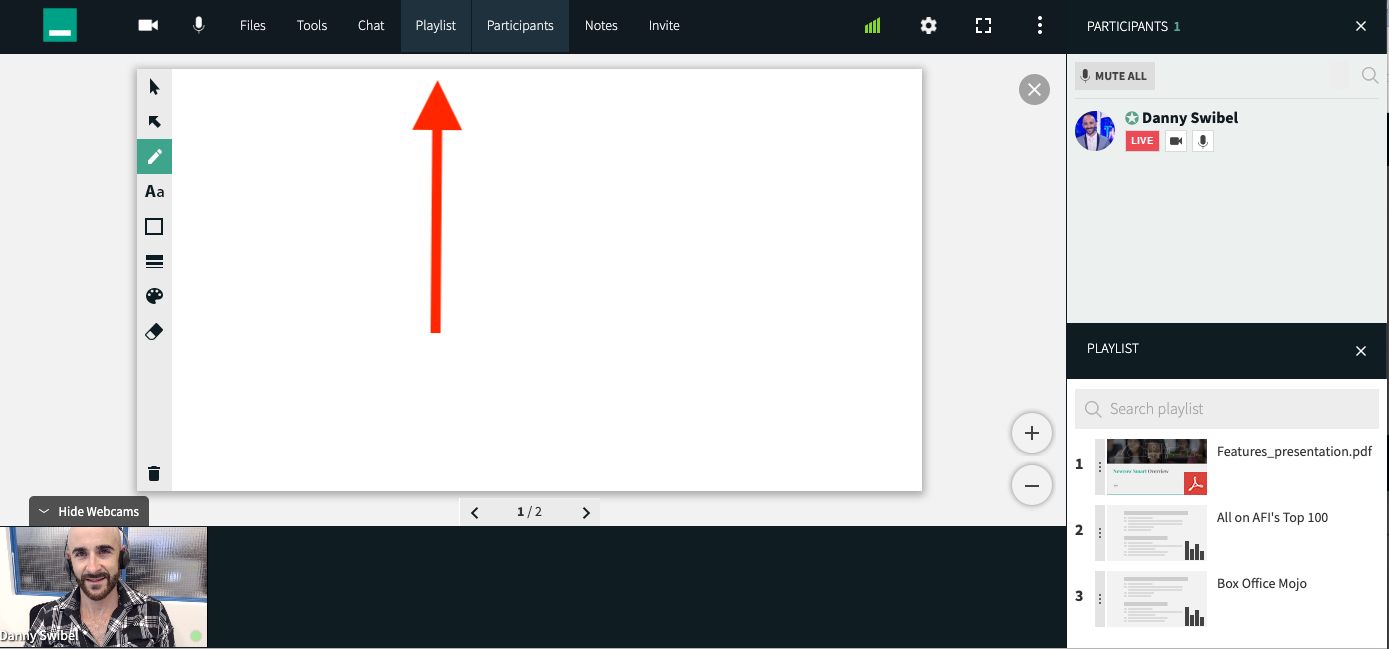
The playlist is only visible to instructors and moderators.
- If the Playlist is hidden, then click Playlist to display the Playlist.
- If the Playlist is displayed, then click Playlist to hide the Playlist.
Organize Your Playlist Content
- Select the item you want to reorder.
- Click and drag to the position you want the item to be in.
- Release the item.
Play Items In Your Playlist
Remove Items From Your Playlist
- Hover your cursor over the item you want to remove.
- Click the x.
💡You can only add 50 items to the playlist at a time, so you will have to remove items before adding others.
Removing a file from the playlist does not delete it. You can still access the file in your files window. YouTube videos are not saved. If you remove a YouTube video from the playlist, you will have to re add the video.


