About
Moderators can use the storyboard in a Kaltura Room to manage and present media during a session. Media added to the storyboard can be presented, previewed, reordered, or removed at any time, making it easy to control the flow of content.
When media is presented, it appears on the stage - the main viewing area that all participants see during the session.
- For instructions on preparing content in advance, see Prepare your storyboard before a session in the Kaltura Room.
- If your slides include notes, see Use speaker notes while presenting slides in the Kaltura Room.
Mobile users, including moderators, can view storyboard content (videos, slides, images, etc.) when it's presented on stage, but cannot add, remove, or control items in the storyboard.
Open the storyboard

The storyboard opens as a horizontal panel at the bottom of the screen.

All media added to the storyboard appears as thumbnails, ready to be presented on stage.
Present content
Locate the desired item on the storyboard and click it.

The item appears for all participants, and the storyboard thumbnail changes to "Presenting".

Note on microphone control
If the item you present includes audio, all microphones are automatically muted when playback starts. To speak while media is playing, see the section Speak while media is playing below.
Storyboard thumbnail behavior
Each item on the storyboard appears as a thumbnail. The thumbnail color changes depending on its state.
- When you hover over an item, the thumbnail turns green and displays “Start presenting.” A preview popup of the media also appears so you can quickly review the content before presenting it.
- When an item is being presented, its thumbnail turns blue and displays “Presenting.”
- If you hover over the item that is currently being presented, the thumbnail turns red and displays “Stop presenting.”


Play videos and audio
You can control playback using the player controls:
- Click the play button or the center of the player screen to pause or resume playback
- Use the progress bar to move forward or backward. As you move the scrubber, a thumbnail preview appears to help you locate a specific moment in the media.
- Hover over the volume icon to adjust audio levels
Participants do not see the storyboard. They only see the content presented on stage, without player controls such as the progress bar or volume.

Speak while media is playing
When you present a video, audio file, or a scene that includes audio, all microphones are automatically muted.
To speak while media is playing:
- Hover over the content area and click Talk over media.
- Click Stop talking to mute your microphone and restore the volume to 100%.
Your microphone is unmuted and the media volume is reduced to 20% for all participants so you can be heard clearly.


Present and annotate documents
When presenting documents such as slides, you can hover over the stage to display a pencil icon, then click it to open annotation tools and zoom controls.

Switch between storyboard items
When multiple items are available, you can switch between them at any time.
- Locate the next item on the storyboard.
- Click Start presenting.

The newly selected item replaces the currently presented content.
Stop presenting content
To end the presentation, click the red Stop Presenting button on upper-right corner of the stage.

You can also click on the file in the storyboard.

Preview items
You can preview storyboard items without presenting them.
- When you hover over an item, a preview popup appears showing the content.
- You can also hover over the next or previous arrows to preview upcoming or previous items.
- If the storyboard is collapsed, you can still preview upcoming or previous items by hovering over the arrows.


The preview closes automatically when you move your cursor away.

Target active content
If you scroll through the storyboard and the currently presented content is no longer visible, the target active content button appears at the far right of the storyboard.

Clicking this button automatically scrolls the storyboard so the active item becomes visible again. This makes it easier to manage the content currently shown on stage.
Remove files from storyboard
- Hover over the thumbnail of the file you want to remove.
- Click the X in the top right corner.
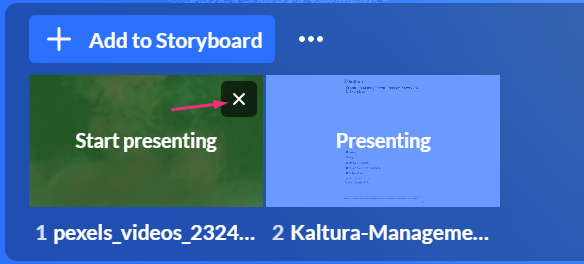
The file is removed.
Removing a file from the storyboard does not delete it from the media library.
Rearrange files
You can change the order of items in the storyboard.
- Click and drag the file to the position you want.
- Release the file.
The new order is saved automatically.
Clear storyboard
- On the storyboard, next to the Add to storyboard button, click the three dots.
- From the menu that opens, select Clear Storyboard.
- Click Clear. All items are removed from the storyboard.


A confirmation displays: Are you sure you want to clear the storyboard?
