About
Marketo integration for Kaltura Webinars allows you to receive and sync data on your webinar registrants and attendees from Kaltura to your Marketo account.
Kaltura Marketo integration supports program based leads. Each registrant is sent to Marketo as a lead with their registration information which can be later updated with their attendance and engagement data.
To connect your Kaltura account to Marketo you will first need to create an integration on your account level and then you can connect it to the different webinars you or your colleagues create.
Before you start
Marketo needs to be set up with the channel, program, custom activity mapping and API user. Follow https://knowledge.kaltura.com/help/kaltura-data-sharing-connector-for-adobe-marketo to create and validate the setup in Marketo.
For the first integration you create you will need your Marketo account’s API endpoint domain, Client ID, and Client Secret. Be certain you have them before starting
For each webinar registration form, you will map the fields to your Marketo lead record.
Make sure you map ALL the required fields on your Marketo lead form so that leads will be submitted successfully.
Integration settings
There are two levels of integration settings on Kaltura Webinars.
- Account Level
- Webinar Level
Account level
The account level may be set up so that you can connect different webinars to use for the Marketo integration.
Set up the Marketo integration on the account level
Each integration needs to map the registration form fields to the lead records on Marketo.
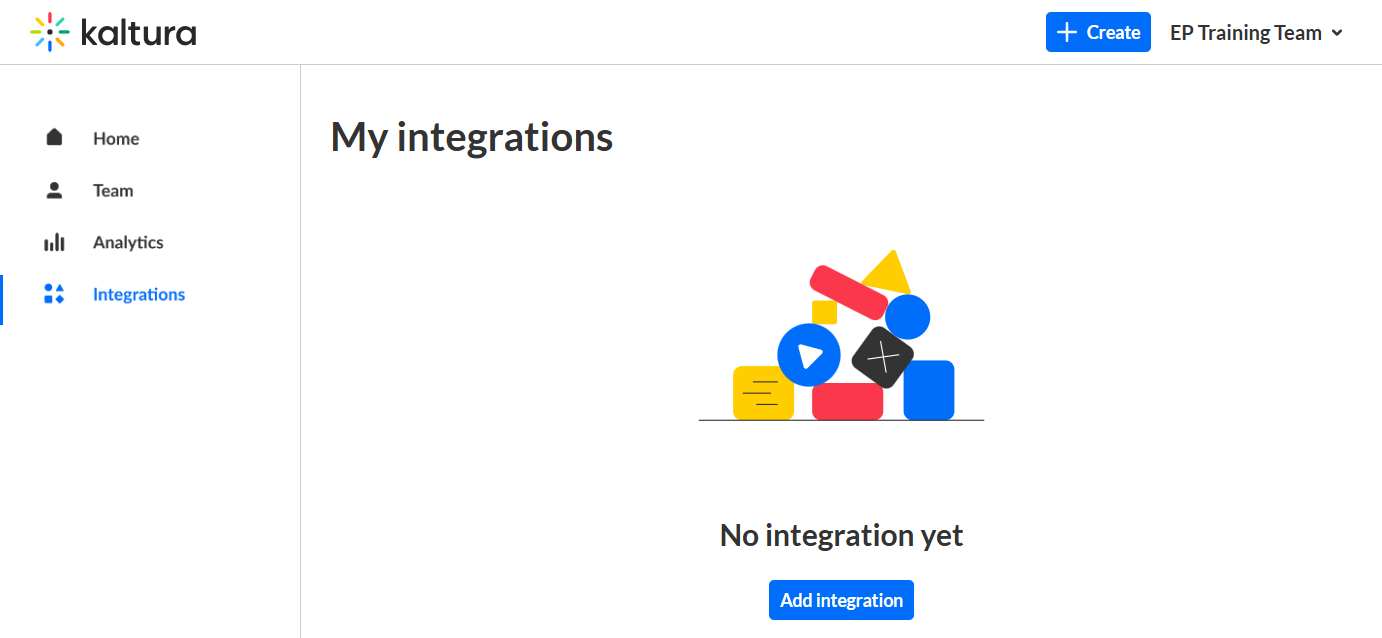
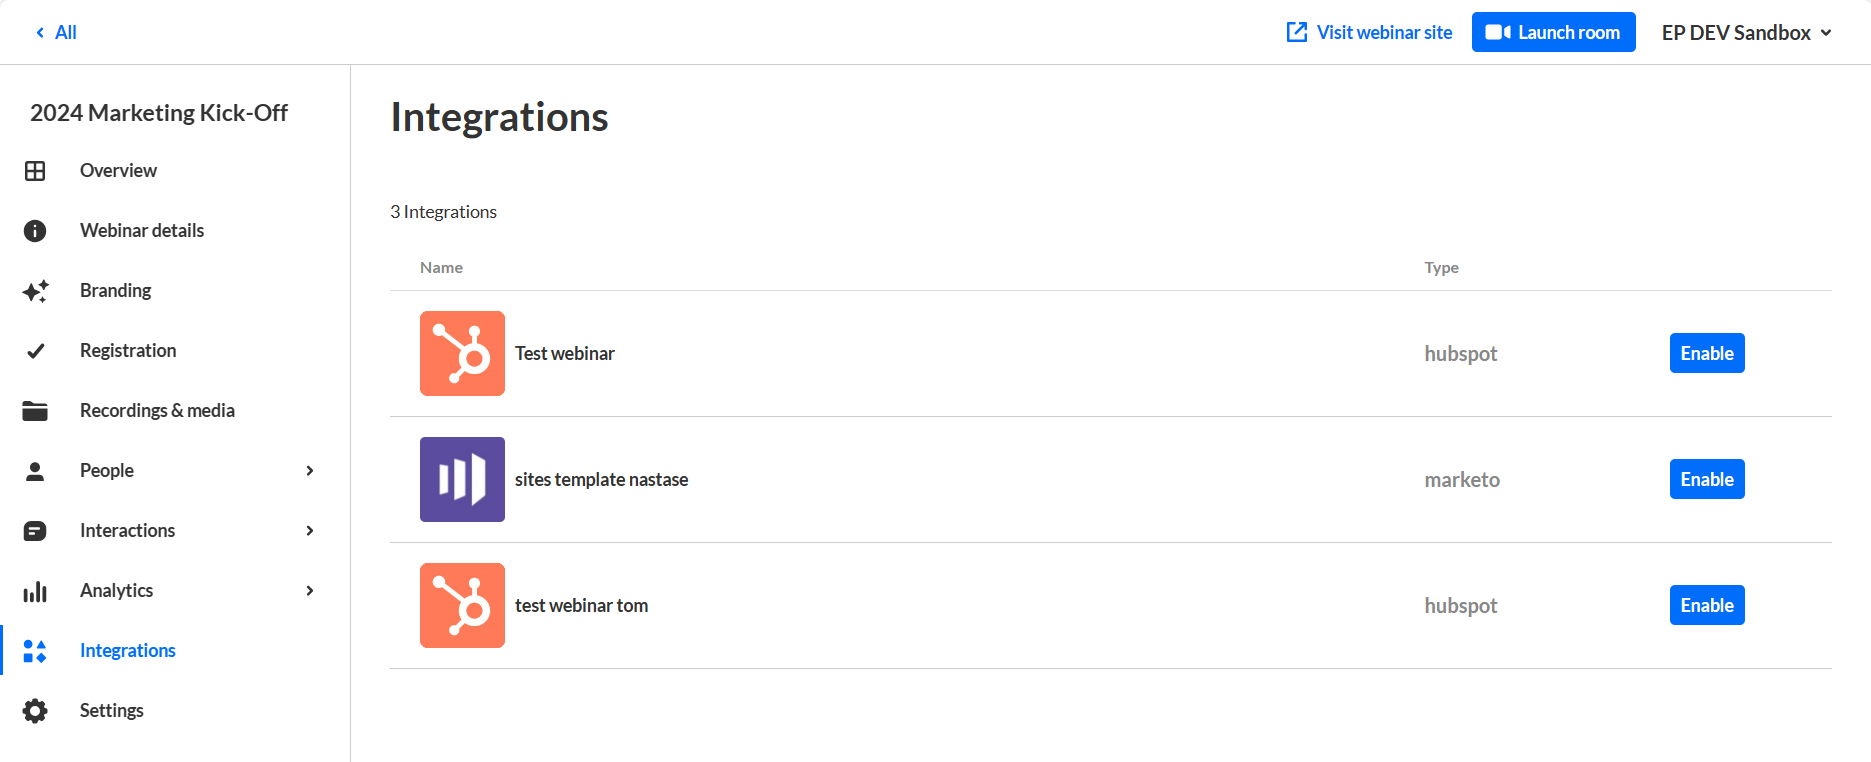
- On the Kaltura Webinars screen navigate to the Integrations tab.
- Click Add Integration. The first time you view this tab, the list is empty. A list of other existing integrations that were created for this account/partner are displayed after subsequent use.
 The New Integration window is displayed.
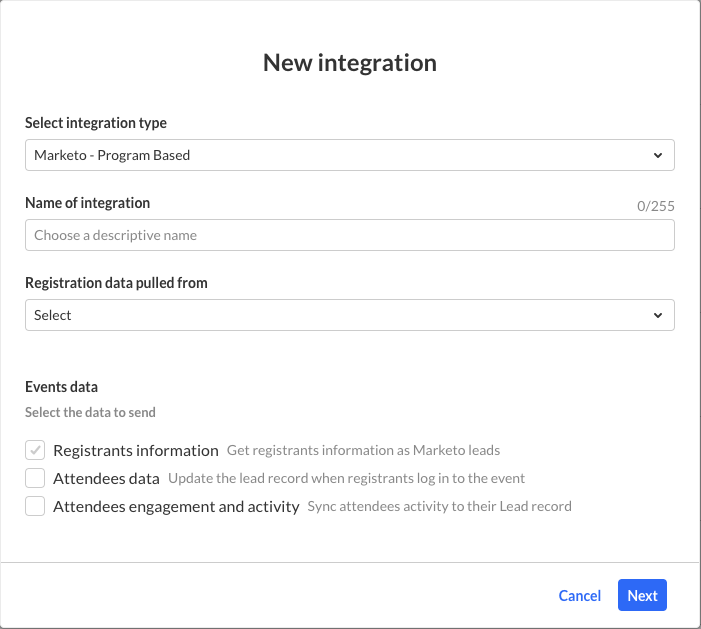
- Select integration type, Marketo
- Enter a Name for the integration. We recommend using a descriptive name, for example Webinar Marketo Integration.
- In Registration data pulled from pull-down list, select Webinar.
- Select the Kaltura Webinars Data you would like to send to Marketo
- Registrants Information - (lead or registrants information) Checked by default to get registrants information as Marketo leads. The registrant information is mandatory. That is the part that creates the lead in Marketo.
- Attendees Data - Check to update the lead record that was created when registrants login to the webinar. The lead record is updated with the attendants information.
- Attendees Engagement and Activity - Check to be able to sync attendees activities to their lead record. This process is manual. When the session is over and webinar organizers want to obtain attendees' engagement information they may click Sync Engagement Data to update the lead with their engagement data such as viewing rate or reactions.
- Click Next.
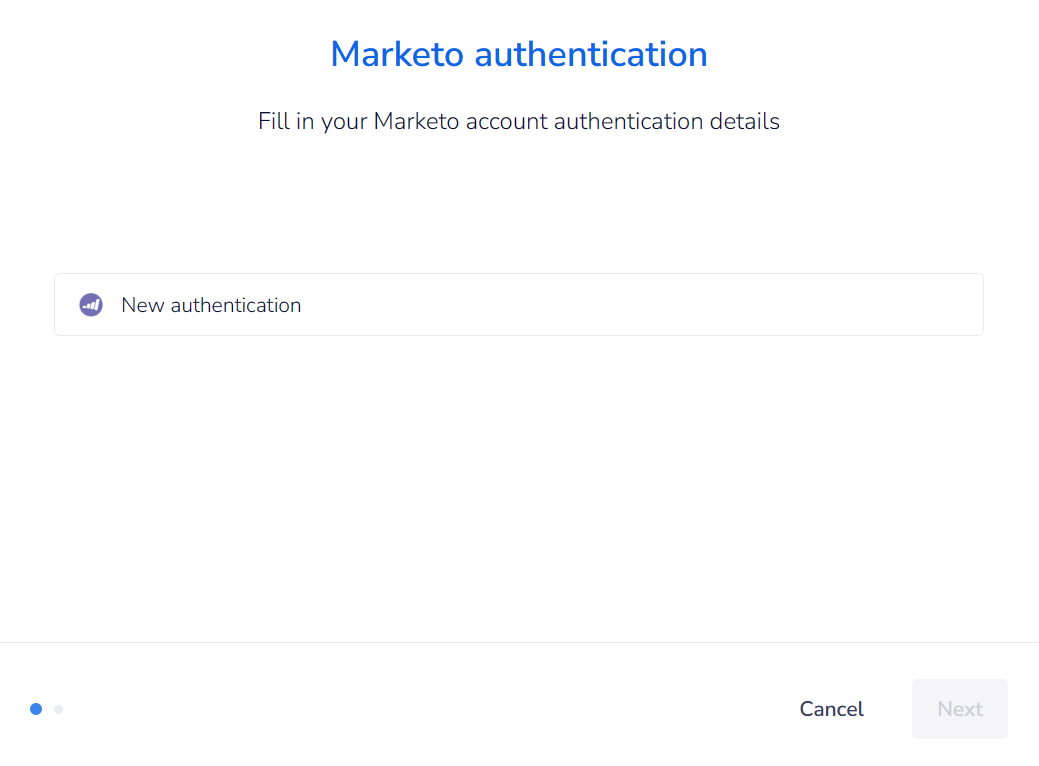
- Click New authentication and enter your Marketo account authentication details (API endpoint domain, Client ID, and Client Secret). This is done once, and then your account will be auto selected and you can just click Create.
- Map the different fields on Kaltura registration form to Marketo Lead fields.
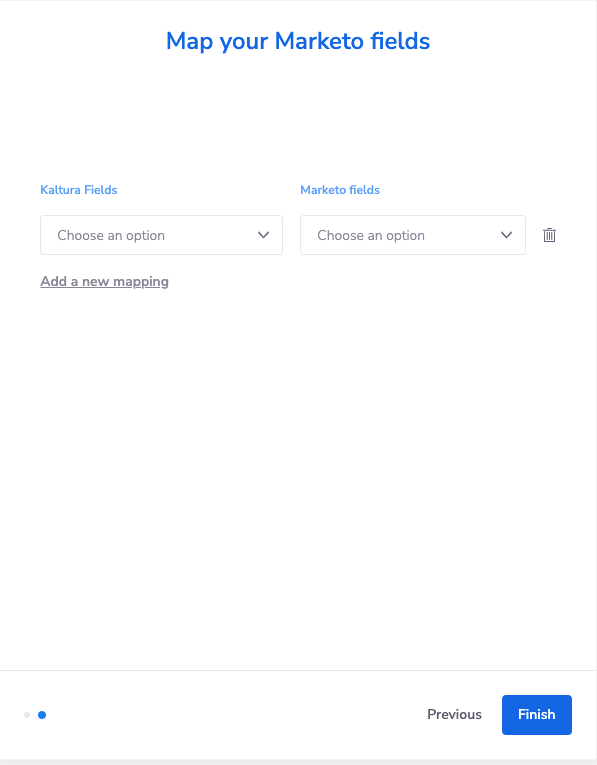
For example, first name, last name, email, and company. These fields must be mapped to a Marketo record. - Click Finish.
 The New Integration window is displayed.


Marketo has required fields that Kaltura must be aware of so the leads will be submitted successfully. The admin needs to make sure Marketo required fields are mapped to Kaltura fields.
The new integration is displayed.

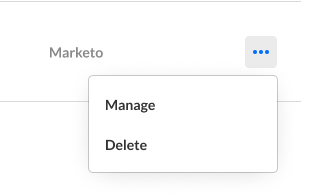
You can then manage the integration in case you need to edit the information or delete it completely.
Deleting an integration is only available if the integration is not yet enabled on a webinar.
Other integrations will eventually be added, and the screen will display multiple integrations.
Only Active integrations may be enabled on webinars. If an integration is disabled - you may have missing information on the integration, such as incomplete field mapping.
Note: Integrations are not enabled until you enable the integration per webinar. This process sets the grounds for the webinar manager/organizers to turn it on.
Webinar level
To setup a Kaltura Marketo integration for a specific webinar
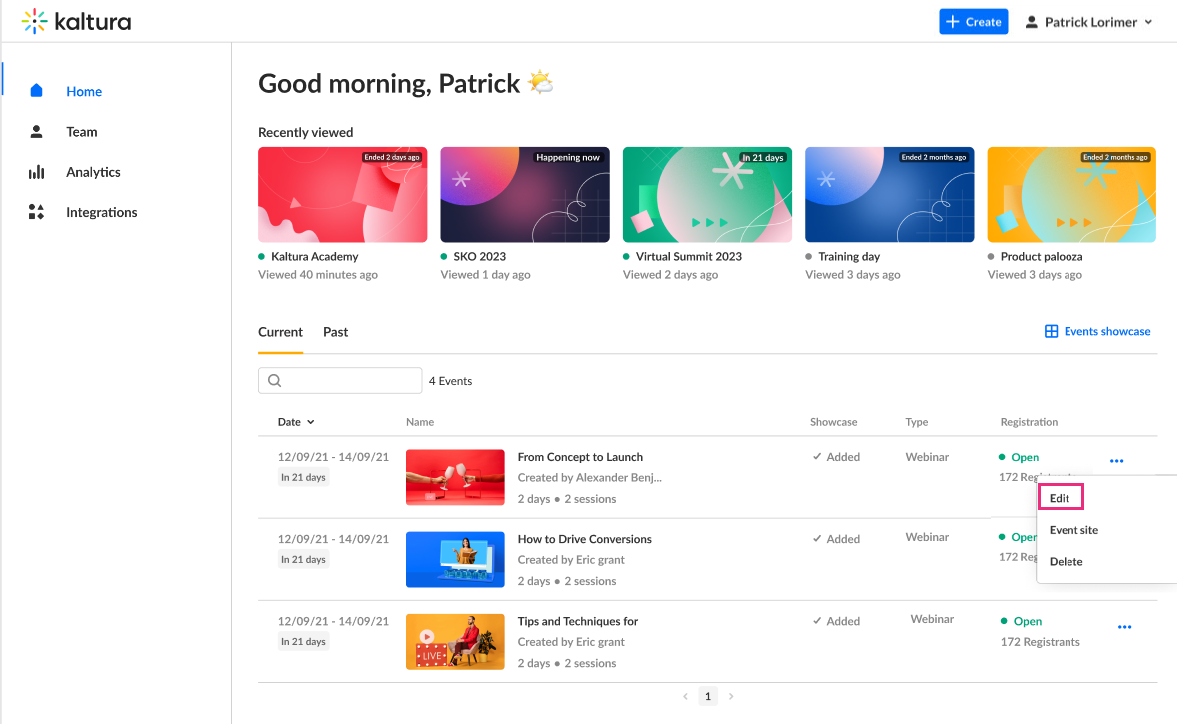
- From the event/webinar list, Select Edit from the actions menu to edit the webinar to which you would like to add the integration.
 The Webinar site displays.
 - On the Kaltura Webinar screen navigate to the Integrations tab.
- Click Enable.
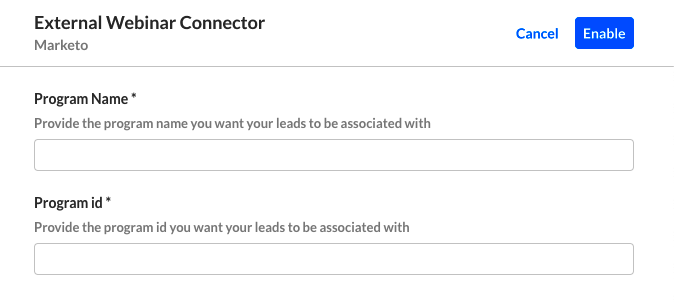
- Enter the Program Name and Program id. This will associate the leads to their relevant program on Marketo.
Program Name must be the exact name from Marketo. For instance, the Program Name in the image below is 'External Webinar Connector'. The Program id must only include numbers. You can find the Program id in the URL when you have the program selected in Marketing Activities. It is the first contiguous set of numbers after the hash in the URL. For instance, the Program id is 2459 in the URL 'https://app-sj01.marketo.com/#PG2459A1'.
 Click Enable.
 The Webinar site displays.
 Click Enable.
Manage or sync engagement data
After the integration is enabled you may Disable, Manage or Sync engagement data.
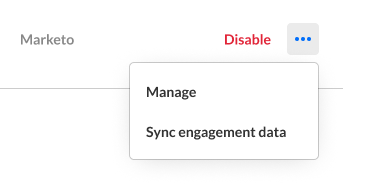
- Click Disable to disable an integration. Disabling an integration stops the data synchronization to Marketo
- Click Manage to edit the additional info / Marketo identifiers (e.g., campaign/program ID) for this webinar.
- Click Sync engagement data - to send attendees engagement data and update the lead with additional insights once the webinar is over.
For more information about the Marketo Integration, see Kaltura Data Sharing Connector for Adobe Marketo.
