About
Breakout rooms are a great tool for dividing participants into smaller groups. They enhance collaboration in activities like workshops, group assignments, or focused discussions. This article guides you on how to set up breakout rooms.
Create breakout rooms
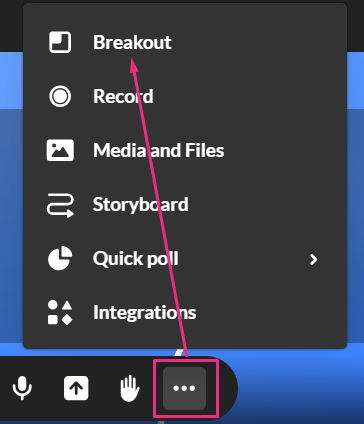
- Click the three dots on the bottom toolbar and select Breakout.

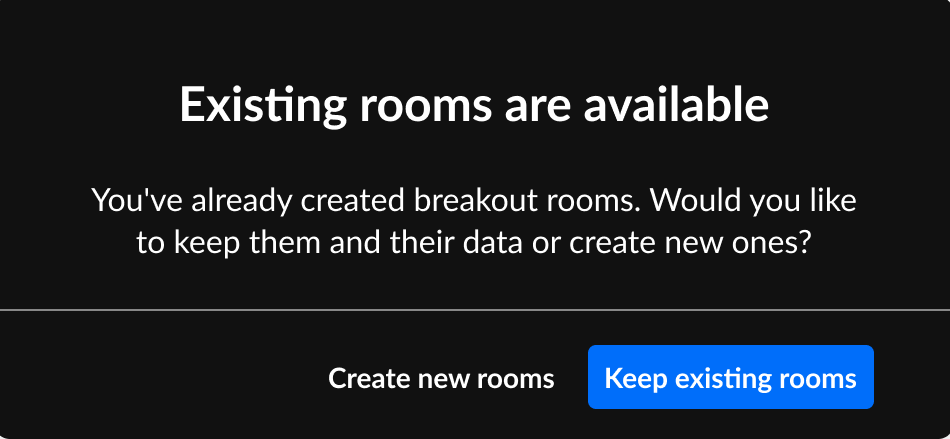
If you have already created rooms, a pop-up will ask if you'd like to use your existing rooms or create new rooms:

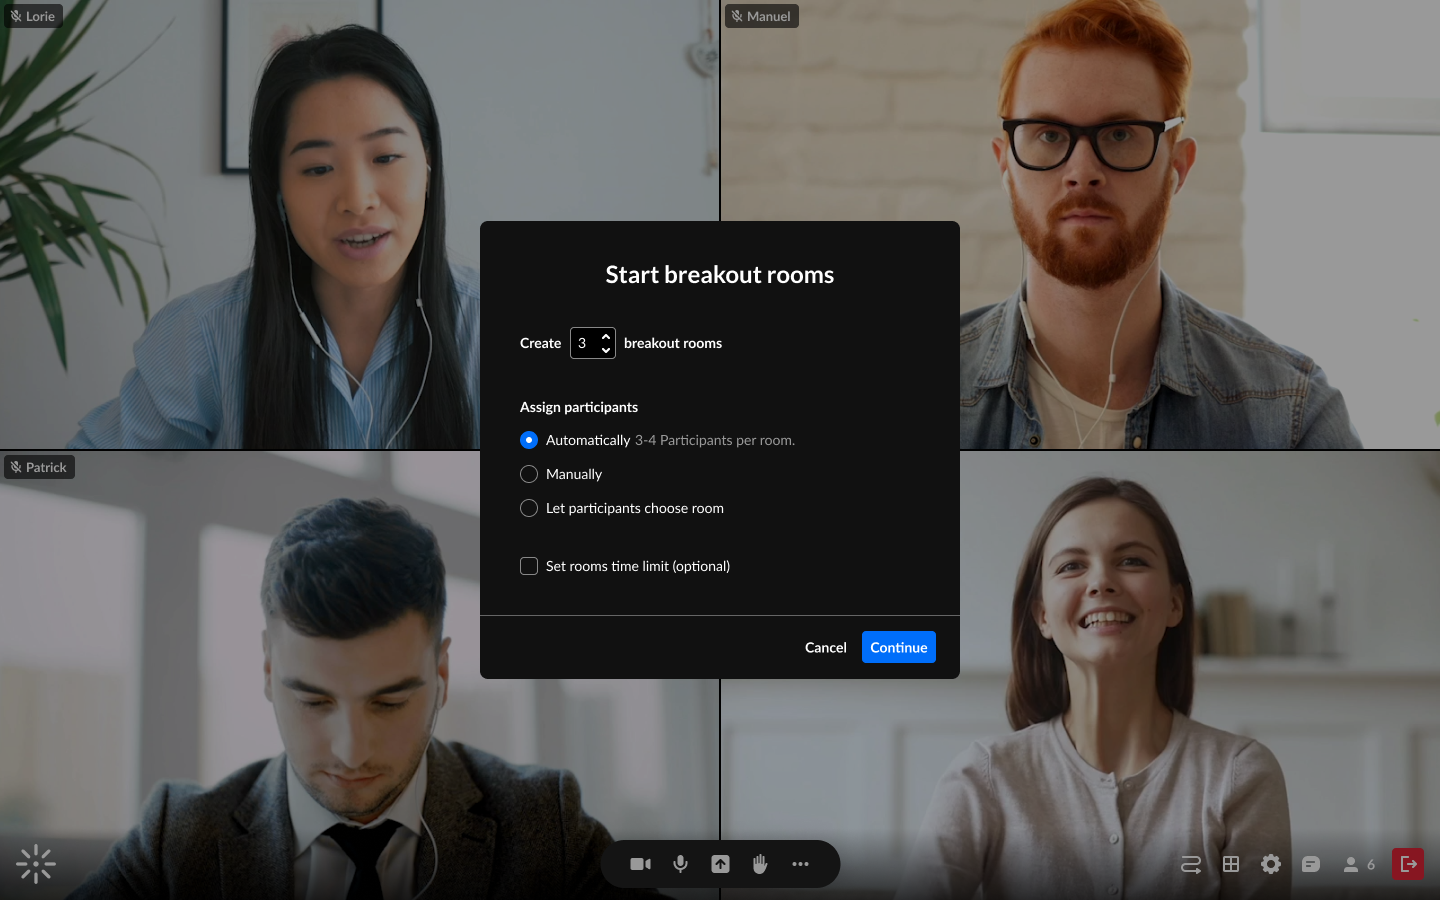
When creating new rooms, you'll see the Start breakout rooms window display with options to:
- Set number of breakout rooms - up to 15 rooms
- Assign participants - up to 50 participants per room
- Set rooms time limit (optional) - after the time limit, the breakout rooms close and all participants are sent back to the main room.

Breakout rooms dashboard
The dashboard is where you can prepare and manage your breakout session. Here you can add, rename and delete rooms, as well as assign participants in a variety of ways, among other functions.

Search participants (1) - Typing two or more characters triggers a search for participants in relevant rooms. Rooms with matching participants will show up.
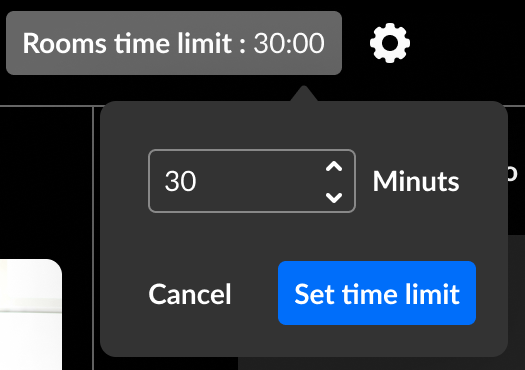
Time limit (2) - Time will display if set in the Start breakout rooms window. You can click on the text to adjust the time limit.
Settings menu (3) - When clicked, displays a drop-down menu with options to enable / disable a time limit, as well as set permissions for all participants regarding the breakout rooms.
Close dashboard (4) - Click to exit the window.
Start breakout (5) - Click to launch the session and start the timer.
Main room panel (6) - Displays the count and names of participants in the main room, along with the stage view. Hosts are automatically included in the main room list.
Shuffle (7) - Randomly re-assigns participants to different rooms.
Move to next room (8) - This activates a "Round Robin" switch, moving participants sequentially from one room to the next. This is useful, for example, when hosts want to distribute topics among rooms with participants covering all topics.
Breakout rooms panel (9) - This displays the names and number of the participants in each room*, as well as an + Add Room button on the top right to add more rooms.
*The list of participants in each room is initially based on how you set them up in the Start breakout rooms window. However, you can also reassign participants by dragging their names, individually or by multi-selection, into different rooms.
You can also change the room's name or delete a room by hovering over a breakout room, and clicking the three dots menu. A drop-down menu gives options to rename or delete a room.
Assign Automatically or Gather back everyone (10) - The button changes based on where participants are: In the main room, it displays "Assign Automatically" to send them to breakout rooms. In breakout rooms, it shows "Gather back everyone" to return them to the main room.
Launch breakout rooms
Once you have set up your breakout rooms, click Start Breakout at the top of the dashboard to launch the session. All users assigned to breakout rooms will see a countdown message to join their rooms. Users assigned to the main room will have the choice to enter one of the breakout rooms or to click the X to remain in the main room.
Next up, visit Manage breakout rooms.

