About
This guide explains how to upgrade to the Kaltura LMS Video integration version 4.2.6 for Moodle 3.x.
Before you start
If you’re upgrading a client site:
- For Moodle 2.5, you must have Kaltura release 3.1.02 (RL: 2.6.1.1) with build 2014010901 or 2014102105.
- For Moodle 2.6, you must have Kaltura release 3.1.02 (RL: 2.5.1.7) with build 2013071808 or 2014102106.
To confirm your current version, see Verify version on Moodle (below).
Mandatory steps
To access your KAF instance Admin Console from within your Moodle site
- Go to Site administration > Plugins > Local plugins > Kaltura package libraries and click the URL at top of the page:
- In the Categories module, set the rootCategory field to the category you created in the KMC.

- Do not change this root category after configuration.
- The name can be changed in the KMC - it will update automatically in the KAF Admin Consol

Pre-upgrade tasks
Complete the following before upgrading to version 4.2.6:
To begin the upgrade process
- Create a backup of your Moodle 3.x database.
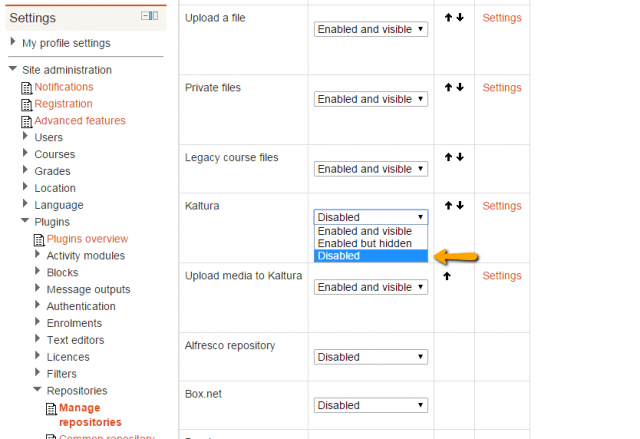
- Disable the Kaltura repository plugin.
- Login as administrator.
- Go to Settings > Site Administration > Plugins > Manage repositories.
- Set Kaltura to ‘Disabled.
- Delete the following folders from the Moodle folder:

- local/kaltura
- local/mymedia
- mod/kalvidres
- mod/kalvidpres
- mod/kalvidassign
- repository/kaltura
- filter/Kaltura
Known issues and limitations
- Entries shared with multiple courses in V3 may not be migrated properly when running on PHP versions below 5.3.29.
- Video presentation resources may be migrated incorrectly if the video was also added via TinyMCE.
- Migration may exceed the KMC 32 category limitation. This limit can only be temporarily adjusted by Kaltura Customer Care. Contact Support to schedule downtime and adjust the limit during migration. The limit should be reapplied once migration is complete.
Upgrading process
To upgrade to version 4.2.6
- After copying the Moodle 4.x code into your web server, copy the additional Kaltura modules. See Kaltura LMS Video for Moodle installation guide, and use your current Kaltura credentials.
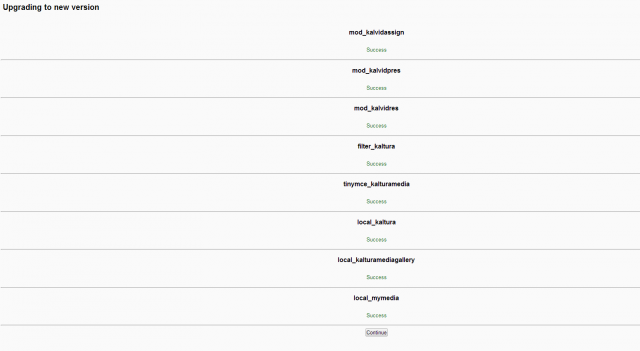
- Click ‘Upgrade Moodle database now’ to install the new package.
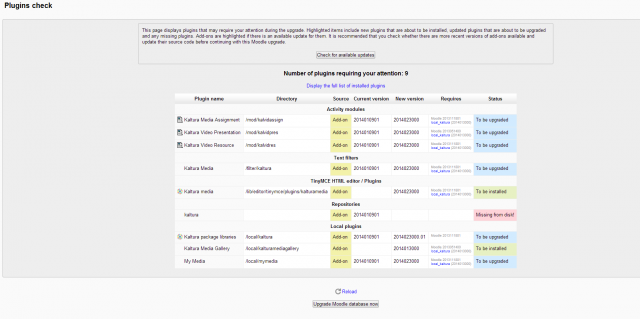
- Review the upgraded modules and click ‘Continue’:
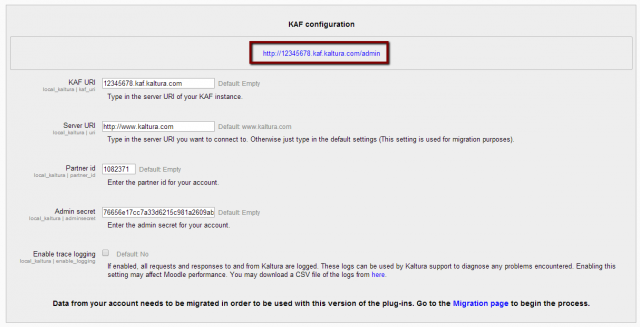
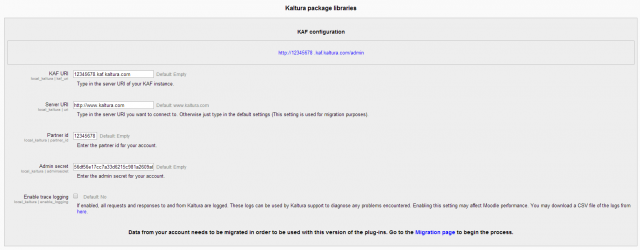
- After the upgrade completes, insert the KAF URI in the Kaltura package libraries configuration.
Please make sure the KAF URI does not include http:// prefix and that it does not end with any trailing slashes (‘/’). - for example: “http://12345678.kaf.kaltura.com” and “12345678.kaf.kaltura.com/” are incorrect formats.
- Click Save Changes.
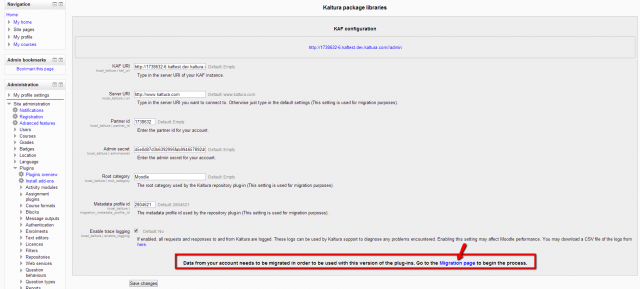
- Go back to: Site administration > Plugins > Local plugins > Kaltura package libraries and verify that your account details appear correctly:
- To start the migration of content, click on the link at the bottom of the Kaltura package libraries page:
- On the Data migration page select a KAF category to migrate to and click Start. This should be the category selected on your KAF instance. For more details, please refer to the Kaltura LMS integration for Moodle setup guide.
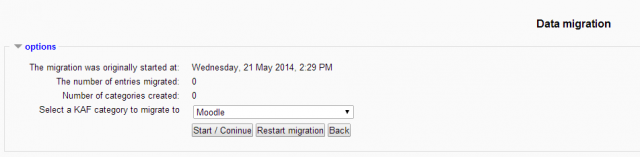 A confirmation message is displayed once migration is complete..
 - Click Continue.


 A confirmation message is displayed once migration is complete..
Post upgrade checks
- Ensure all of your assignments, video resources and presentations are located in the correct courses and that all of the videos play without any issues.
- Ensure video assignments grades are kept intact.
Content migration details
V3 entries that were shared with the site will be transferred to Shared Repository category.
- V3 entries that were shared with course will be transferred to Kaltura Media Gallery of the specific course.
- V3 entries that were added by a specific user will be displayed on user’s My Media page on V4.
- Kaltura video resources / assignments / presentations will be available at the same path they were on V3.
- Users, credentials and courses names will stay the same as they were on V3.
Verify version on Moodle
To verify the Kaltura Video Package Version on Moodle
- Log into your Moodle site as an administrator.
- Go to: Site administration > Plugins > Plugins overview.
The following Kaltura plugins should appear:
|
Plugin name |
Source |
Version |
|
Kaltura Media Assignment |
Add-on |
2017062132 |
|
Kaltura Video Resource |
Add-on |
2017062132 |
|
Kaltura Media Gallery (block) |
Add-on |
2017061432 |
|
Kaltura Media (filter) |
Add-on |
2017062132 |
|
Embed Kaltura Media (atto) |
Add-on |
2017062132 |
|
Kaltura media (tinymce) |
Add-on |
2017062132 |
|
Kaltura package libraries |
Add-on |
2017062132 |
|
My Media (local_mymedia) |
Add-on |
2017062132 |
|
Kaltura Media Gallery (local) |
Add-on |
2017062132 |
