About
Kaltura's Teams integration enables you to effortlessly upload and archive your Teams recordings, ensuring everything stays neatly organized in one centralized location.
The integration supports both scheduled Teams meetings and ad-hoc session recordings.
As the owner and host, you'll retain full control and enjoy easy collaboration with co-hosts.
Before you start
- A paid Microsoft Teams account
- A registered Azure app (enabled in your tenant)
- Rich Media CMS account and access
- Teams integration service enabled in Kaltura (paid service)
Each Teams account can be linked to only one Kaltura account.
Step 1 - Set up Azure account
Request permissions
- Navigate to the Microsoft Azure portal and sign in with your Azure account credentials.
- In the Azure Portal's left-hand menu, click Azure Active Directory.
- Under Manage, click App registrations.
- Click +New Registration.
The Register an application page displays. - In the Name field, type in a name, for example, 'Kaltura Teams Integration'.
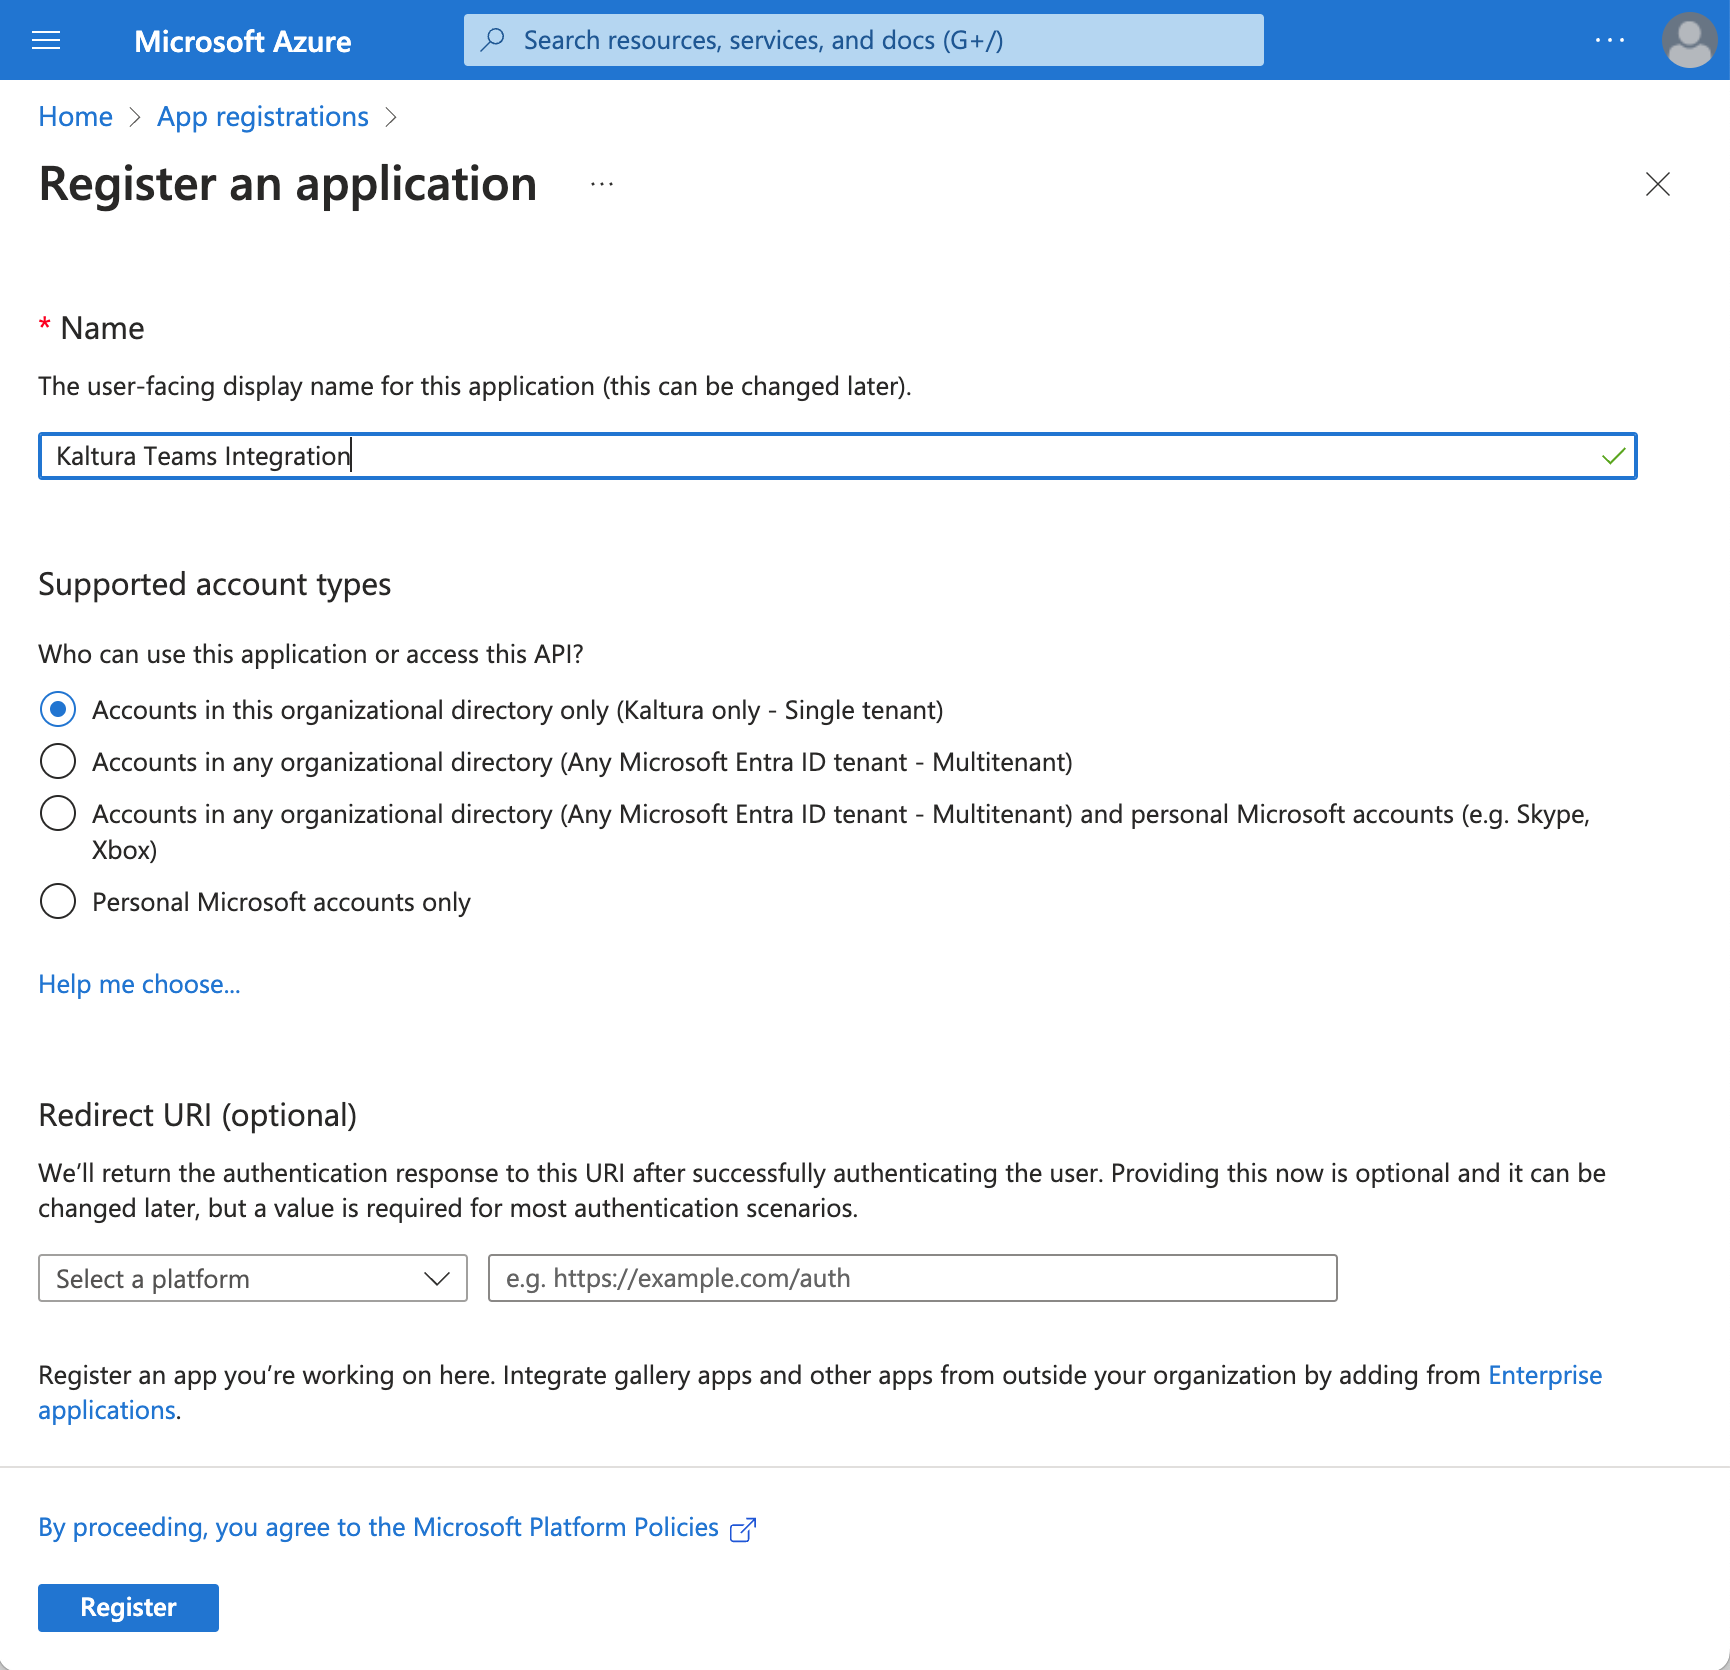
- At the bottom of the page, click Register.
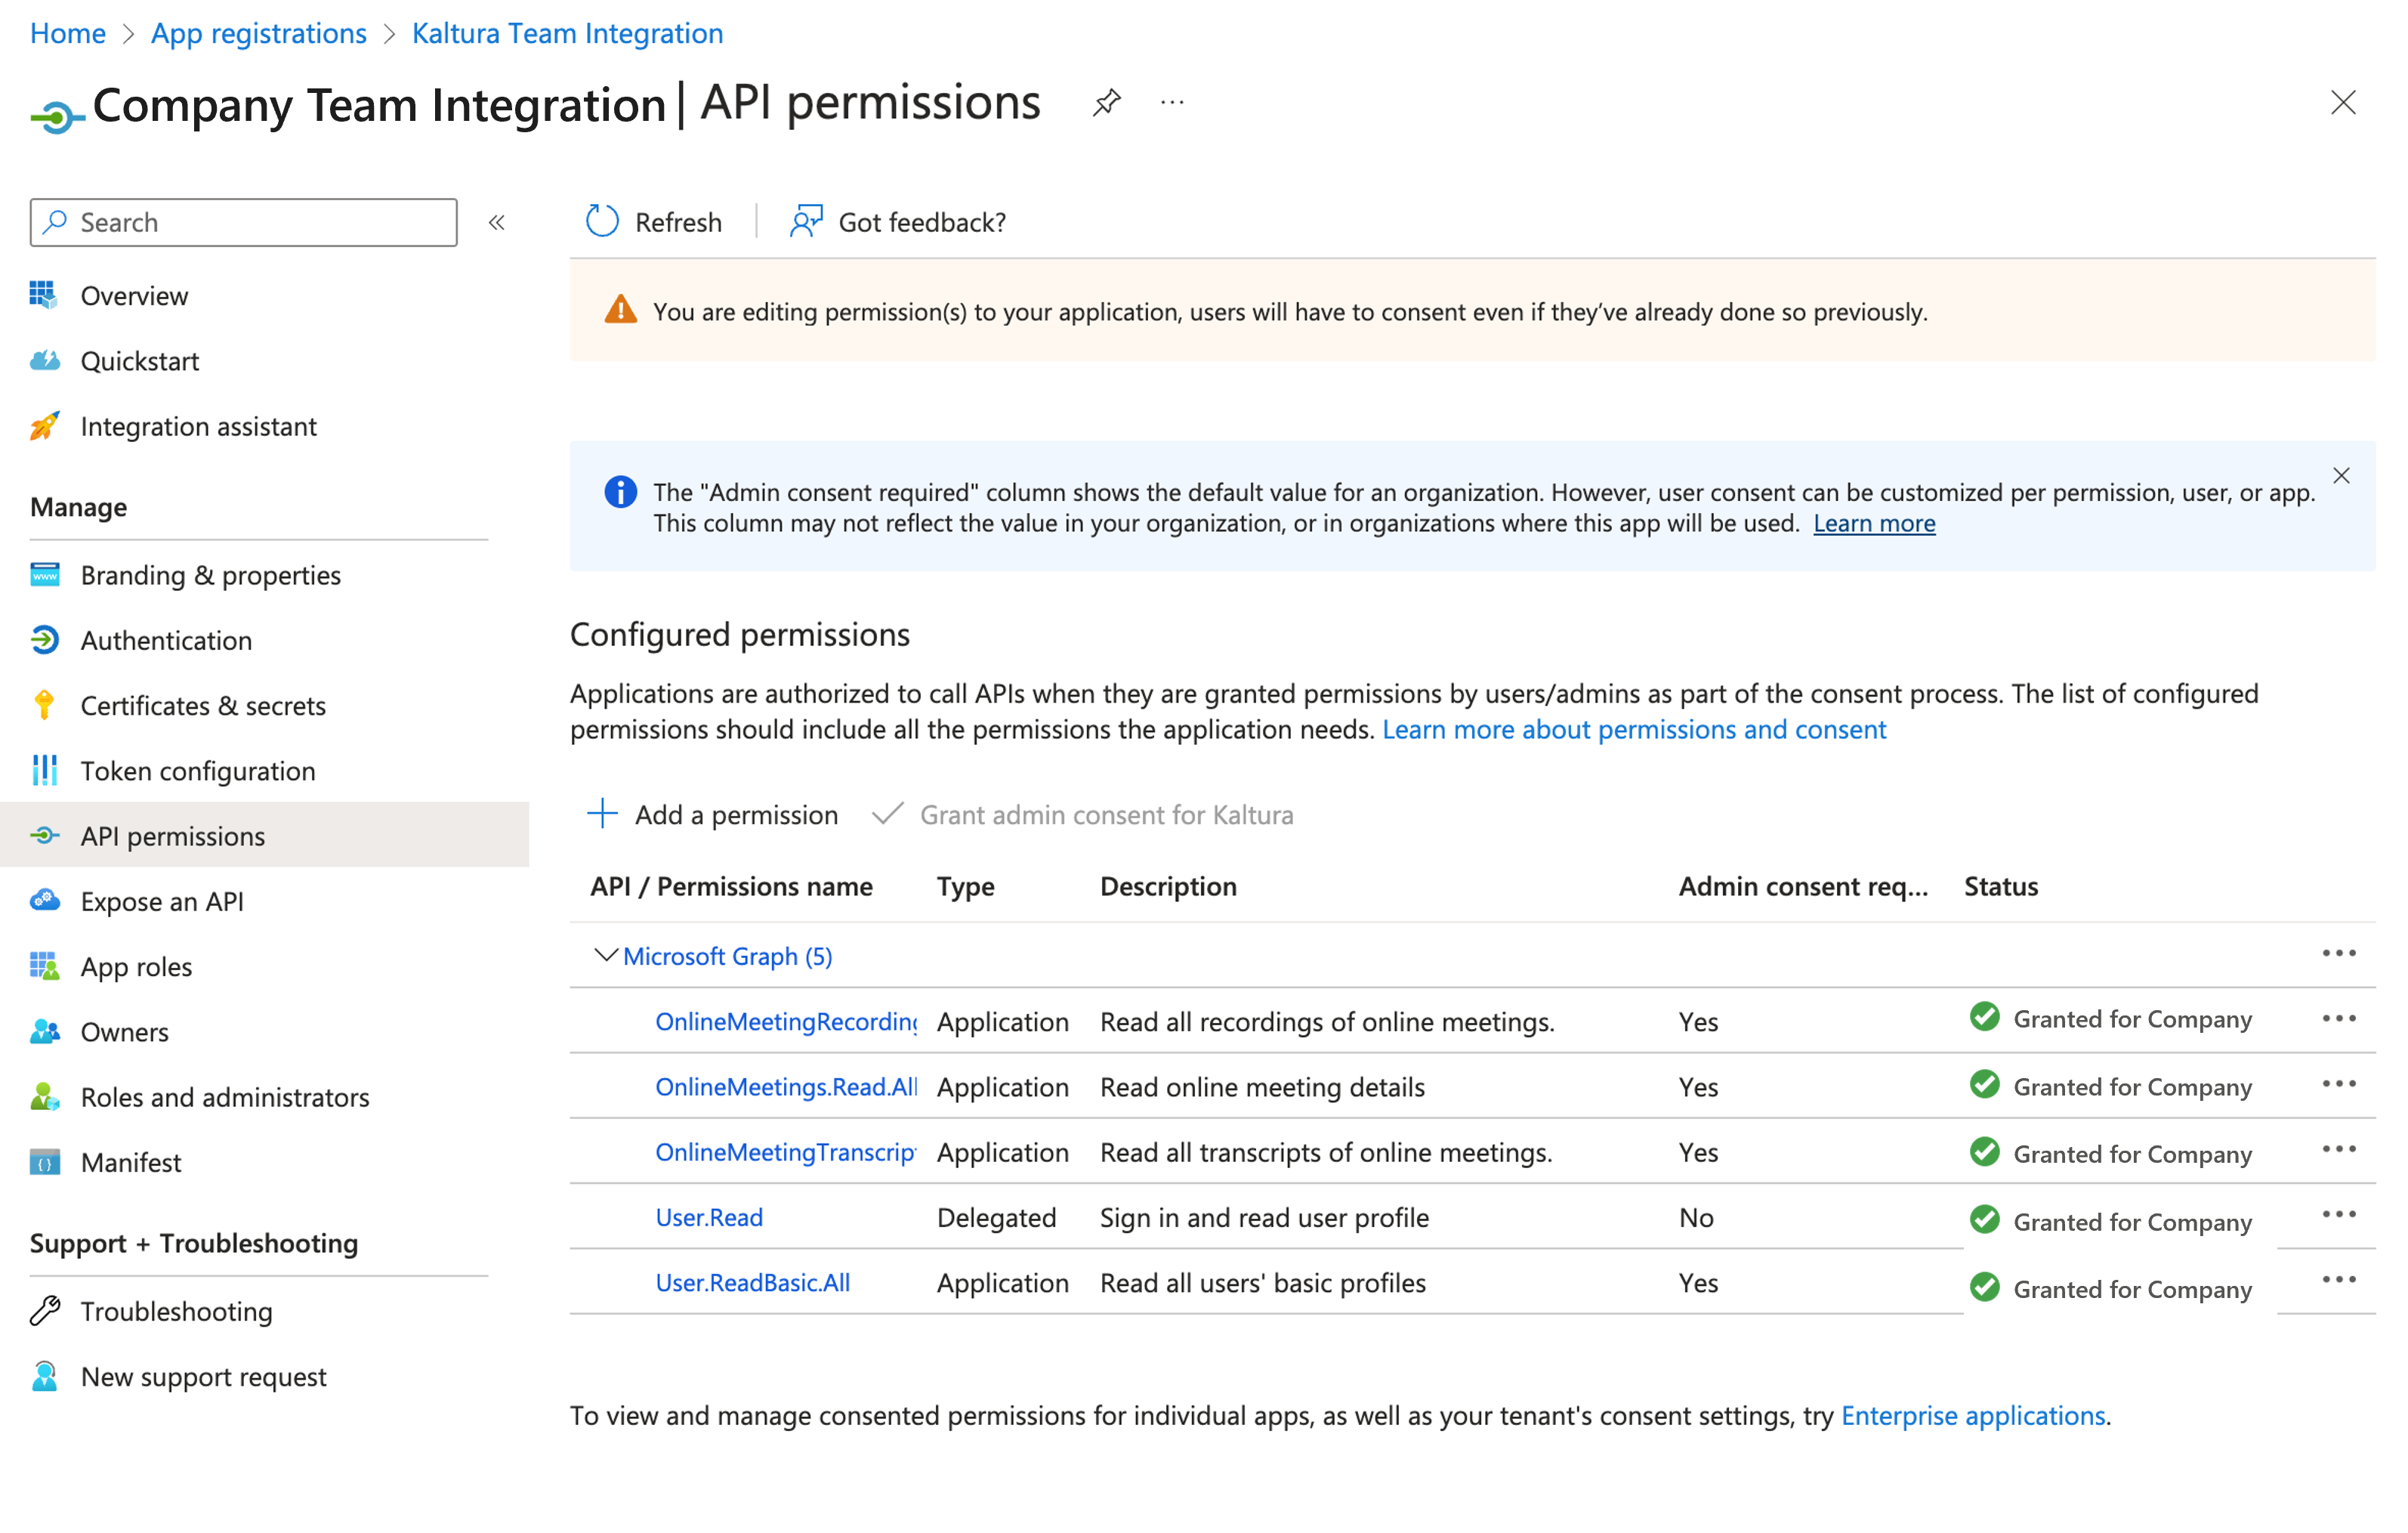
The settings page displays. - Under Manage, click API permissions.
- In the API permissions page, click +Add a permission.
- Under the Microsoft APIs tab, click Microsoft Graph.
- Under the Microsoft Graph tab, click Application permissions.
- Under Select permissions, check the checkbox for each of the following permissions:
- OnlineMeetingRecording.Read.All
- OnlineMeetings.Read.All
- OnlineMeetingTranscript.Read.All
- User.ReadBasic.All
- CallTranscripts.Read.All
- CallRecordings.Read.All
- CallRecords.Read.All
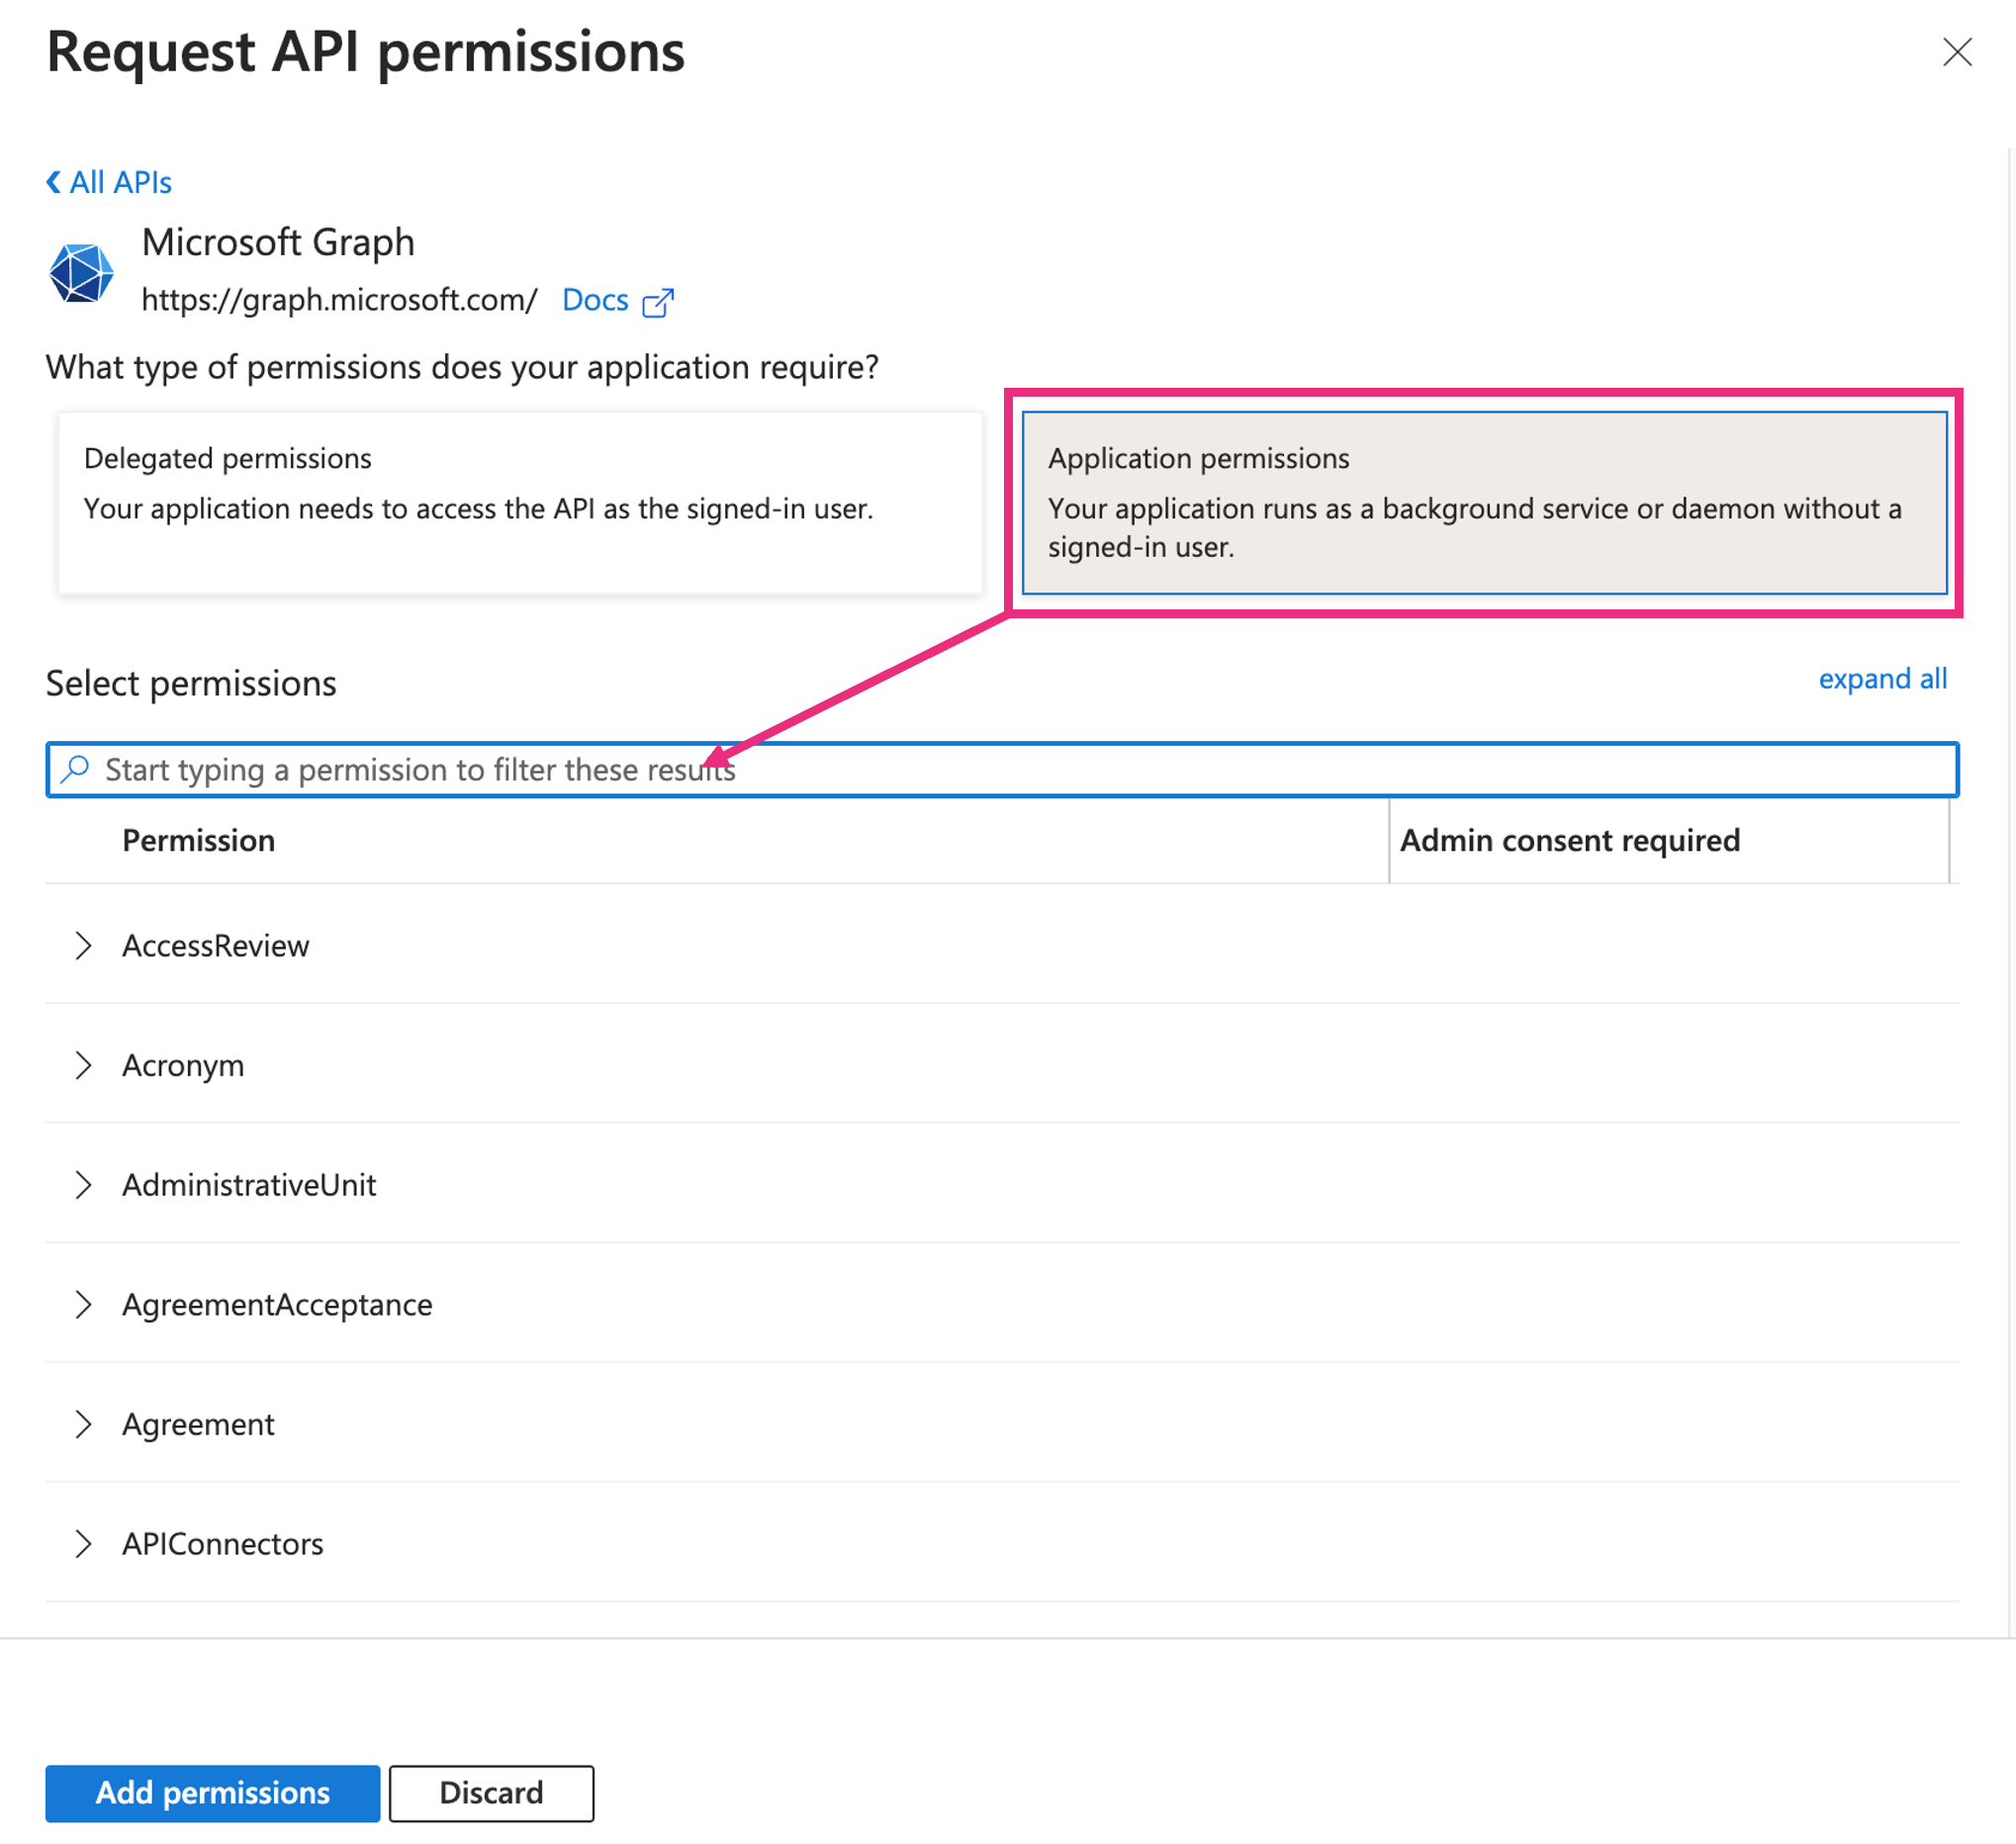
- At the bottom of the page, click Add permissions
- The configured permissions display with the status Not granted for[your company name]. Permissions require the administrator's consent. Once granted, status will display as Granted for [your company name].


The Request API permissions page displays.


Create a client secret
- In the left-hand menu under Manage, click Certificates and Secrets.
- Click +New client secret.
- In the Description field, type in a description.
- In the Expires field, choose a time period from the drop-down menu.
- Click Add to create the client secret.

The Add a client secret window displays.
Please note that while updating the secret in Kaltura isn't available at the moment, it's planned for the near future. In the meantime, we recommend selecting a longer expiry date.

After adding the client secret, Azure will generate a new client secret value.
Copy the client secret value and save it securely. You won't be able to see this value again after leaving this page.

6. Click on the Overview tab to view your credentials which you will need for the configuration in Rich Media CMS.

Configure an application access policy
To allow your Azure app to access online meetings via Microsoft Graph, follow Microsoft’s instructions in Configure application access policy*.
*In Microsoft's instructions, you'll need to follow steps 1-3, then skip step 4 and proceed to step 5. Step 4 is not needed for Kaltura.
Below are example commands:
Connect to Microsoft Teams PowerShell
| Connect-MicrosoftTeams |
Create Application Access Policy
| New-CsApplicationAccessPolicy -Identity Teams-policy -AppIds "REPLACE_WITH_APP_ID" -Description “Upload Teams recordings to Kaltura” |
Grant the policy globally
| Grant-CsApplicationAccessPolicy -PolicyName Teams-policy -Global |
Enable metered API on Microsoft Graph
Once the application access policy is created and assigned, return here to complete this step in Kaltura.
To use Microsoft Graph’s metered APIs, your Azure app must be linked to an active subscription. For guidance, refer to Enable metered APIs and services in Microsoft Graph.
Here are the high-level steps:
- Create a resource group in the Azure portal under your subscription.
- Using the Azure CLI, execute the following commands:
az login --scope https://management.core.windows.net//.default
|
Step 2 - Configure Teams integration in Kaltura
- Login to the Rich Media CMS and click the settings icon.

- Click the Integration tab.

- On the Integrations page, scroll down to Teams integration.
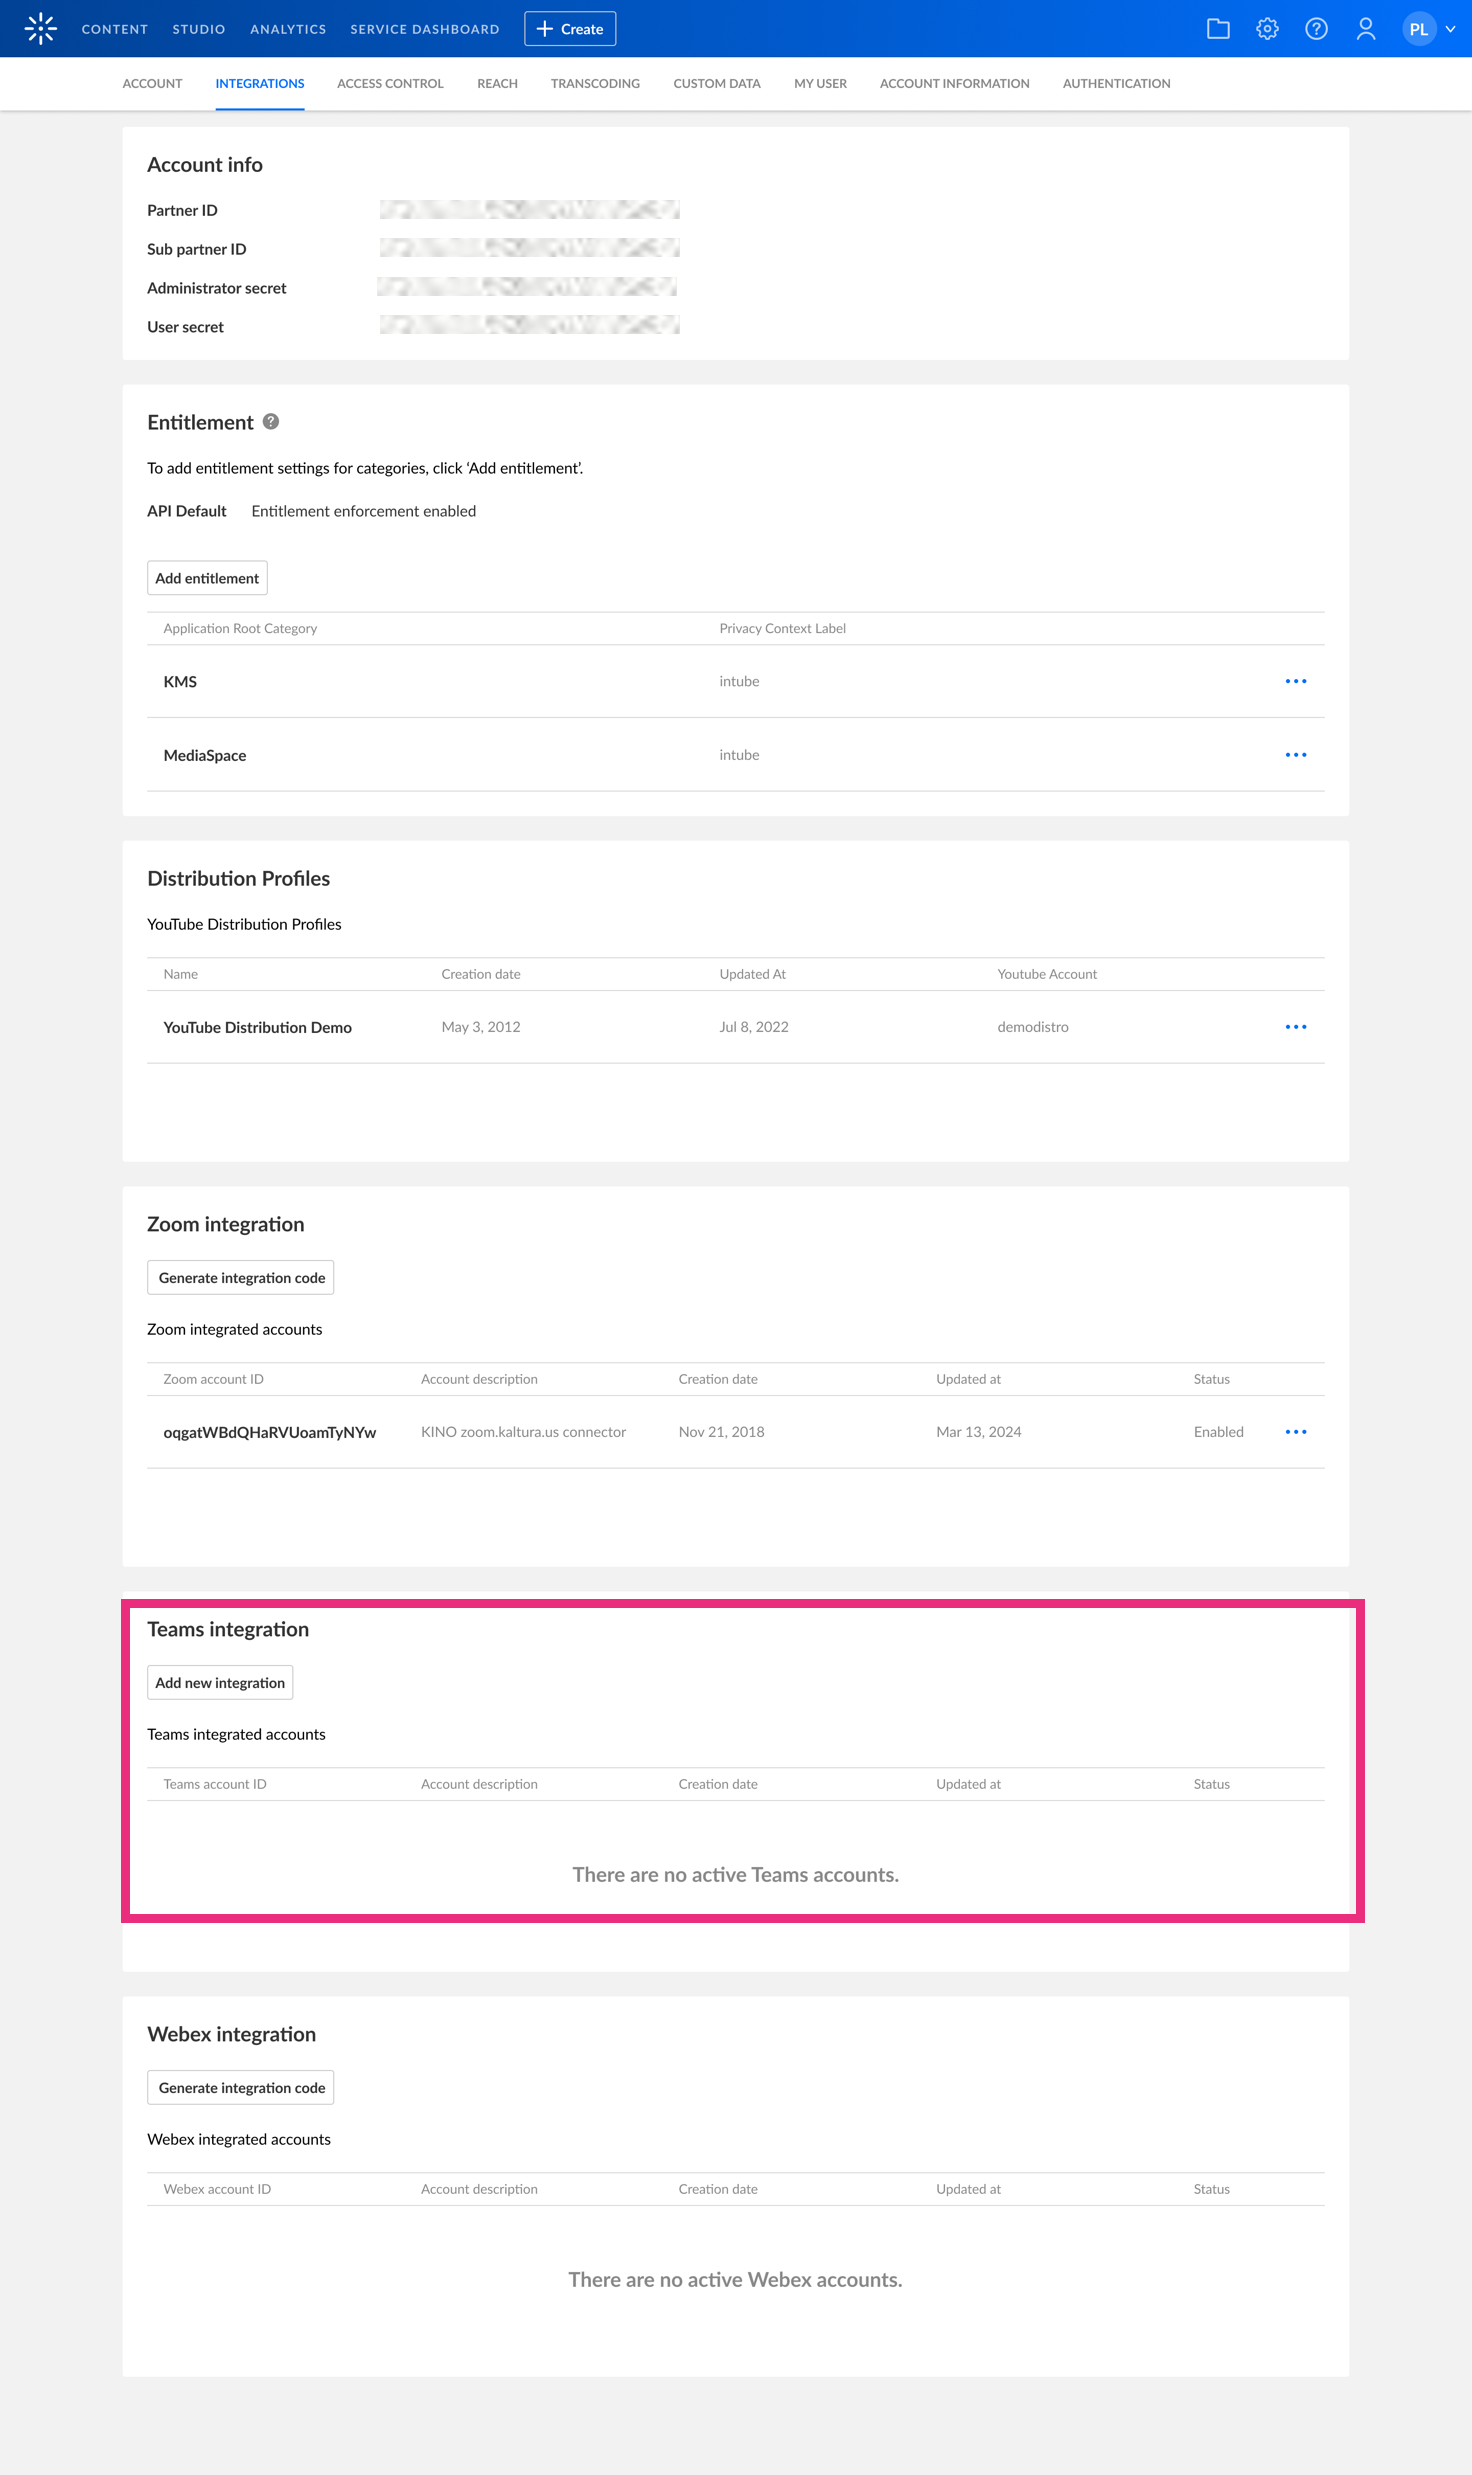
- In the Teams integration section, click Add new integration.
The Add new Teams integration window displays.
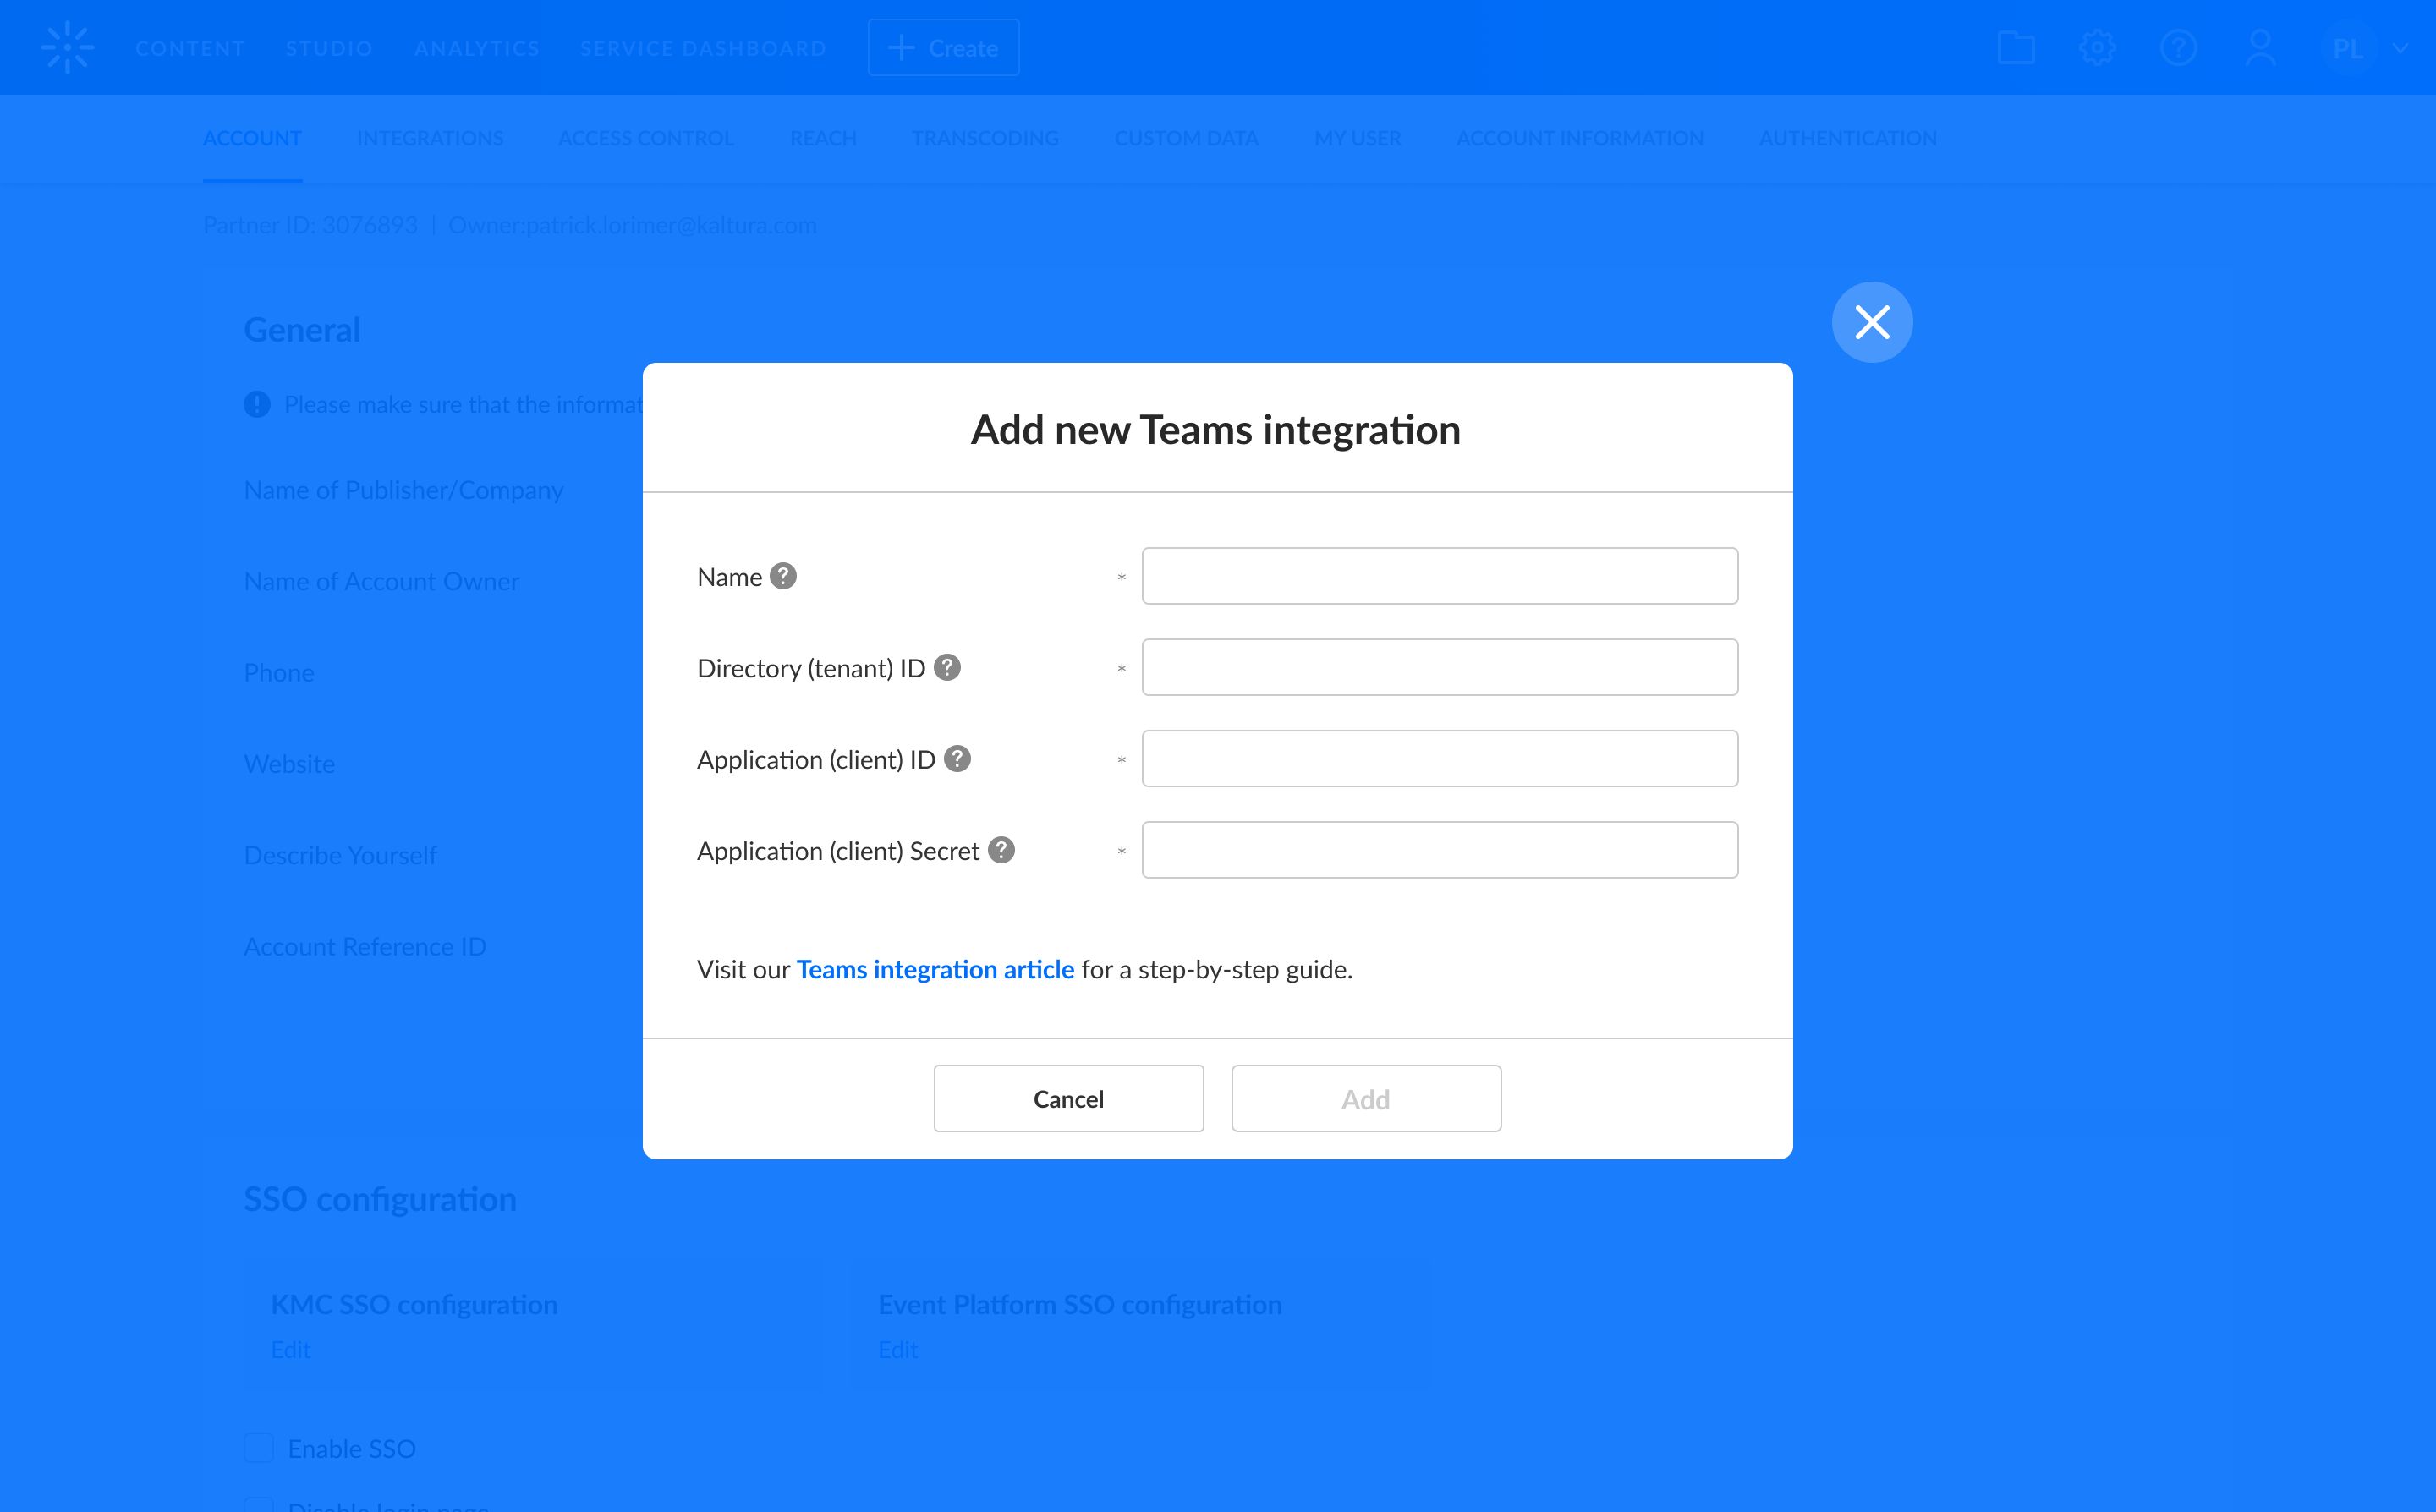
- Complete the required fields
- Name - Enter a name for your integration.
- Directory (tenant) ID - Copy your Azure directory ID from the overview tab of the Azure application you just created (see number 6 of 'Create a client secret').
- Application (client) ID - Copy your Azure Application ID from overview tab of the Azure application you just created (see number 6 of 'Create a client secret').
- Application (client) Secret - Copy your Azure application of the secret you created previously (see number 6 of 'Create a client secret').
- Click Create. The edit window displays.


Edit integration settings
You can edit an existing Teams integration. The settings are as follows:
- Name
- Directory (tenant) ID (read only)
- Application (client) ID (read only)
- Publish to categories - Enter one or more categories for Teams recordings.
- Upload recordings management:
- Upload all recordings - All recordings in the account will be uploaded to Kaltura.
- Opt-in groups - Recordings will be uploaded to Kaltura if the owner of the recordings is in one of the opt-in groups.
- Opt-out groups - Recordings will be uploaded to Kaltura if the owner of the recordings is not in one of the opt-out groups.
- Upload ad-hoc sessions recordings – Select whether to upload recordings from ad-hoc Teams sessions in addition to scheduled meeting recordings.
- Teams transcription - Set to 'Yes' to include the transcription when uploading the recording.
Assign user permissions for uploaded recordings
Co-organizers - Choose an option from the drop-down menu:
- None
- Co-viewers
- Co-editors
- Co-publishers
- Co-editors & Co-publishers
Please note that the option co-organizers is not currently supported by Microsoft.
Presenters - Choose an option from the drop-down menu:
- None
- Co-viewers
- Co-editors
- Co-publishers
- Co-editors & Co-publishers
Users - Choose an option from the drop-down menu:
- None
- Co-viewers
- Co-publishers
The Users setting also applies to participants of ad-hoc session recordings.
Set owner for recordings

In Azure, user identification may differ from Kaltura. For instance, the Microsoft User Principal Name (UPN) may include the entire email address (e.g. first.last@company.com) or just the user name (e.g. first.last).
This setting enables synchronization between Azure and Kaltura users by adding or removing a postfix (e.g. @company.com) or maintaining the same user ID as in Azure.
Set user based on - Choose from the following:
- Microsoft User Principal Name
- Do not modify (default) - This will be the user ID.
- Remove postfix - Select to remove postfix. For example, if your UPN is john.doe@example.com and the Kaltura user ID is john.doe, the postfix is @example.com.
- Add postfix - Select to add a postfix to the field. For example, if your UPN is john.doe and the Kaltura user ID is john.doe@example.com, the postfix is @example.com.
- Azure user ID
- Azure user ID is a unique identifier assigned to a user in Azure Active Directory.
When using this method for ad-hoc session recordings, only the recording owner is identified. Other participants won’t automatically receive access permissions to the recording.
Find user by - Set where the system should look for the user. Choose from:
- User ID
- User email
- Both
In case the user doesn't exist - Choose from:
- Create new user based on Teams user (default)
- Use default user - add user from account
Edit Teams account information
In Teams integration, you'll see a list of all active integrations.

The following information is available:
- Account name
- Creation date
- Updated at
- Status - Enabled or Disabled
Use the three dots menu next to the relevant integration to:
- Edit - This opens the integration form.
- Enable / Disable - This allows you to enable / disable the integration.
Note: Integration is created in 'disabled' status. To activate it, switch the status to 'enabled' manually. - Delete - This allows you to delete the account.
If the profile status is enabled, a message will display: Please change integration status to 'Disable' in order to delete it.

Troubleshooting
If an error occurs, it will be indicated by a red exclamation mark in the status column. Hover to see a message, such as Application policy is missing for the configured application registration.

Here's a list of possible error messages and troubleshooting tips:
| Error message | Troubleshooting |
| The provided application credentials are missing the 'OnlineMeetingRecording.Read.All' permission. | Double-check the permissions created in 'Request permissions'. |
| The provided application credentials are missing the 'OnlineMeetingTranscript.Read.All' permission. | Double-check the permissions created in 'Request permissions'. |
| Application policy is missing for the configured application registration. | This likely means the application access policy wasn't created or granted correctly. Check Configure an application access policy. |
| Access to the Microsoft API was denied. | This means we failed to access the Microsoft API using the configured credentials. |
| The provided application secret has expired. | To fix this, create a new integration with a new secret. (In the future, it will be possible to update the secret.) |
| The provided application secret is invalid. | This probably means the application secret was deleted in the Azure console. To fix this, create a new integration with a new secret. (In the future, it will be possible to update the secret.) |
| Application is disabled | The Azure app you registered for the Teams integration (e.g., “Kaltura Teams Integration”) is currently disabled. Ask your Azure administrator to enable the app in your organization's Azure environment (Azure tenant), then try setting up the integration again. |
