Login to the Configuration Management Section of Kaltura MediaSpace
Login to your MediaSpace Configuration Management admin site at: https://[your_partner_id].mediaspace.kaltura.com/admin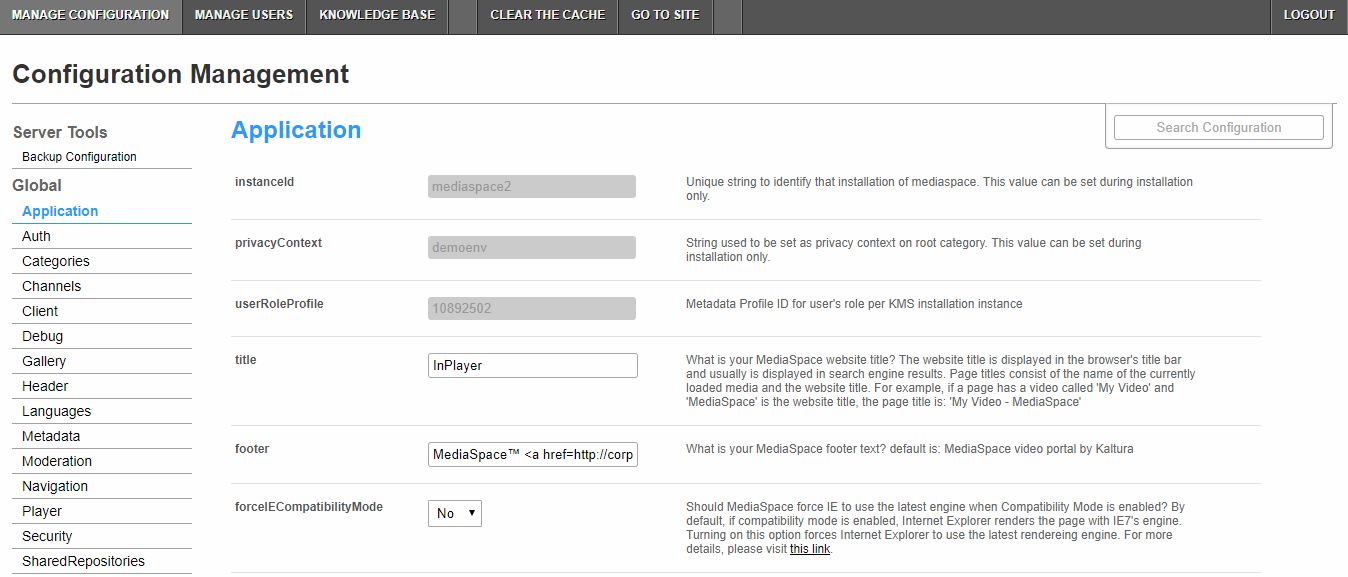
Configure the Auth Module
- In the list of configurable items on the left of your screen, locate and click on Auth.If you want to create two login options (one for user and one for administrator) so that you can create and configure channels in MediaSpace, you must enable and configure MultiAuth. If you would rather do so in the Rich Media CMS, MultiAuth configuration is not necessary.In the enableMultiAuth pull down list, select Yes. Additional configuration options display.
- Scroll to the authMethods section. You will set up two authMethods here.
- For the first authMethod:
- Under the authMethods section, click + Add "authMethods".
- In the method pull down list, select SSO Gateway AuthN.
- For the second authMethod:
- Under the authMethods section click + Add "authMethods" again.
- In the method pull down list, select KalturaAuthN.
These settings prevent users who authenticate via the InPlayer SSO to add/edit content to channels. Only admin users who authenticate via the Kaltura authentication will be able to do so.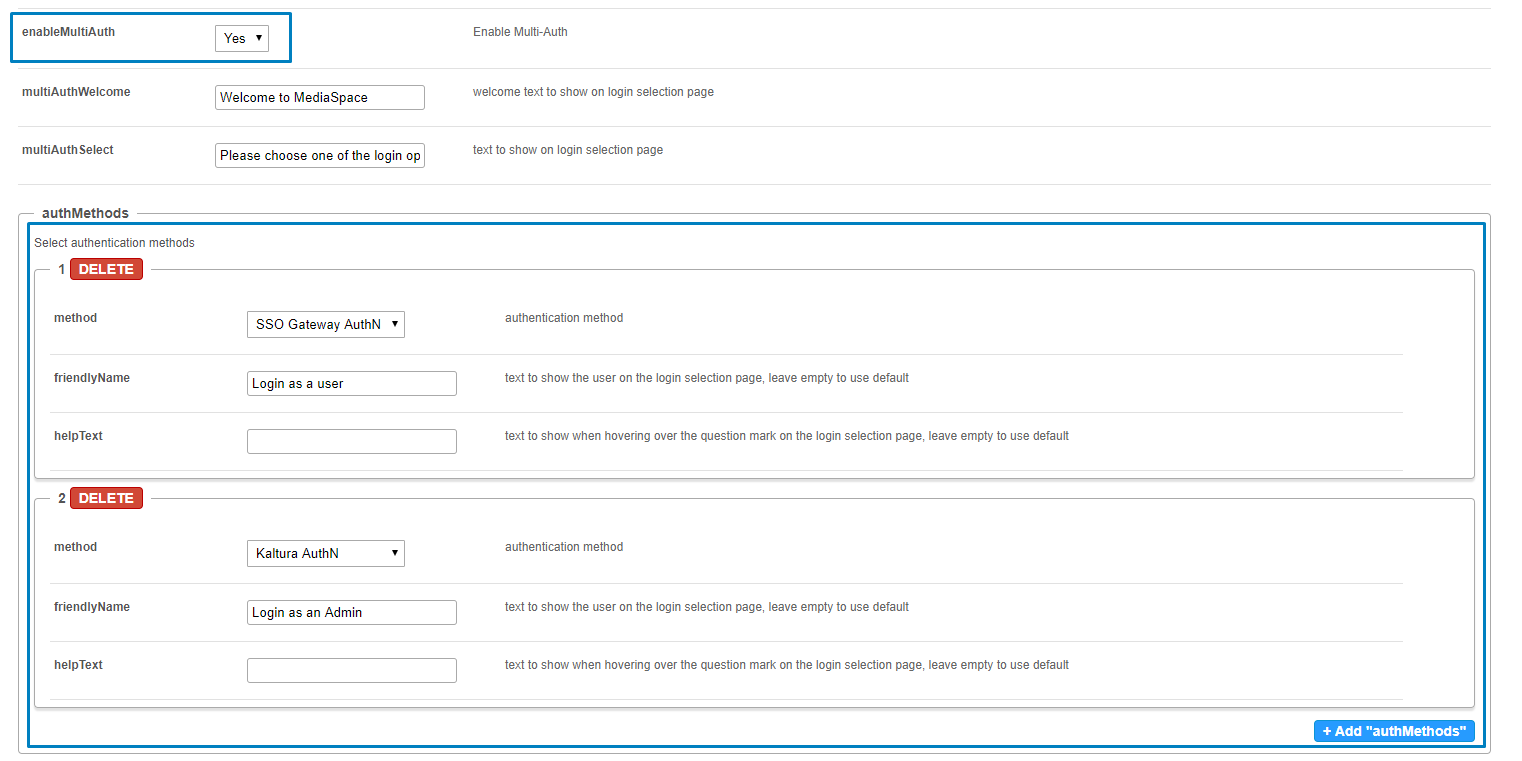
Once you are finished creating and configuring channels in MediaSpace using your two login options, go back to the MediaSpace Configuration Management admin site and disable multiAuth (set the enable multiAuth setting to No). Set the authNAdapter with ’SSO Gateway AuthN’ and set the authZAdapter with ’SSO Gateway AuthZ’.
- Scroll down to the sso section. You will complete two fields here.
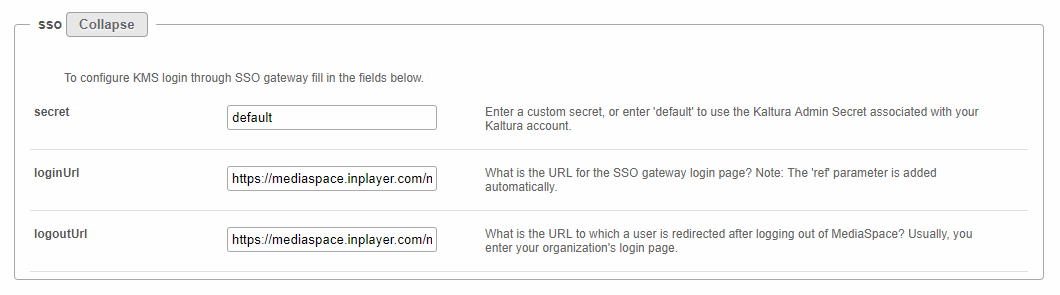
In the loginURL field, enter the InPlayer MediaSpace App URL, making sure to first edit the parts in bold with your InPlayer merchant UUID and your MediaSpace domain URL.
Depending on which environment you are currently running (Demo or Live), the InPlayer MediaSpace App URL is as follows:
Demo Environment: https://staging-mediaspace.inplayer.com/merchant-uuid?mediaspace=domain-url
Live Environment: https://mediaspace.inplayer.com/merchant-uuid?mediaspace=domain-url- The domain-url is the URL where your MediaSpace portal is hosted.
- To find your InPlayer merchant UUID, go to your InPlayer account at https://dashboard.inplayer.com/account/details/details and copy it from there.
- In the logoutURL enter the following:
Demo Environment: https://staging-mediaspace.inplayer.com/merchant-uuid?mediaspace=domain-url&logout=true
Live Environment: https://mediaspace.inplayer.com/merchant-uuid?mediaspace=domain-url&logout=true Click Save. A message displays confirming your configuration for Auth was saved.
Click OK.


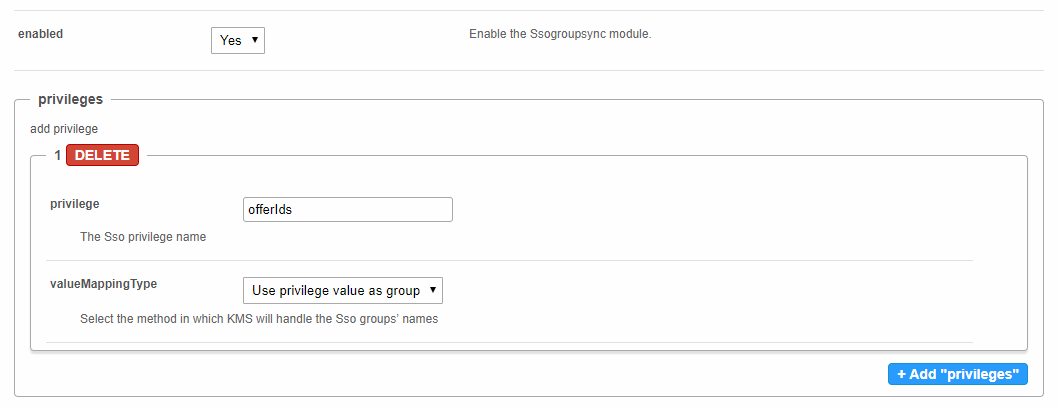
Configure the Ssogroupsync Module
- In the list of configurable items on the left of your screen, locate and click on t he Ssogroupsync module.
- In the enabled pull down list, select Yes.
- Click + Add "privileges".
- In the privilege field, enter offerIds.
- Leave the valueMappingType as Use privilege value as group.
- Click Save. A message displays confirming your configuration for Ssogroupsync was saved.
- Click OK.

