Kaltura Preview Live Overview
The Preview Live feature allows a live broadcaster to preview the live stream before the actual live event has started, and before viewers can actually see the live content.
The Preview Live feature ensures that the end to end streaming is working well, and allows the live broadcaster to fix streaming problems before they happen during the live event. When you enable the Preview Live feature, starting your encoder will not automatically start your live event. Instead, you can preview your stream, make changes in the encoder configuration and decide when you are ready to Go Live by a simple click of a button.
It is beneficial to use the Preview Live feature for live events where you typically want to perform a test/dry-run before the actual event happens.
- The live stream for the end viewer starts when you, the broadcaster, are ready and explicitly click “Go Live". Your viewers do not have to see the preparation work done prior to the actual event.
- The producer can see the stream health before the actual live event starts. This helps to identify issues (wrong encoder configuration, lack of bandwidth, etc.) before the actual event starts.
- The Live to VOD recording starts when the actual event starts and will not include all the preparatory work before the event start, saving you time and avoiding the need to trim the recording.
Enabling the Preview Live Feature
- in the Rich Media CMS
- or by your Kaltura MediaSpace Administrator.
Enable the Preview Live Feature from the Rich Media CMS
The Preview Live feature can be enabled or disabled per live entry. It is set up when creating a live entry and can be edited on an existing entry.
To enable the Preview Mode in the Live Dashboard in the Rich Media CMS
- Create a Live Entry.
- In the Add stream window be certain the the Preview Mode option is unchecked to enable the Preview Mode feature.
You may also enable the Preview Mode feature in the Edit entry window > Live Stream tab by selecting Enable for the Preview Mode option. - Start the encoder.
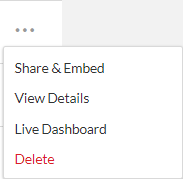
- Select the live entry in the Entries table and then select Live Dashboard from the Actions menu.
- The Live Dashboard starts with the initializing stream status to indicate that the encoder is initializing. The stream status will display the Preview Mode after the encoder initialization. The player will indicate Preview and the Go Live button is displayed. At this point the viewers are not able to see the live stream.
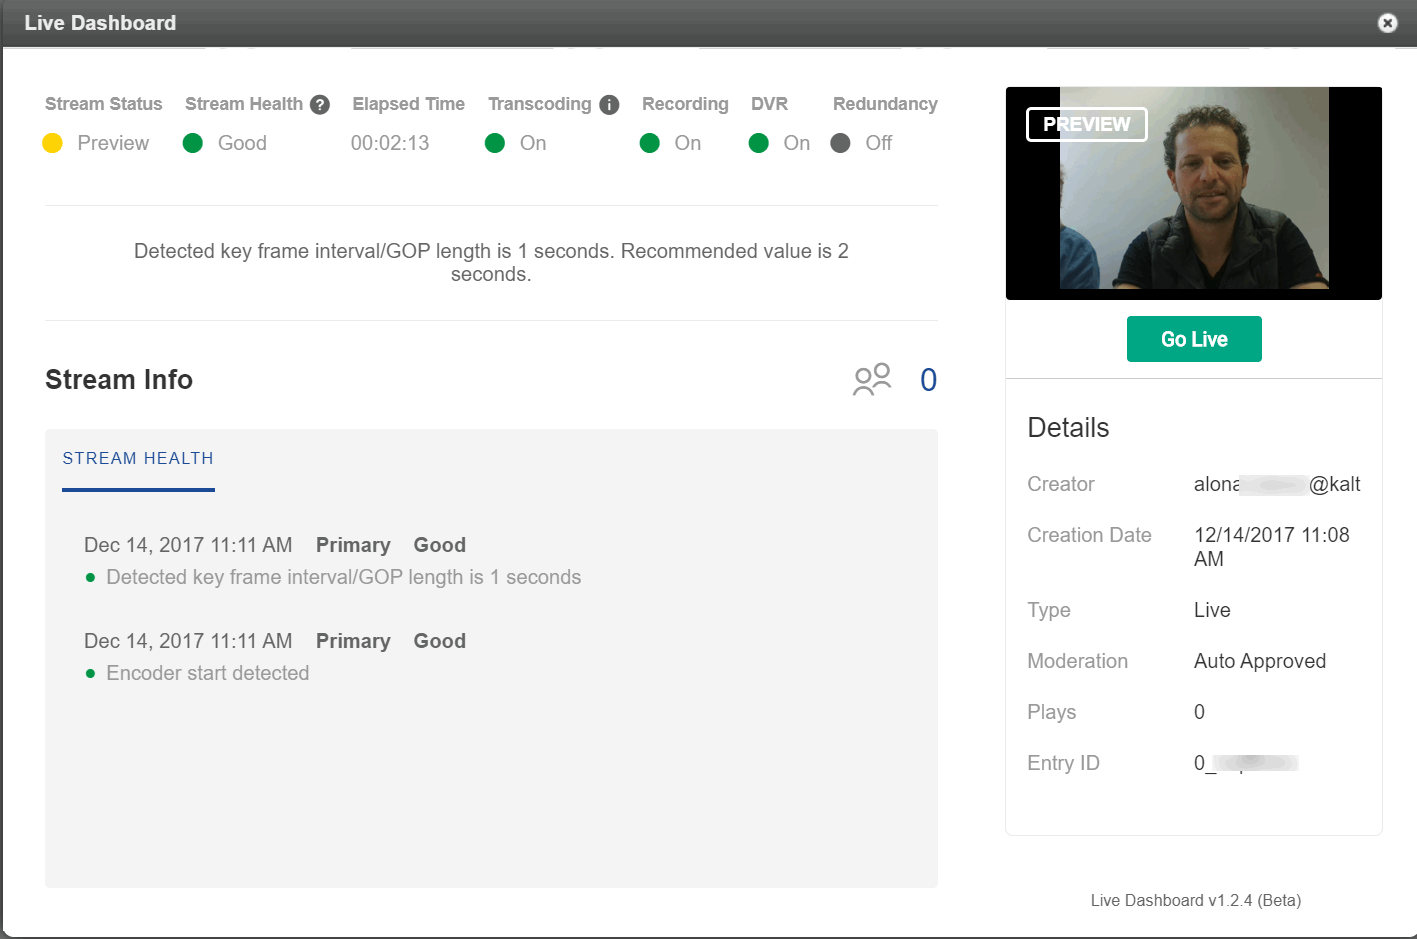
- Check your live stream's status. If the stream health is not good, troubleshoot the issue. See Stream Health Monitoring Using the Kaltura Live Dashboard for additional information.
- Click Go Live when you are satisified with the stream's status. Going Live starts the actural broadcast and the recording and viewers begin to see the live stream.
The actual recording starts from that point so all preparation work is not recorded.The Go Live button now changes to "End Live". - When you want to stop the live stream, either click End Live, or stop your encoder. This will stop the live stream to your viewers and finalize the recording.


Accessing the Monitoring Dashboard and Viewing the Preview Live Feature from Kaltura MediaSpace
To access the Monitoring Dashboard and view the Preview Mode in the KMS Webcasting Producer's Application
- Be certain that your admin has configured the Kwebcast Module to enable the Preview Mode and Monitoring Dashboard feature.
- Create the Webcast Event.
- Start the encoder.
- Open the Webcasting Producer's Application and select the Monitoring Tab.
- The Monitoring Dashboard starts with the initializing stream status to indicate that the encoder is initializing. The stream status will display the Preview Mode after the encoder initialization. The player will indicate Preview and the Go Live button is displayed. At this point the viewers are not able to see the live stream.
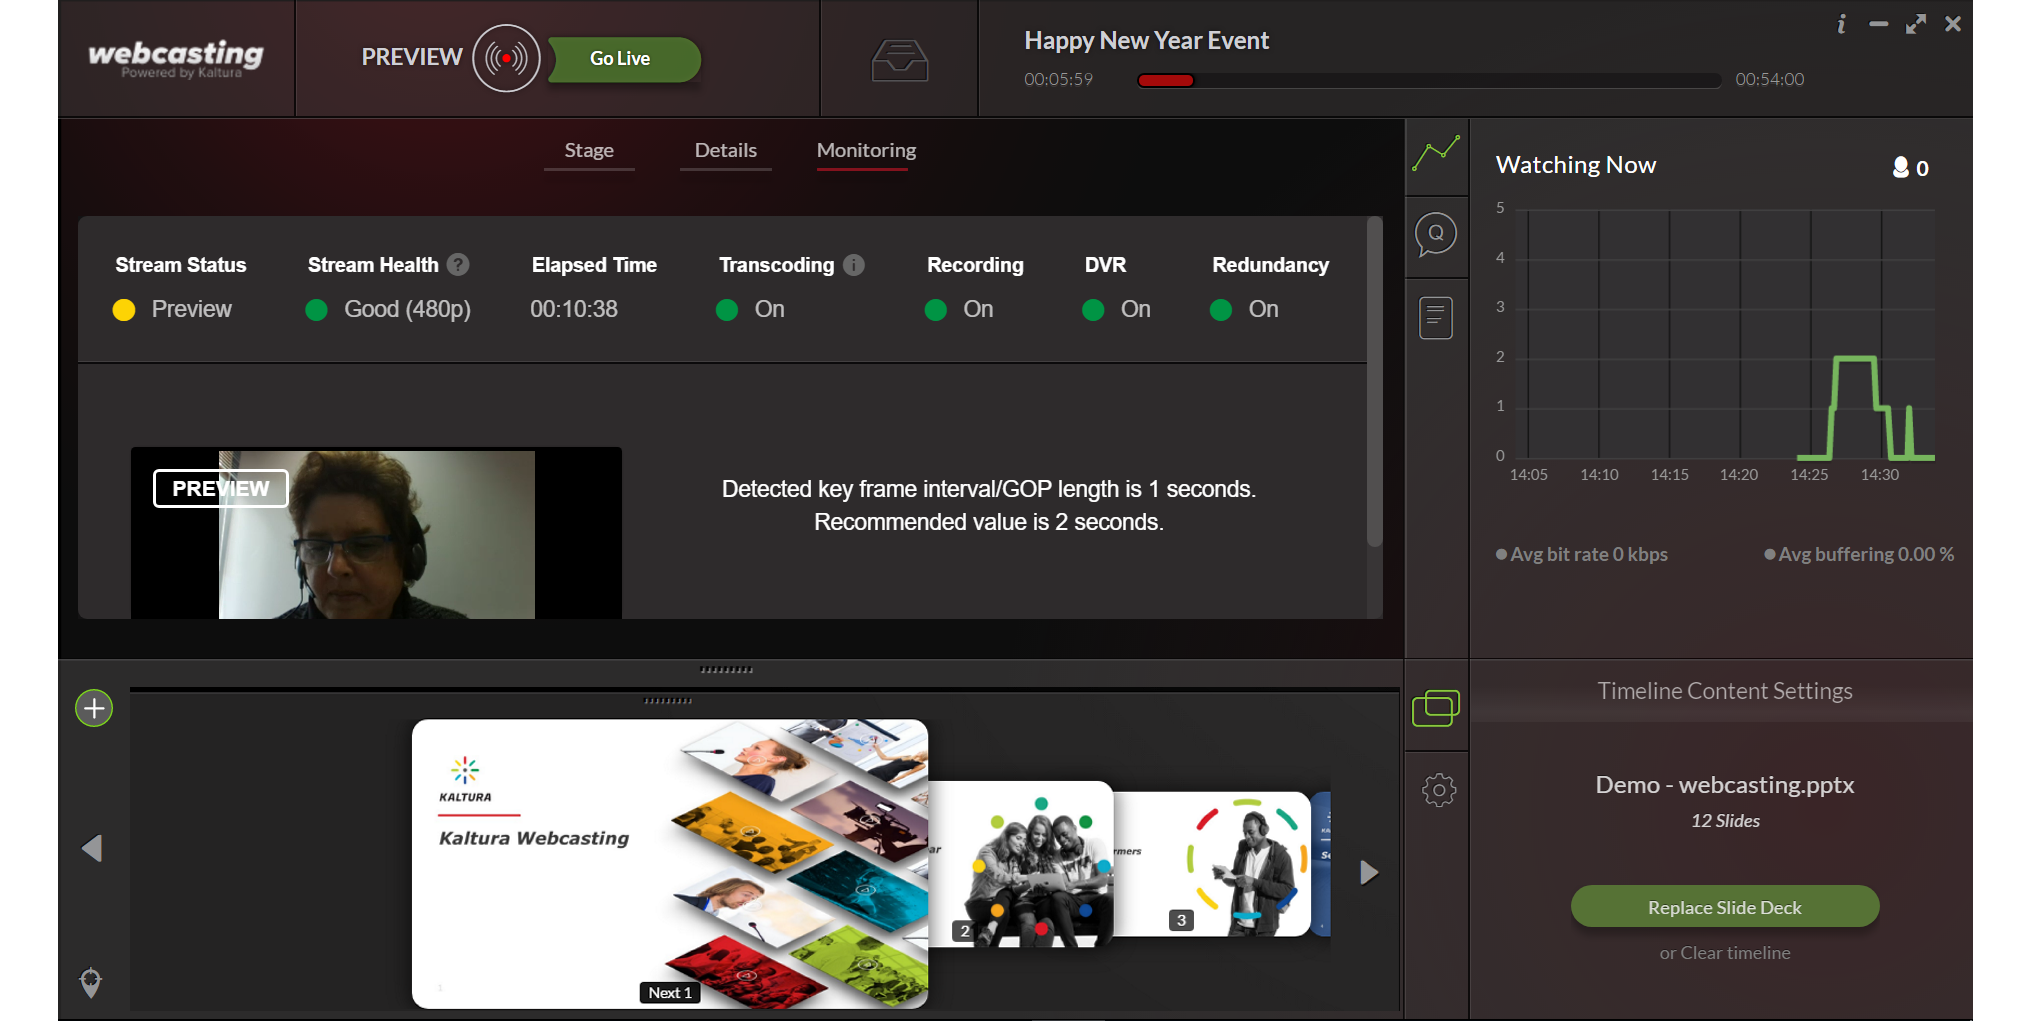
- Check your live stream's status. If the stream health is not good, troubleshoot the issue. See Stream Health Monitoring Using the Kaltura Live Dashboard for additional information.
- Note that while your stream is in preview status, the entry owner and co-editors can see it on the edit webcast event page in MediaSpace. This is done intentionally to allow real evaluation of the preview status on the actual event page. Users accessing the actual event page will not be able to see the live stream while in preview status.
- Click Go Live when you are satisfied with the stream's status. Going Live starts the actual broadcast and the recording and viewers begin to see the live stream.
The actual recording starts from that point so all preparation work is not recorded.The Go Live button now changes to "End Live". - When you want to stop the live stream, either click "End Live", or stop your encoder. This will stop the live stream to your viewers and finalize the recording.
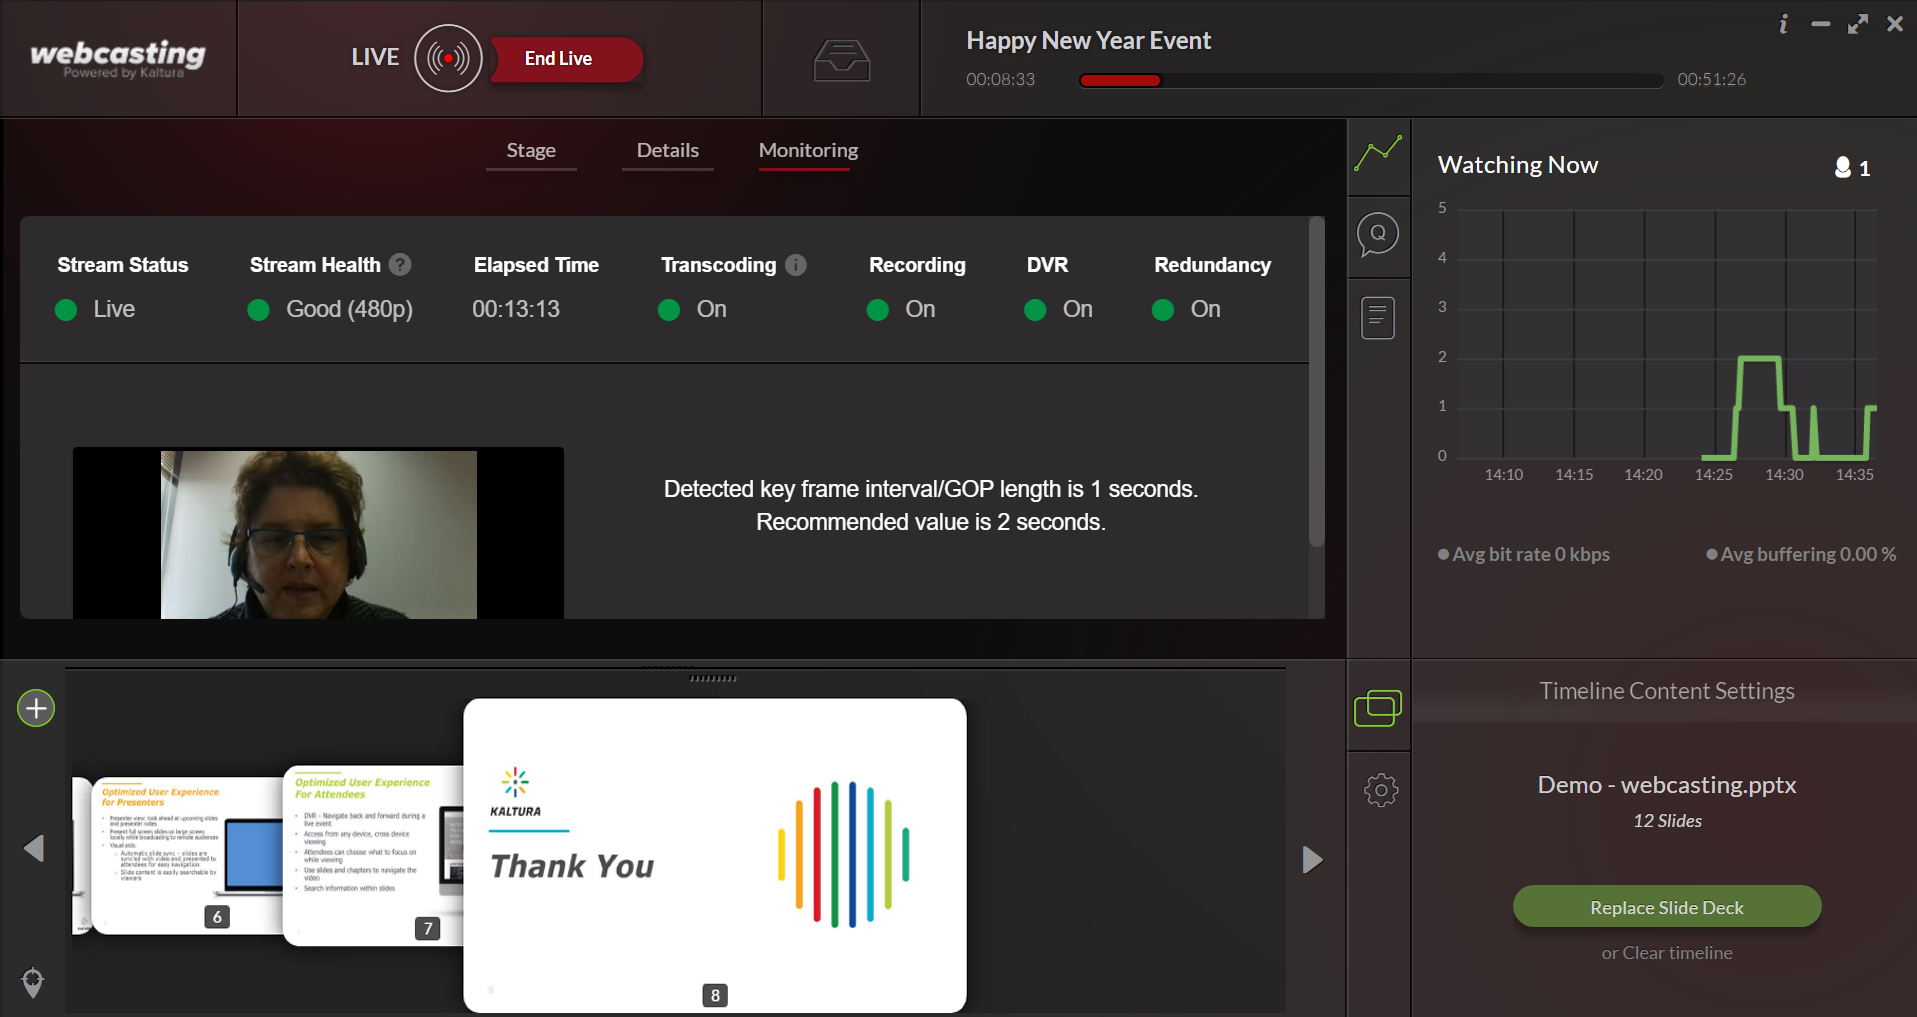
- You will be prompted with a confirmation message that you want to end your live broadcast.


