About
When you enter a Kaltura Room, you'll need to configure your devices, and optionally customize your background. Follow the steps in this guide or watch the video tutorial below for a smooth and professional meeting setup.
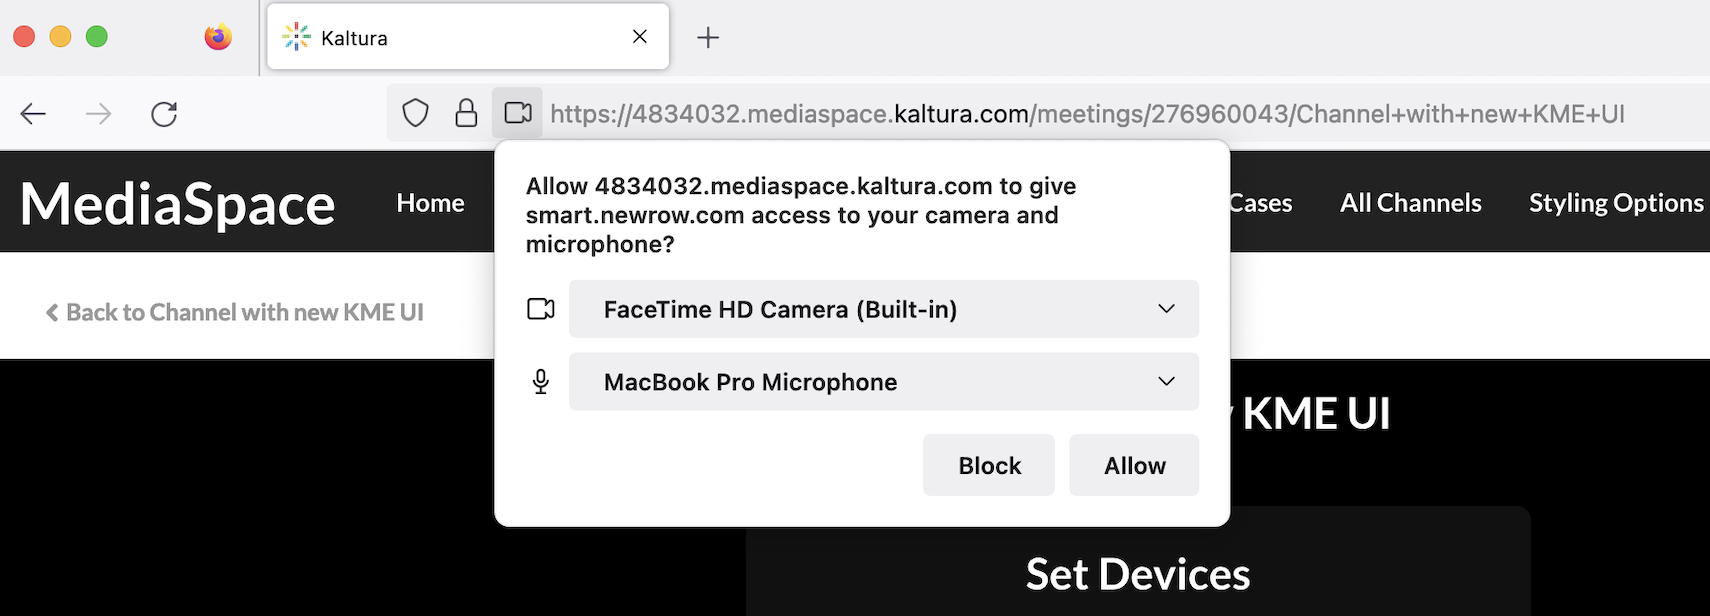
Allow browser access
When entering the room for the first time, your browser may ask for permission to access your devices. If prompted, click Allow.

When does the device settings popup appear?
The Set Devices popup appears when:
- You're entering a Kaltura Room for the first time.
- The room is in 'Open Stage' mode, or you've been invited (or requested) to join the stage.
- Your browser hasn’t yet saved mic/camera permissions for that specific meeting link. It remembers these permissions per room link, so even if you’ve allowed access before, you may see the popup again when joining a different session or if your browser settings were reset or cookies were cleared.
Set devices
You can select your webcam, microphone, and speaker devices from the dropdown options and test them to ensure they're working properly. Additionally, enable noise reduction for clearer audio during your meetings.
If you're having trouble accessing your camera or microphone, make sure to close any other programs that might be using them (like Zoom, Teams, or browser tabs with camera access).

Test your camera (1) - You should be able to see yourself in the viewing pane. Note the positioning lines to center yourself in the camera view. This is helpful when many people are on stage and your camera view may be cropped to these lines.
Test your microphone (2) - On the right side, there's a meter to test the volume from your microphone.
Noise reduction (3) - Toggle on to minimize background noise for clearer audio, ensuring you can focus on the conversation and enjoy better audio quality in recordings. Your selection will be saved for future sessions.
If you're using professional studio tools or have background music, we recommend toggling this feature off.
Test your speakers (4) - Click the link Test speakers. The text will then change to Playing if working successfully.
The speaker instructions apply specifically to the Chrome browser. In Firefox, there is no drop-down menu for speaker selection, but there is a link available to test the speakers.
On mobile, your front-facing camera and default mic/speaker are selected automatically. Some browsers (like Safari and Firefox) don’t allow you to choose devices from a dropdown list, so no selection menu will appear.
If you open Set Devices before being invited to the stage, your mic and camera will appear disabled and you won’t be able to switch devices or see mic activity, even if speaking. Once you're invited or allowed to join the stage, your default camera and mic will activate automatically.
Noise reduction is not supported on mobile.
For the best experience, keep your phone in portrait orientation.

Set background
Personalize your meeting experience by choosing a background that suits your style. Select from Kaltura’s default options or upload your own custom images for a unique touch.
The virtual background feature is not currently available on mobile.
- Click Background to open the panel.
- Choose from Kaltura’s default images, blur effects, or one of your uploaded custom images. If you haven’t uploaded any images, see Upload your own background below to learn how.
- Click Background at the top left of the panel to return to the main screen.
The Background option may not appear if your device doesn't meet the minimum graphics requirements. For details on supported devices, see our article Kaltura Room recommended system requirements.


The first time you select a background, it may take a few seconds to load.
Upload your own background
- Click Background to open the panel with background options.
- Click Upload.
The file picker will open, allowing you to select an image from your computer. Image should have aspect ratio of 16:9 and a minimum resolution of 1280 x 720 pixels.

- You can upload up to three images at a time.
- Personal images are displayed at the top of the background list.
Once the limit is reached, the Upload button will be hidden. To upload a new image, you'll need to delete an existing one by clicking the X on the image.

Uploaded images are saved in your browser’s local storage. If you switch browsers or clear your browser history, the images will no longer be available. Simply re-upload the images if needed.
Breakout rooms will inherit the custom image.
Mirror view - Toggle the mirror effect on your camera for a more personalized self-view.

Join as viewer or on stage
In the case of an Interactive room mode, two buttons will display:
Join as viewer - Click to join the meeting without your microphone and camera enabled.
Join stage - Click to join the meeting's main screen with your mic / camera or both enabled.

To learn more about entering as a viewer or on stage, visit our article Join as viewer or on stage.
